
How to Add Products in Email Templates
This article shows you how to add and use the Product Element inside Email Templates using Enrollio's Email Builder. This feature makes it easier to build promotional emails for your childcare program—like showcasing summer camp offerings, after-school programs, or branded merchandise—directly in templates with consistent design.
What is the Product Element?
The Product Element lets you showcase a product or service—including an image, description, and purchase link—inside an email built with Enrollio's Email Builder. Now available in Email Templates, this gives you greater flexibility when designing reusable marketing emails for your childcare business.
Key Benefits of the Product Element
Using the Product Element in your email templates helps you:
- Create consistent product layouts across campaigns and templates
- Save time by reusing product displays in multiple email flows
- Promote programs, merchandise, or add-on services within automated emails
- Customize product descriptions and call-to-action buttons
- Maintain your center's branding across all parent communications
- Set up custom purchase journeys with redirect links
How to Use the Product Element in Email Templates
Follow these steps to add and customize the Product Element in your email template:
- Navigate to Marketing > Emails > Templates
- Click + New to create a new email template
- Choose a layout or start from scratch
- Drag and drop the Product element into your email body
- Click on the Product block to edit it
- Select a product from your catalog
- Add or adjust the title, description, and image (these auto-pull from your product record)
- Set a custom redirection link to your checkout or product page
- Customize the button text (like "Enroll Now" or "Learn More")
- Save your template
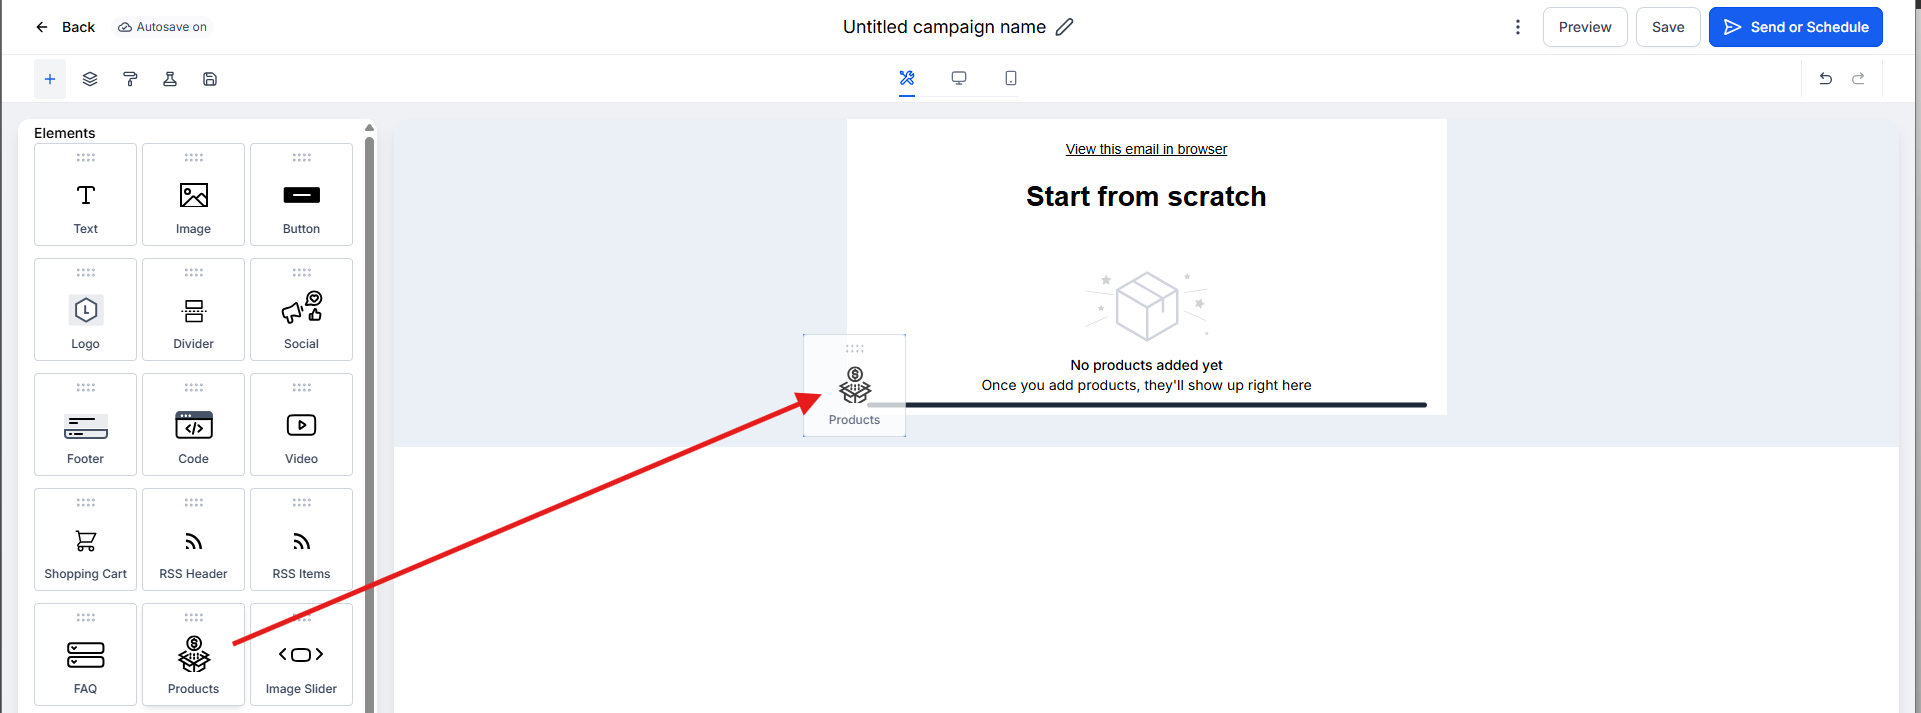
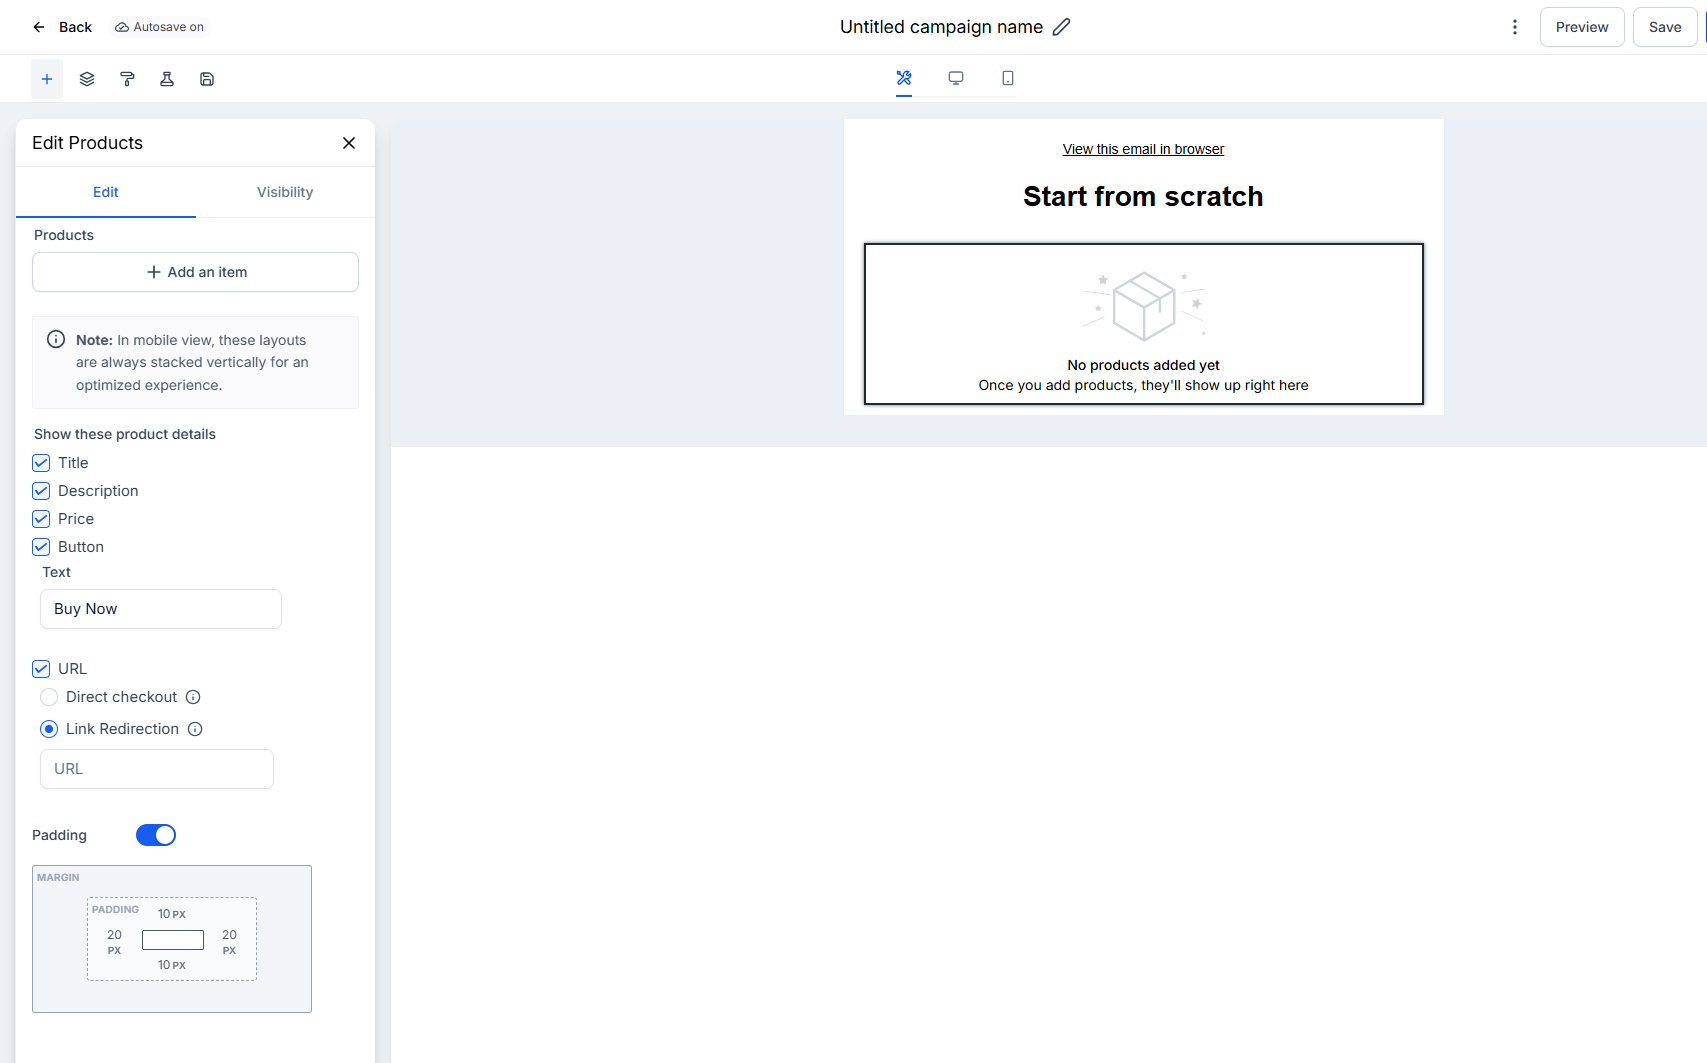
You can now use this template in automations, campaigns, or one-time email broadcasts to families.
Important Notes About Checkout Links
Checkout links work differently depending on how you send your email:
- Direct checkout links only work when sending emails in Campaign Mode
- When using templates in automations or broadcasts, you'll need to use a custom redirection link that points to your checkout page or product URL
- Make sure your product setup in Payments > Products includes all necessary details: name, price, description, and image
Frequently Asked Questions
Can I use the Product Element in automation emails?
Yes. Templates using the Product Element can be inserted into automation emails that trigger based on parent actions or enrollment stages.
Do direct checkout links work in templates?
No. Direct checkout links only work when the email is sent in Campaign Mode. In templates, use a custom URL redirect to guide families to your checkout or enrollment page.
Where do I configure the product details?
Go to Payments > Products in your Enrollio dashboard to manage product information, pricing, images, and descriptions.
Can I add multiple products in one email?
Yes. You can drag in multiple Product Elements to display several programs or services in one template—perfect for showcasing your summer camp options or after-school programs.
Can I customize the product design?
Yes. You can edit layout, spacing, fonts, colors, and button styles for each Product Element to match your center's branding.
Next Steps
- Try adding a Product Element to your next email template for an upcoming program
- Review your product setup under Payments > Products to ensure all details are optimized
- Send yourself a preview email to see how the template looks on desktop and mobile
- Explore how templates with Product Elements work inside your enrollment automations