
The Button Element lets you add clickable buttons to your email templates, making it easy for families to take action on your messages. Whether you're promoting an open house, sharing enrollment information, or inviting parents to schedule a tour, buttons help drive engagement with clear, visually appealing calls to action.
You can fully customize each button's text, color, size, and destination to match your center's branding and messaging goals.
What is the Button Element?
The Button Element is a drag-and-drop block that lets you insert a customizable call-to-action button into your email layout. Adjust the design, alignment, and link destination to fit your goals—like directing families to your enrollment page, tour scheduler, or event registration.
Buttons are essential for guiding parent actions and improving click-through rates. Style them to stand out while keeping a consistent look across all devices.
Note: Buttons are built using HTML and display reliably in most email clients. Always preview your design on both desktop and mobile to ensure everything looks right.
Why Use Buttons in Your Emails
Adding buttons to your email templates offers several advantages:
- Create clear and effective calls to action that guide parents toward enrollment
- Customize button text, color, and size to match your center's branding
- Add links to direct families to specific pages—tour booking, enrollment forms, or event details
- Position and space buttons precisely for visual balance
- Automatically responsive across mobile and desktop devices
How to Add a Button to Your Email
Follow these steps to add and configure a button in your email template:
- Go to Marketing → Emails → Templates from your dashboard.
- Open an existing email template or click + New to create one.
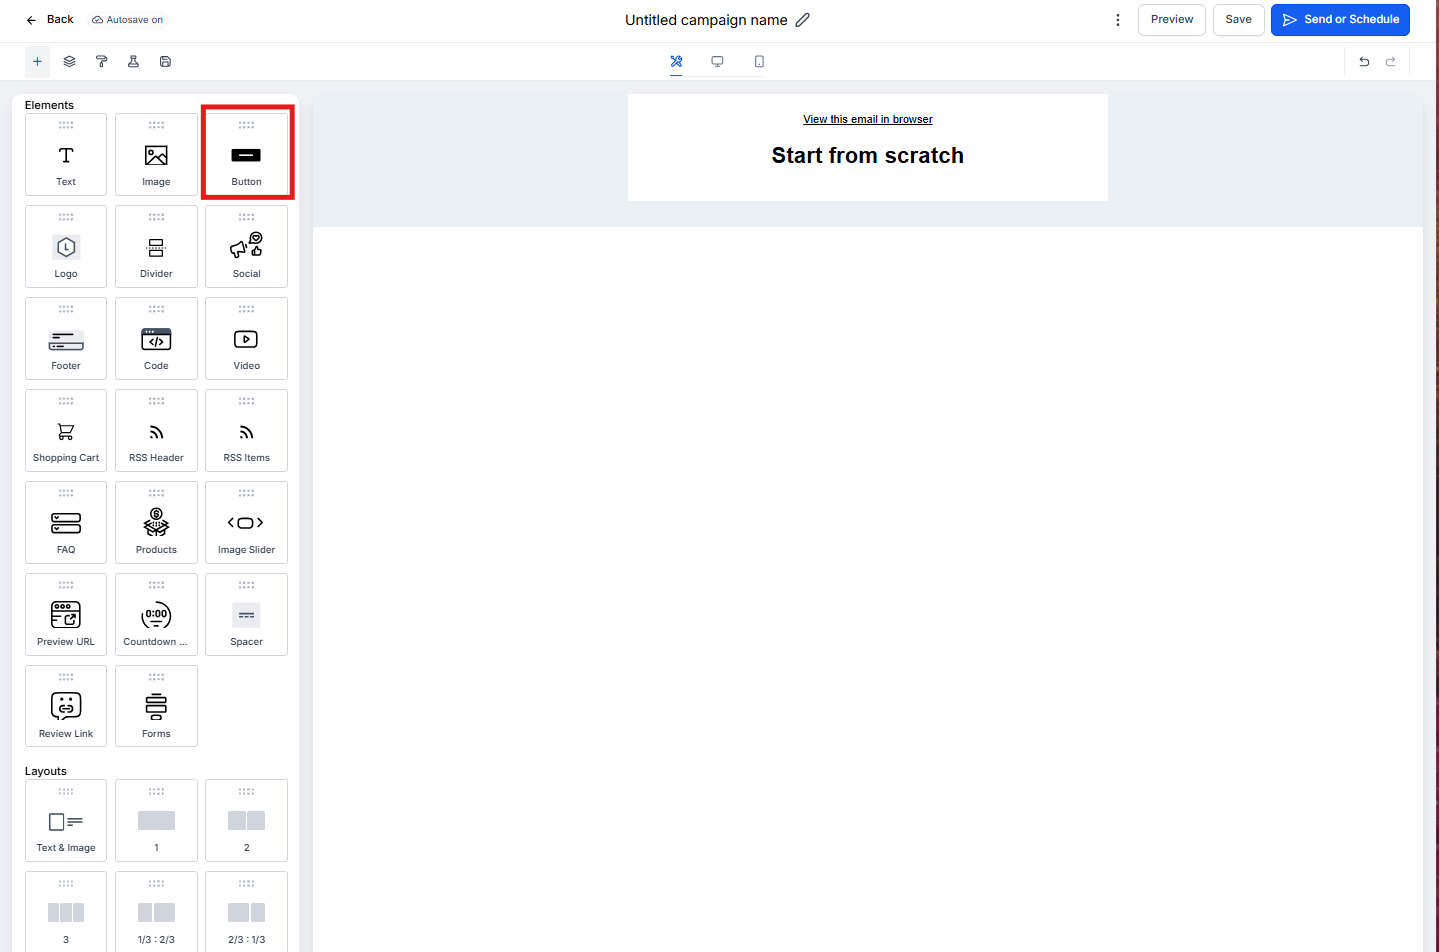
- In the Email Builder, click the Add Elements (+) icon in the left sidebar.
- Locate the Button Element under the Elements section.
- Drag and drop the Button Element into your desired position in the layout.
- Click on the button to open the Edit panel on the left.
Customize Your Button
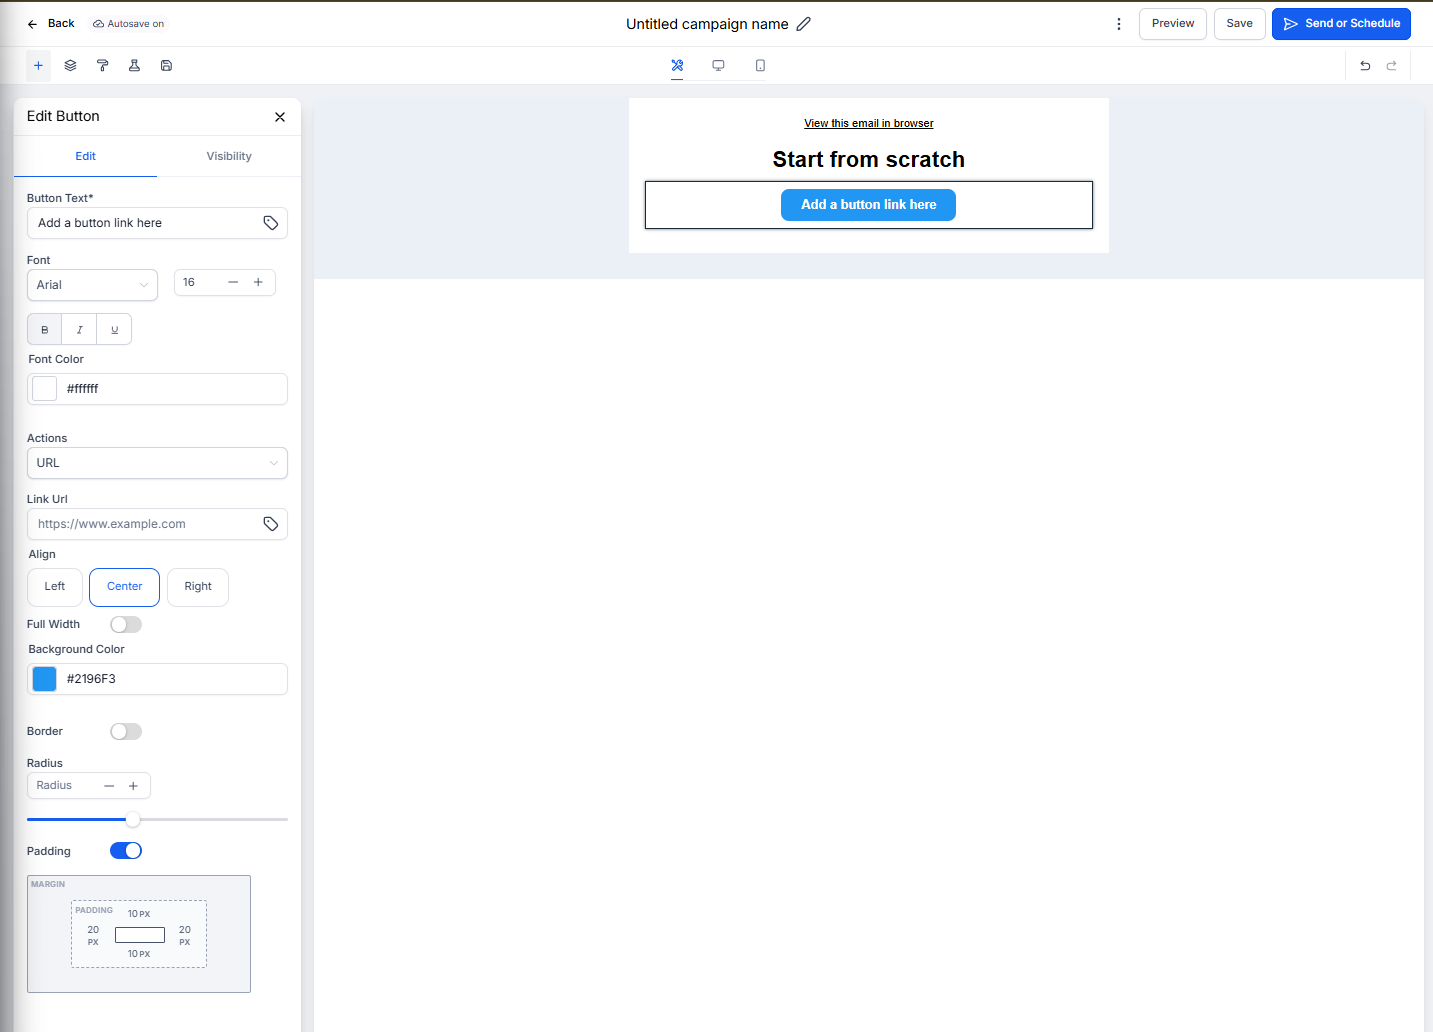
In the Edit panel, you can:
- Edit Button Text: Change the label to reflect your desired action (e.g., "Schedule a Tour", "Enroll Now", "View Programs", "RSVP Today")
- Add a Link: Enter the destination URL where the button should take families
- Customize Styling: Adjust button color, text color, font, border radius, and background
- Adjust Size and Alignment: Control width, padding, and alignment (left, center, or right)
- Add Padding: Add space around the button for better layout balance
Set Visibility Options
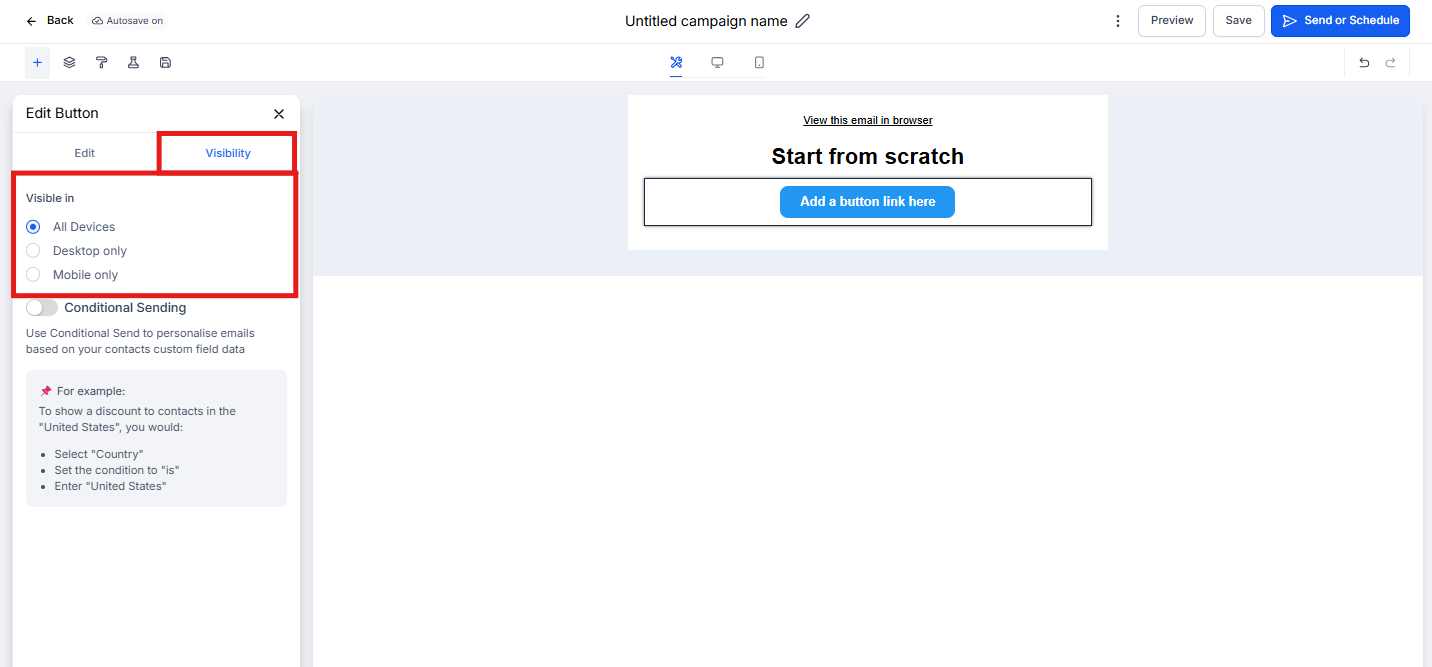
- Click the Visibility tab to configure device-based visibility or conditional sending options if needed.
- Preview your email in both desktop and mobile modes to ensure the button looks and functions correctly.
Pro Tip: Use action-oriented button text that tells families exactly what happens next. "Schedule Your Tour" is more effective than just "Click Here."
Frequently Asked Questions
Can I add multiple buttons in one email?
Yes, you can add as many buttons as you need. Each one can have unique styling and links. For example, use one button for "Schedule a Tour" and another for "Download Our Parent Handbook."
How do I make a button full-width?
Use the full width toggle in the edit panel to set the button to 100%, or manually adjust it using the padding and alignment controls.
Are buttons mobile responsive?
Yes, buttons automatically resize and reposition for optimal display on mobile devices. Always preview on mobile to confirm the look.
How do I remove a button from my layout?
Select the Button Element and click the trash/delete icon to remove it from your email design.
What should my button link to?
Link your buttons to pages that help families take the next step: your tour scheduler, enrollment form, program information page, or event registration. Make sure the destination matches what your button text promises.