
Add to Automation Action
The "Add to Automation" action lets you automatically move families into specific automations, creating smooth transitions between stages of your enrollment journey.
In this article, you'll learn what this action does, how to set it up step-by-step, and see real-world childcare examples.
What is the "Add to Automation" Action?
This action automatically adds parents and families to another automation you've already created. Use it to move families between different stages — like from initial inquiry to tour scheduled to enrollment follow-up.
The Pass Input Trigger Parameters option lets you carry data from the original automation into the new one. This means details like tour dates, family names, or child information flow seamlessly from one automation to the next.
Example: After a parent books a tour, automatically add them to a "Tour Confirmation & Reminders" automation that sends confirmation details and reminder texts before their visit.
Key Benefits
- Seamless transitions: Move families between automations without manual work
- Keep data intact: Important details from forms, bookings, and conversations carry over automatically
- Save time: No need to manually track which families need which follow-ups
- Better parent experience: Timely confirmations, reminders, and follow-ups keep families engaged
- Scale easily: Handle more enrollment inquiries without adding manual steps
Step-by-Step Setup
Here's how to configure the "Add to Automation" action:
- Go to Automations from your main menu
- Click + Create Automation in the top right
- Select + Start from Scratch
- In the automation builder, click the + button to view available actions
- Scroll to find Add to Automation and click to configure
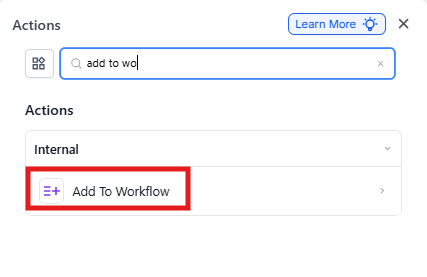
Configure the Action
Name the Action: Give it a descriptive name so you can identify it later. Example: "Add to Tour Reminder Automation"
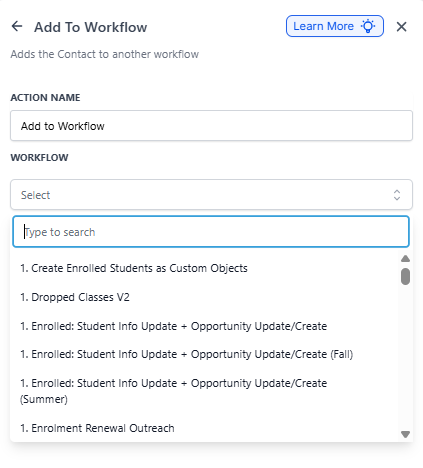
Select the Target Automation: Choose which automation families will be added to. You'll see a dropdown of all your existing automations.
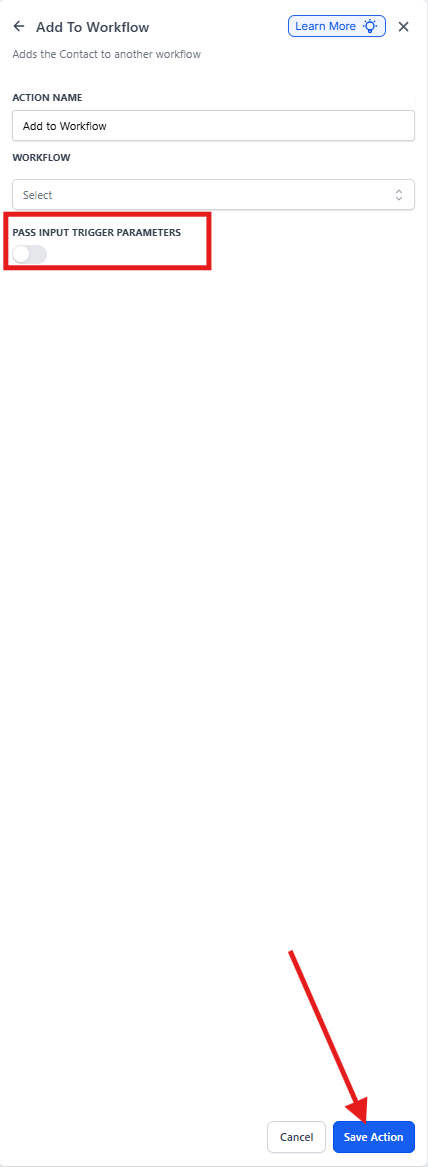
Enable "Pass Input Trigger Parameters" (Optional): Turn this on if you want to carry data from the original automation into the new one. For example, pass tour dates, child ages, or program interests so your next automation can reference them.
Click Save Action before returning to the automation builder.
Test and Activate
- Test first: Run a test to confirm families move to the correct automation with the right data
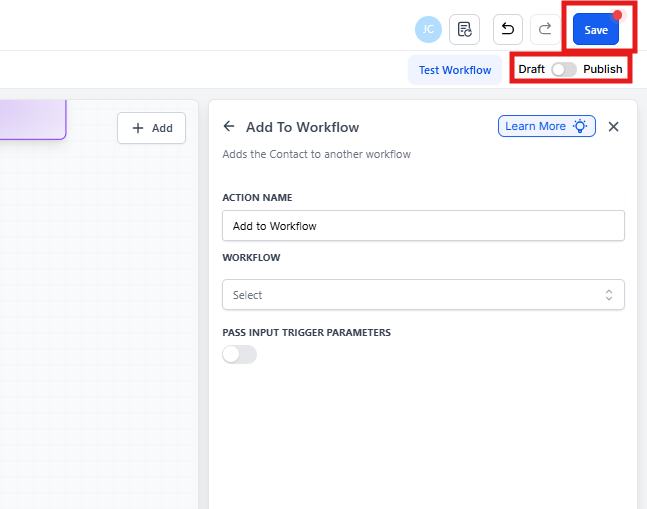
- Save your draft: Click Save whenever you leave the builder so your work isn't lost
- Publish: Use the toggle to activate your automation when you're ready
Childcare Use Cases
Tour Booking to Reminders: When a parent books a tour, automatically add them to an automation that sends confirmation, directions, and reminder texts.
Waitlist to Spot Available: When a spot opens, move families from your waitlist automation to an enrollment offer automation.
Inquiry to No-Show Follow-up: If a family doesn't attend their scheduled tour, add them to a re-engagement automation.
Application Started to Completion: After a parent starts your enrollment application, add them to an automation that sends helpful reminders and deadline notifications.
New Enrollment to Onboarding: Once a family completes enrollment, automatically move them to your new family onboarding automation with welcome materials and first-day prep.
Frequently Asked Questions
Can I add a family to multiple automations at once?
No, each "Add to Automation" action adds families to one automation at a time. However, you can add multiple "Add to Automation" actions in sequence to enroll them in several automations.
What happens when I enable "Pass Input Trigger Parameters"?
It transfers data from the original automation trigger into the new automation. This lets you personalize follow-ups with specific details like tour dates, child names, or program preferences.
What information gets passed when I enable parameters?
It depends on what triggered the original automation:
- Tour Booking: Parent name, email, phone, tour date/time, calendar assignment, booking status
- Form Submission: Form name, submission date, all form fields and answers, parent details
- Survey Response: Survey name, submitted answers, parent details
- Inbound Call/Text: Parent details, source (call/text), timestamp, assigned staff member
- Custom Event: Any custom fields you've defined for that event
You can view and use these fields in the receiving automation's actions (like "Send Email" or "Update Field").
How do I know if parameters are passing correctly?
Test your automation before activating it. Run a test enrollment and verify the data shows up correctly in the next automation.
What trigger do I need in the receiving automation?
You don't need a trigger. When you use "Add to Automation," families are automatically enrolled at the start of that automation. Just build your automation starting with your first action (like Send Email, Wait, or Update Enrollment Opportunity).