
Overview
You can automatically add notes to appointments using the Create Appointment Note action in your automations. This helps you log important details without manual data entry — perfect for tracking tour feedback, parent preferences, or follow-up reminders.
When to Use This
This automation action works in two ways:
- With appointment triggers — automatically add notes when tours are booked, rescheduled, or completed
- With webhook triggers — receive appointment notes from external systems or forms
How to Set It Up
Step 1: Create Your Automation
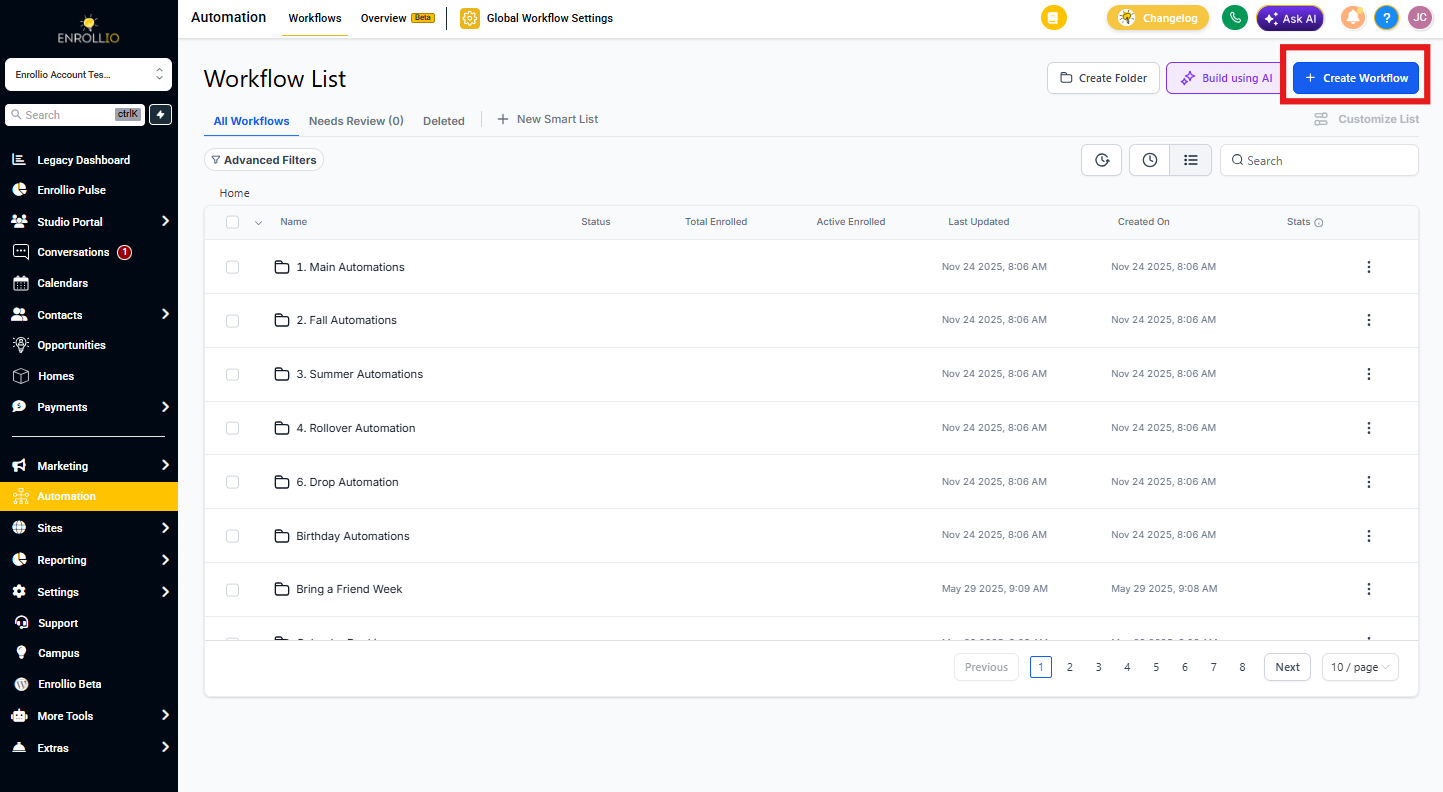
- Go to Automations in your Enrollio dashboard
- Click Create New Automation
- Choose Start From Scratch
Step 2: Add Your Trigger
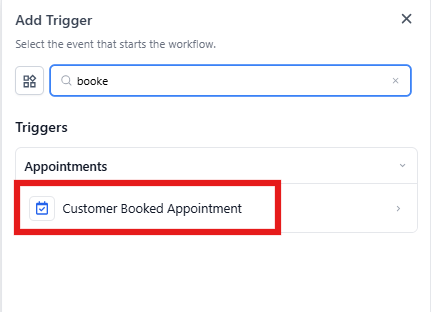
Select one of these triggers based on your needs:
- Tour Booked — when a family schedules a tour
- Tour Completed — when a tour status changes to completed
- Inbound Webhook — when receiving data from an external source
Step 3: Add the Create Appointment Note Action
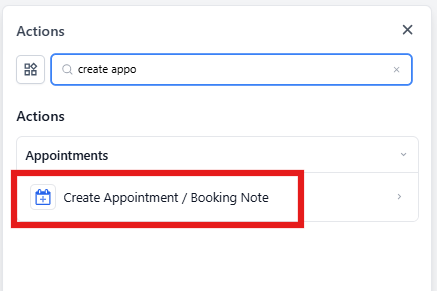
- Click Add Action
- Select Create Appointment Note from the list
- Give your action a clear name (e.g., "Log Tour Feedback")
Step 4: Configure Your Note Content
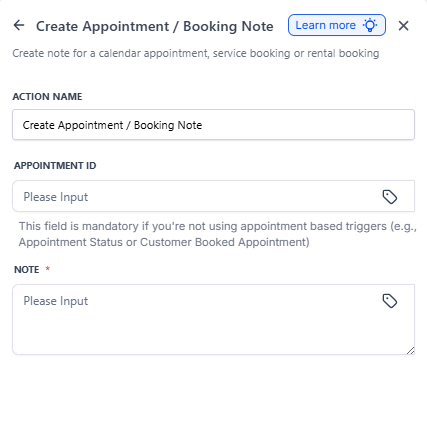
If you used an appointment trigger:
Simply type the note you want to add. You can use custom values to personalize it:
Tour completed for {{contact.first_name}} {{contact.last_name}}. Follow up in 2 days.If you used an Inbound Webhook trigger:
You'll need to specify which appointment to add the note to:
-
Appointment ID:
{{inboundWebhookRequest.appointmentId}} -
Note Body:
{{inboundWebhookRequest.body}}
Configuration Details
Appointment ID Field
When it's required: Only when using an Inbound Webhook trigger. You must pass the appointment ID so Enrollio knows which appointment to add the note to.
When it's not required: When using appointment-based triggers (Tour Booked, Tour Completed, etc.). The automation already knows which appointment triggered it.
Note Body Field
This is the actual content of your note. You can:
- Type static text that stays the same every time
- Use custom values to pull in parent names, appointment details, or form responses
- Combine both for personalized notes
Character limit: 5,000 characters maximum per note
Example Use Cases
Automatic Tour Follow-Up Notes
Trigger: Tour Completed
Note: "Tour completed on {{appointment.start_date}}. Parent interested in {{custom_values.program_interest}}. Schedule enrollment call."
Webhook Integration Notes
Trigger: Inbound Webhook
Use case: When a parent fills out a pre-tour form, automatically add their responses as a note to their scheduled tour appointment.
Staff Reminder Notes
Trigger: Tour Booked
Note: "New tour scheduled. Family has {{custom_values.number_of_children}} children ages {{custom_values.child_ages}}. Prepare materials for {{custom_values.program_type}}."
Pro Tips
Keep notes organized: Start each automated note with a consistent label like "[AUTO]" or "[SYSTEM]" so your team knows it was generated automatically.
Use with other actions: Combine this action with others — for example, send a text to staff AND add a note to the appointment when a family cancels a tour.
Important Things to Know
- Notes added through automations appear alongside manually created notes — they're not visually different
- If you're using webhooks, make sure your webhook payload includes both
appointmentIdandbodyfields - The 5,000 character limit is generous, but avoid adding extremely long notes that might be hard to read
- Notes are attached to the appointment, not the parent record (though you can view them from both)
Troubleshooting
Note isn't appearing on the appointment:
- Check that your automation was triggered (look at the automation history)
- If using a webhook, verify the appointment ID is being passed correctly
- Make sure the note body isn't empty
Webhook integration not working:
- Test your webhook payload format — both
appointmentIdandbodymust be included - Check that the appointment ID matches an actual appointment in Enrollio