
Advanced Builder for Automations
Building and optimizing automations just became faster and more collaborative. The Advanced Builder introduces a cleaner Stats Mode, image-ready Sticky Notes, inline comments, and a right-click Quick Actions menu—everything you need to plan, document, and iterate without leaving the canvas.
What You'll Learn
- How to use the visual canvas to build multi-trigger automations
- Creating parallel paths for different enrollment scenarios
- Using Sticky Notes and comments to document your logic
- Keyboard shortcuts to speed up your workflow
What is the Advanced Builder?
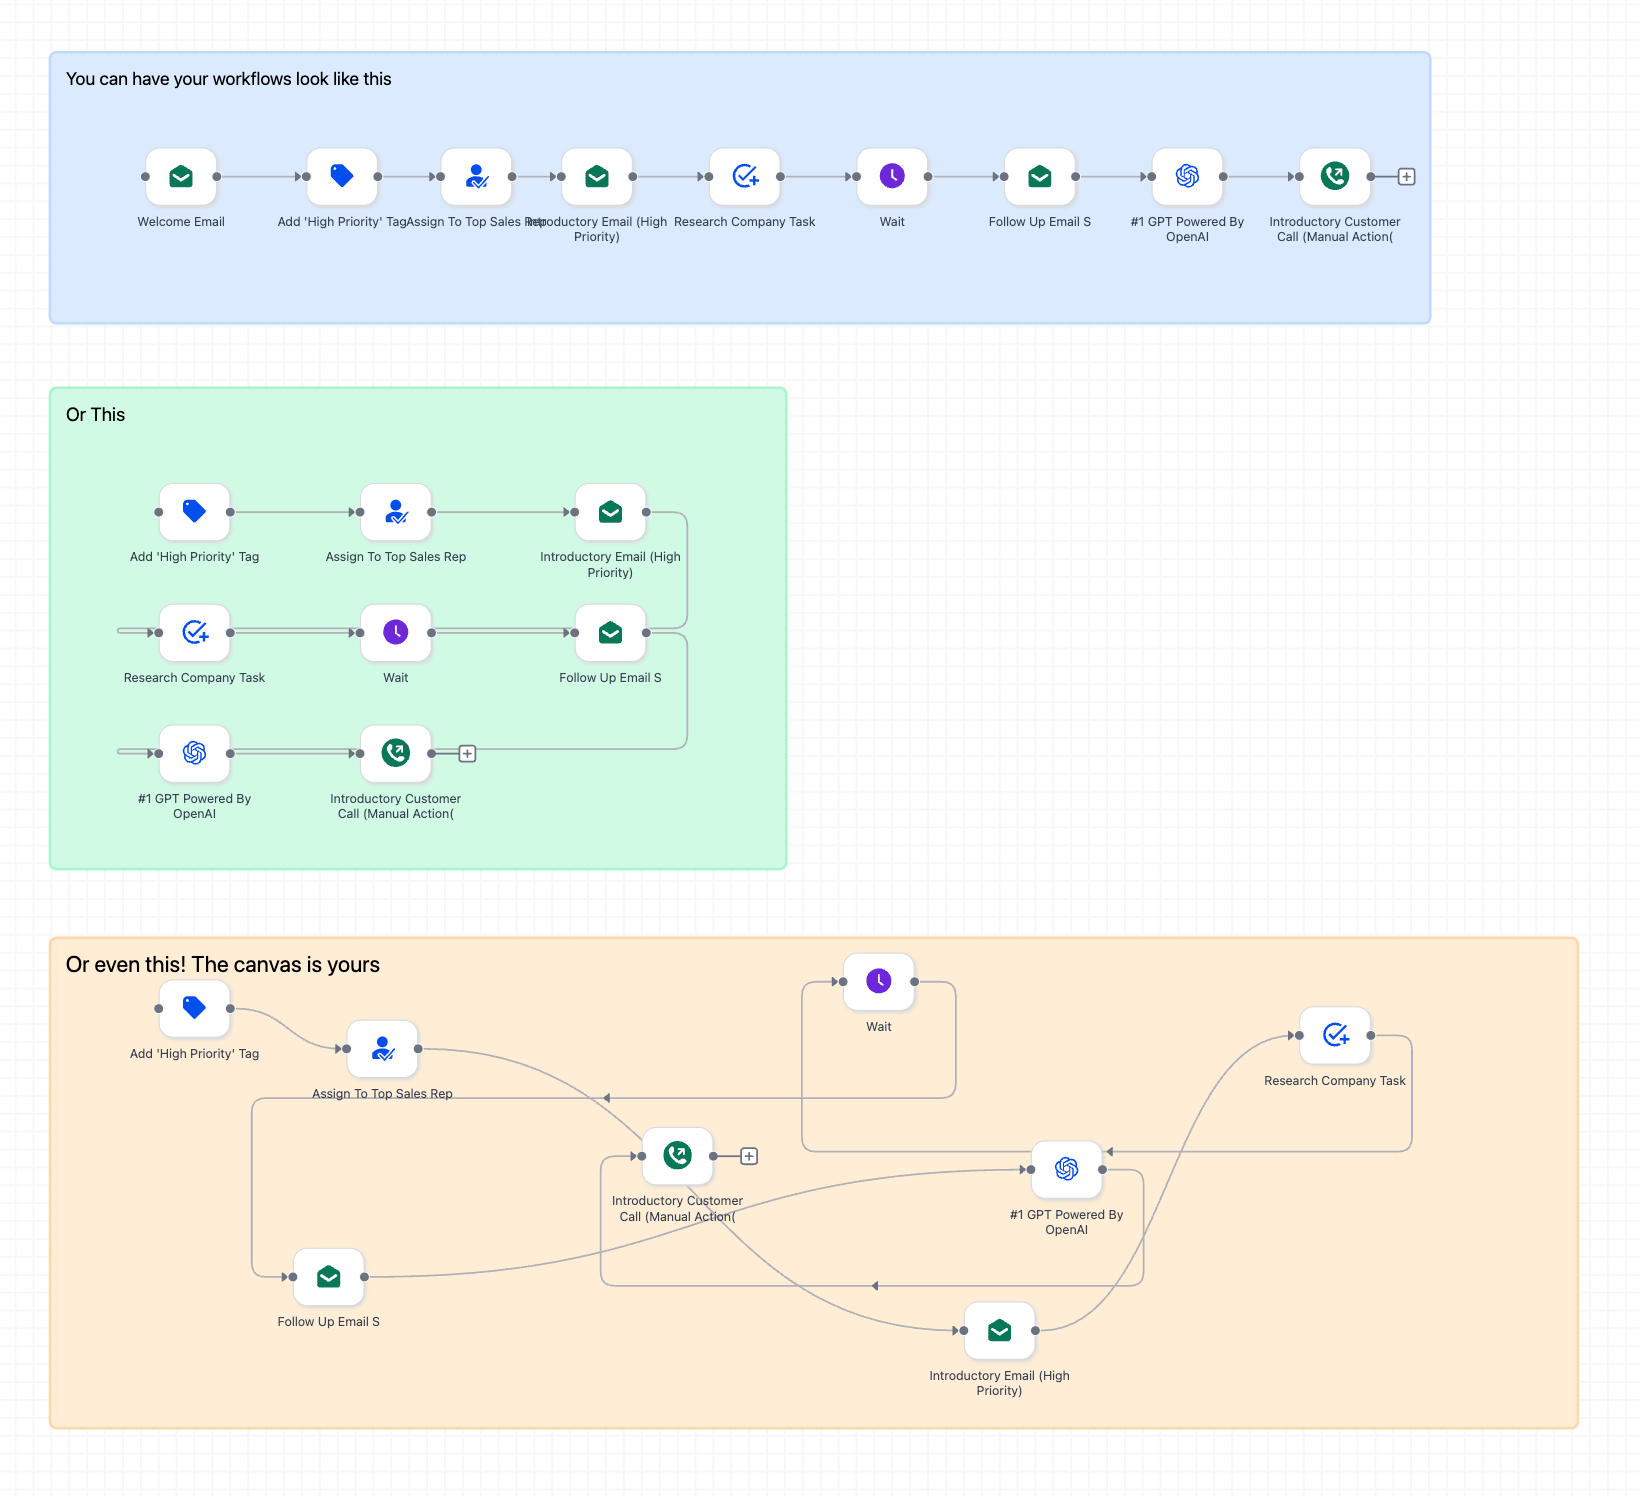
The Advanced Builder is a fully visual, freeform canvas for creating automations. Drag, drop, and connect multiple trigger paths, parallel branches, and complex logic in one view—perfect for managing enrollment journeys, waitlist flows, and parent communication sequences.
This upgrade includes four key enhancements: Stats Mode, Sticky Notes 2.0, comments, and Right-Click Quick Actions. Together, they help you review performance, collaborate with your team, and keep your automations organized.
Access & Requirements
Where to find it: Open any automation → toggle to Advanced Builder (top-left corner).
Switching views: You can toggle between Standard and Advanced on the same automation. Note that some Advanced-only features won't carry over if you switch back to Standard view.
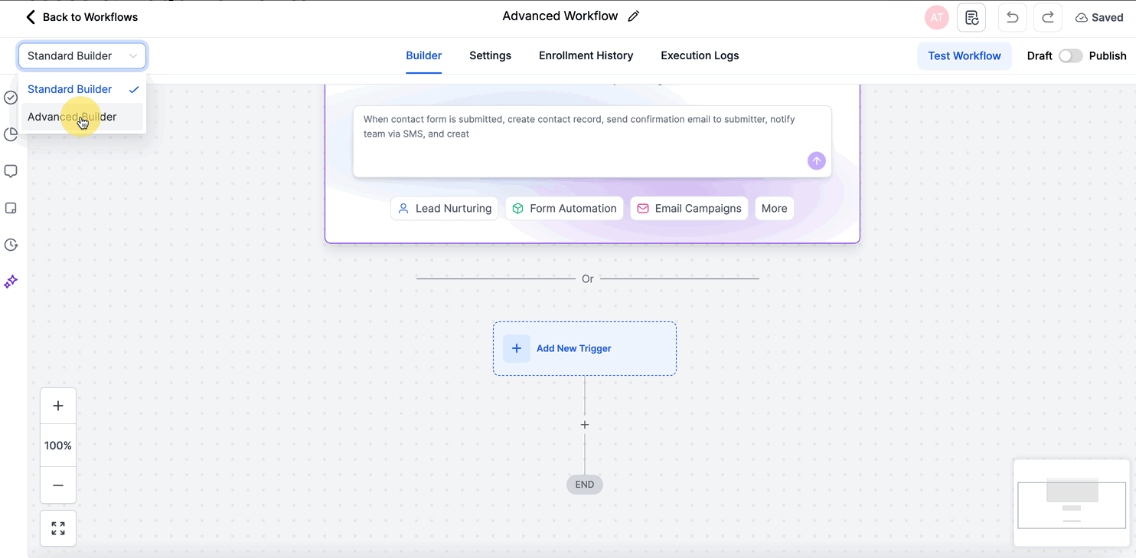
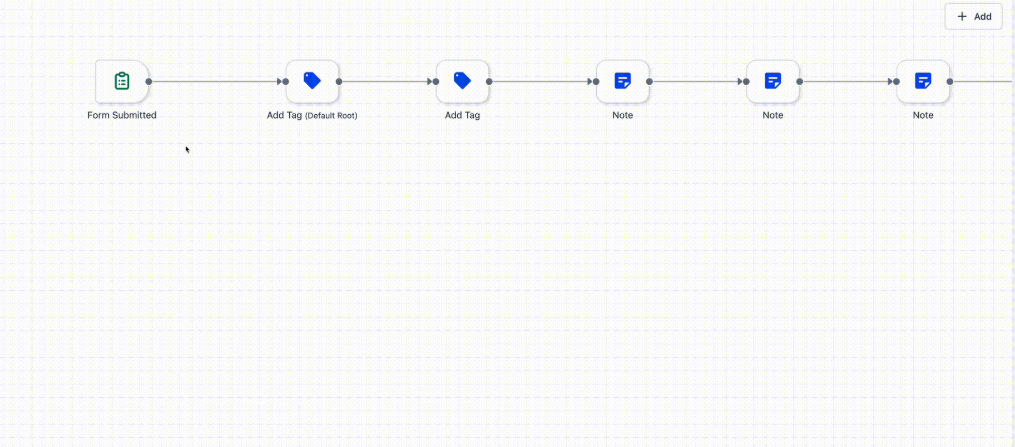
The Canvas: Build, Connect, and Organize
Add & Connect Steps
- Open the Triggers & Actions panel on the left
- Configure from the panel or drag items directly onto the canvas
- Connect nodes by dragging from the connector handle (or the + icon)
Pro tips:
- Multi-select (marquee or Shift-drag) to move groups of nodes together
- Copy and paste branches across automations to reuse enrollment patterns
Trigger Go-To & Delinked Nodes (Parallel Paths)
These features let you build complex automations that handle multiple enrollment scenarios in one place.
Trigger Go-To (Set Each Trigger's Starting Action)
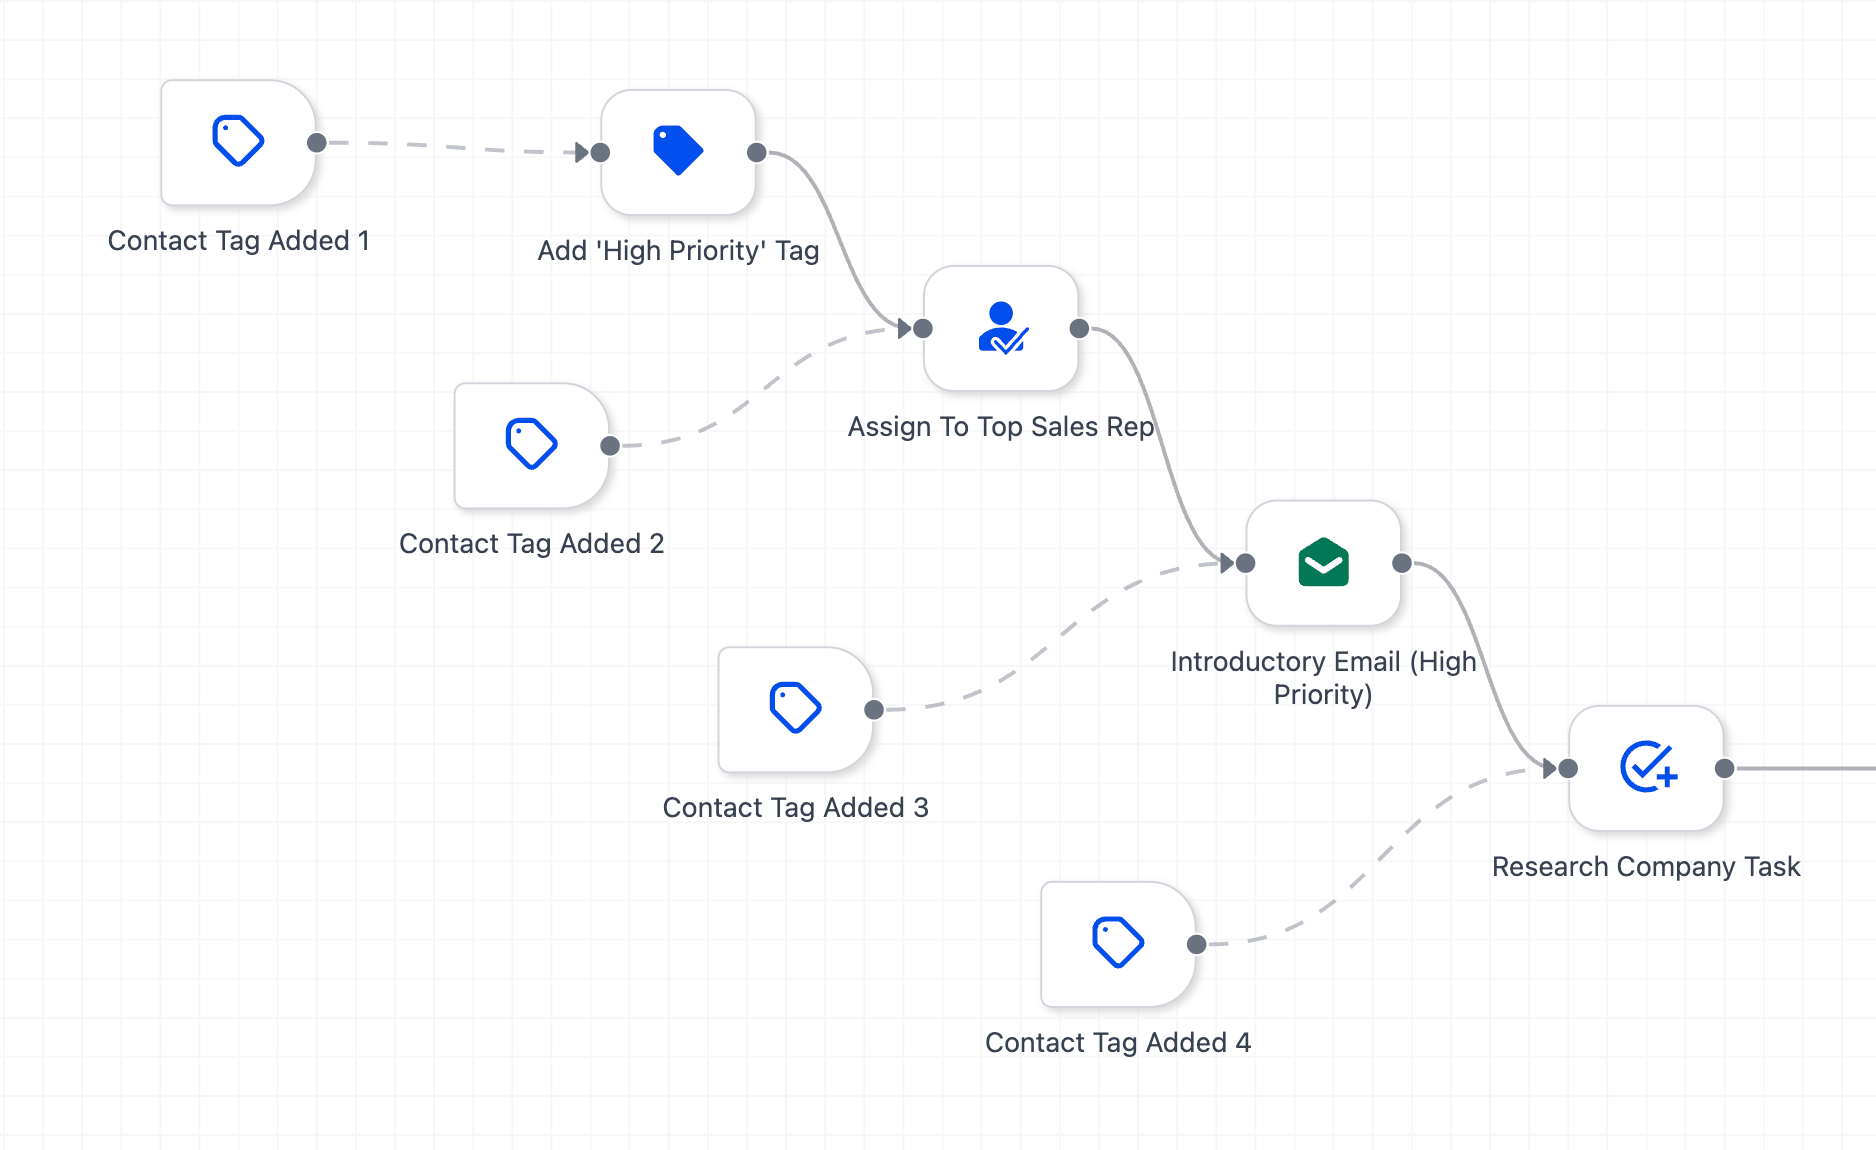
Route a trigger to the exact action where it should start—perfect when different parent behaviors need different responses.
How to connect: Drag the trigger's Go-To connector onto your target action.
Visual cue: Trigger Go-To connections appear as a dashed line with an arrowhead (normal sequential links remain solid).
Execution: When the trigger fires, the automation jumps directly to the target action and continues from there.
Example: A "Tour Scheduled" trigger can jump to a confirmation sequence, while a "Tour Cancelled" trigger jumps to a re-engagement sequence—all in one automation.
Delinked Nodes (Independent/Parallel Branches)
Create branches that don't need to connect linearly—great for handling multiple triggers or outcomes on the same canvas.
How to build:
- Create an independent cluster of actions anywhere on the canvas
- Attach a trigger via Go-To connection to start that branch
- Each branch runs independently within the same automation context
Visual cues at a glance:
- Solid connector → normal sequential path
- Dashed connector with arrow → Trigger Go-To (jump to target action)
- Isolated cluster → Delinked branch
Example: Build separate branches for waitlist enrollment, direct enrollment, and tour follow-up—all visible on one canvas.
Enable / Disable Nodes
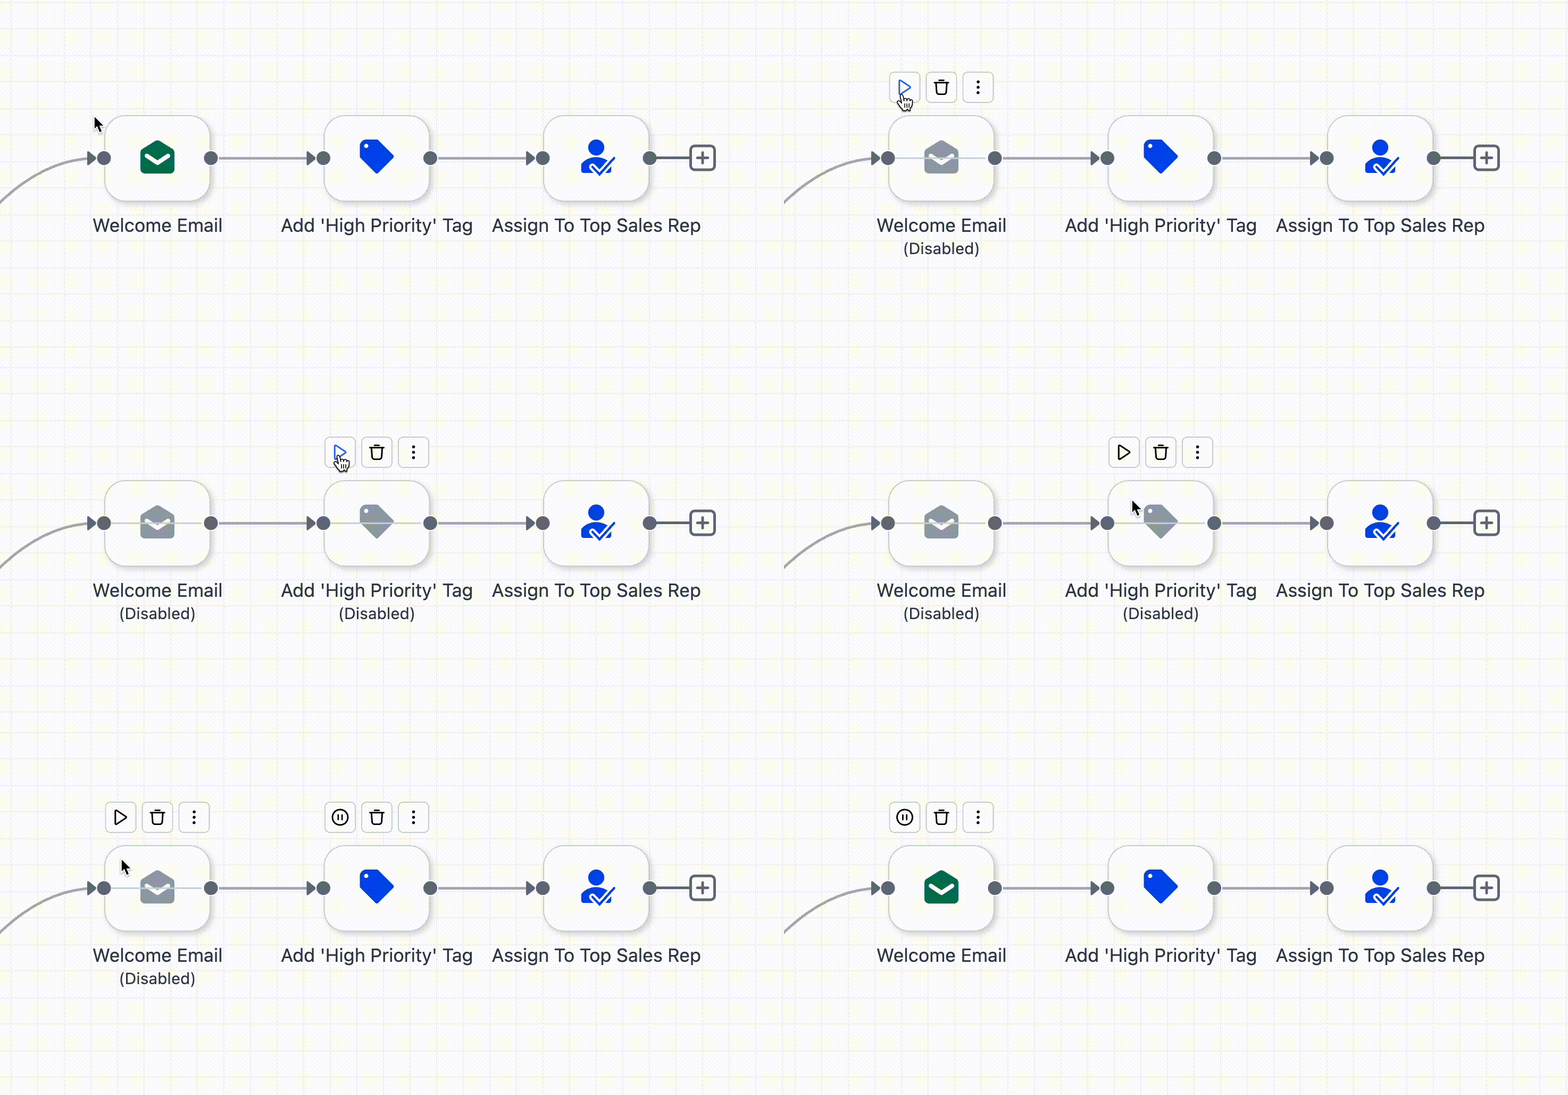
Turn any action or condition off for testing—without deleting or rewiring your automation.
- Disable: Hover over a node → click the pause icon
- Enable: Hover again → click the play icon
Execution: Disabled nodes are skipped, but connections remain intact so you can easily test different scenarios.
Use case: Temporarily disable a text message step while testing email timing, then re-enable once confirmed.
Sticky Notes & Color Coding
Use notes to explain your logic for teammates and future you. Great for documenting why certain enrollment rules exist or what each branch handles.
- Add a note from the left sidebar
- Choose color and style
- Enter your text (notes support images and links)
Pro tip: Color-code by function—yellow for parent communication flows, blue for staff notifications, green for enrollment milestones.
Keyboard Shortcuts & Power Navigation
Open the keyboard icon (top-left) for the full list—Navigation, Tools, View, and Edit shortcuts.
Essential shortcuts:
- Arrow keys to move selection
- Cmd/Ctrl + C / V for copy/paste
- Next/Previous action buttons for fast traversal

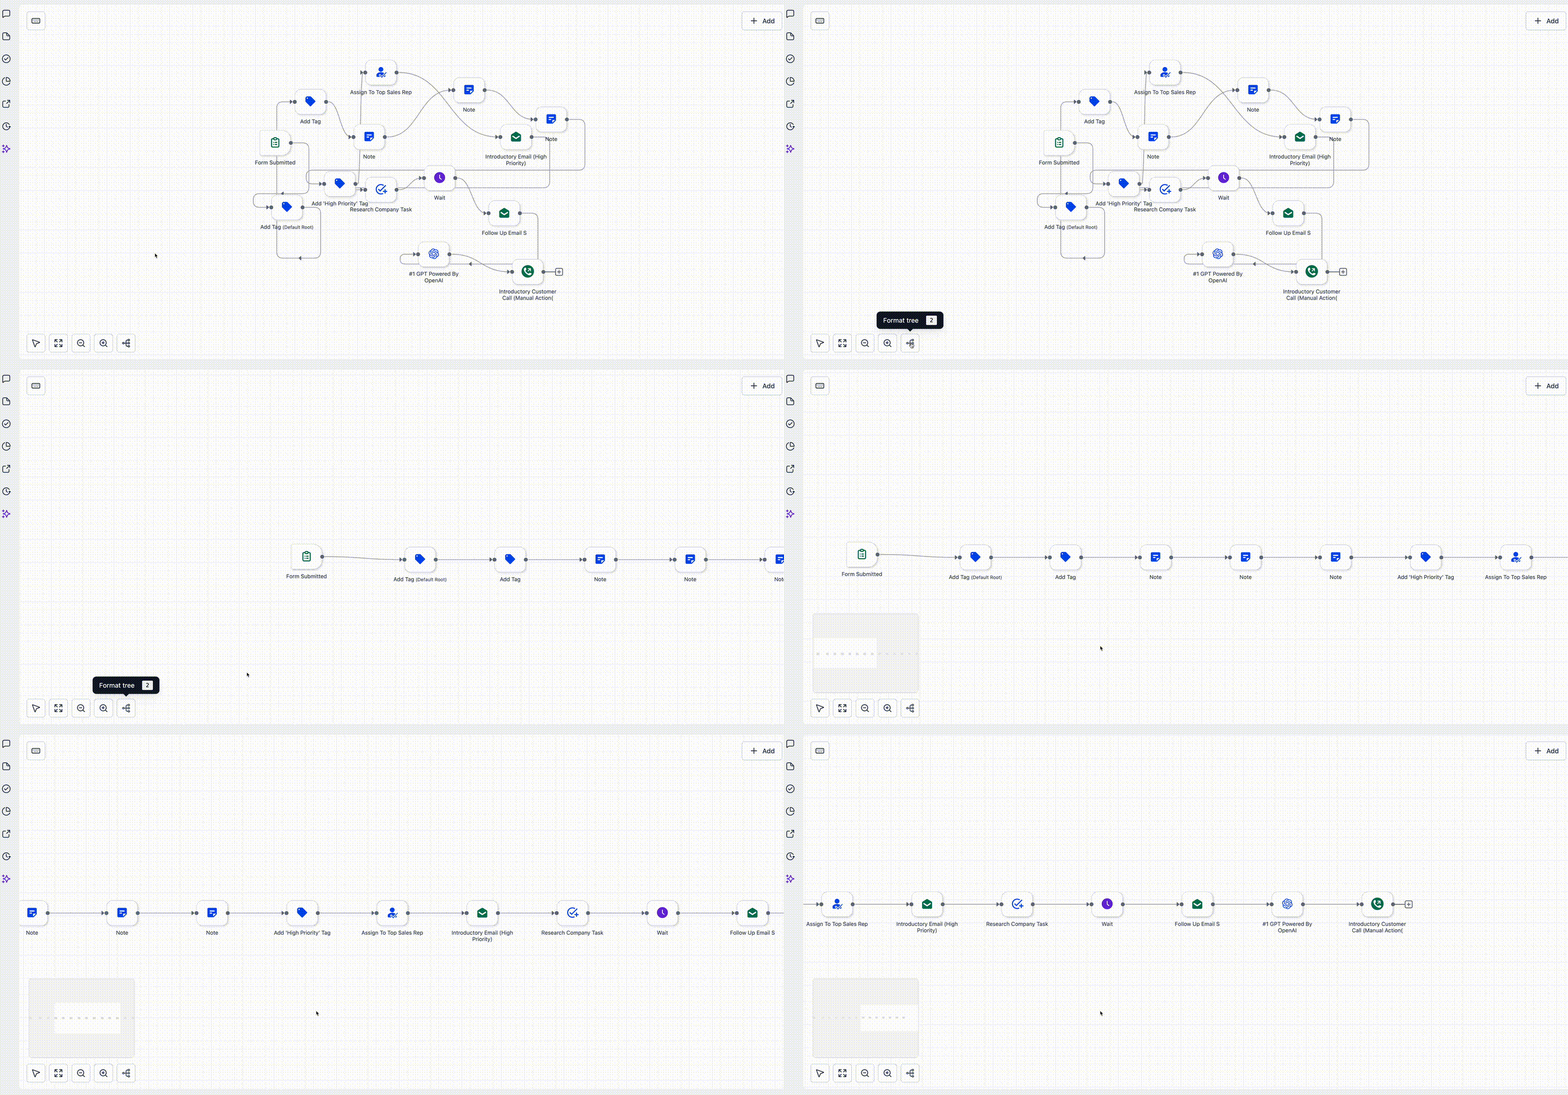
Tidy Up (Auto-Layout)
One click to clean up cluttered canvases—great after heavy edits or when you've imported automation templates.
Click the Tidy Up button to automatically reorganize all nodes into a clean, logical layout.
Pro tip: Use this after building out complex enrollment journeys to make them easier to review with your team.
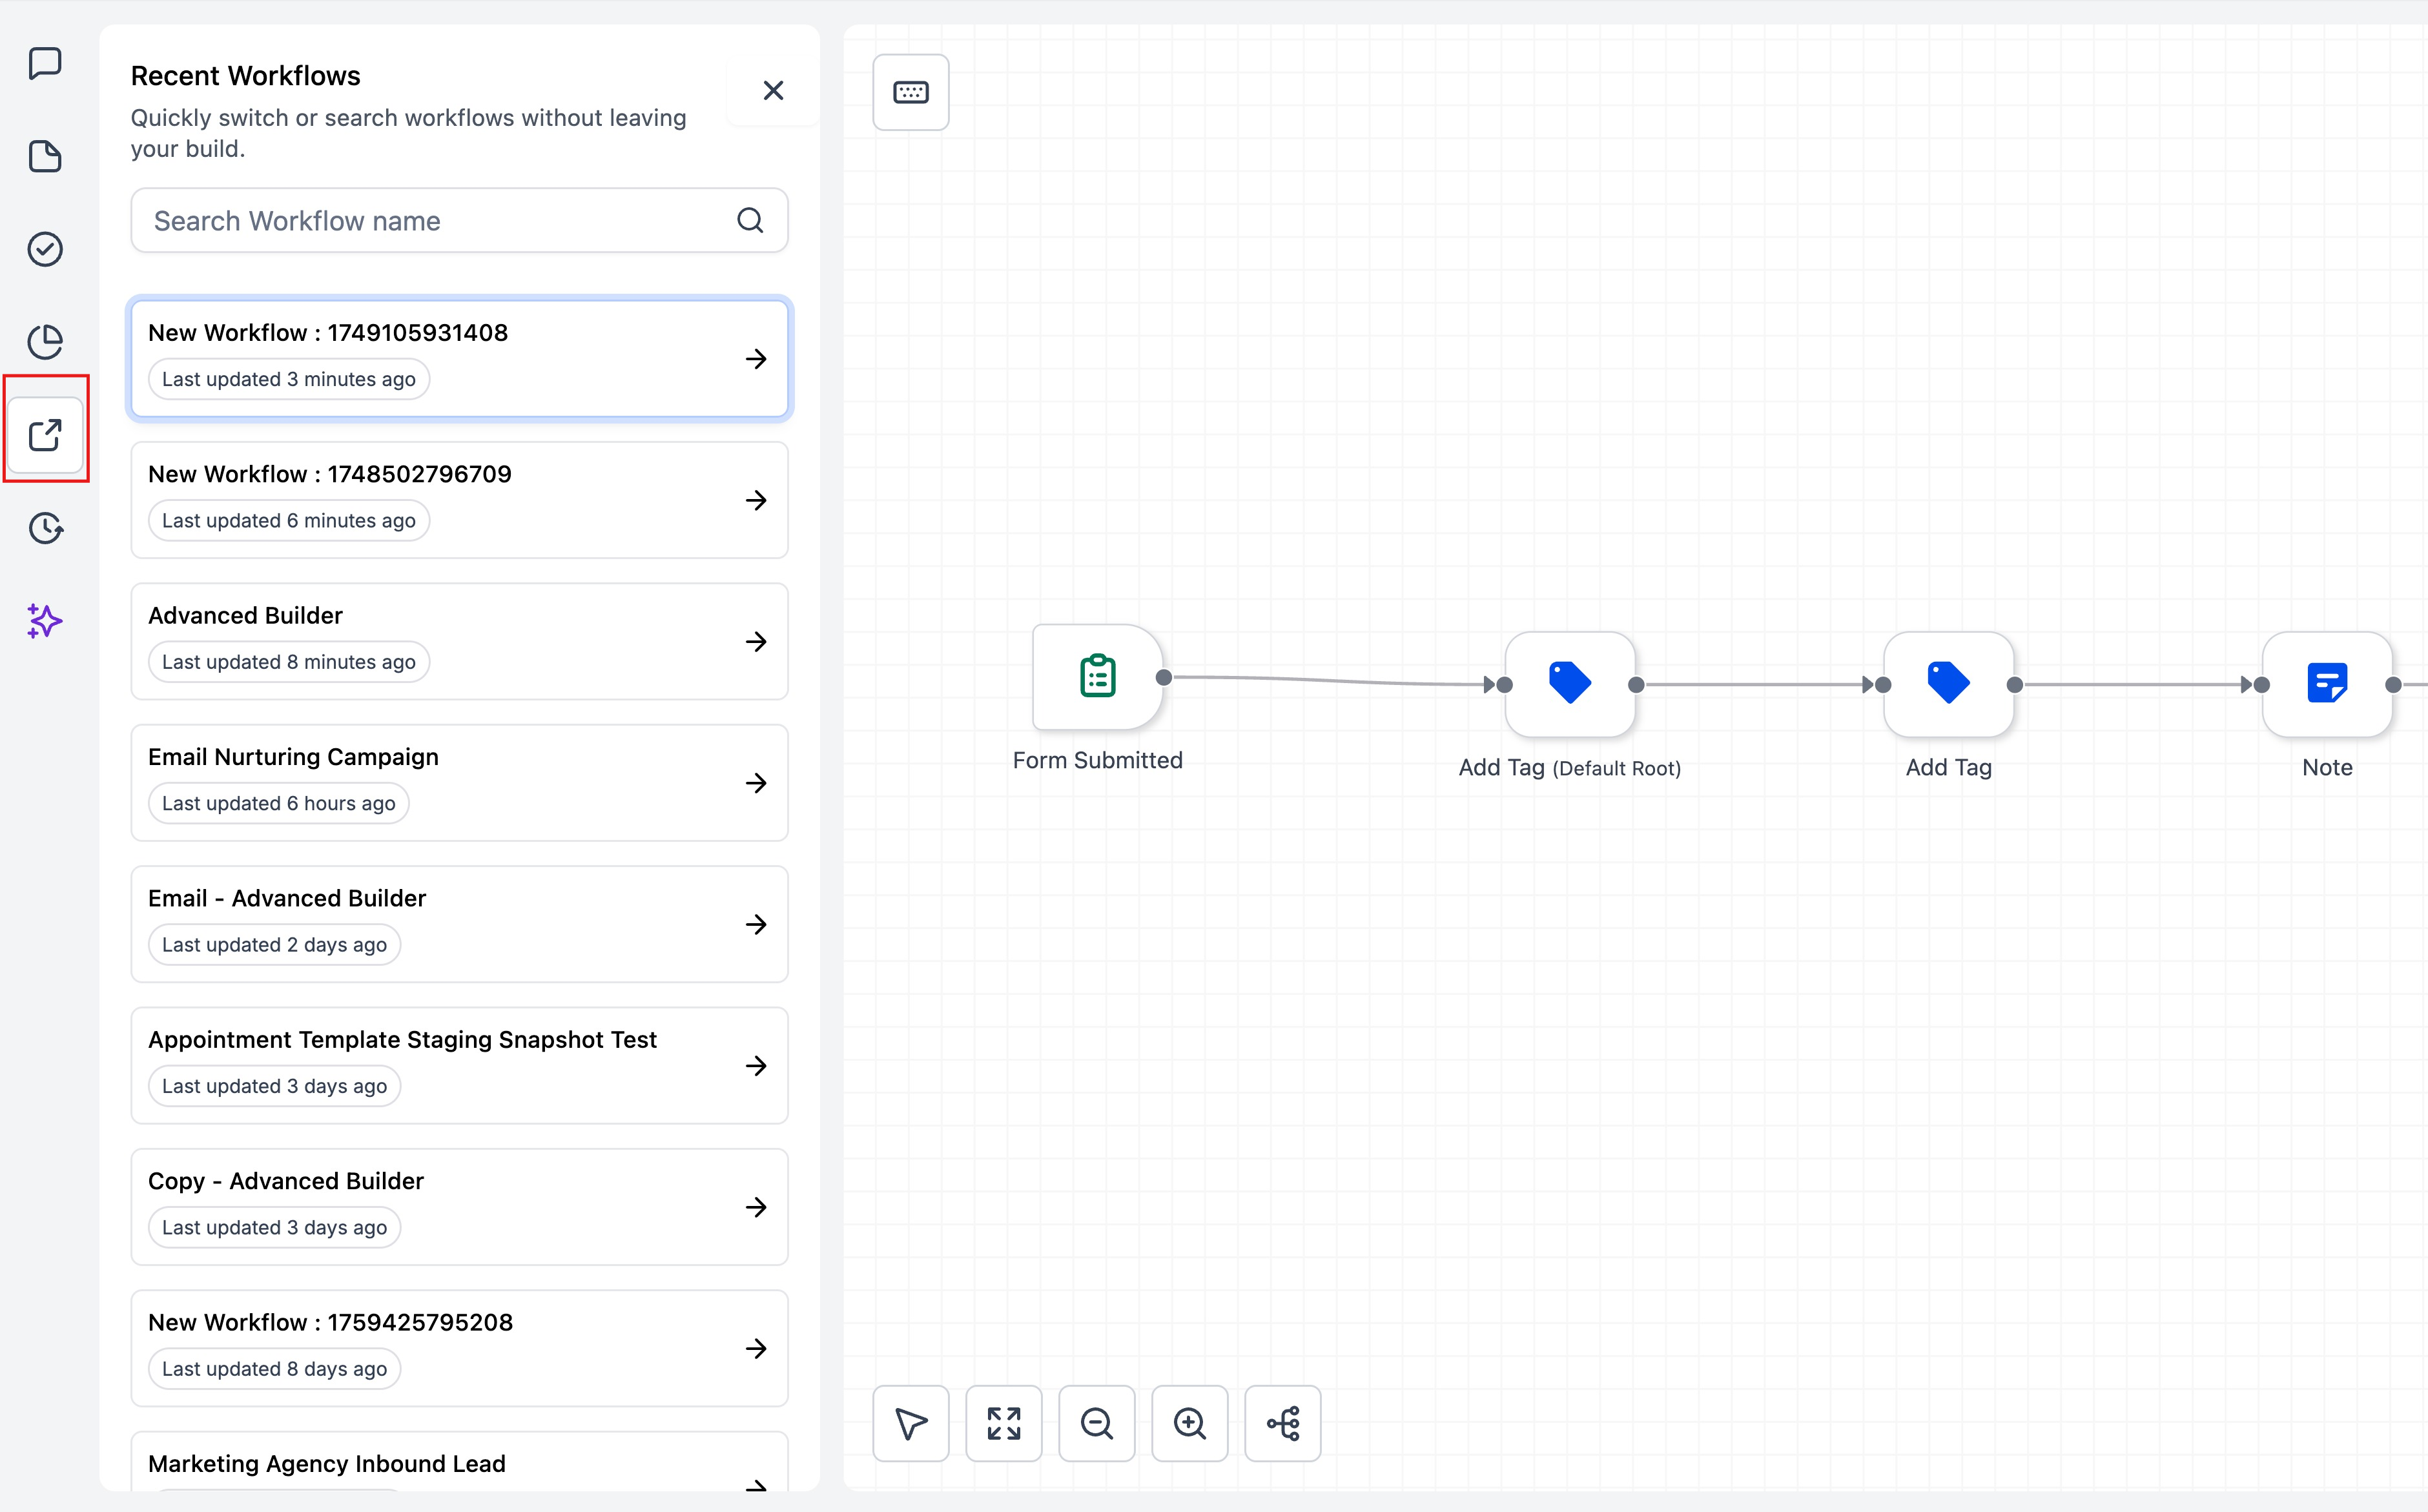
Automation Switcher
Navigate between automations without leaving the builder.
- Open the Automation Switcher (left sidebar)
- See recent automations or search by name or tag
- Click a result to open it in a new tab—your current canvas stays open
Use case: Quickly reference your waitlist automation while building your tour confirmation automation.
Saving, Versioning & Publishing
Your changes are saved automatically as you work. When you're ready to make your automation live, click Publish in the top-right corner.
Version History: Access previous versions from the settings menu to review changes or restore earlier configurations.
Notes, Limits & Best Practices
Important Behaviors
Single enrollment per family: Even with parallel branches, the same family won't run concurrently through multiple branches of the same automation. This prevents duplicate messages or conflicting actions.
Switching to Standard Builder: Remove Advanced-only features (Trigger Go-To, Delinked nodes, Disabled nodes) before switching back to Standard view.
Best Practices for Childcare Centers
Organize early: Use color-coded notes and Tidy Up to keep complex enrollment journeys readable. Your future self (and your team) will thank you.
Name clearly: Give triggers and actions descriptive names like "Tour Scheduled - Send Confirmation" instead of generic labels. This helps in both the canvas and Version History.
Document decision points: Add sticky notes explaining why certain conditions exist—like "Families on waitlist over 30 days get priority" or "Tours scheduled within 48 hours get SMS reminder."
Test in stages: Use the Enable/Disable feature to test one branch at a time before publishing your complete enrollment automation.
Common Questions
Can I use this for all my automations?
Yes! You can toggle any automation between Standard and Advanced Builder. Start with simpler automations to get comfortable, then build more complex enrollment journeys.
What happens to my Standard automations?
Nothing changes unless you switch them. Your existing automations continue working exactly as they are.
Can I collaborate with my team on the canvas?
Yes! Use Sticky Notes and comments to leave context for teammates. Multiple staff members can view and edit automations (based on your permission settings).
How do I know which branch a family is on?
Check the family's automation history in their profile. You'll see which triggers fired and which actions executed.
Should I build everything in one giant automation?
Not necessarily. While the Advanced Builder handles complexity well, it's often clearer to separate major functions—one automation for tour scheduling, another for waitlist management, another for enrollment follow-up. Use your judgment based on what feels logical for your team.