
Before you send an email campaign to hundreds of families, you'll want to make sure everything looks perfect. Testing your campaign helps you catch typos, check how it displays on different devices, and verify that personalization fields are working correctly.
Quick Test vs. Full Preview
Enrollio gives you two ways to check your campaign before sending:
- Preview mode — See how your email will look with sample data
- Test send — Send a real version to your own email address
How to Send a Test Email
- Open your email campaign in the Email Builder
- Click Preview & Test in the top right corner
- Select Send Test Email
- Enter your email address (or add multiple addresses separated by commas)
- Click Send
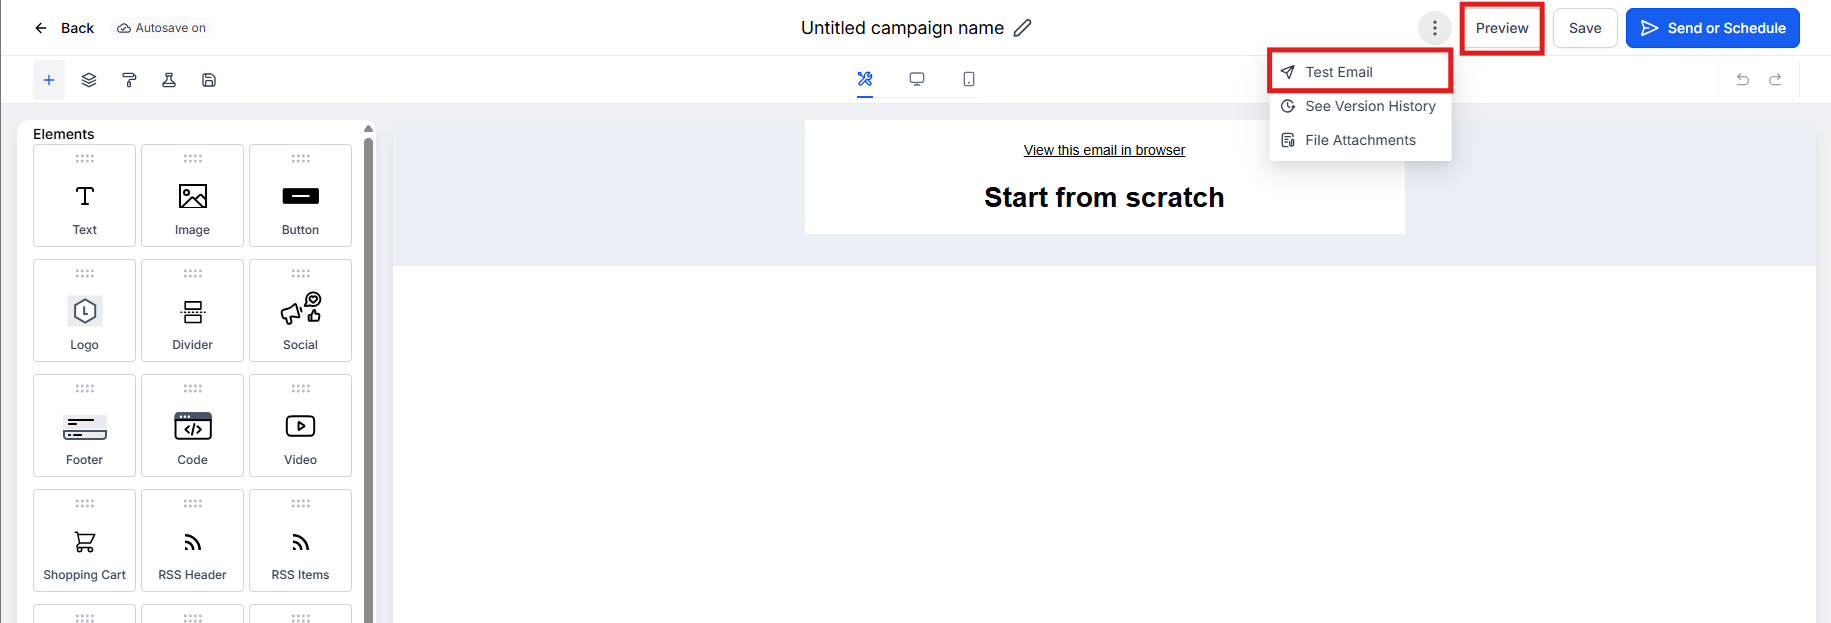
Your test email will arrive in a few moments. Check it on both desktop and mobile to make sure formatting looks good everywhere.
What to Check in Your Test
When reviewing your test email, pay attention to:
- Subject line — Does it grab attention without being too long?
- Personalization fields — Do parent names, child names, and custom fields display correctly?
- Links and buttons — Click every link to verify they work
- Images — Do photos and logos load properly?
- Mobile view — Open the email on your phone to check readability

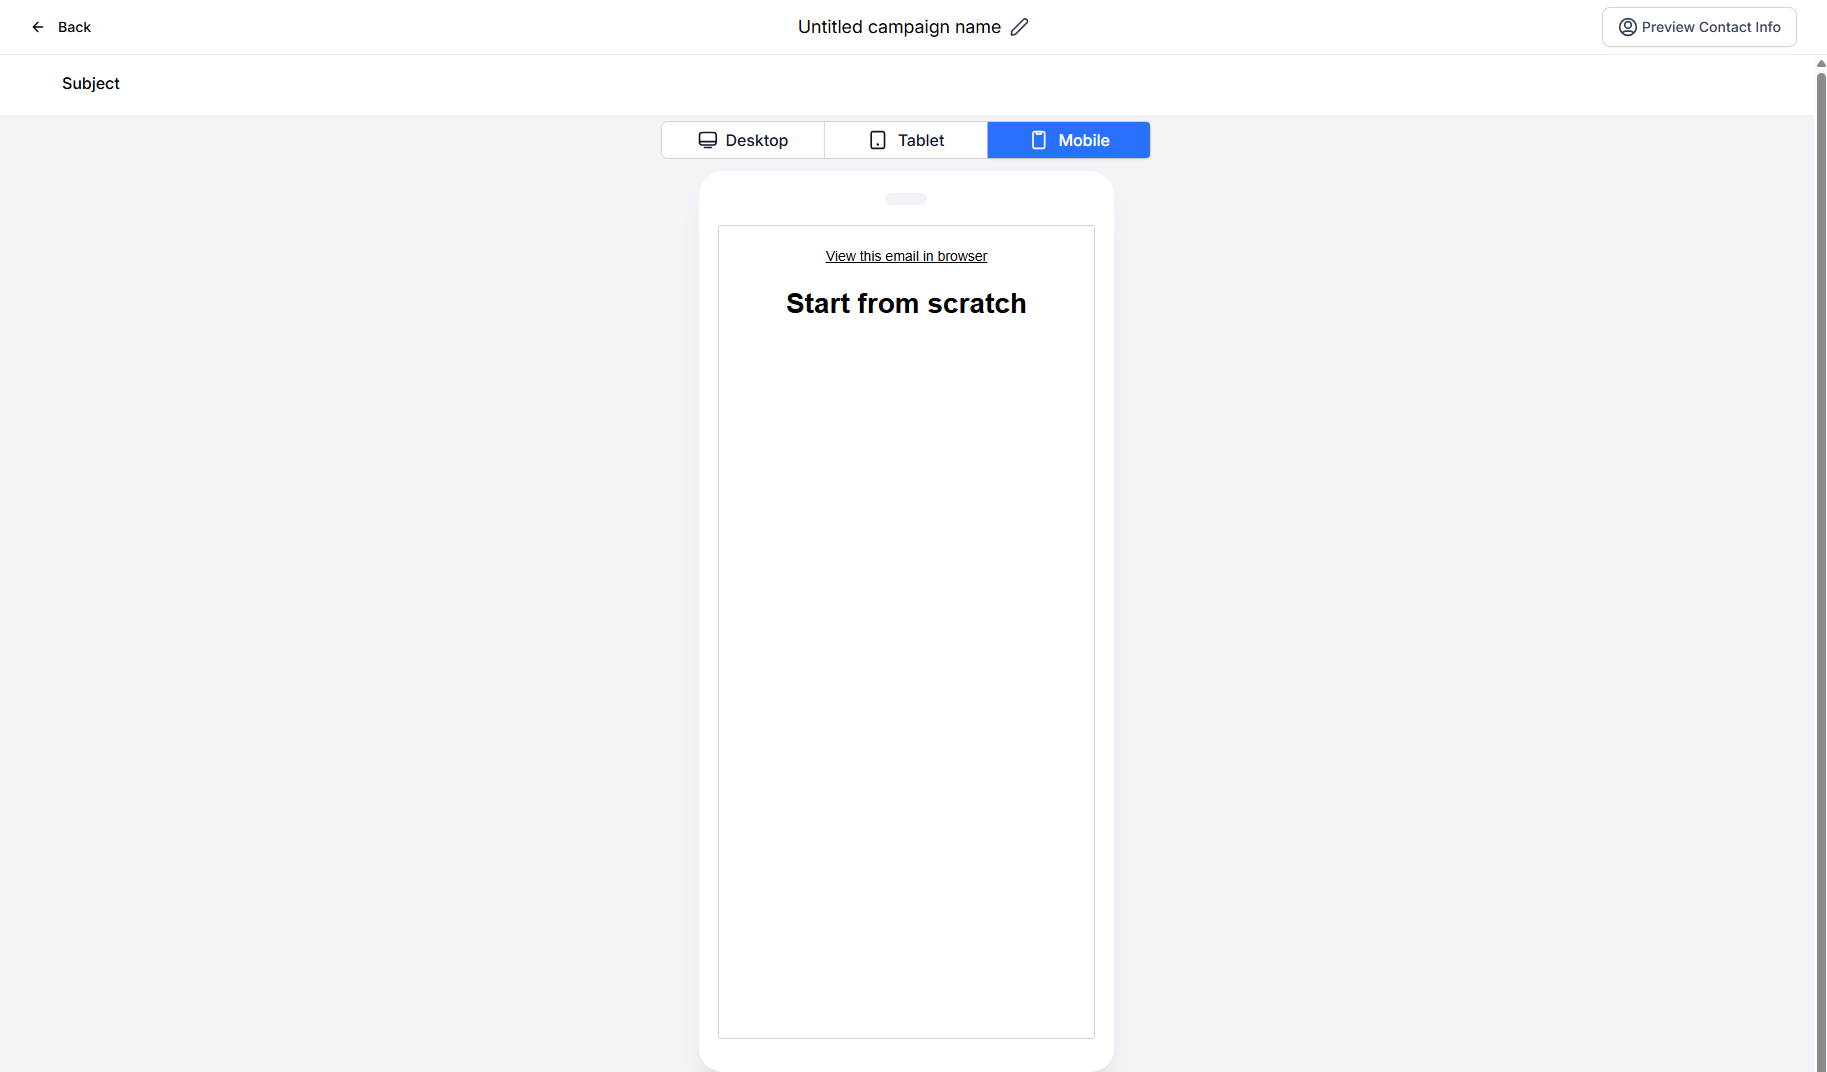 Pro Tip: Send test emails to team members who use different email clients (Gmail, Outlook, Apple Mail) to catch any formatting issues before your campaign goes live.
Preview with Real Family Data
Want to see exactly how your email will look with actual parent and child information? You can preview using real contacts from your database:
- In the Email Builder, click Preview & Test
- Select Preview with Contact
- Search for and select a family from your list
- Review how their information populates in the email
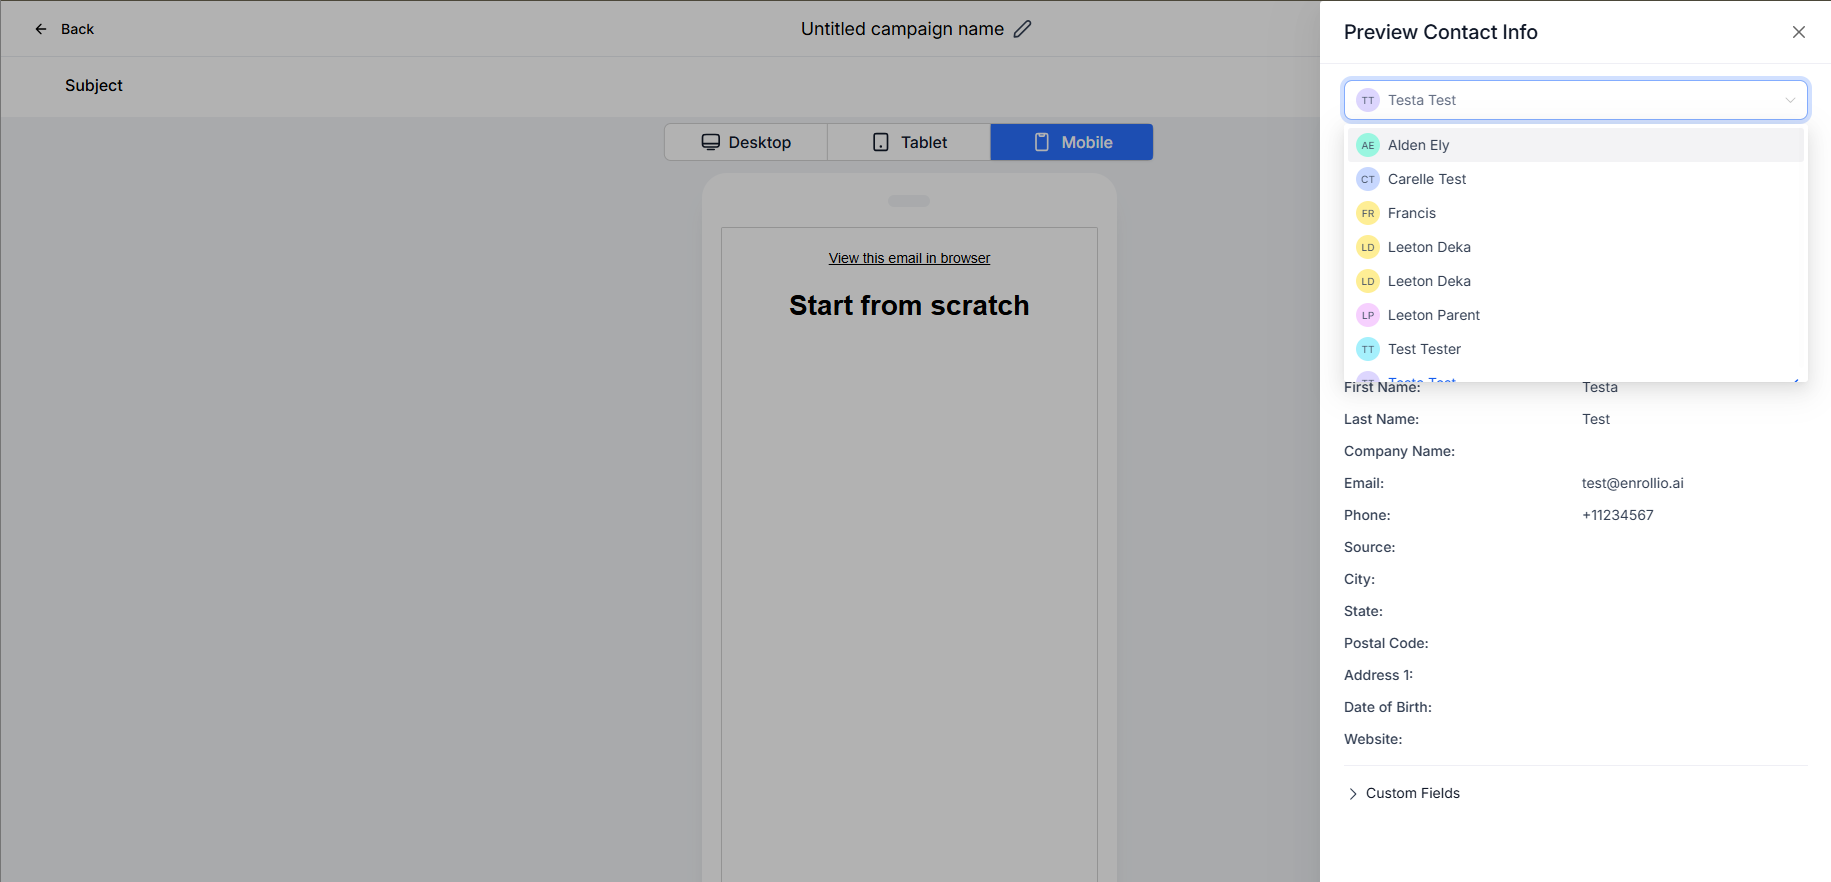
This is especially helpful when you're using conditional content that shows different information based on enrollment status or program type.
Testing Automated Email Sequences
If you're setting up an automation that sends multiple emails over time (like a welcome series for new families), you can test the entire sequence:
- Create a test contact in your database with your own email
- Tag this contact as "test" so you can easily identify it
- Trigger the automation manually for this test contact
- Watch the emails arrive in your inbox according to your schedule
- Delete or archive the test contact when finished
Before You Send for Real
Once you're satisfied with your test, here's your final checklist:
- ✓ Subject line is clear and compelling
- ✓ All links work correctly
- ✓ Personalization fields display properly
- ✓ Email looks good on mobile and desktop
- ✓ Call-to-action buttons are prominent and clickable
- ✓ Unsubscribe link is visible (required by law)
- ✓ You've selected the right audience filter
Ready to send? Head back to your campaign and click Send Now or Schedule to deliver your message to families.