
Note: This article refers to legacy campaign tools. We now recommend using Automations for all scheduling and follow-up workflows. Learn more about Automations.
How & When to Use Event Start Date
The Event Start Date feature lets you build automations around a specific date and time. This is perfect for childcare centers running events like open houses, parent orientations, or seasonal enrollment drives.
Once you set an Event Start Date, every action in that automation will trigger relative to that specific day and time.
Example: Open House Reminders
Let's say you're hosting a center open house on January 20th at 2:00 PM. Here's how you'd set it up:
- Set your Event Start Date to January 20th, 2:00 PM
- Add reminder emails and texts that go out automatically
- Schedule each reminder relative to the event: "Before 1 day", "Before 1 hour", etc.
Common Use Cases for Childcare Centers
- Tour Reminders: Send confirmation and reminder texts before scheduled tours
- Enrollment Deadlines: Count down to registration closing dates
- Start Date Preparations: Send welcome sequences before a child's first day
- Parent Events: Automate reminders for parent-teacher conferences or community events
Pro Tip: Use Event Start Date for one-time events. For recurring weekly tours or regular schedules, standard automation triggers work better.
Setting Up Event Start Date
- Navigate to Marketing → Automations (or legacy Campaigns)
- Create or edit your automation
- Look for the Event Start Date field in settings
- Select your target date and time
- Add actions and set their timing relative to the event (before or after)
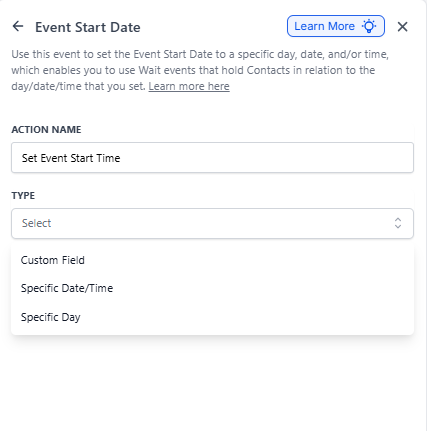
All families added to this automation will receive communications based on this fixed date, making it easy to coordinate event promotion across your entire waitlist or prospective family list.