
What is the Update Enrollment Opportunity Action?
The Update Enrollment Opportunity action lets you automatically modify existing enrollment records in your enrollment pipeline. You can change the enrollment's name, value, pipeline stage, or status based on parent behavior or automation logic—no manual updates needed.
Why Use This Action?
Automating enrollment updates saves you time and keeps your pipeline accurate. Here's what you can do:
- Automatically move enrollments to the correct stage based on parent actions (like booking a tour or submitting paperwork)
- Update enrollment values as families progress through your process
- Customize enrollment names using parent information for better context
- Keep your CRM data accurate during automated follow-up sequences
- Eliminate manual pipeline updates when families take action
How to Set Up the Update Enrollment Opportunity Action
Follow these steps to configure this action in your automation.
Step 1: Navigate to Automation Builder
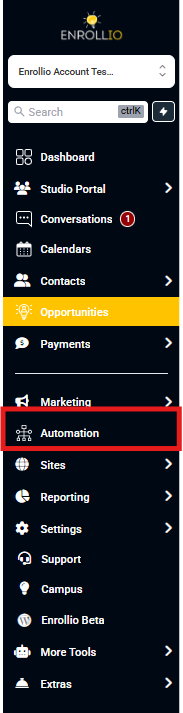
Click Automation in the left menu, then select the Automations tab at the top. This opens your automation list where you can create or manage your workflows.
Step 2: Create or Select Your Automation
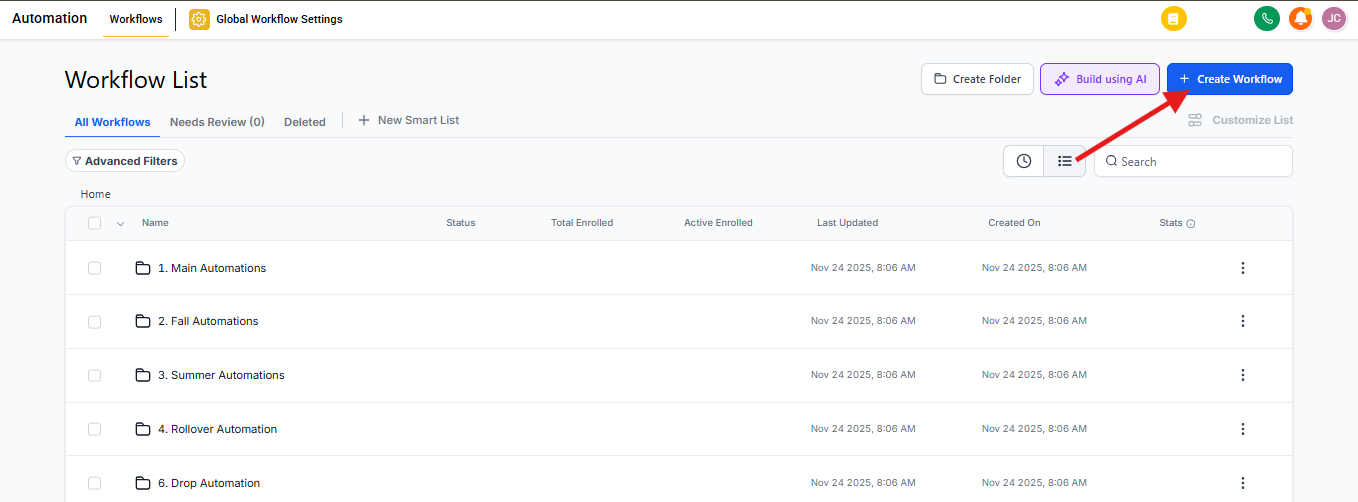
Click + Create Automation to start from scratch, or select an existing automation from your list. If you already have an automation for enrollment follow-up or tour scheduling, you can add this action to it.
Step 3: Choose Your Trigger
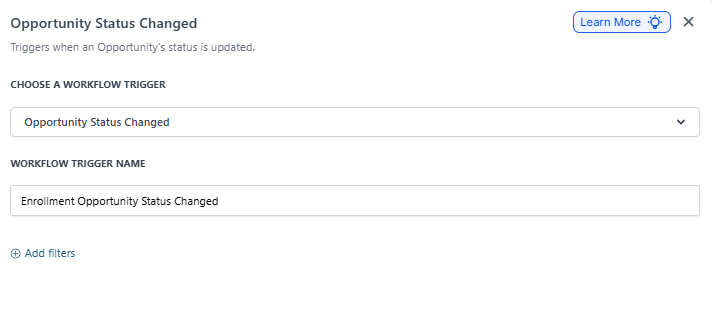
Click Add New Trigger and select the event that should start this automation. For this example, we'll use "Enrollment Opportunity Status Changed"—this trigger fires whenever an enrollment's status is updated.
Pro tip: You can use any trigger that makes sense for your process—like "Form Submitted" or "Tag Added." Just remember: if your trigger isn't enrollment-based, you'll need to add a "Find Enrollment Opportunity" step first to locate the correct enrollment record.
Step 4: Add the Update Enrollment Opportunity Action
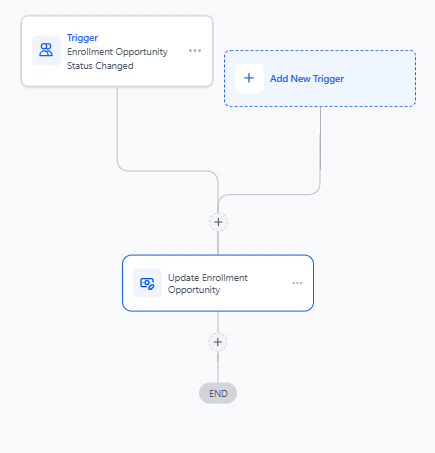
Click the + icon below your trigger. In the actions list, find and select Update Enrollment Opportunity under the Enrollment section.
Step 5: Name Your Action
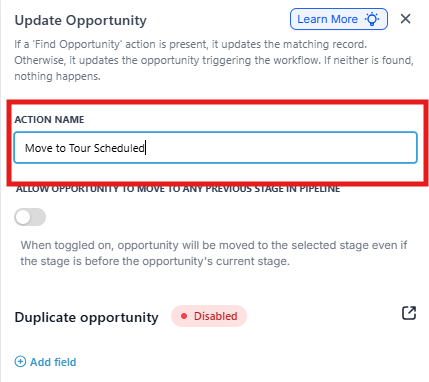
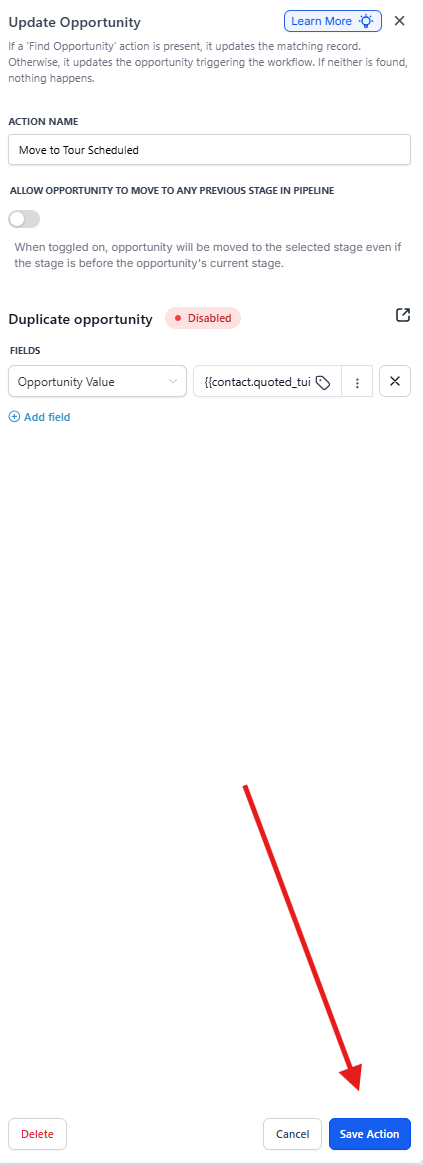
In the Action Name field, enter a clear label like "Move to Tour Scheduled" or "Update Enrollment Value." This name is just for your reference—it helps you stay organized when building complex automations.
Step 6: Configure Stage Movement Settings
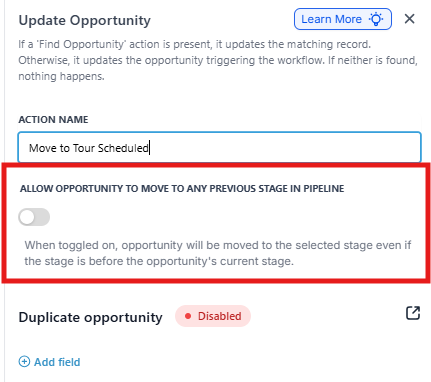
By default, enrollments can only move forward in your pipeline. If you need to move an enrollment backward (like when a family needs to reschedule), toggle Allow Enrollment Opportunity to Move to Any Previous Stage to ON.
Step 7: Add Fields to Update
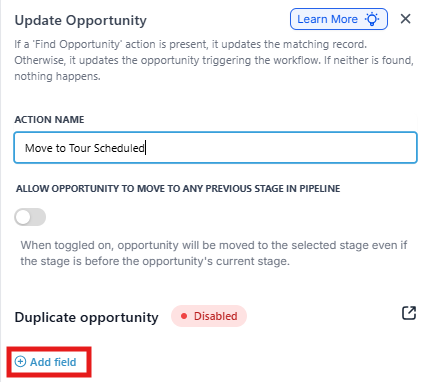
Click Add field to select which enrollment details you want to change. You can update multiple fields at once. Here's what each field does:
Enrollment Pipeline
Select which enrollment pipeline this opportunity should move into. This is useful if you have separate pipelines for different programs (like infant care vs. preschool) or for re-enrollments.
Pipeline Stage
Choose the stage where you want this enrollment to go—like "Tour Scheduled," "Paperwork Submitted," or "Enrolled." This keeps families moving through your enrollment process automatically.
Status
Set the enrollment's current status: Open, Won, or Lost. This helps you track which families are actively enrolling versus those who've completed or opted out.
Enrollment Opportunity Source
Track or update where this enrollment came from—like "Website Form," "Tour Request," or "Facebook Ad." You can enter a fixed value or use dynamic data from the parent record by clicking the tag icon and selecting a custom value like {{contact.source}}.
Enrollment Opportunity Value
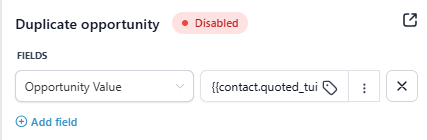
Set or update the monetary value of this enrollment. Enter a fixed amount (like 1200 for monthly tuition) or use dynamic data like {{contact.quoted_tuition}} to pull from the parent record. This helps you forecast revenue based on your enrollment pipeline.
Step 8: Save Your Action
Once you've configured all the fields you want to update, click Save Action. Your automation will now apply these changes whenever the trigger conditions are met.
Frequently Asked Questions
What happens if no enrollment opportunity exists in the automation?
The action is skipped. Make sure your automation either starts with an enrollment-based trigger (like "Enrollment Opportunity Created") or includes a "Find Enrollment Opportunity" step earlier in the sequence.
Can I move an enrollment backward in the pipeline?
Yes, but only if you enable the "Allow Enrollment Opportunity to Move to Any Previous Stage" option. By default, enrollments can only move forward to prevent accidental reversals.
Can I update multiple enrollment opportunities at once?
No, this action updates one enrollment at a time—the one that triggered the automation or was found by a Find Enrollment Opportunity step. If you need to update multiple enrollments, you'll need to build separate automations or use filters.
What's the "Duplicate Enrollment Opportunity" toggle for?
This toggle appears in the action settings, but it doesn't actually create a new enrollment—it only updates existing ones. The related setting in your Business Profile controls whether the same parent can have multiple enrollment opportunities (useful for families enrolling multiple children or re-enrolling). This action itself never creates duplicates.
Can I use parent information to customize enrollment names?
Yes. When updating the enrollment name field, click the tag icon to insert dynamic data like {{contact.first_name}} or {{contact.child_name}}. This makes your pipeline more readable and personal.