General Questions
Q: How do I export enrollment opportunities from Enrollio?
- Click on Enrollment Opportunities in the left sidebar
- Click the three-dot menu in the top right corner
- Select Export Opportunities
- Your file will download to your browser's default folder
This exports all your enrollment data including family contact information, pipeline stages, and opportunity details.
Q: How do I share a specific enrollment opportunity with my team?
Sharing an opportunity with your staff is simple:
- Open the enrollment opportunity you want to share
- Copy the URL from your browser's address bar
- Share that link with your team members via email, text, or Slack
When they click the link, they'll go directly to that specific opportunity with all its details. This makes collaboration much easier than trying to describe which family you're talking about.
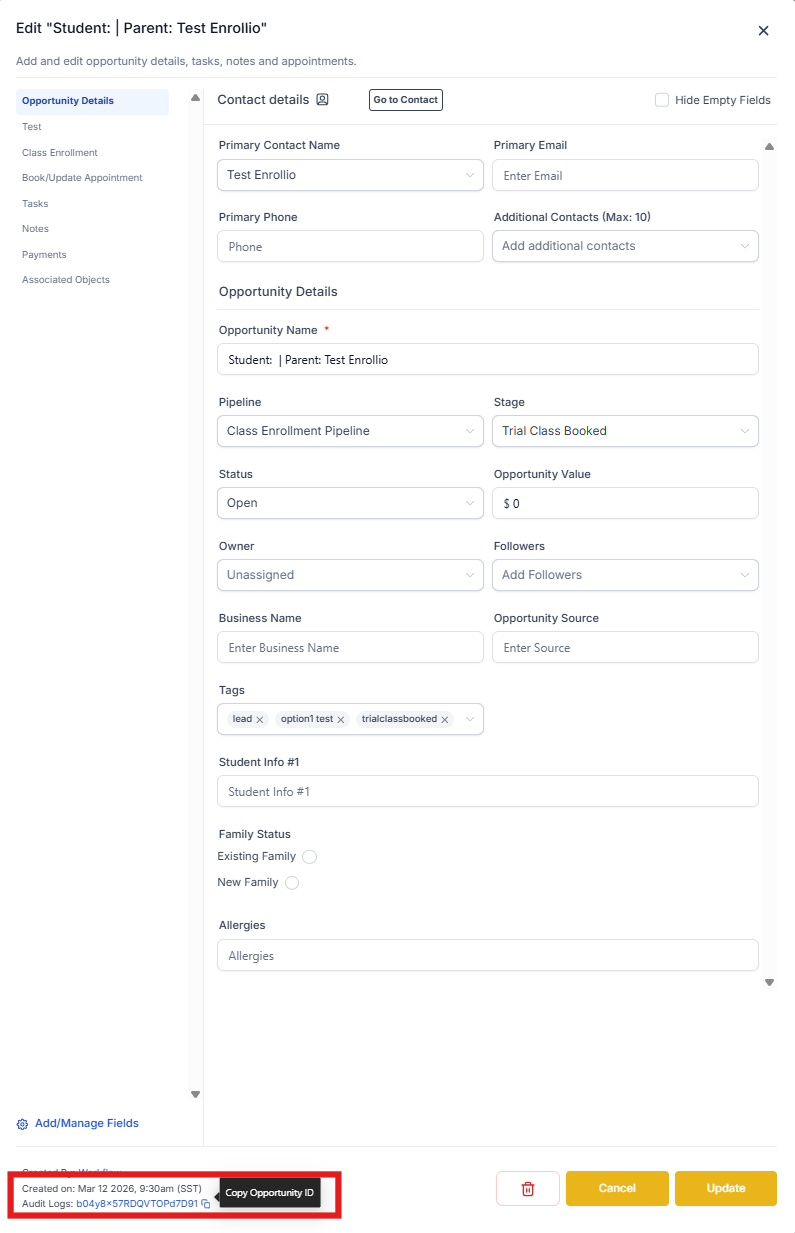
Q: How do I track all activities in an enrollment opportunity and find the Opportunity ID?
Every enrollment opportunity has a complete activity history:
- Open the enrollment opportunity by clicking on its card
- Look in the bottom left corner for the Opportunity ID
- Click on that ID number
You'll see the audit log showing everything that's happened with this enrollment over the last 60 days — status changes, notes added, tours scheduled, and more.
Q: How does linking multiple family members to one enrollment opportunity work?
You can connect multiple parents or guardians to a single enrollment opportunity:
- Open the enrollment opportunity
- In the Additional Contacts field, add any other family members you want linked to this enrollment
Important notes:
- The primary parent on an opportunity can't also be listed as an additional contact
- If you haven't enabled "Allow duplicate opportunities," the same person can't be on two different opportunities (as either primary or additional contact)
- You can add up to 10 additional contacts per enrollment opportunity
- Text automations and lists currently work only with the primary contact
Pro tip: This is perfect for divorced parents, grandparents who help with enrollment, or situations where multiple adults need to receive communications about a child's enrollment.
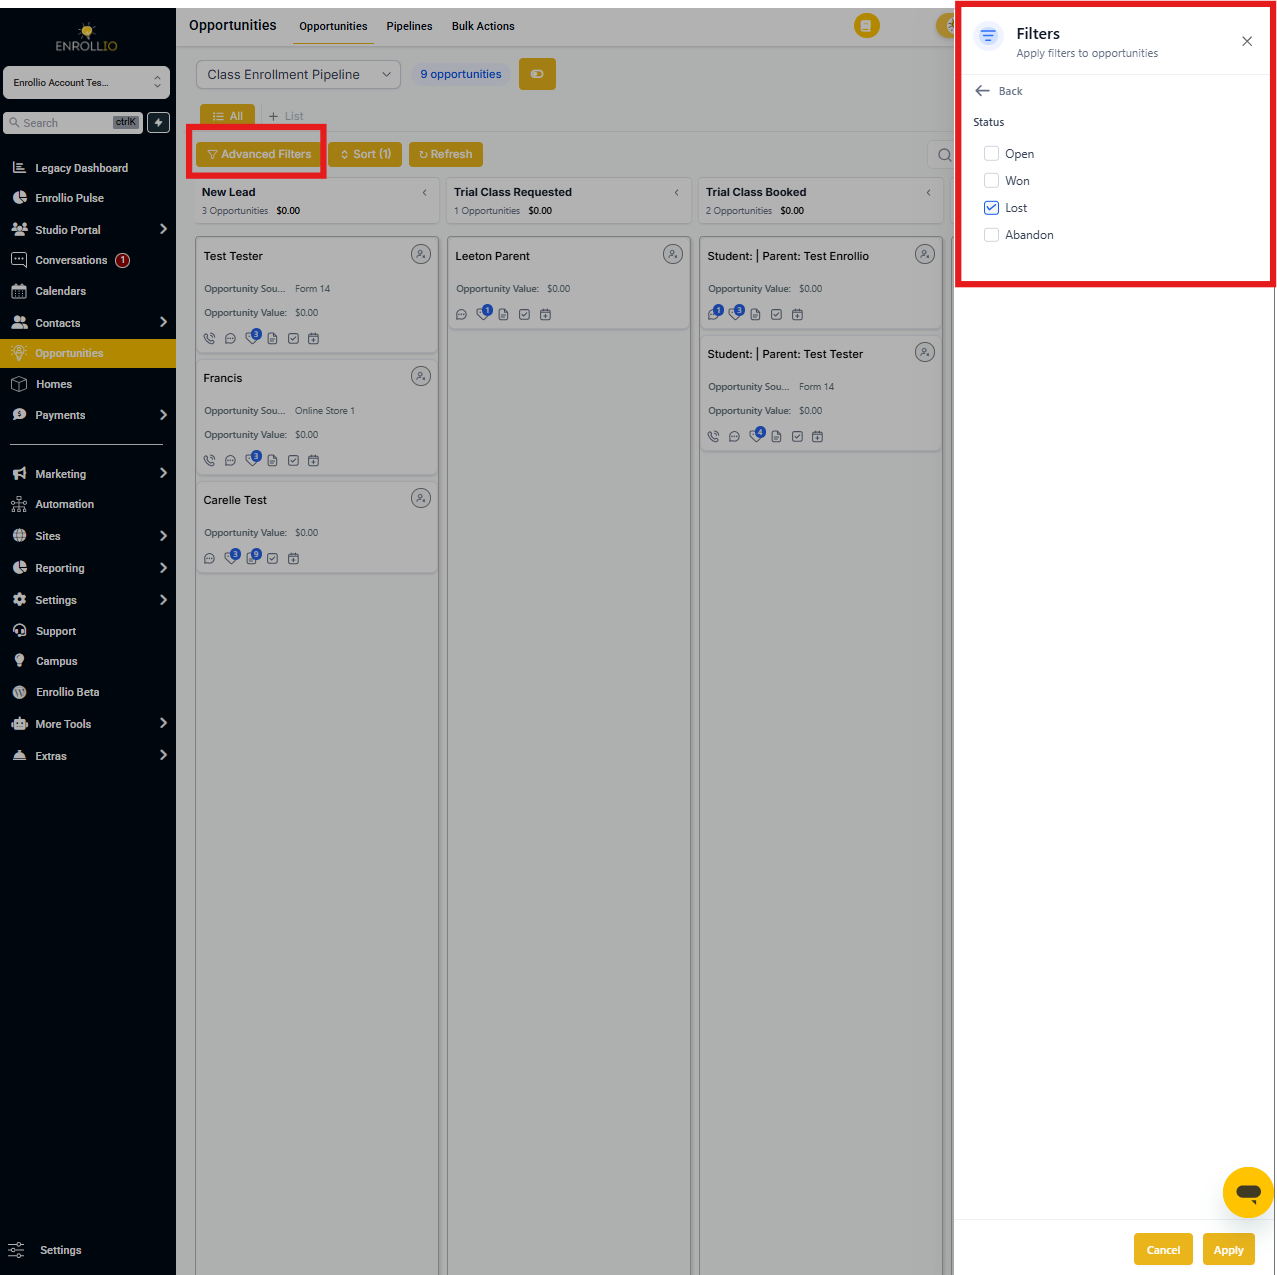
Q: How do I find family details for lost enrollment opportunities?
To see which families didn't complete their enrollment:
- Go to Enrollment Opportunities in the left menu
- Click Advanced Filters
- Under Status, select Lost
- Click Apply
You'll now see only the enrollment opportunities marked as lost. Click any opportunity card to view that family's complete contact details and enrollment history.
Custom Fields Questions
Q: How do I see custom fields in an enrollment opportunity?
Your custom fields appear automatically when you view or edit any enrollment opportunity. If you've organized fields into folders (like "Child Information" or "Payment Details"), they'll display grouped together.
When you open an existing opportunity or create a new one, scroll down to see all your custom fields ready for input.
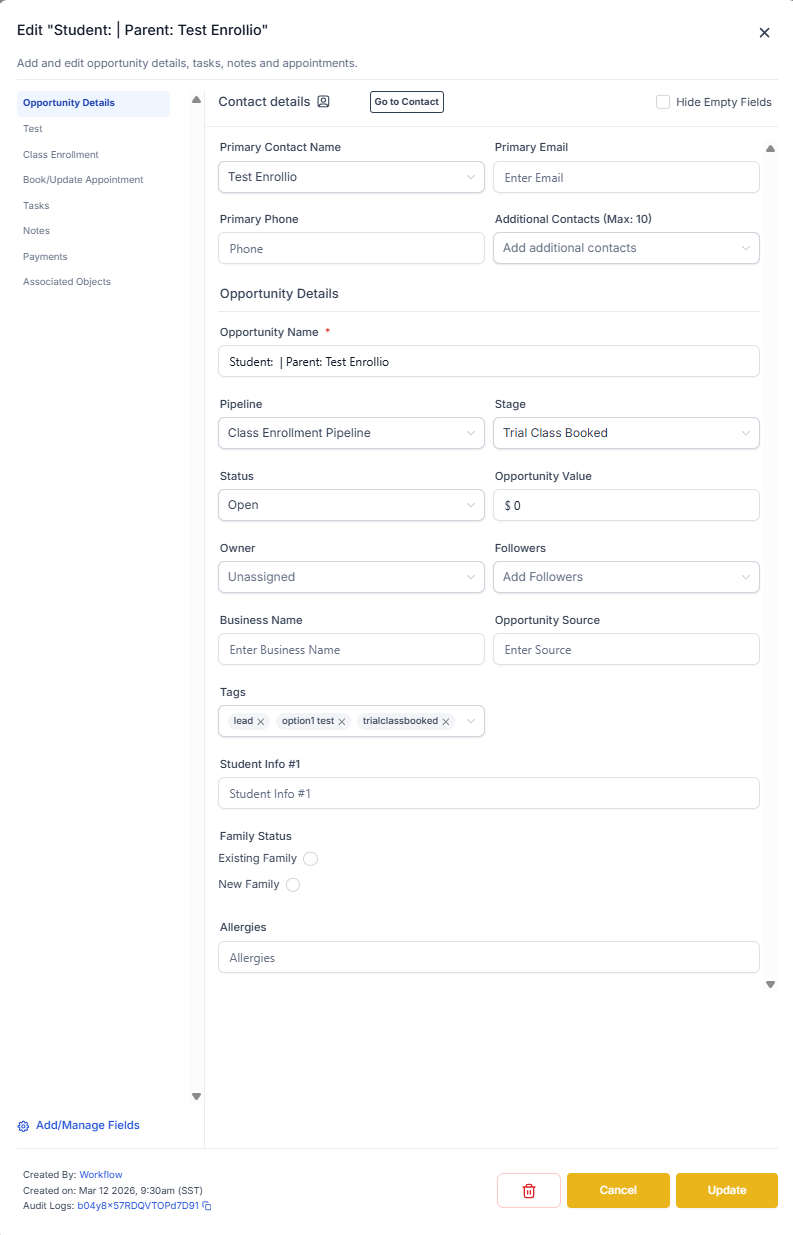
Q: What does the "hide empty fields" feature do?
This toggle cleans up your view by hiding any custom fields that don't have data entered yet. It's especially helpful if you have many custom fields but only a few are relevant for each enrollment.
When enabled, you'll see only fields with values, making it faster to review what information you actually have about each family.
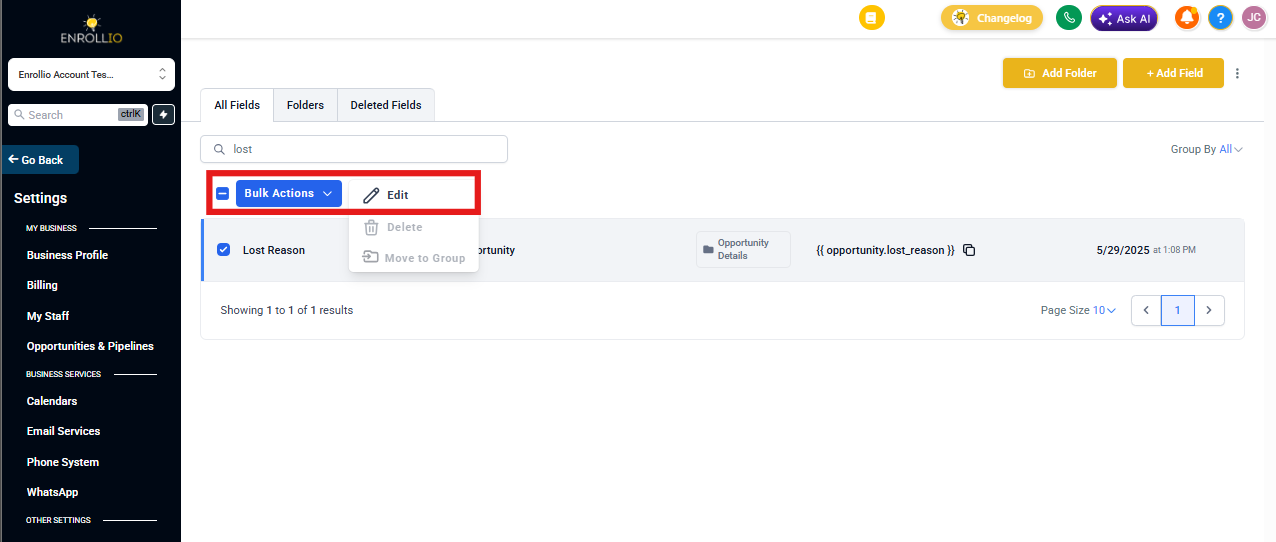
Q: How do I edit the values in the "lost reason" field?
You can customize the dropdown options for why enrollments are lost:
- Go to Settings → Custom Fields
- Find Lost Reason in the list
- Click Bulk Actions → Edit
- Update your lost reason values in the popup
- Click Save
If you rename an existing lost reason, the new name will automatically appear everywhere that reason was previously selected.
Common lost reasons for childcare centers:
- Chose another center
- Too expensive
- No availability for desired start date
- Location not convenient
- Plans changed — no longer need care