
Customize Enrollment Opportunity Cards in Board View
Make your enrollment pipeline work the way you do. Customize what information appears on each enrollment opportunity card so you can see the details that matter most at a glance — whether that's tour dates, enrollment values, or parent contact info.
Customizing Your Opportunity Cards
1. Access the Card Customization Settings
- Navigate to the Opportunities section
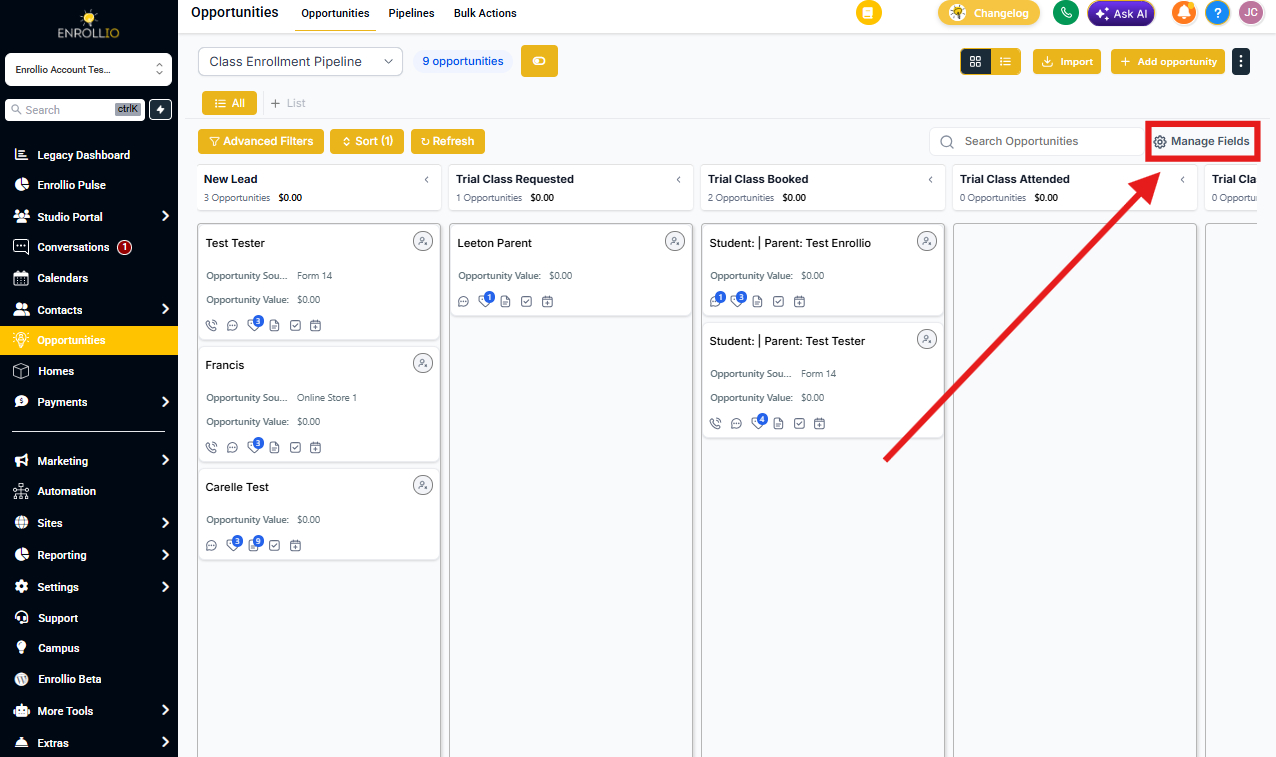
- Click Manage Fields in the top-right corner of your enrollment board
2. Choose Which Fields to Display
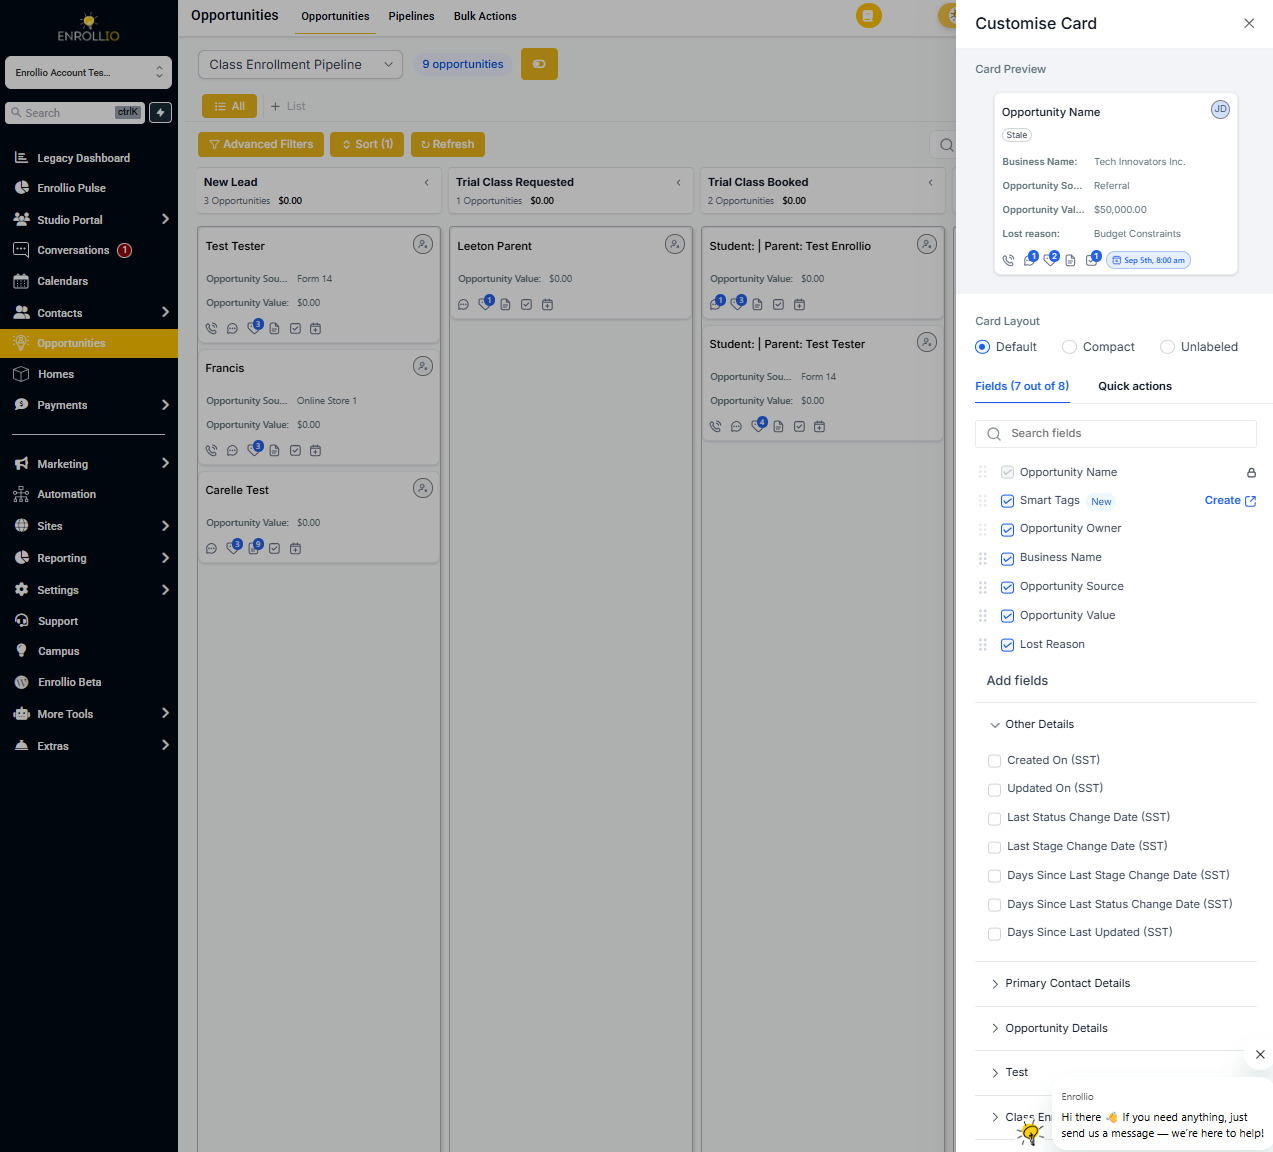
You can display up to 7 fields on each opportunity card. Choose from these options:
Enrollment Opportunity Standard Fields:
- Opportunity Name
- Opportunity Status
- Lost Reason
- Opportunity Value
- Opportunity Owner
- Opportunity Source
Custom Fields:
- Any custom fields you've created for enrollment opportunities
Parent Information:
- Parent Name
- Parent Phone Number
- Parent Email Address
- Business Name
- Next Task Due Date
- Days Till Next Task
- Days Till Next Appointment
- Engagement Score (available for opportunities created or updated after March 19, 2025)
Activity Tracking:
- Created On
- Updated On
- Last Stage Change Date
- Last Status Change Date
- Days Since Last Stage Change
- Days Since Last Status Change
- Days Since Last Updated
3. Customize Quick Action Counters
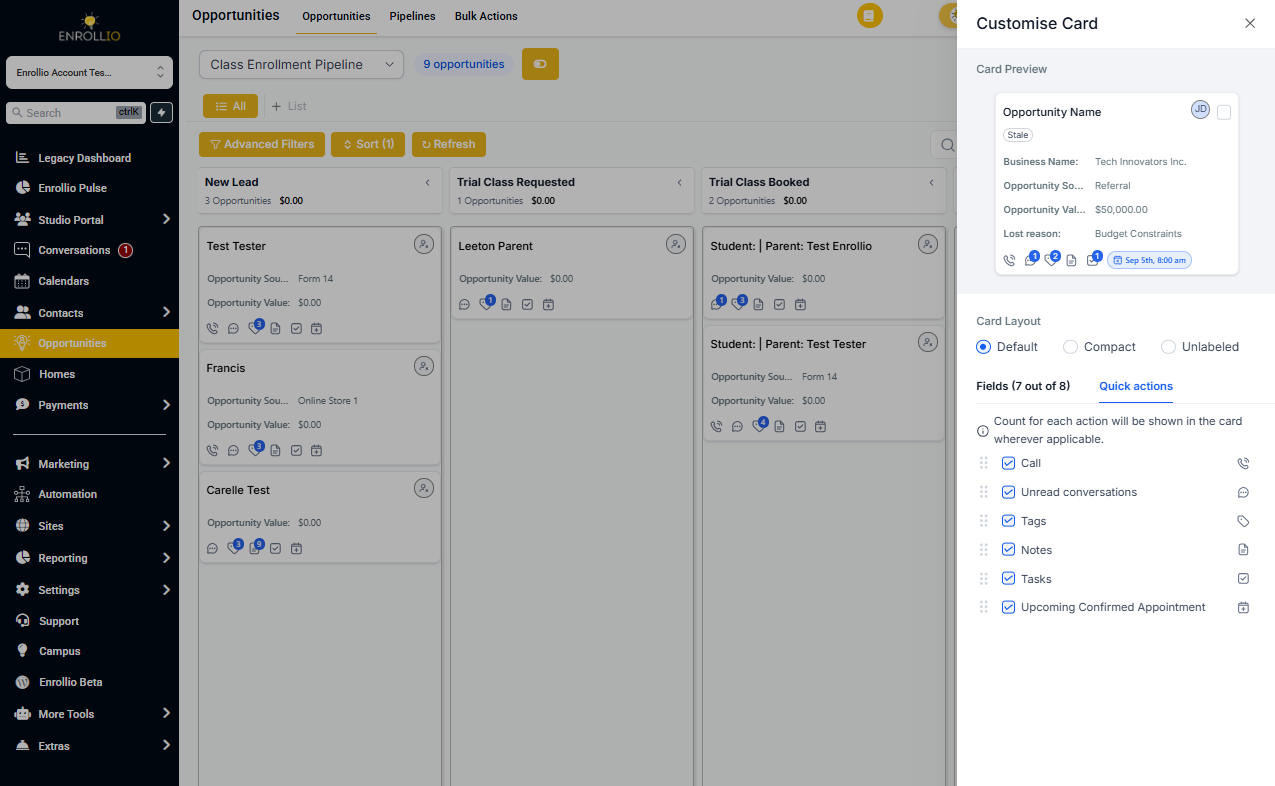
At the bottom of each card, you can add helpful quick action icons and counters. Switch to the Quick Actions tab to choose from:
- Conversations Icon (shows unread message count)
- Task Icon (shows task count)
- Note Icon (shows note count)
- Tags Icon (shows tag count)
- Call Icon
- Appointment Icon (shows next appointment date)
Customizing Multiple Enrollment Pipelines
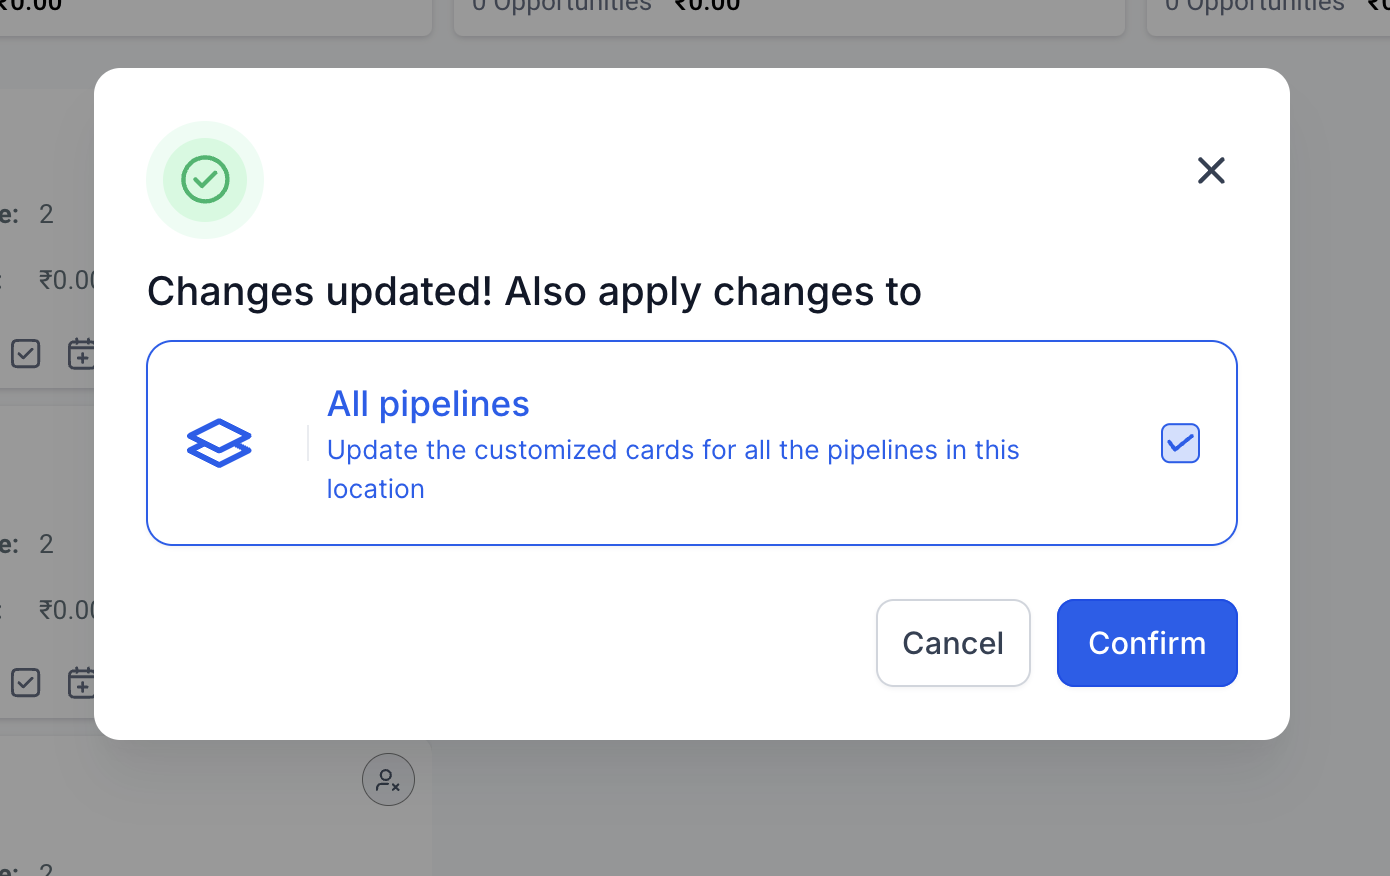
If your childcare center uses multiple enrollment pipelines (for example, separate pipelines for infant enrollment vs. preschool enrollment), here's how customization works:
- Per-pipeline by default: Your card customizations apply to the current pipeline you're viewing
- Apply to all pipelines: You have the option to apply your changes across all pipelines in your account
- User-specific: Your customizations only affect your view — other staff members can set up their own preferred card layouts
- Sticky settings: Your customizations persist until you change them again
Choose Your Layout Style
Pick the view that works best for your workflow:
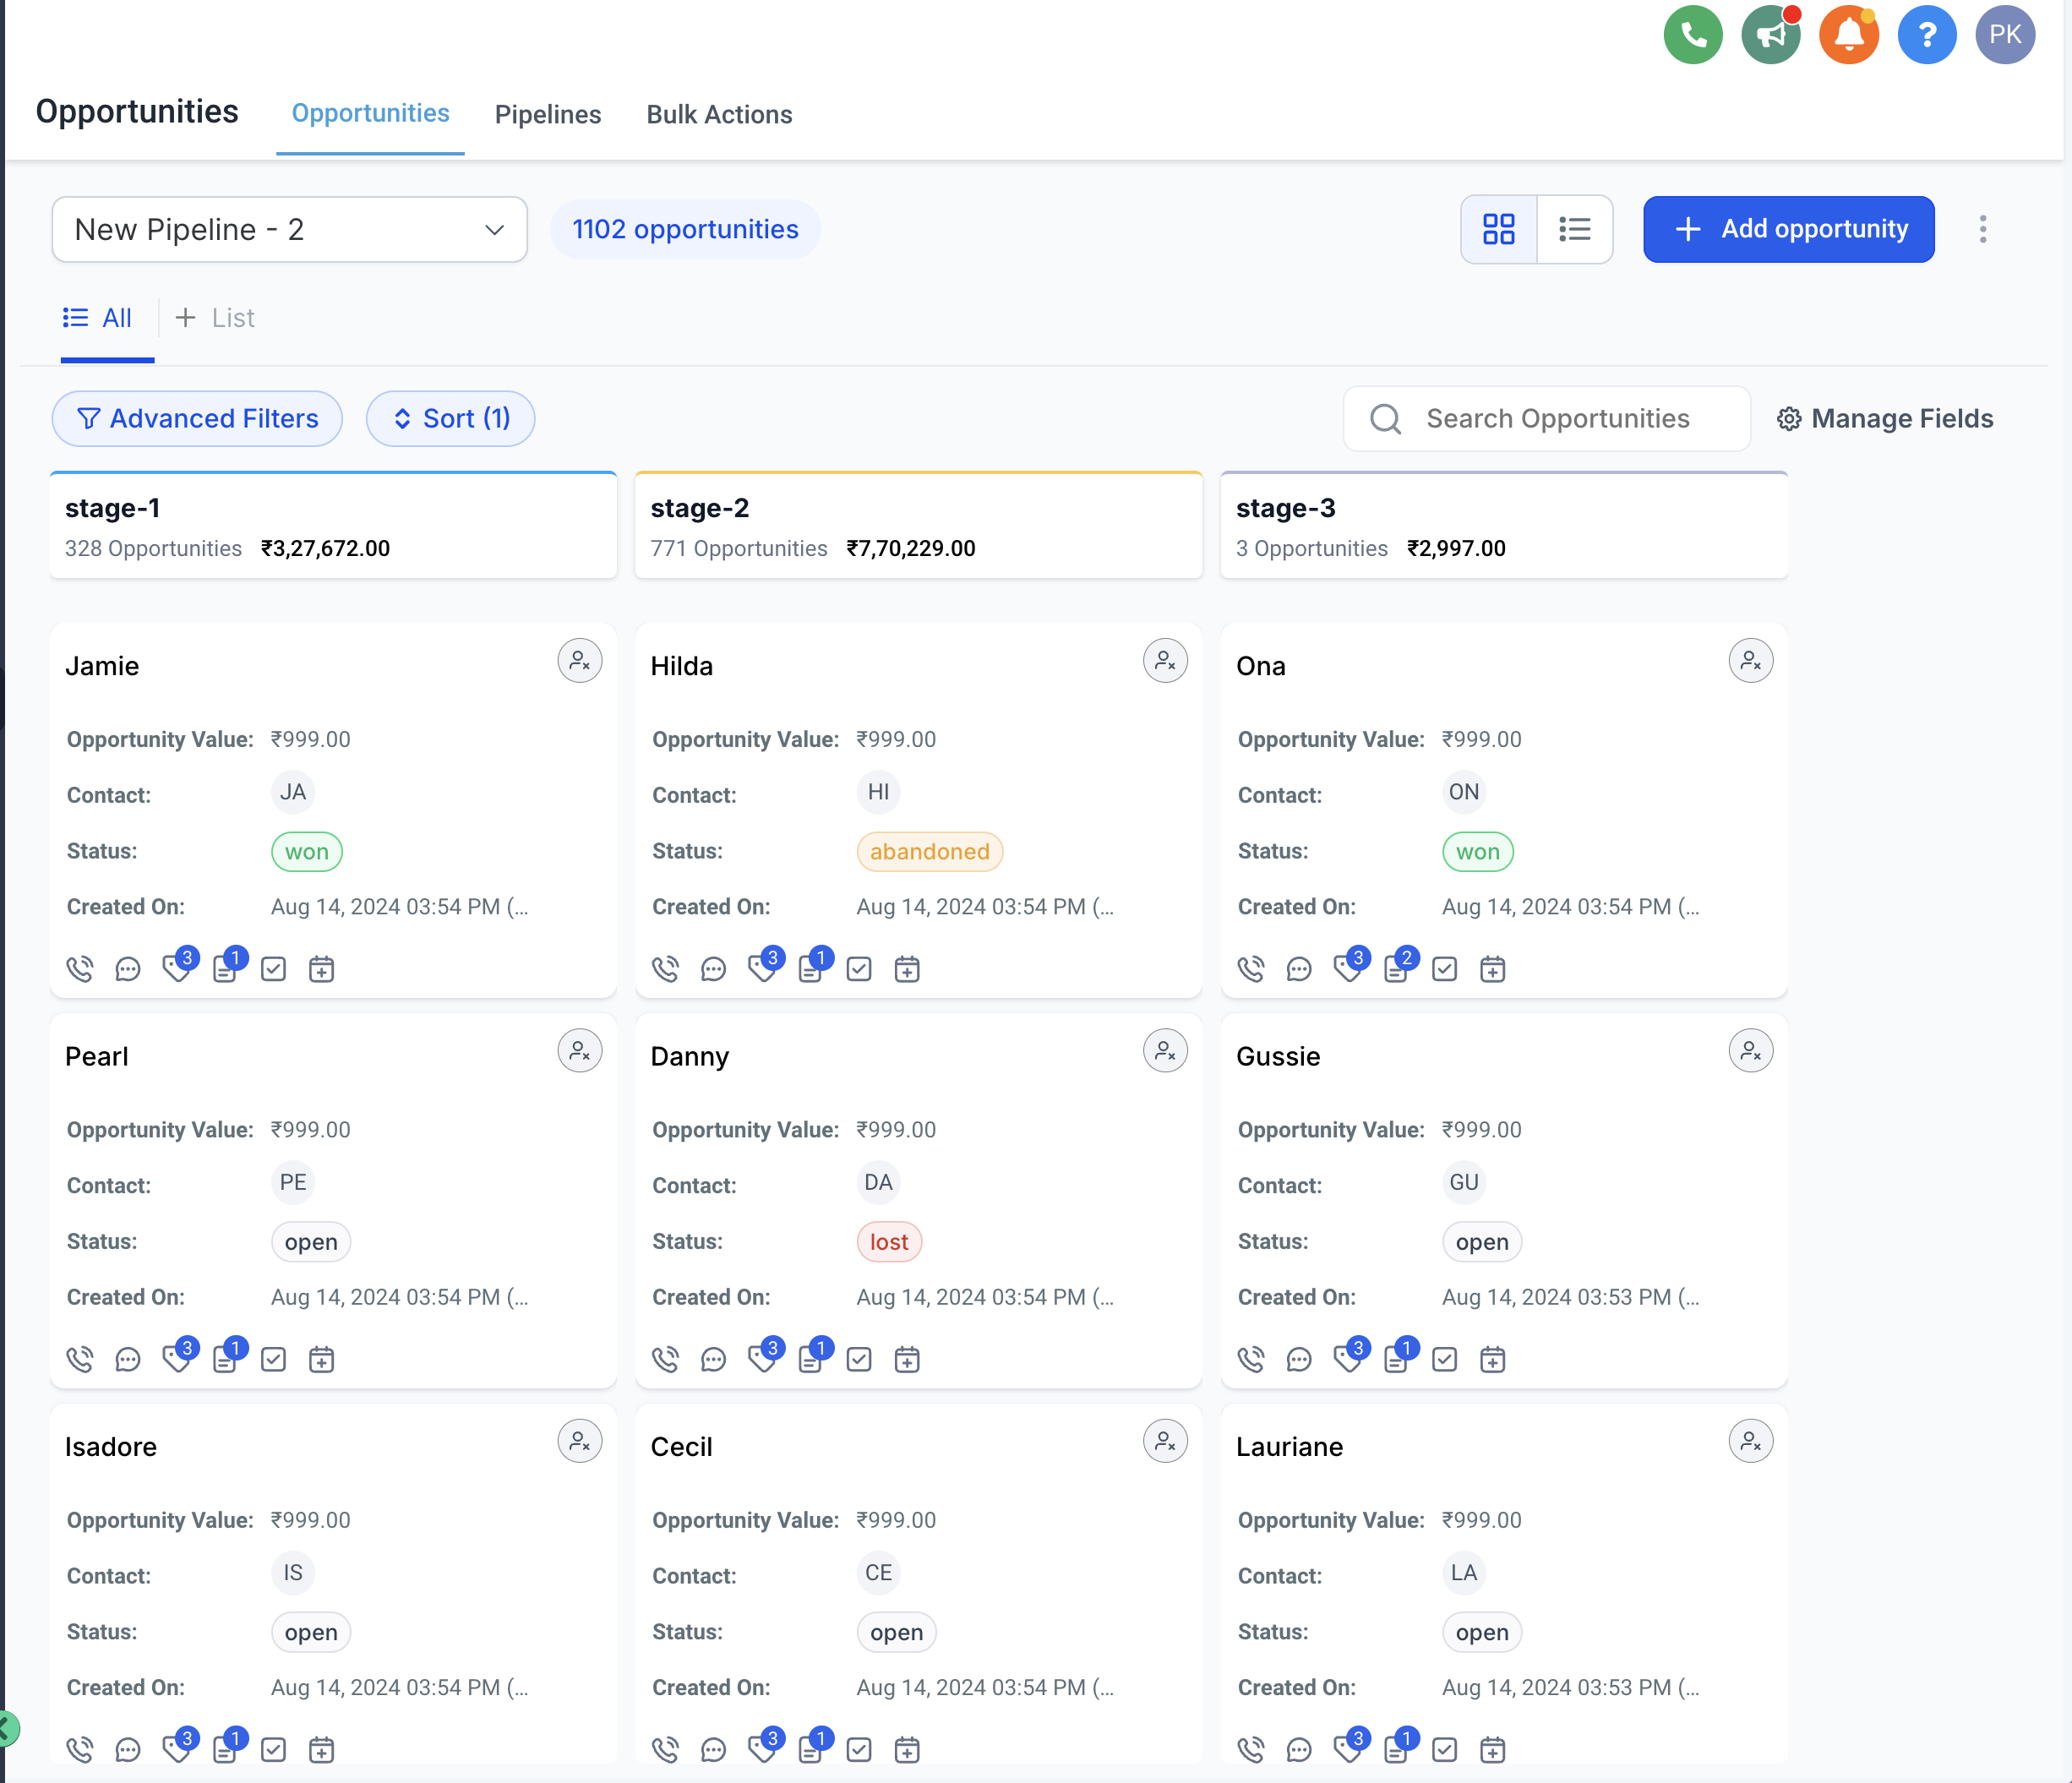
Default View:
Shows both field labels and values on each card. Best when you want to see exactly what each piece of information represents.
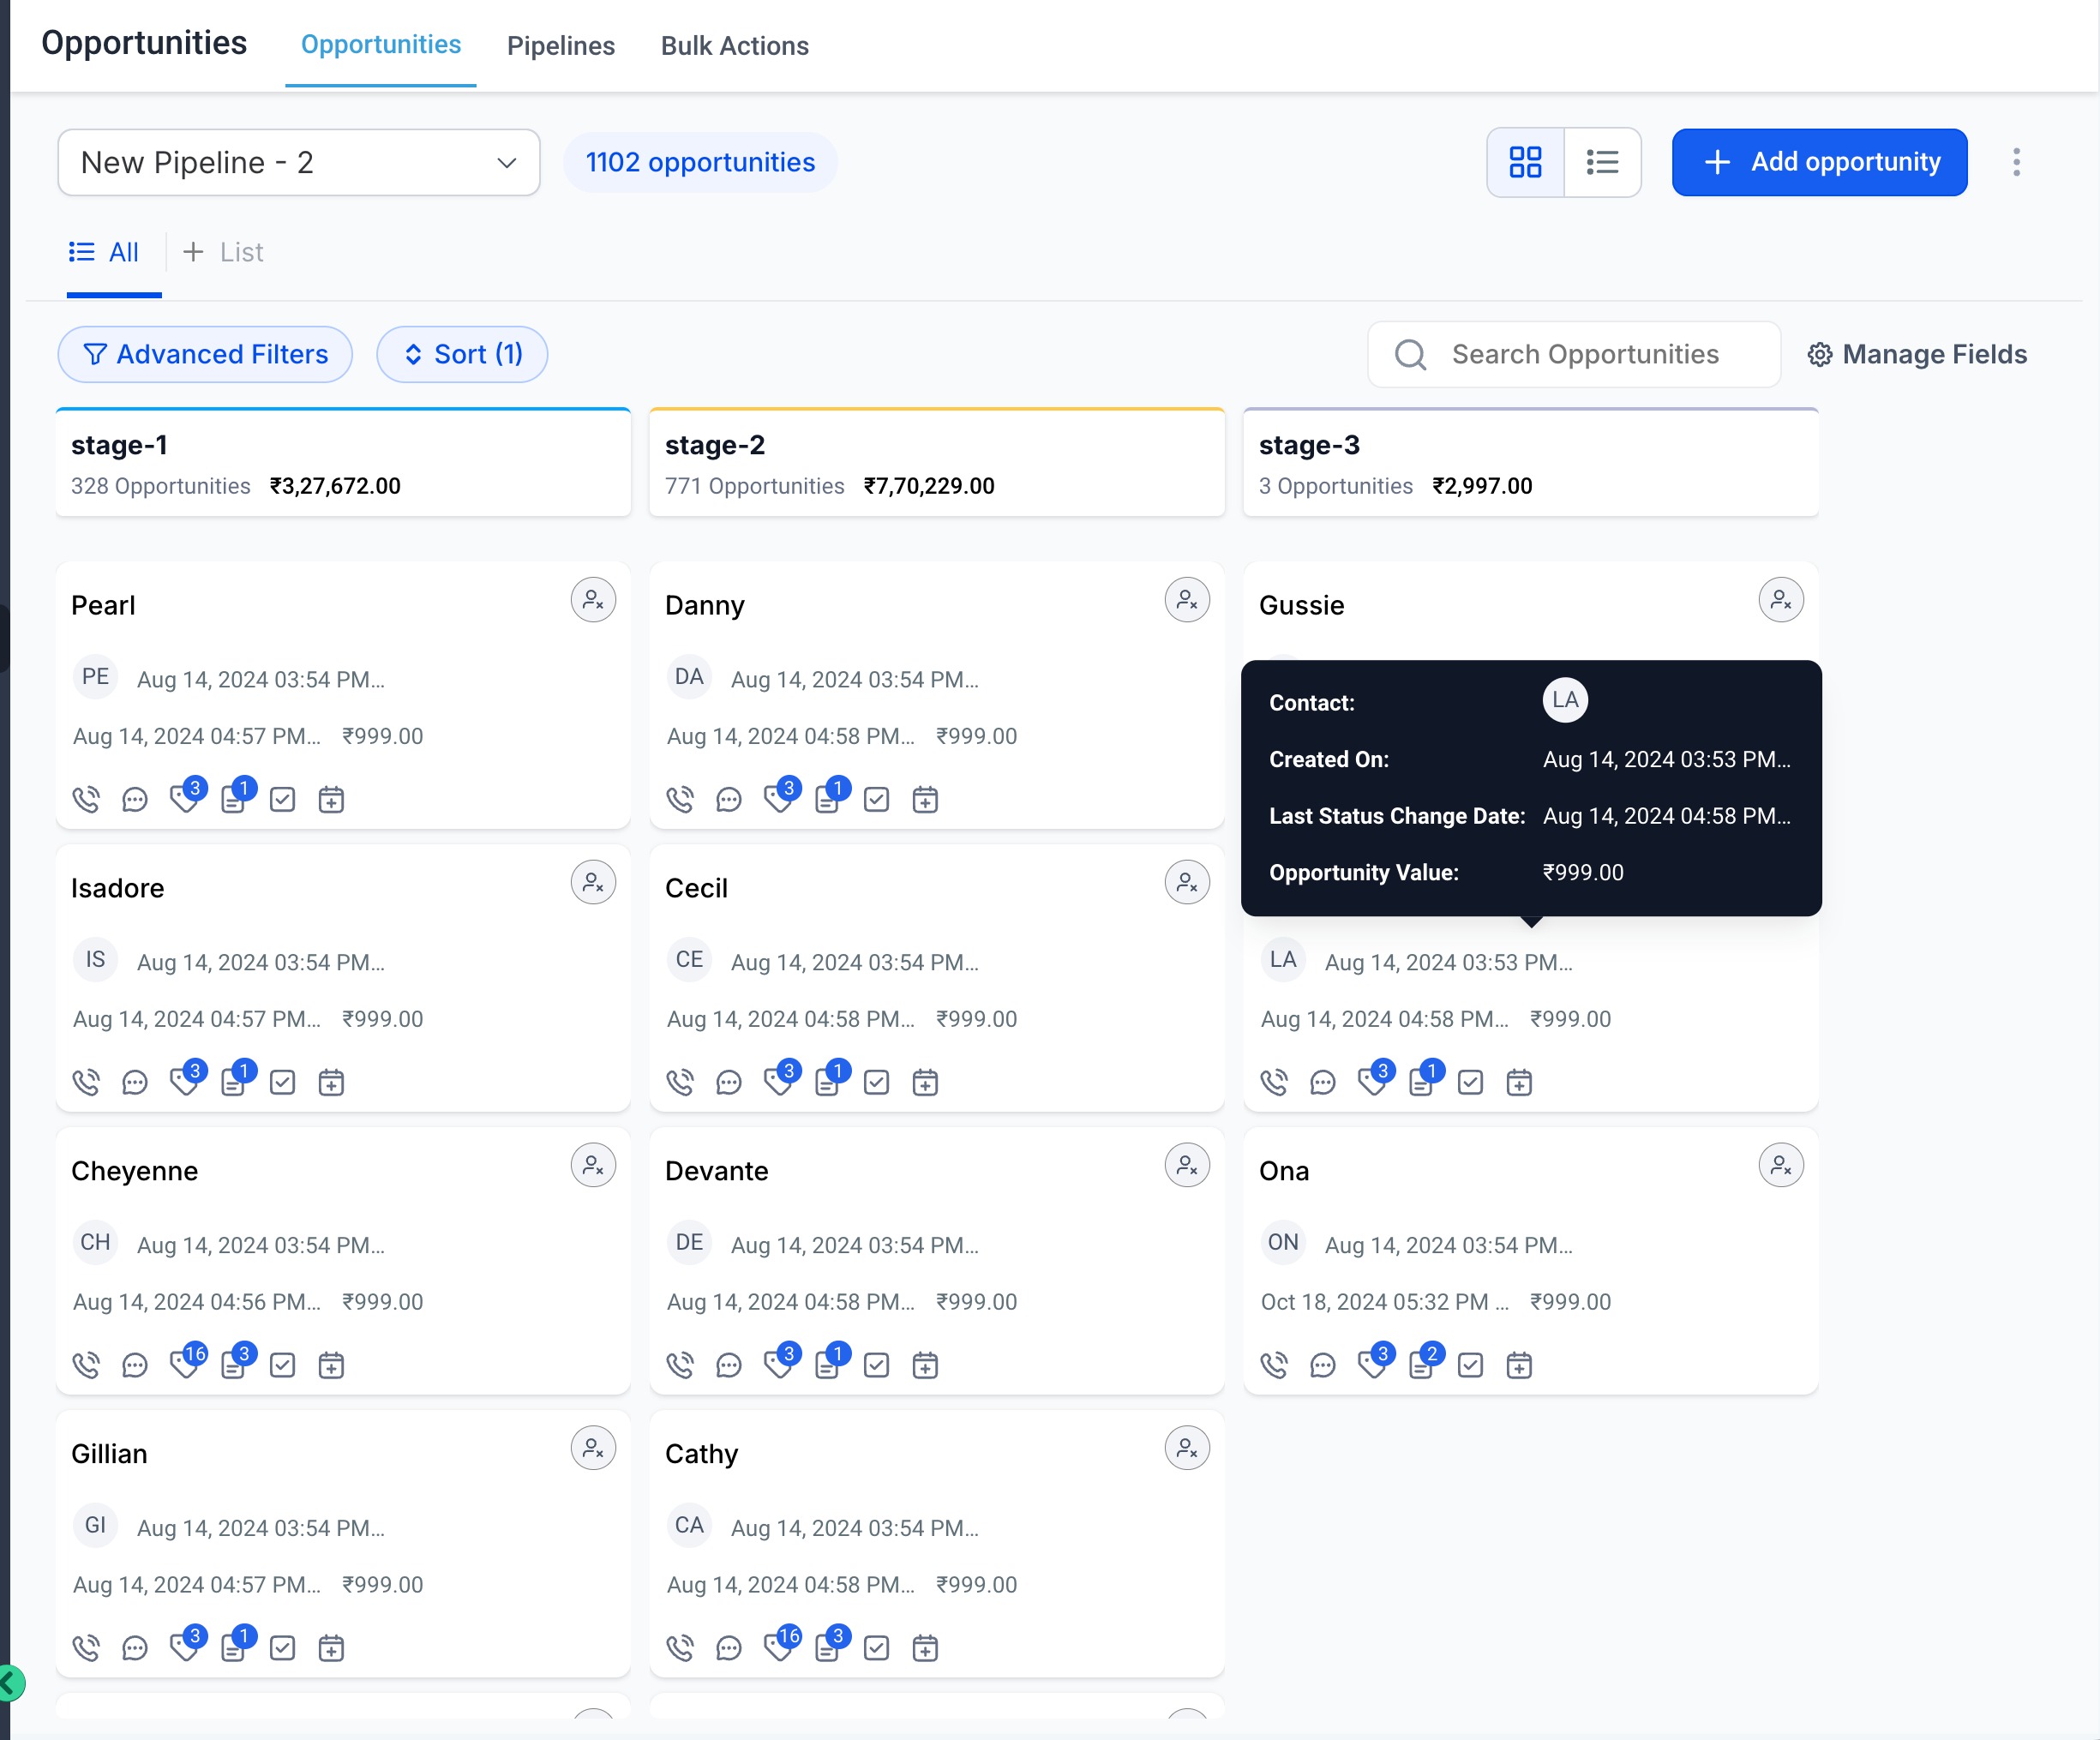
Compact View:
Displays only field values to save space. Hover over any field to see its label and additional details. Great when you're managing lots of enrollment opportunities at once.
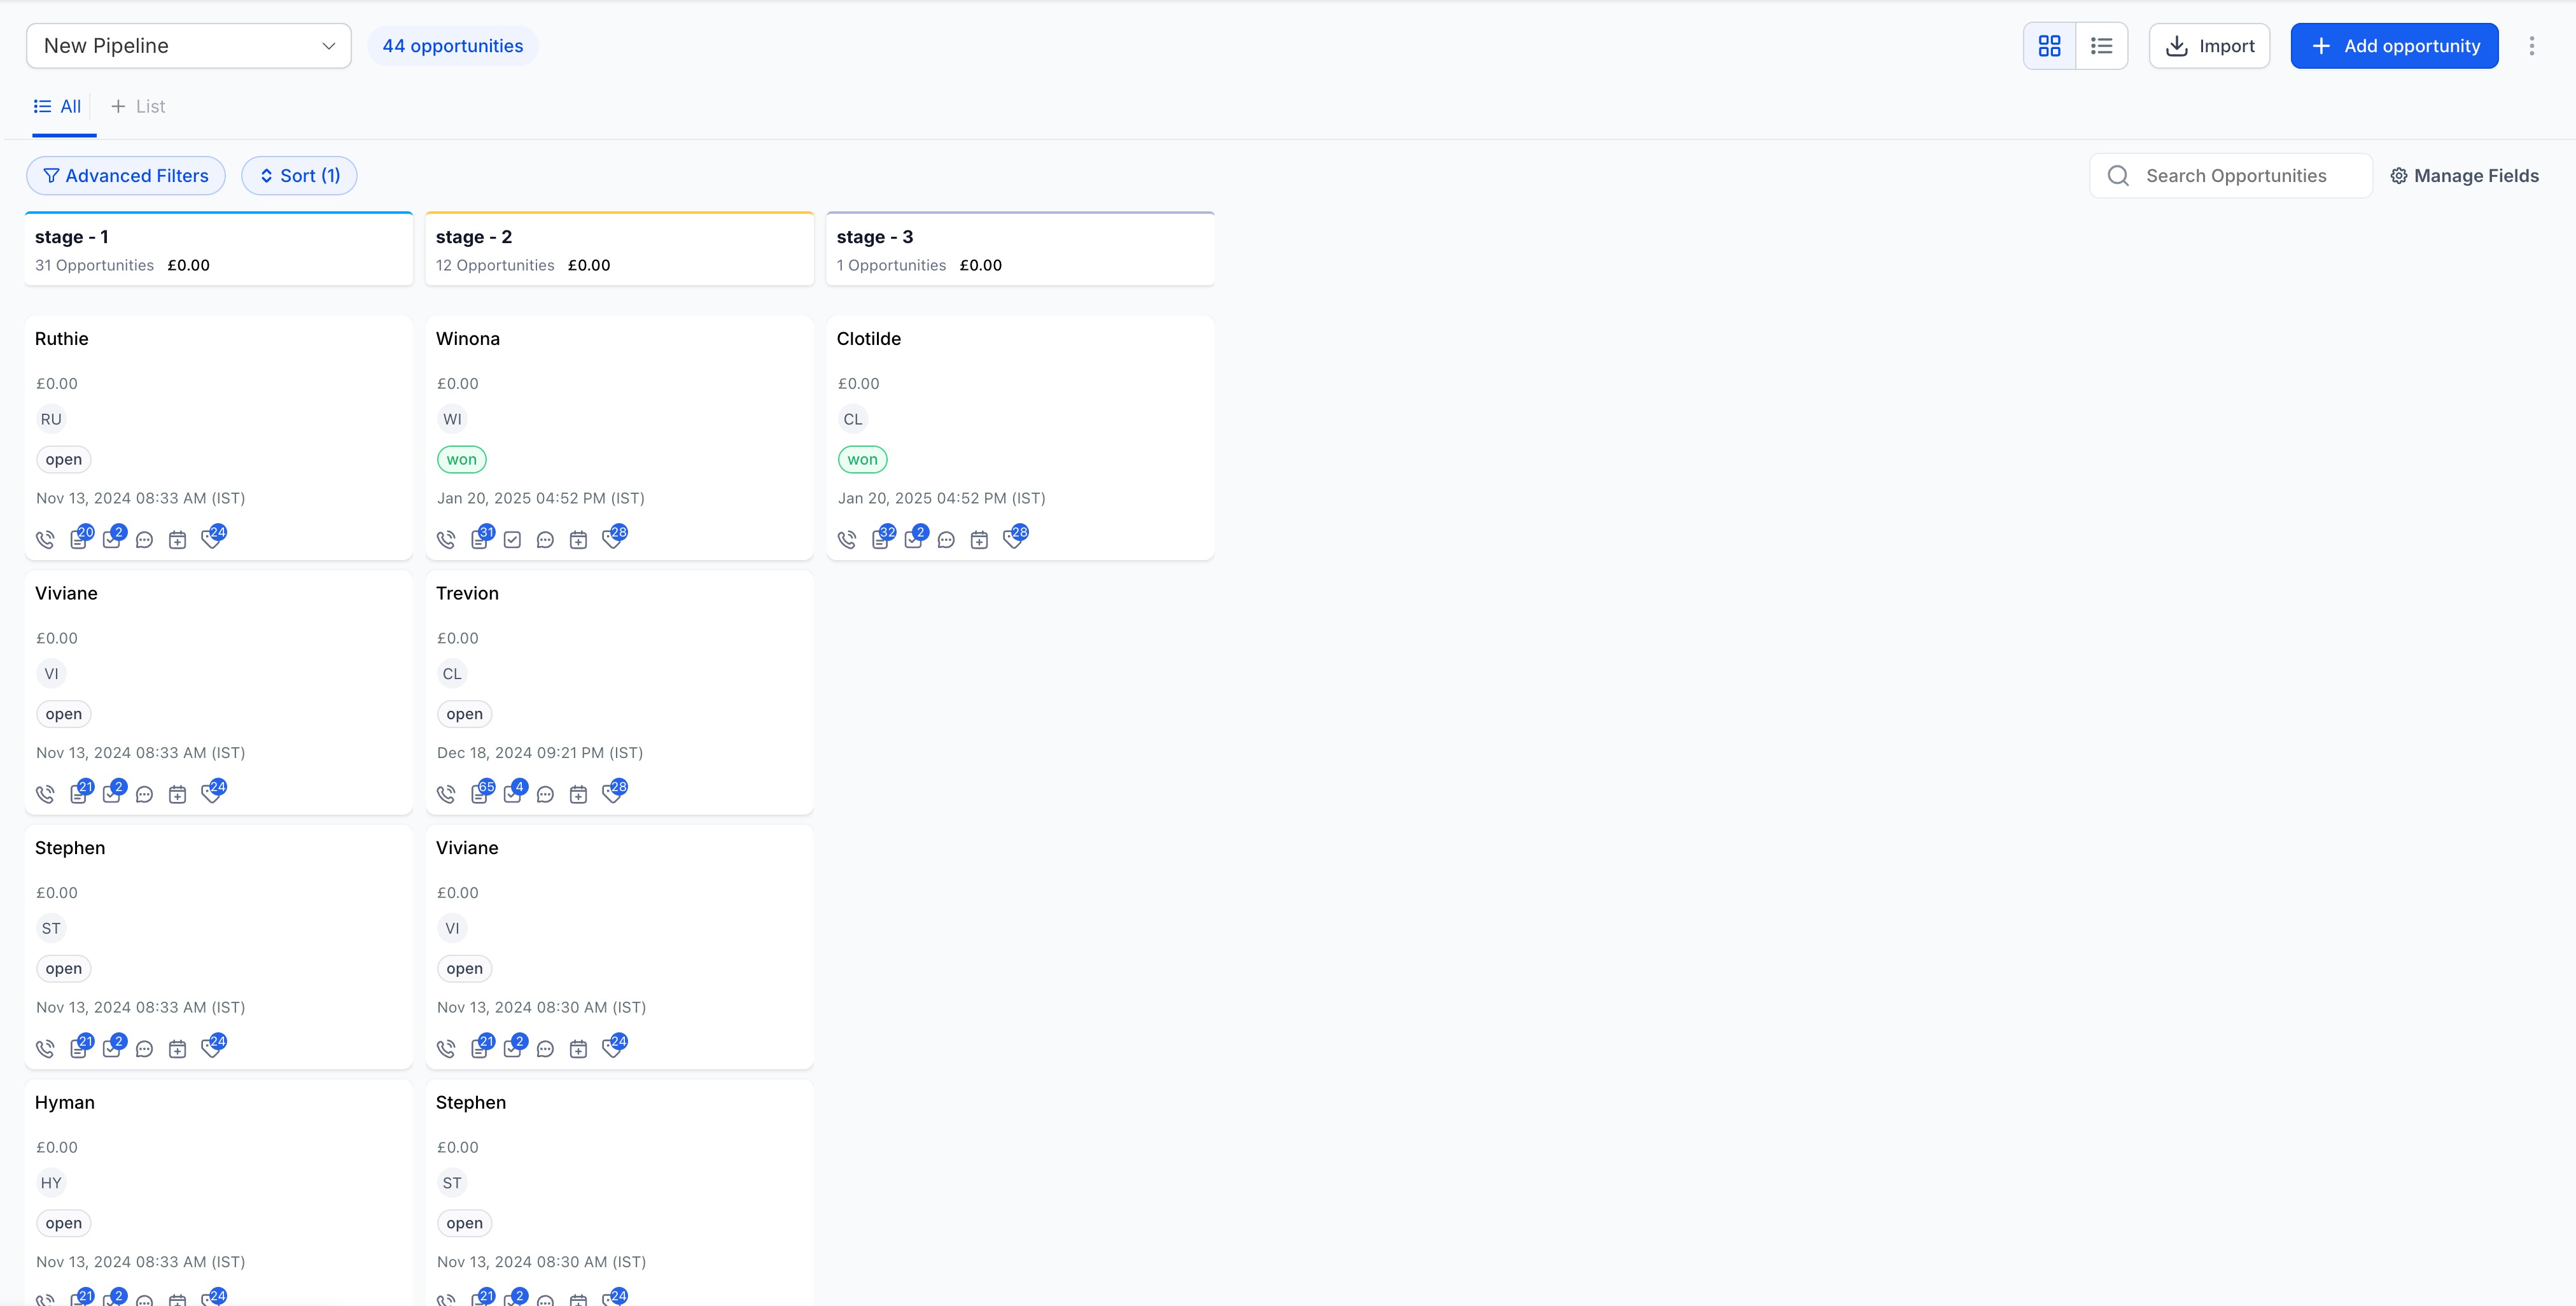
Unlabeled View:
Each line shows one field value only. The cleanest look when you already know what information appears where.
Why This Matters for Your Childcare Center
Every childcare center tracks different information during enrollment. Maybe you need to see tour dates front and center. Maybe enrollment values and start dates matter most. Or maybe you want parent phone numbers visible for quick follow-up calls.
Customizing your opportunity cards means you spend less time hunting for information and more time enrolling families.