
Automation Action - Assign To User
This article shows you how to automatically assign parents and families to your team members using the "Assign To User" automation action. You'll learn what it does, why it's useful, how to set it up, and real-world examples for your childcare center.
Table of Contents
- What is "Assign To User" Automation Action
- Key Benefits
- Adding the Action
- Configuring the Action
- Action Name
- Select the Users
- Splitting Assignment to Users (Weighted Round Robin)
- Distributing Equally
- Distributing Unevenly
- Only Apply to Unassigned Families
- Standard vs Dynamic User IDs
- Where To Find User ID Manually
- How To Assign Users Dynamically
- Frequently Asked Questions
What is "Assign To User" Automation Action
The "Assign To User" automation action lets you automatically assign prospective families to your team members based on rules you define. You can assign families to a single staff member or distribute them across multiple team members using methods like round-robin or custom splits.
This action ensures your enrollment team's workload stays balanced, improves tracking, and makes collaboration easier. Whether you're assigning tour requests, enrollment inquiries, or waitlist families, this feature adapts to how your center works.
Key Benefits
Automated Assignments: Save time by eliminating manual family assignment. No more deciding who should follow up with each inquiry.
Fair Distribution: Use round-robin or equal distribution to balance workload among your enrollment coordinators and directors.
Custom Allocation: Assign families unevenly based on staff capacity, experience, or specialization to maximize your team's efficiency.
Improved Tracking: Know exactly who's responsible for each family. No more confusion about who's handling a tour or enrollment.
Flexible Automations: Use this feature for various scenarios: new tour requests, waitlist management, enrollment follow-ups, or parent support tickets.
Adding the Action
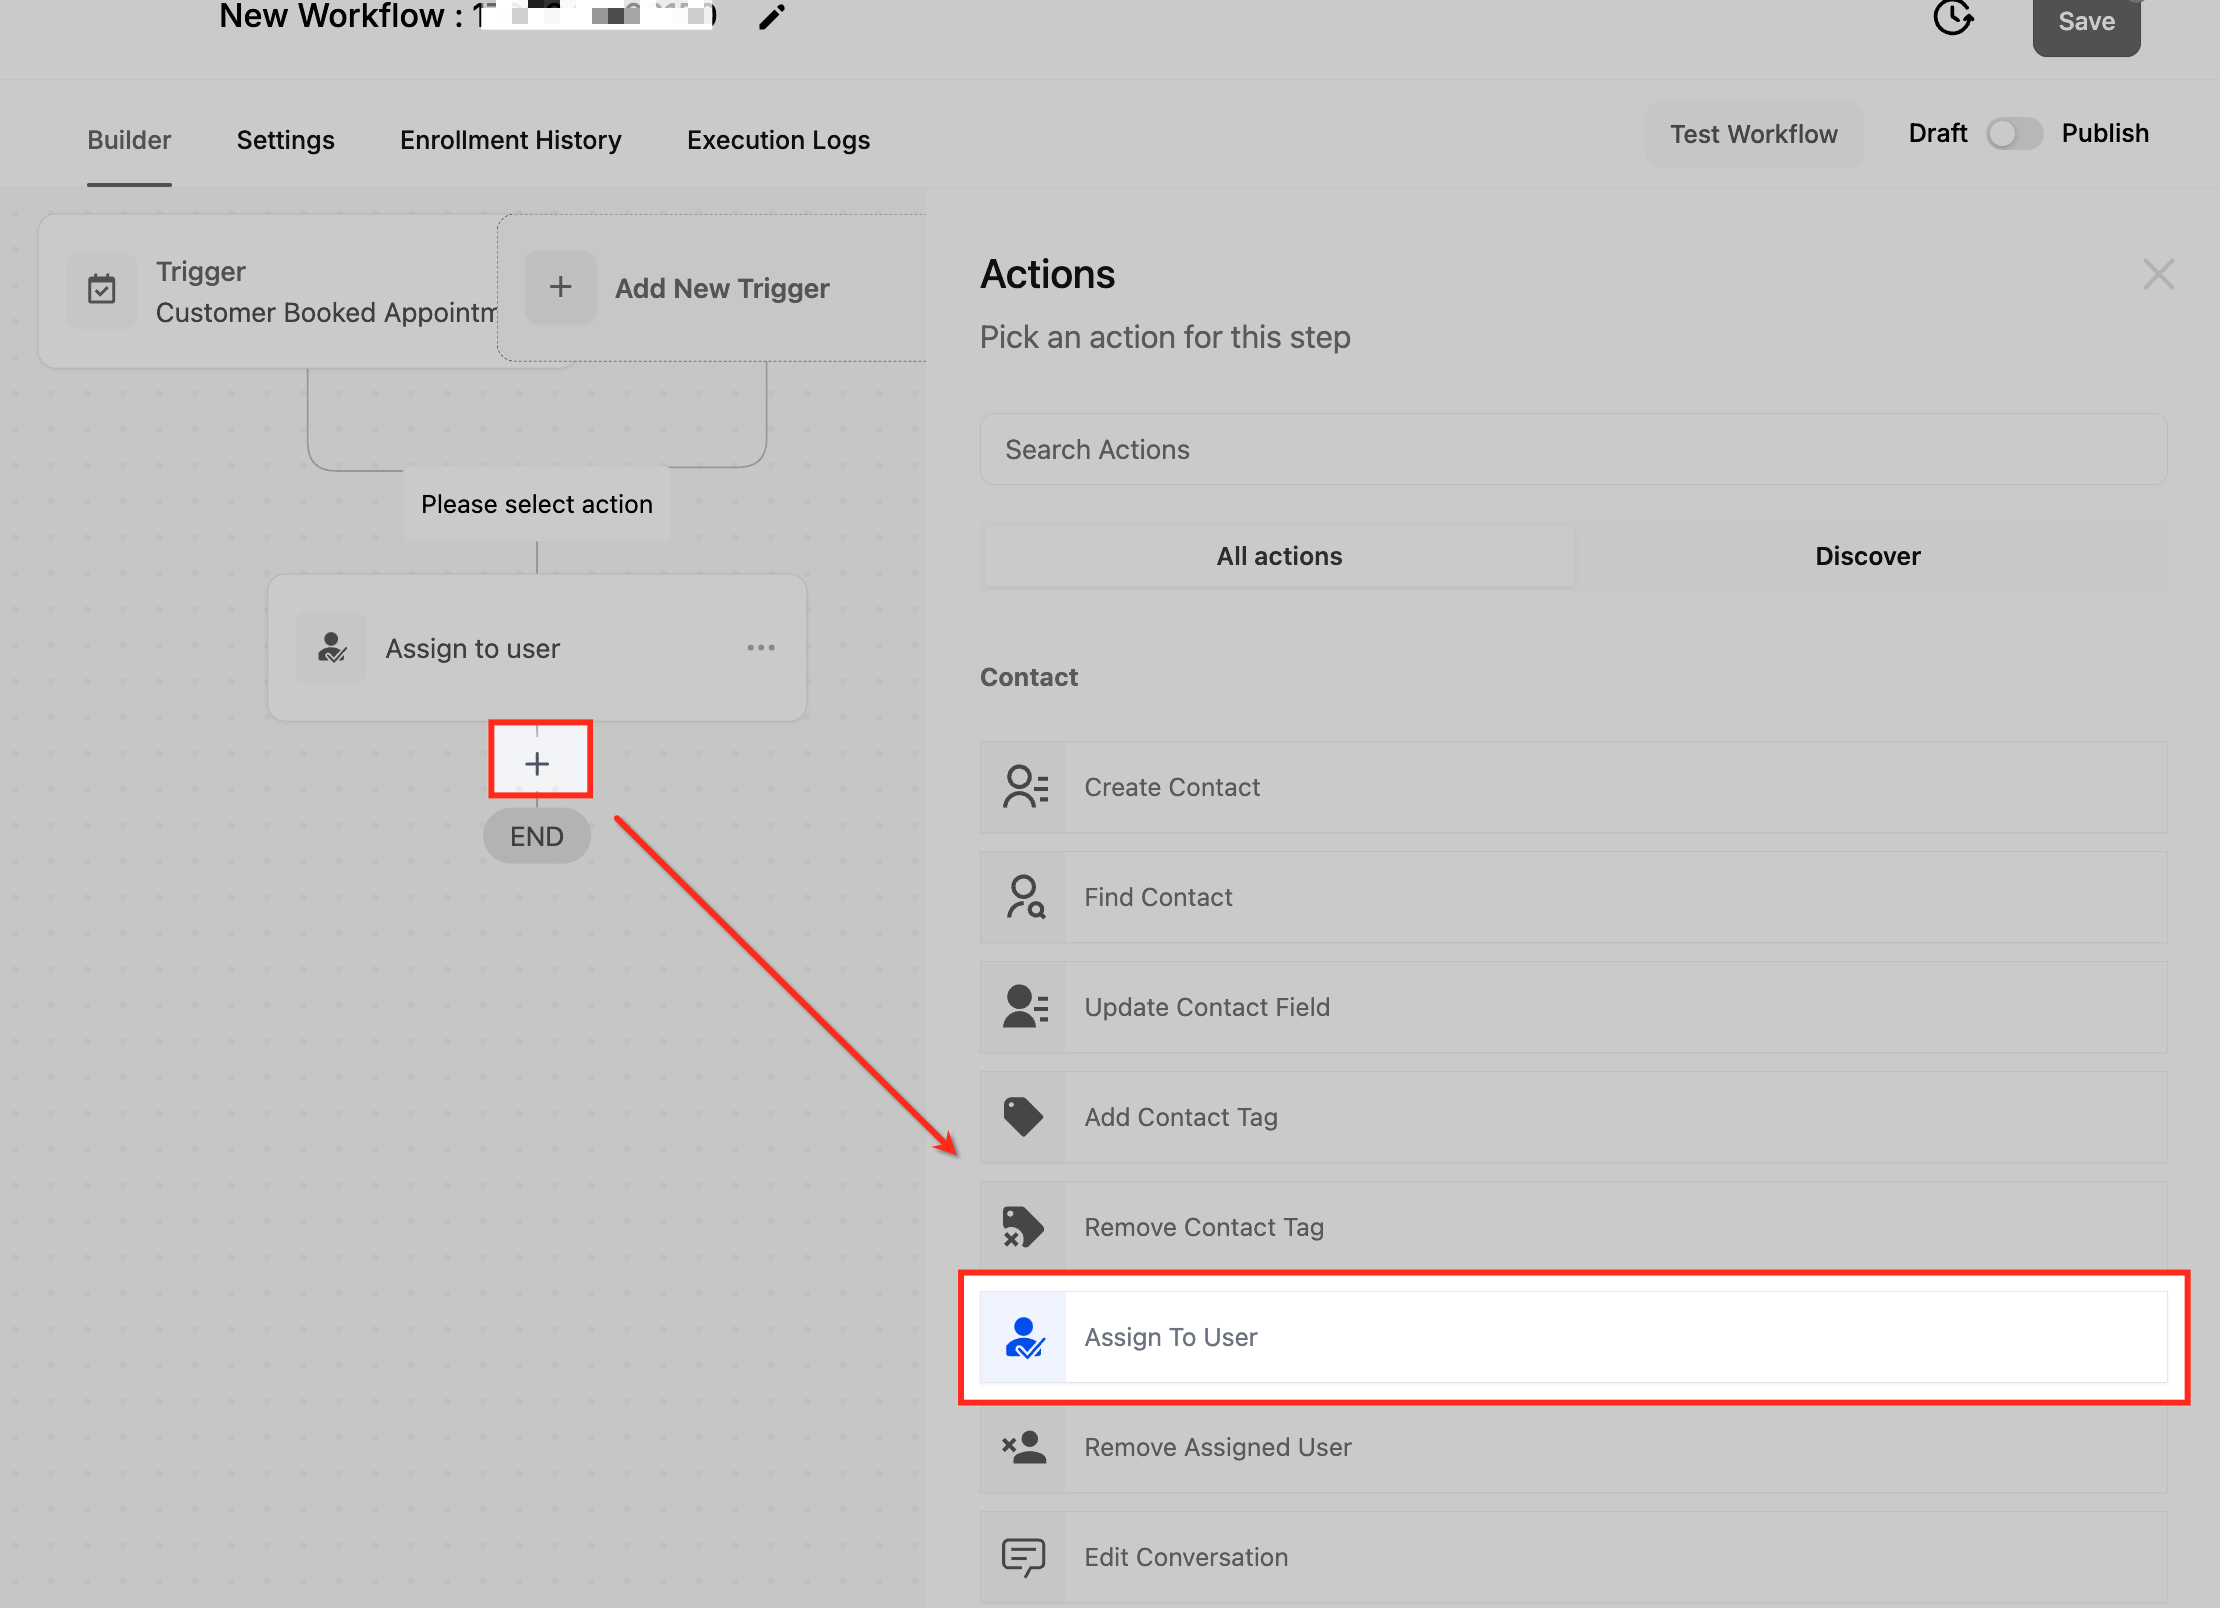
Open your automation builder, click the "+" icon to add a new action, and select "Assign To User."
Configuring the Action
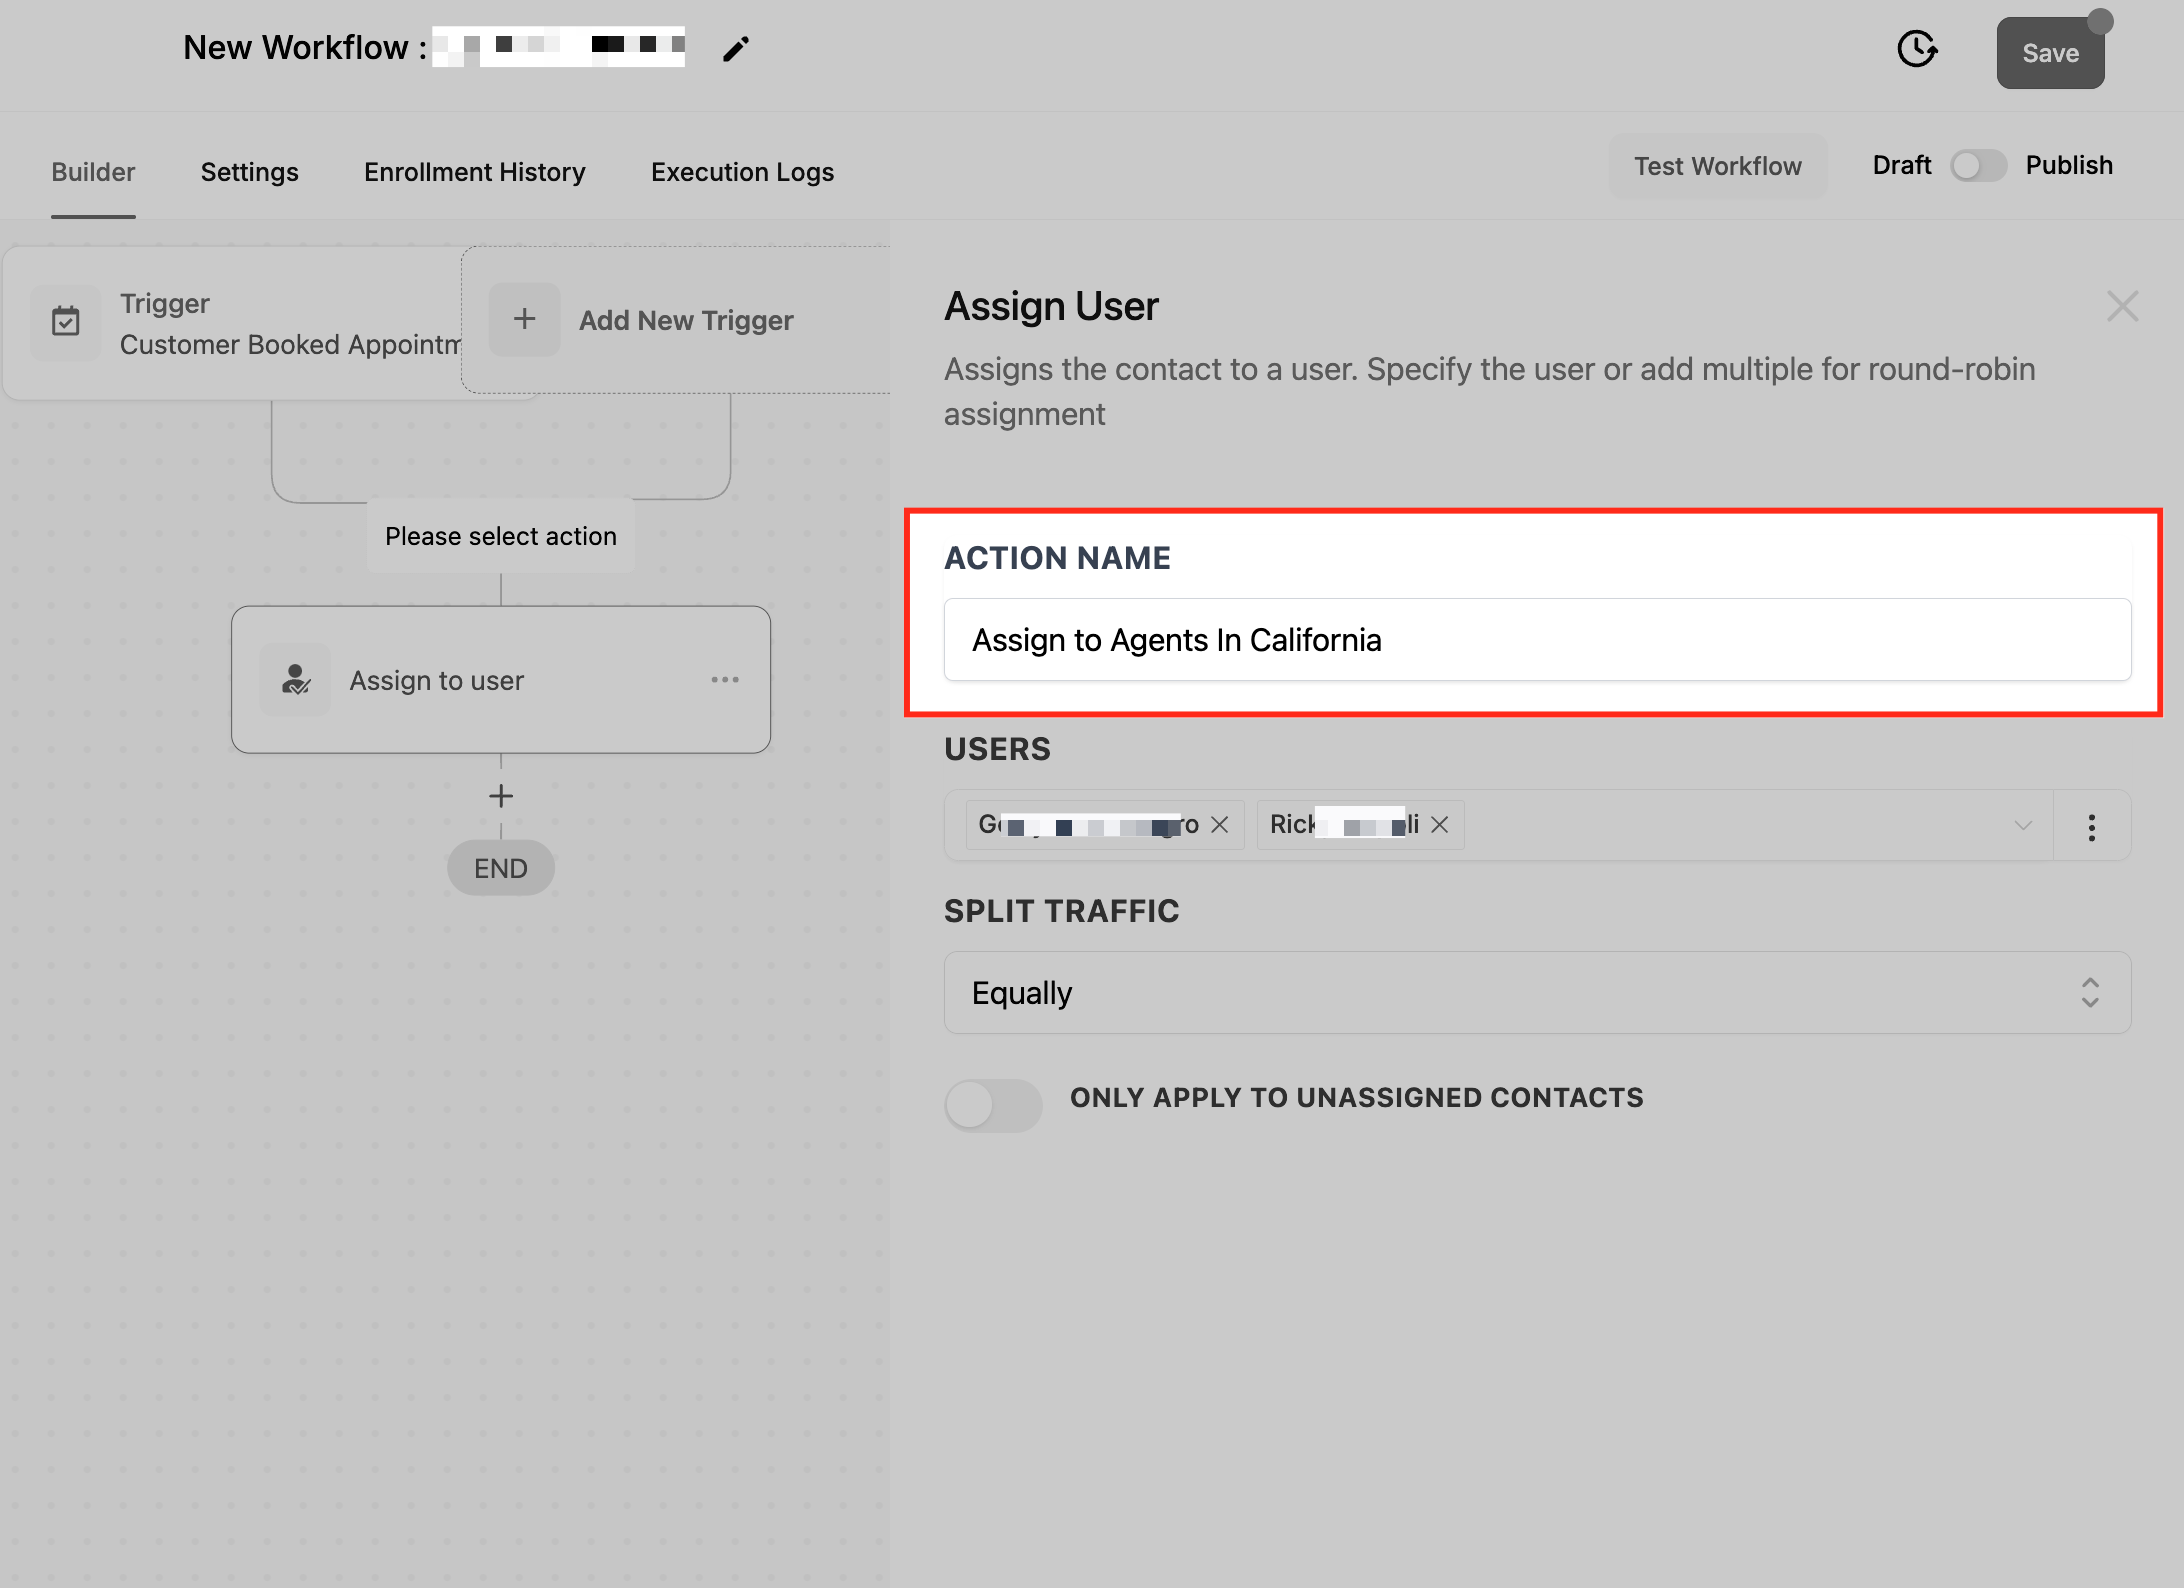
Action Name
Give your action a descriptive name that makes sense for your team. For example: "Assign to Infant Room Director" or "Distribute Tour Requests to Enrollment Team." This helps you quickly identify what the action does when reviewing your automation.
Select the Users
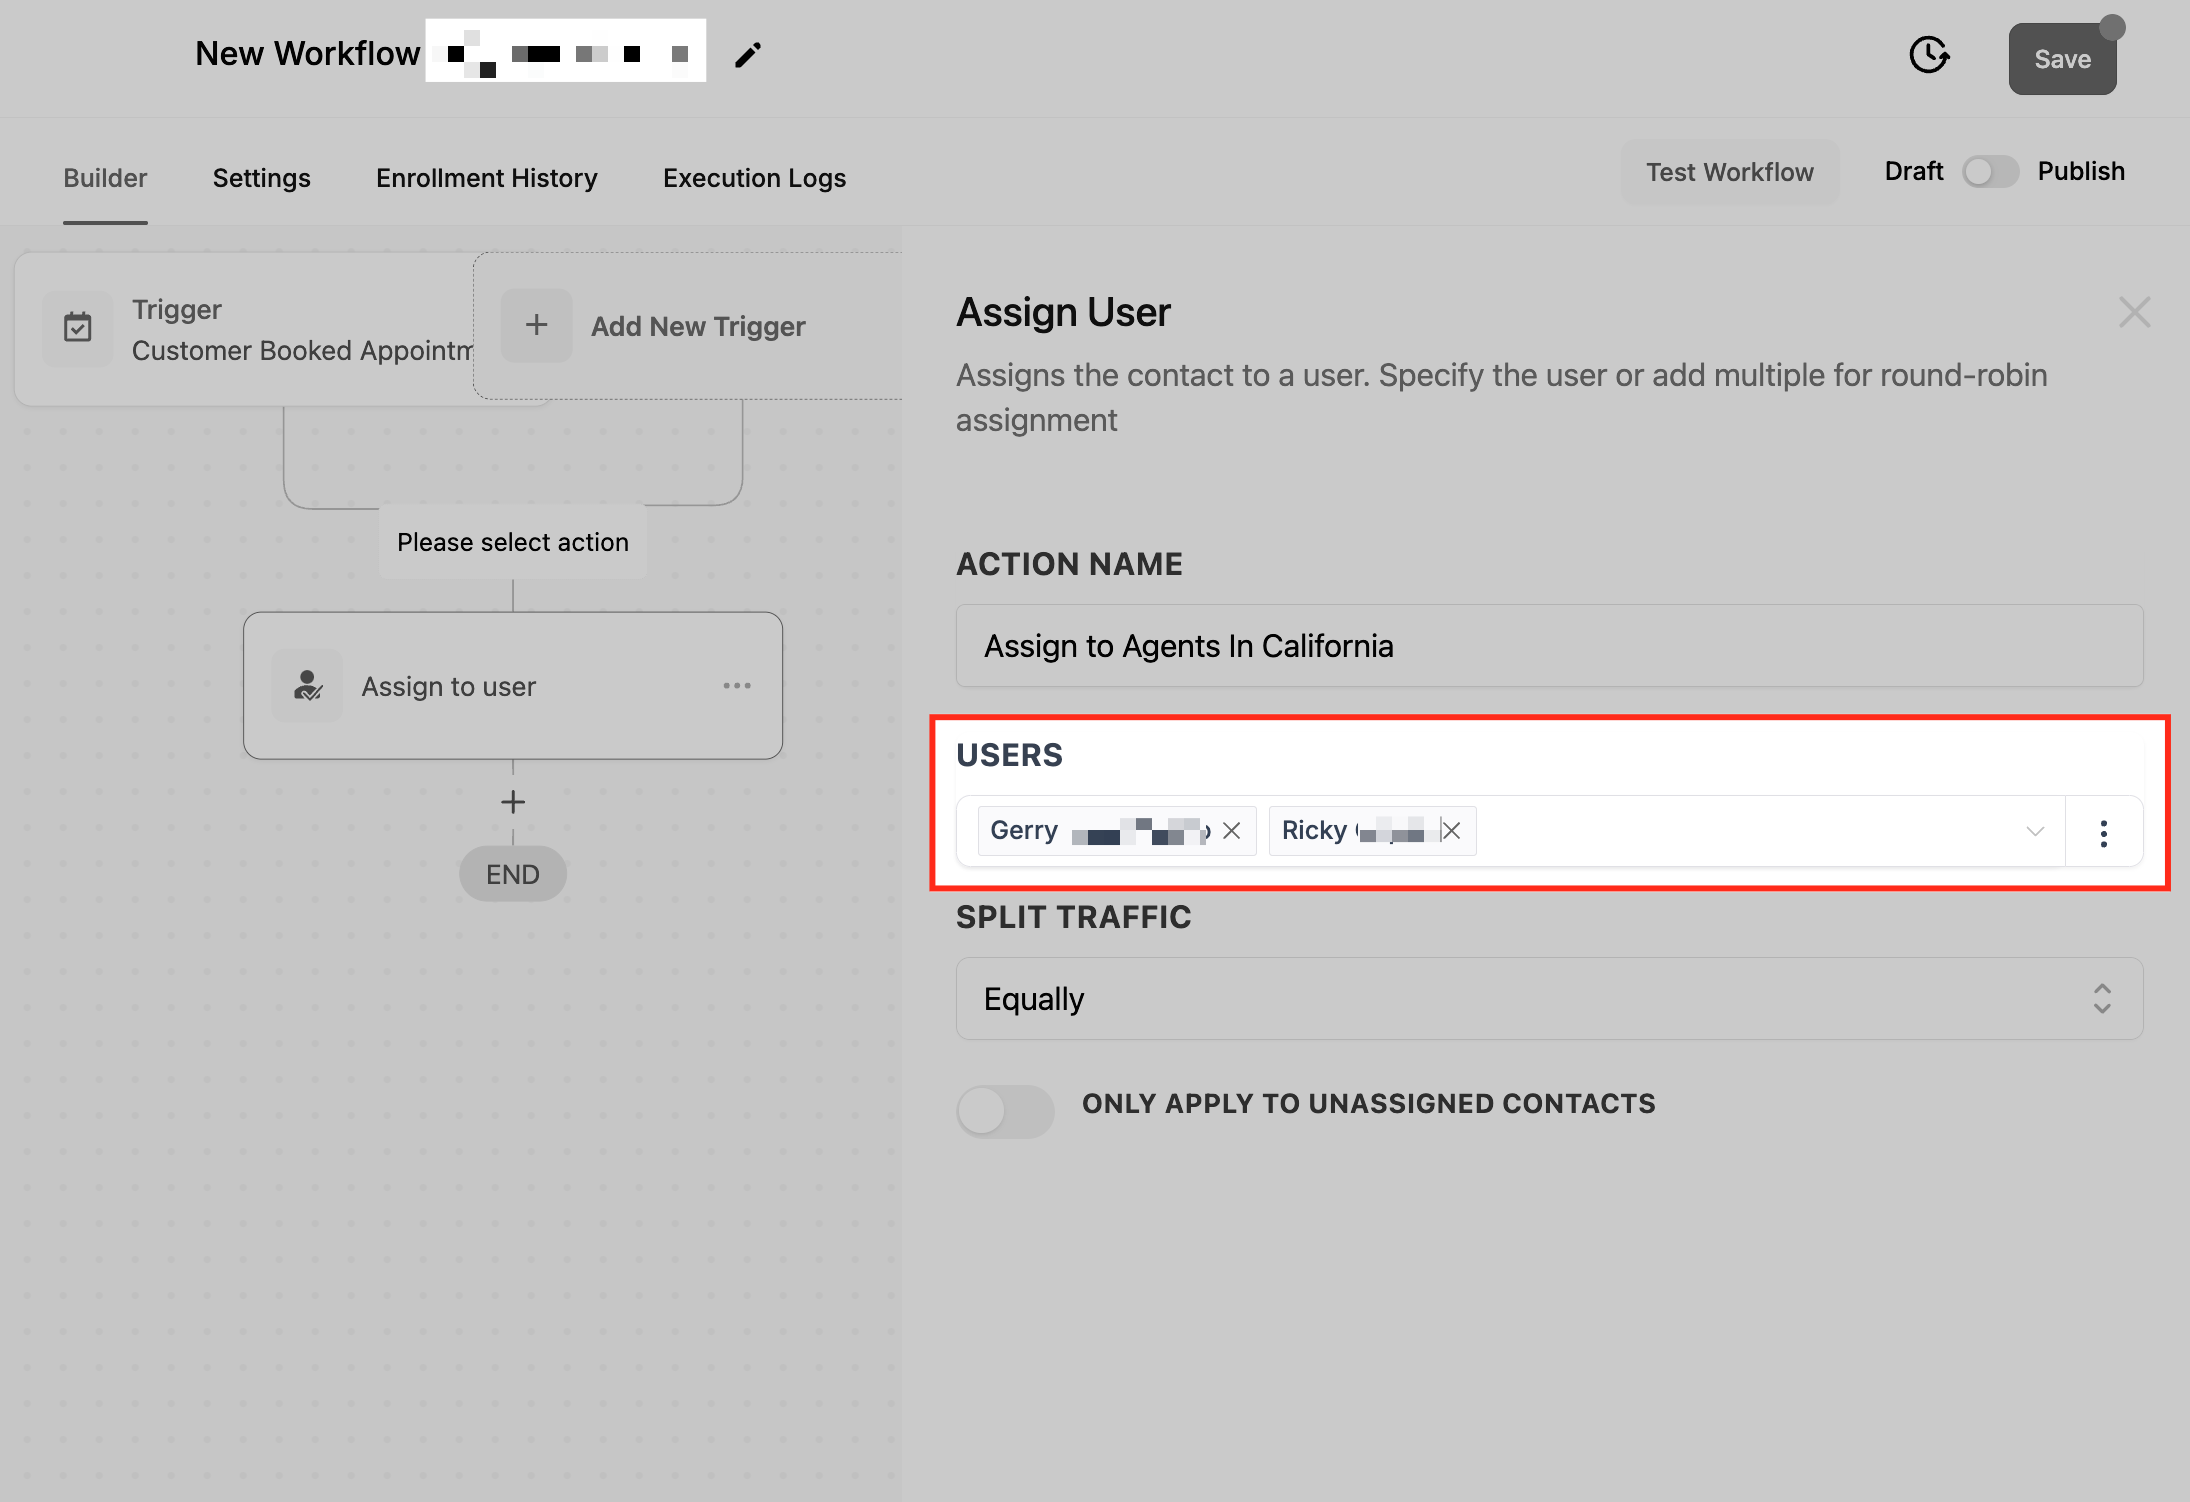
Use the dropdown menu to choose which team members should receive assignments.
Single User: All families are assigned to one staff member. Perfect when you have one enrollment coordinator handling all inquiries.
Multiple Users: When you select more than one staff member, Enrollio automatically rotates between them in a "round robin" pattern. For instance, if you choose Sarah and Mike, the first family goes to Sarah, the second to Mike, the third back to Sarah, and so on.
Splitting Assignment to Users (Weighted Round Robin)
You can distribute families evenly or unevenly among your team based on their capacity or role.
Distributing Equally
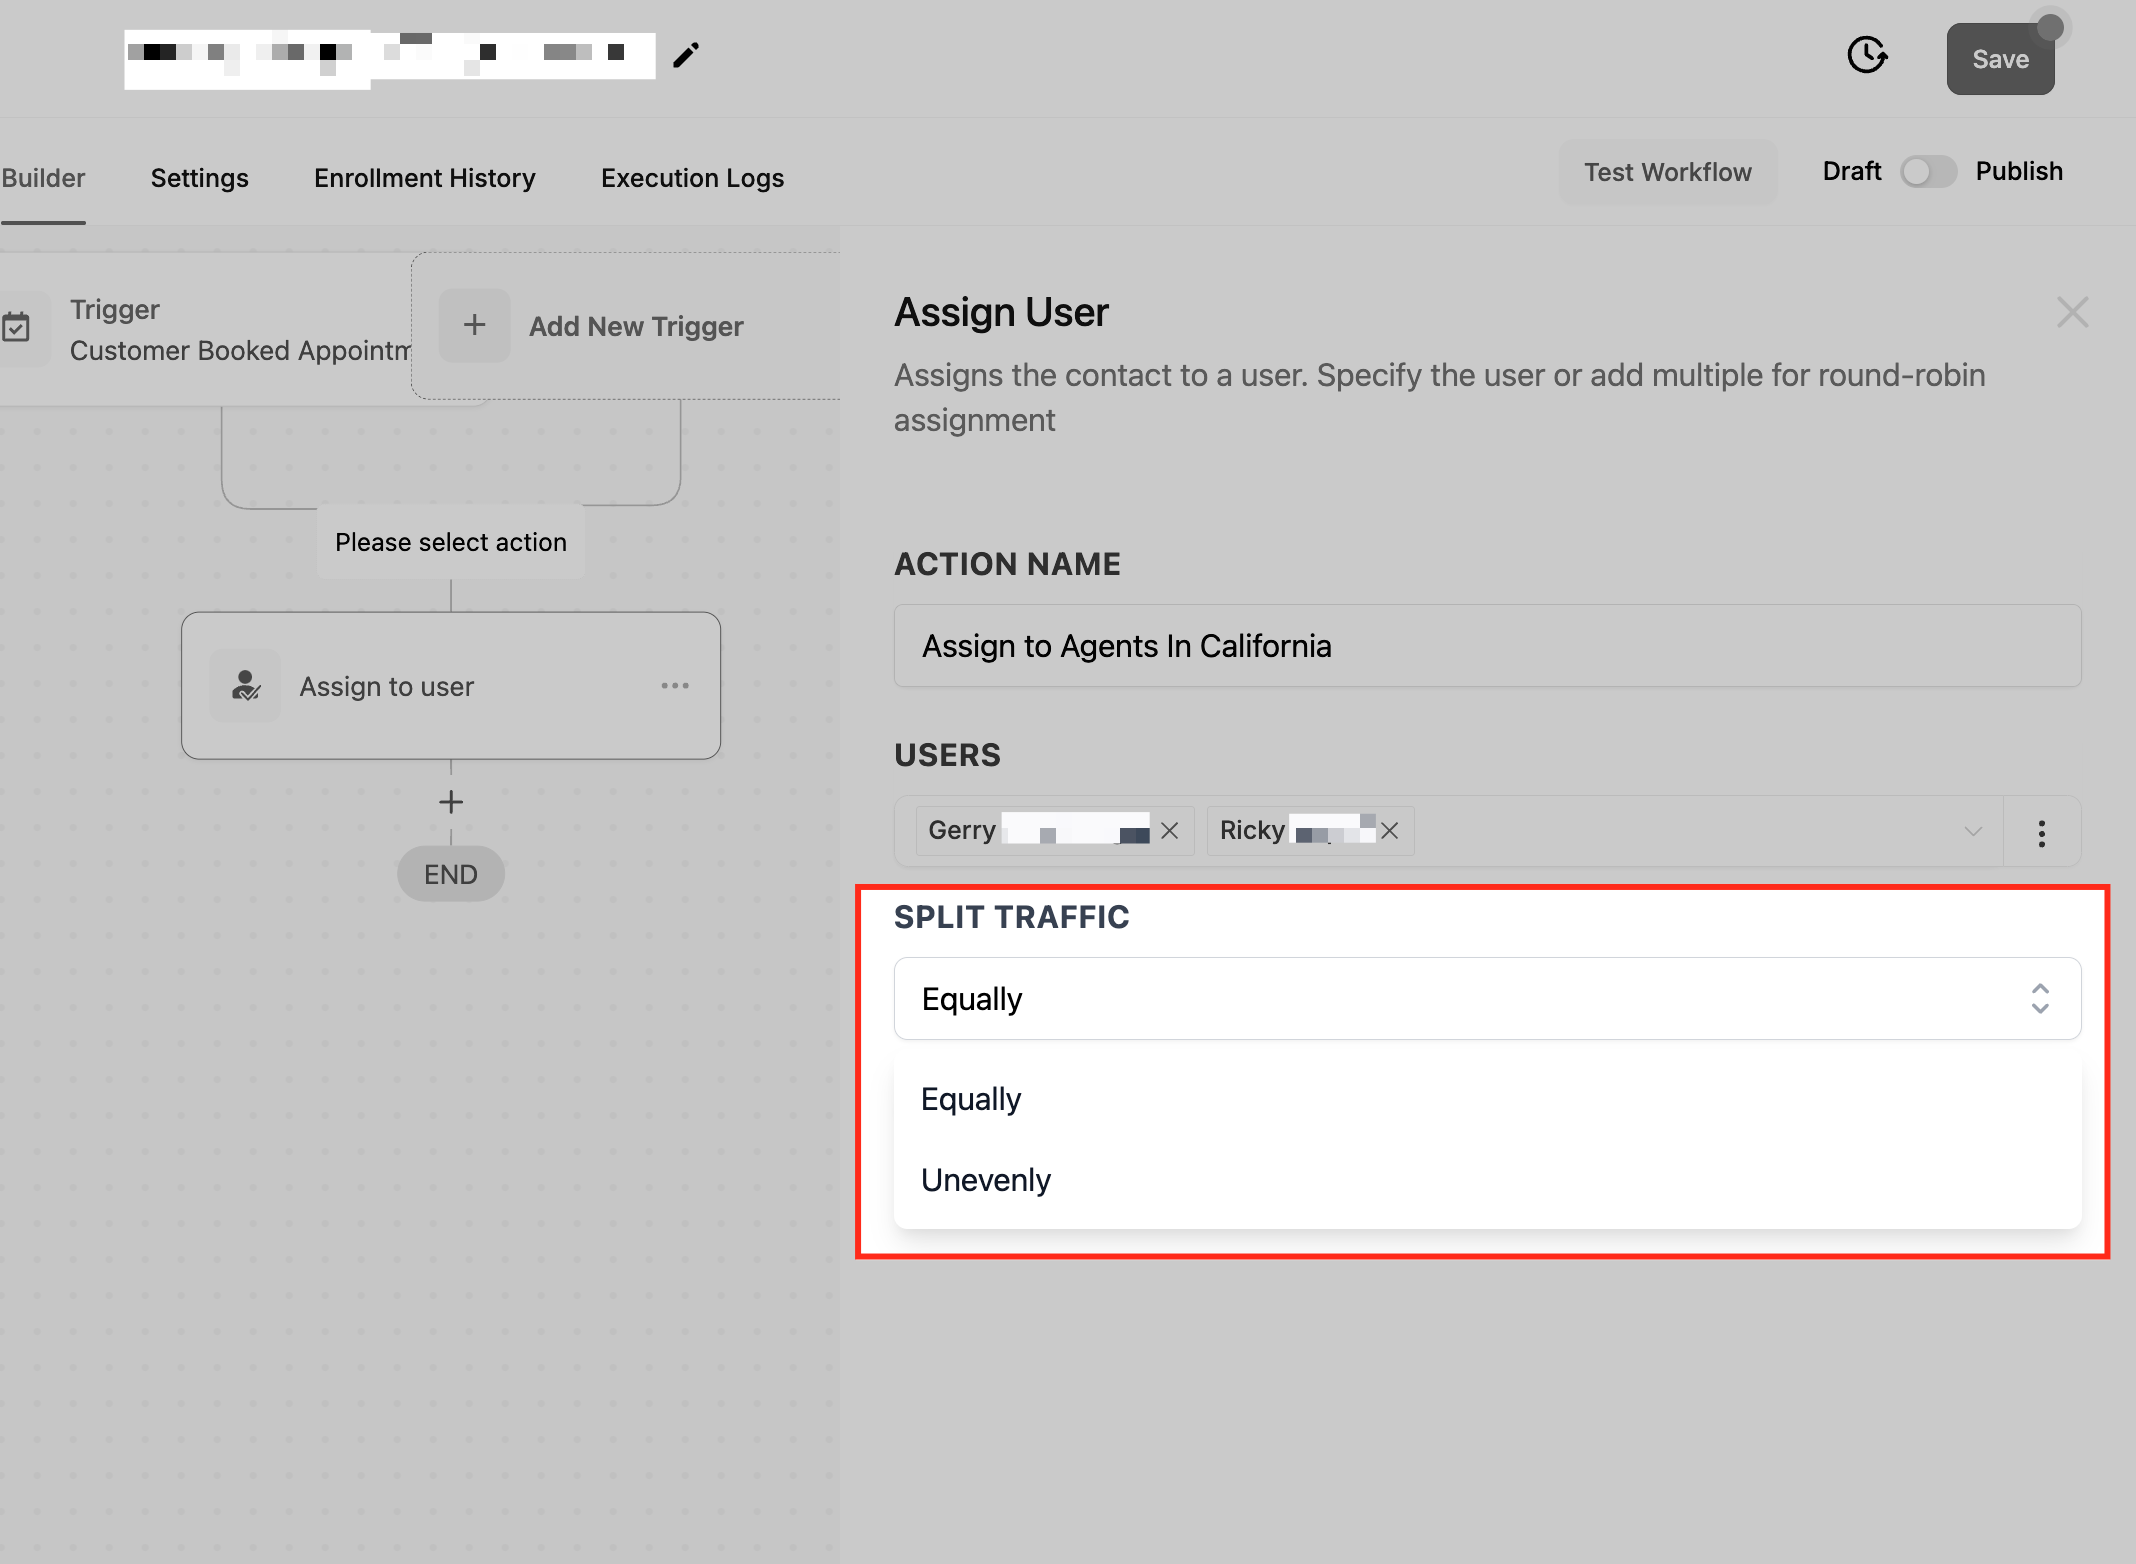
Select "Equally" under the Split Traffic option to distribute families evenly among all selected staff members (1:1, 2:2, etc.). This is the default setting and works just like standard round-robin assignment.
Distributing Unevenly
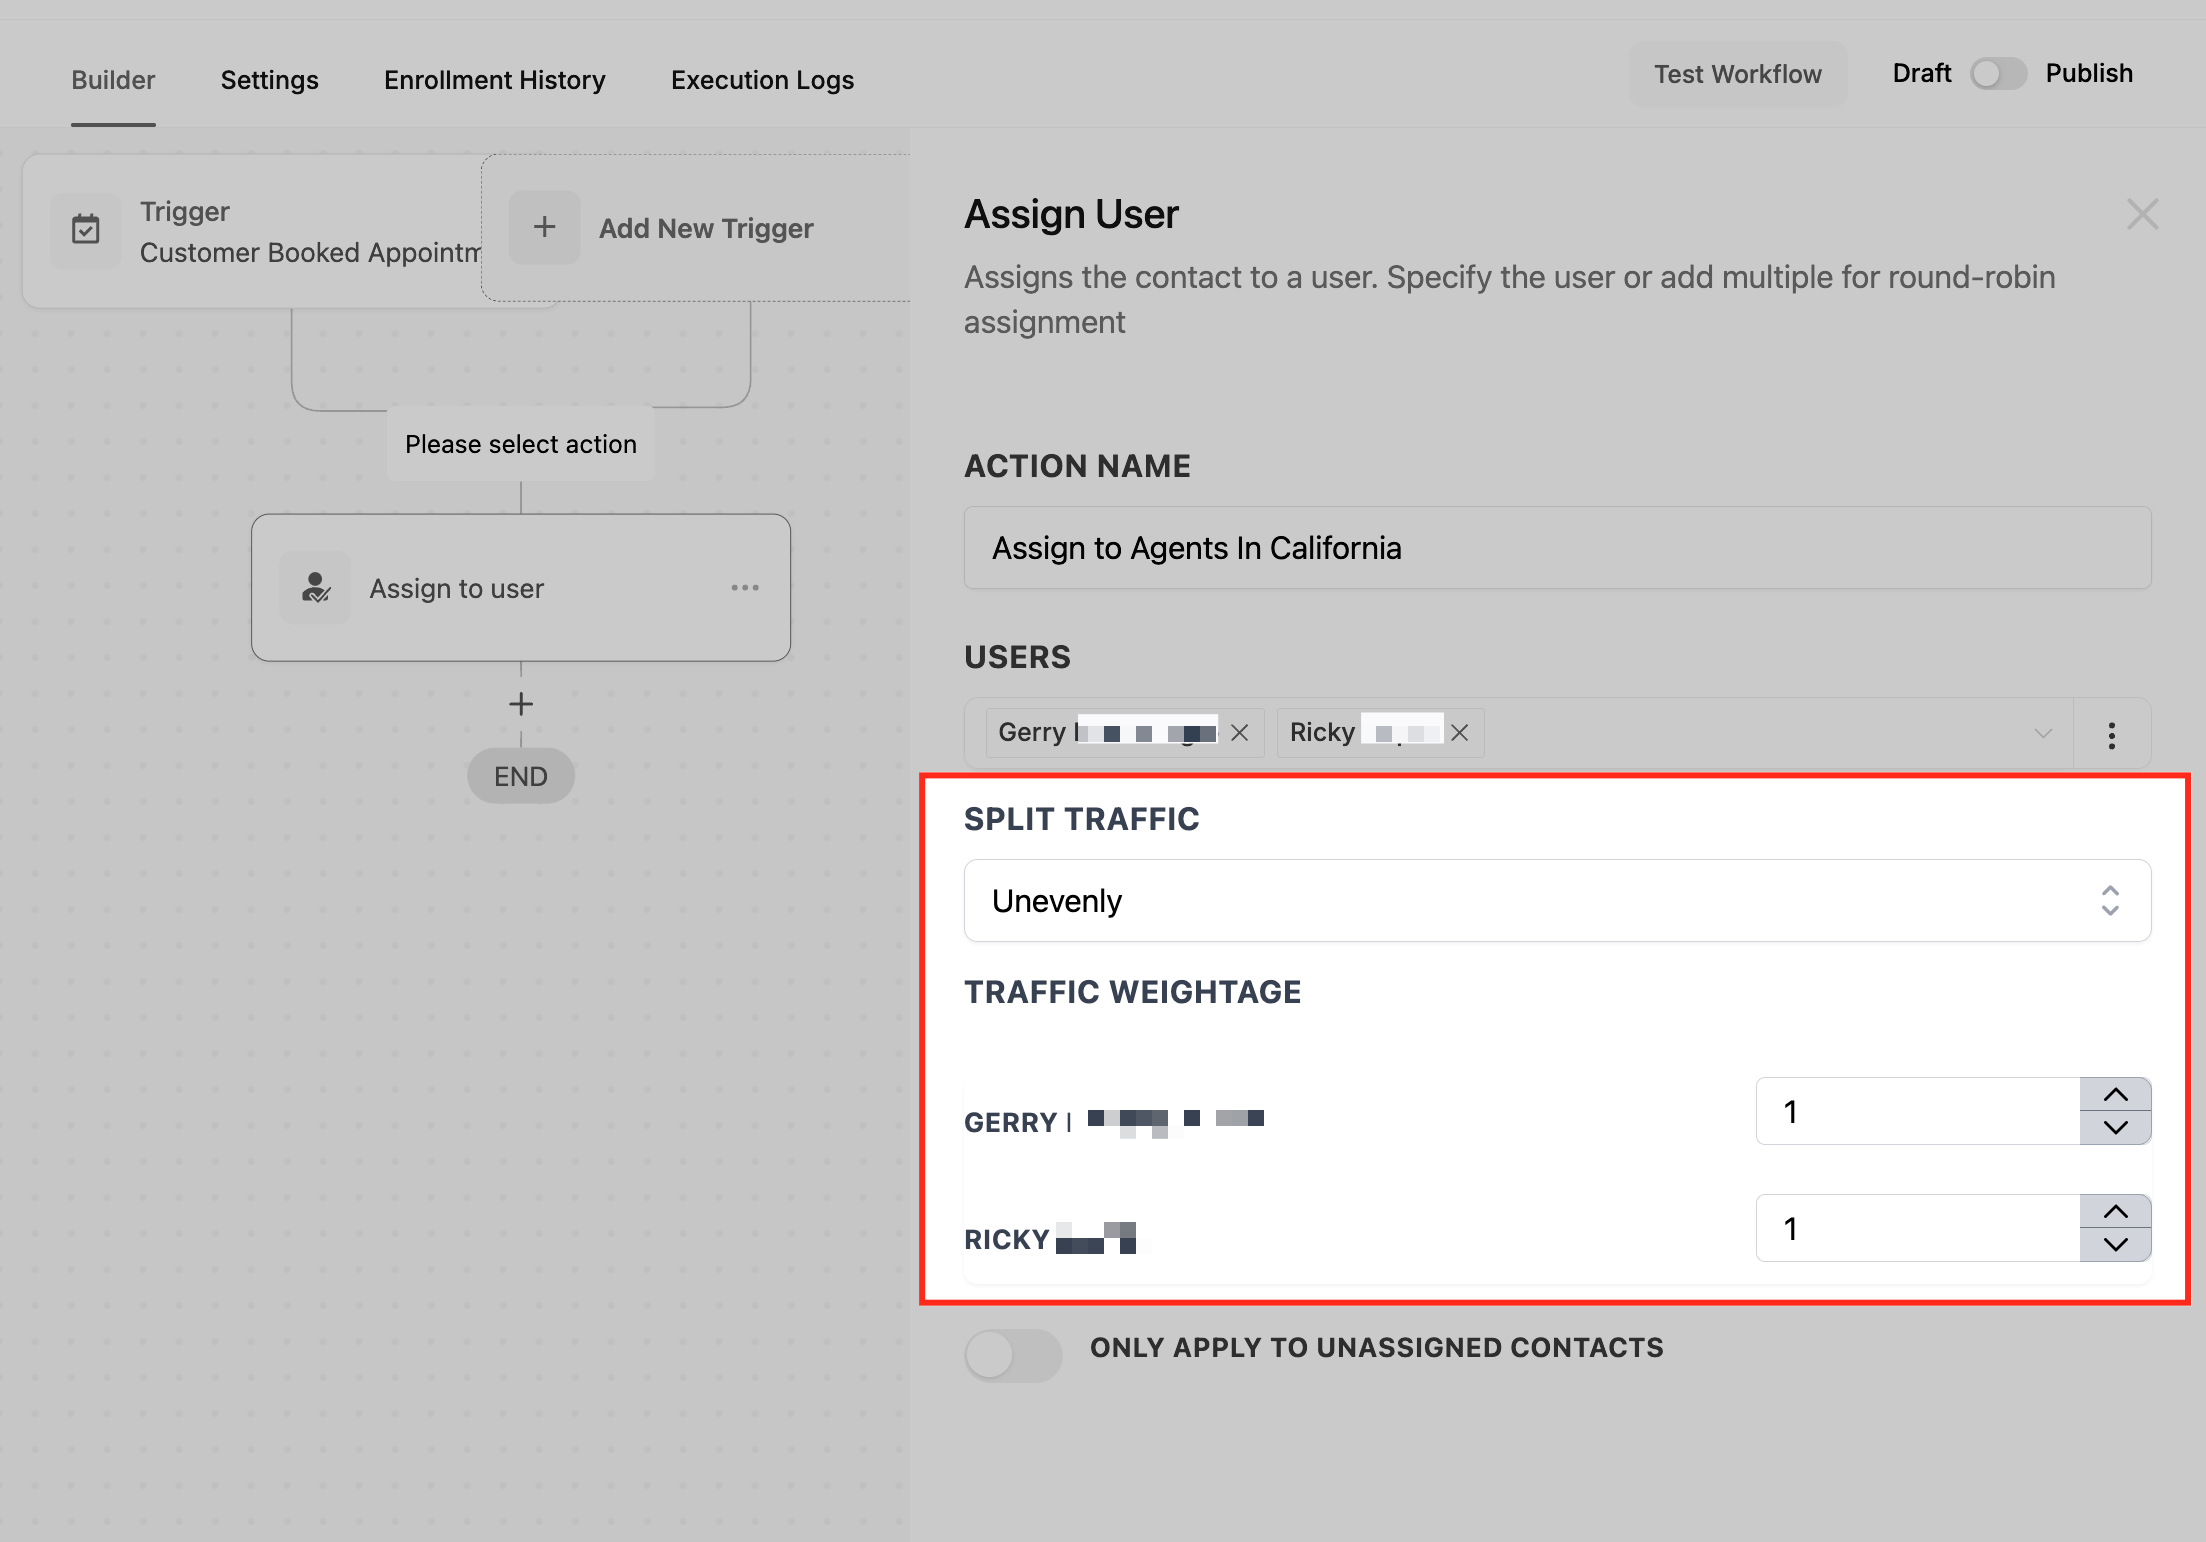
Choose "Unevenly" to customize how families are distributed to each staff member. This is useful when team members have different capacities.
For example, you could set a ratio of 5:2, where your full-time enrollment coordinator receives five families and your part-time coordinator receives two. The part-time coordinator only receives a family after the full-time coordinator has received their fifth.
Here's another example with three staff members:
- Director: 3
- Lead Coordinator: 3
- Assistant: 1
Families 1, 2, and 3 go to the Director; families 4, 5, and 6 go to the Lead Coordinator; family 7 goes to the Assistant; then the cycle repeats.
Only Apply to Unassigned Families
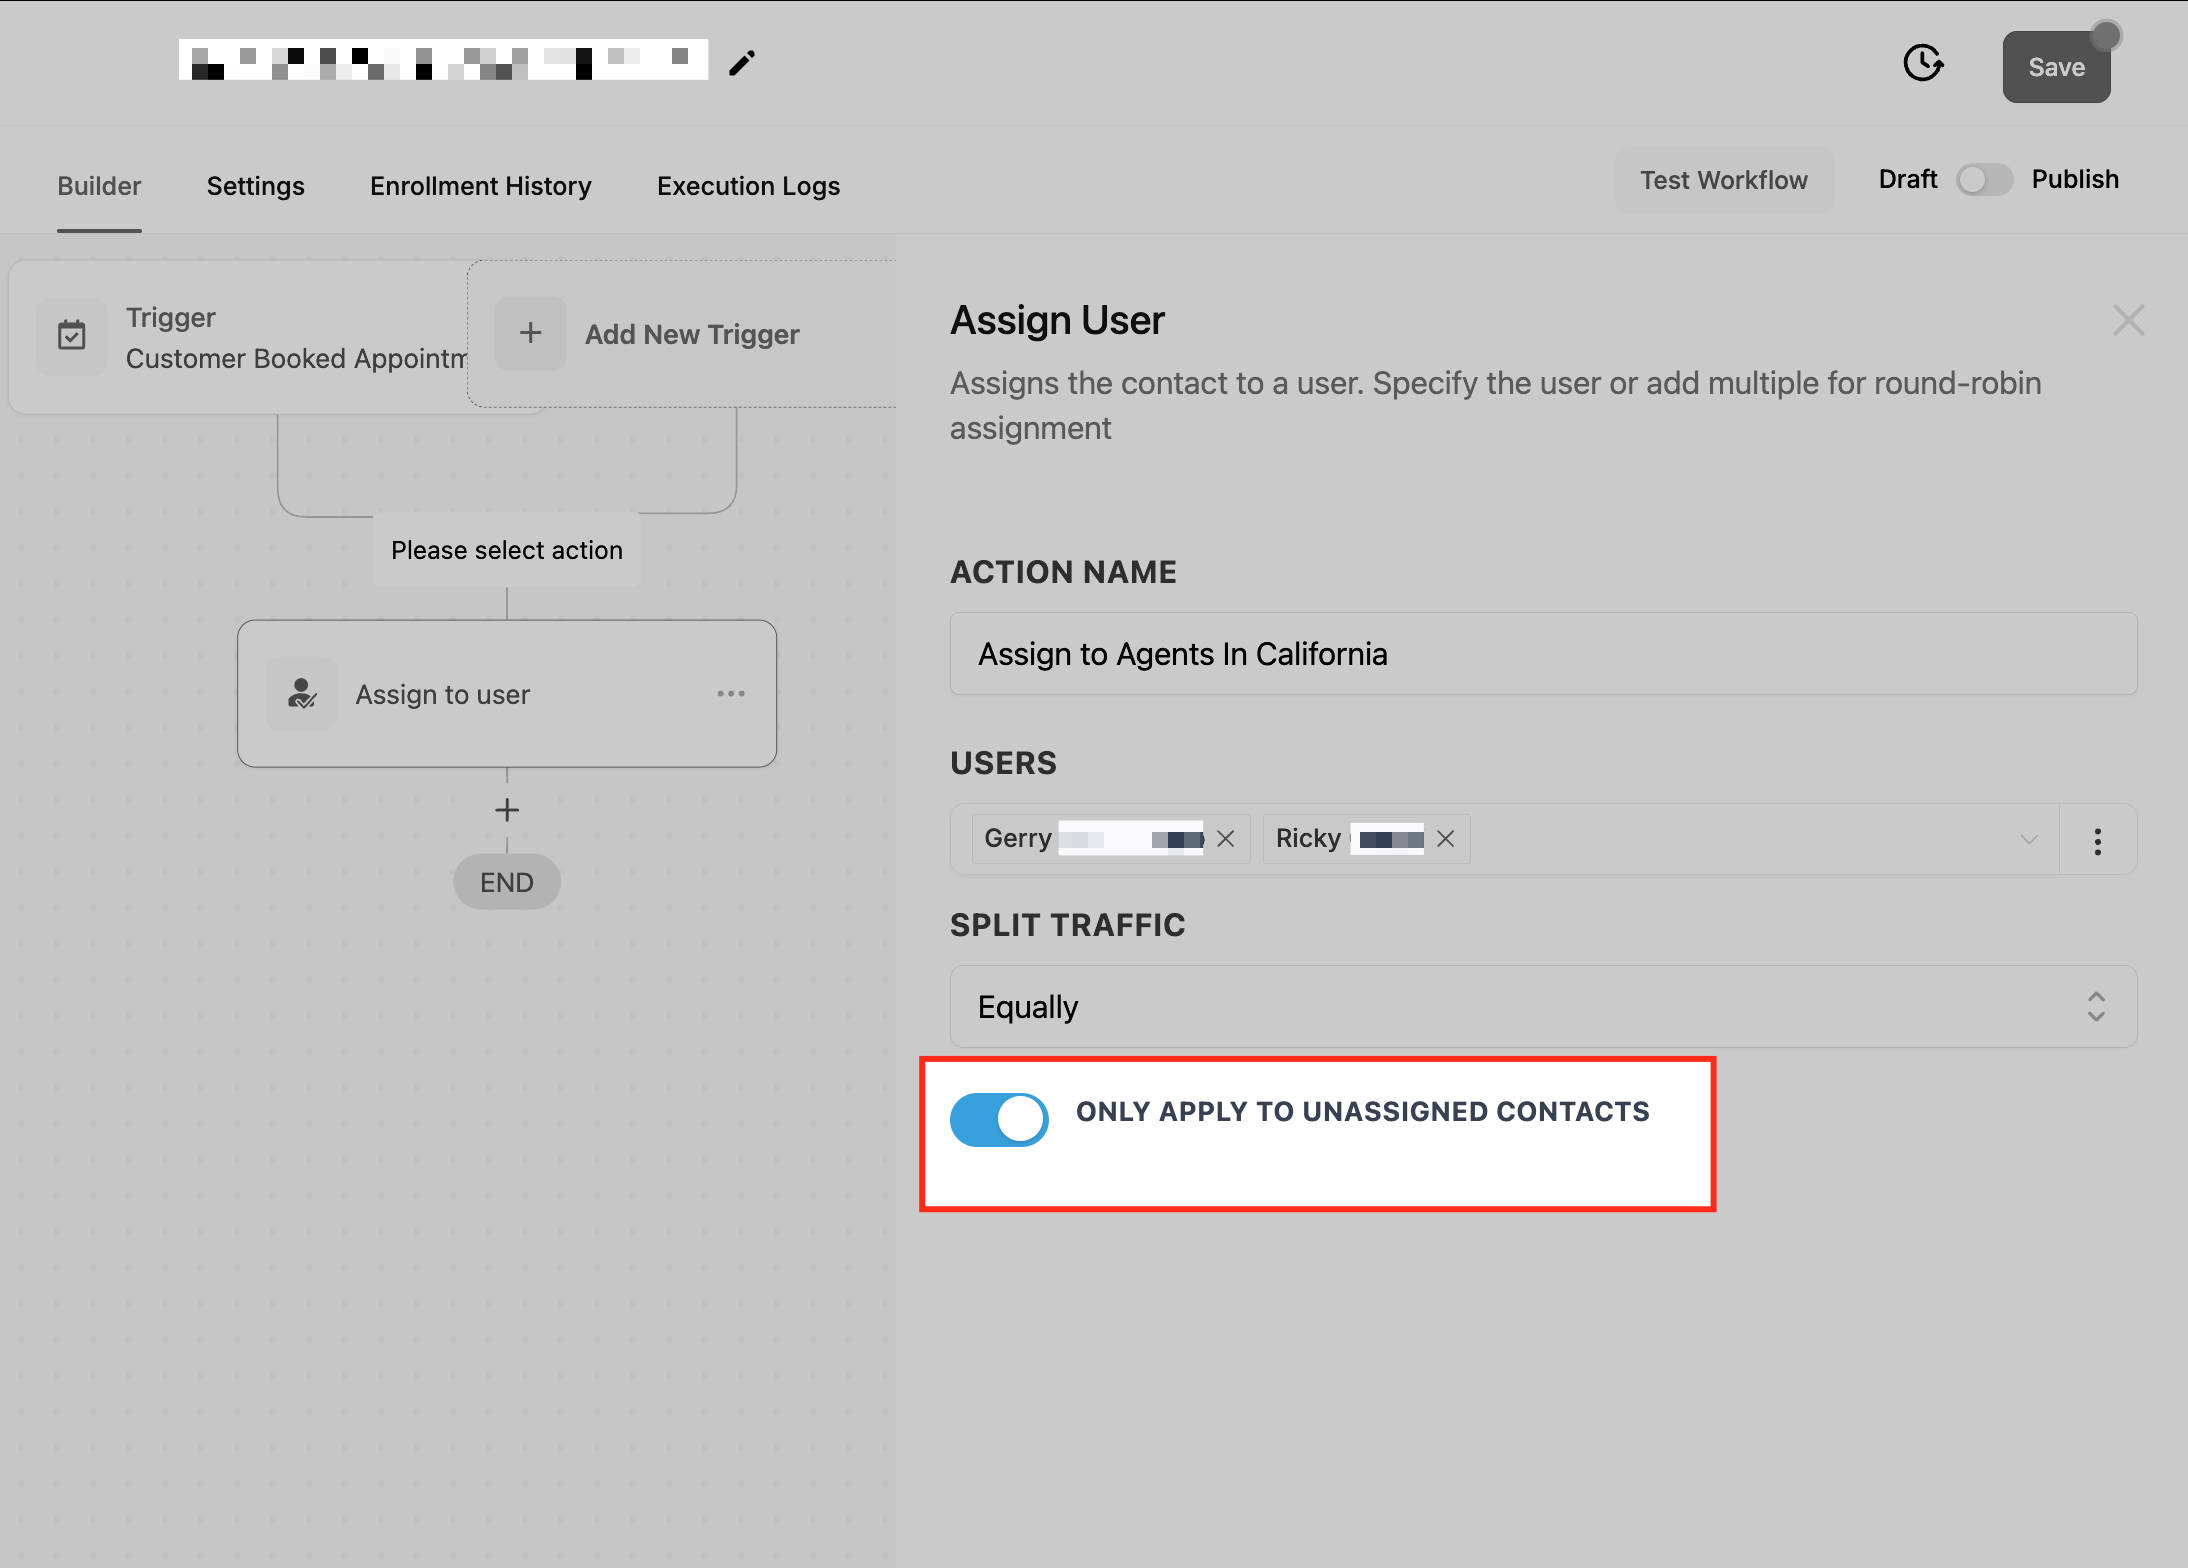
Enabled: Only assign families that haven't been assigned to anyone yet. This prevents reassigning families who already have a staff member working with them.
Disabled: Reassign families even if they're already assigned to someone. The new assignment will overwrite the previous one. Use this carefully, as it will move families from their current staff member.
Standard vs Dynamic User IDs
In the Users dropdown, "Standard" is selected by default. This shows you a dropdown menu of all staff members in your account.
If you select "Dynamic," the field changes to a text field where you can input user IDs directly or use custom fields from earlier in your automation. This is an advanced feature most centers won't need.
Pro Tip: Stick with Standard selection unless you have complex assignment logic running outside Enrollio. Dynamic assignment is for advanced use cases only.
Where To Find User ID Manually
If you need to find a user ID manually:
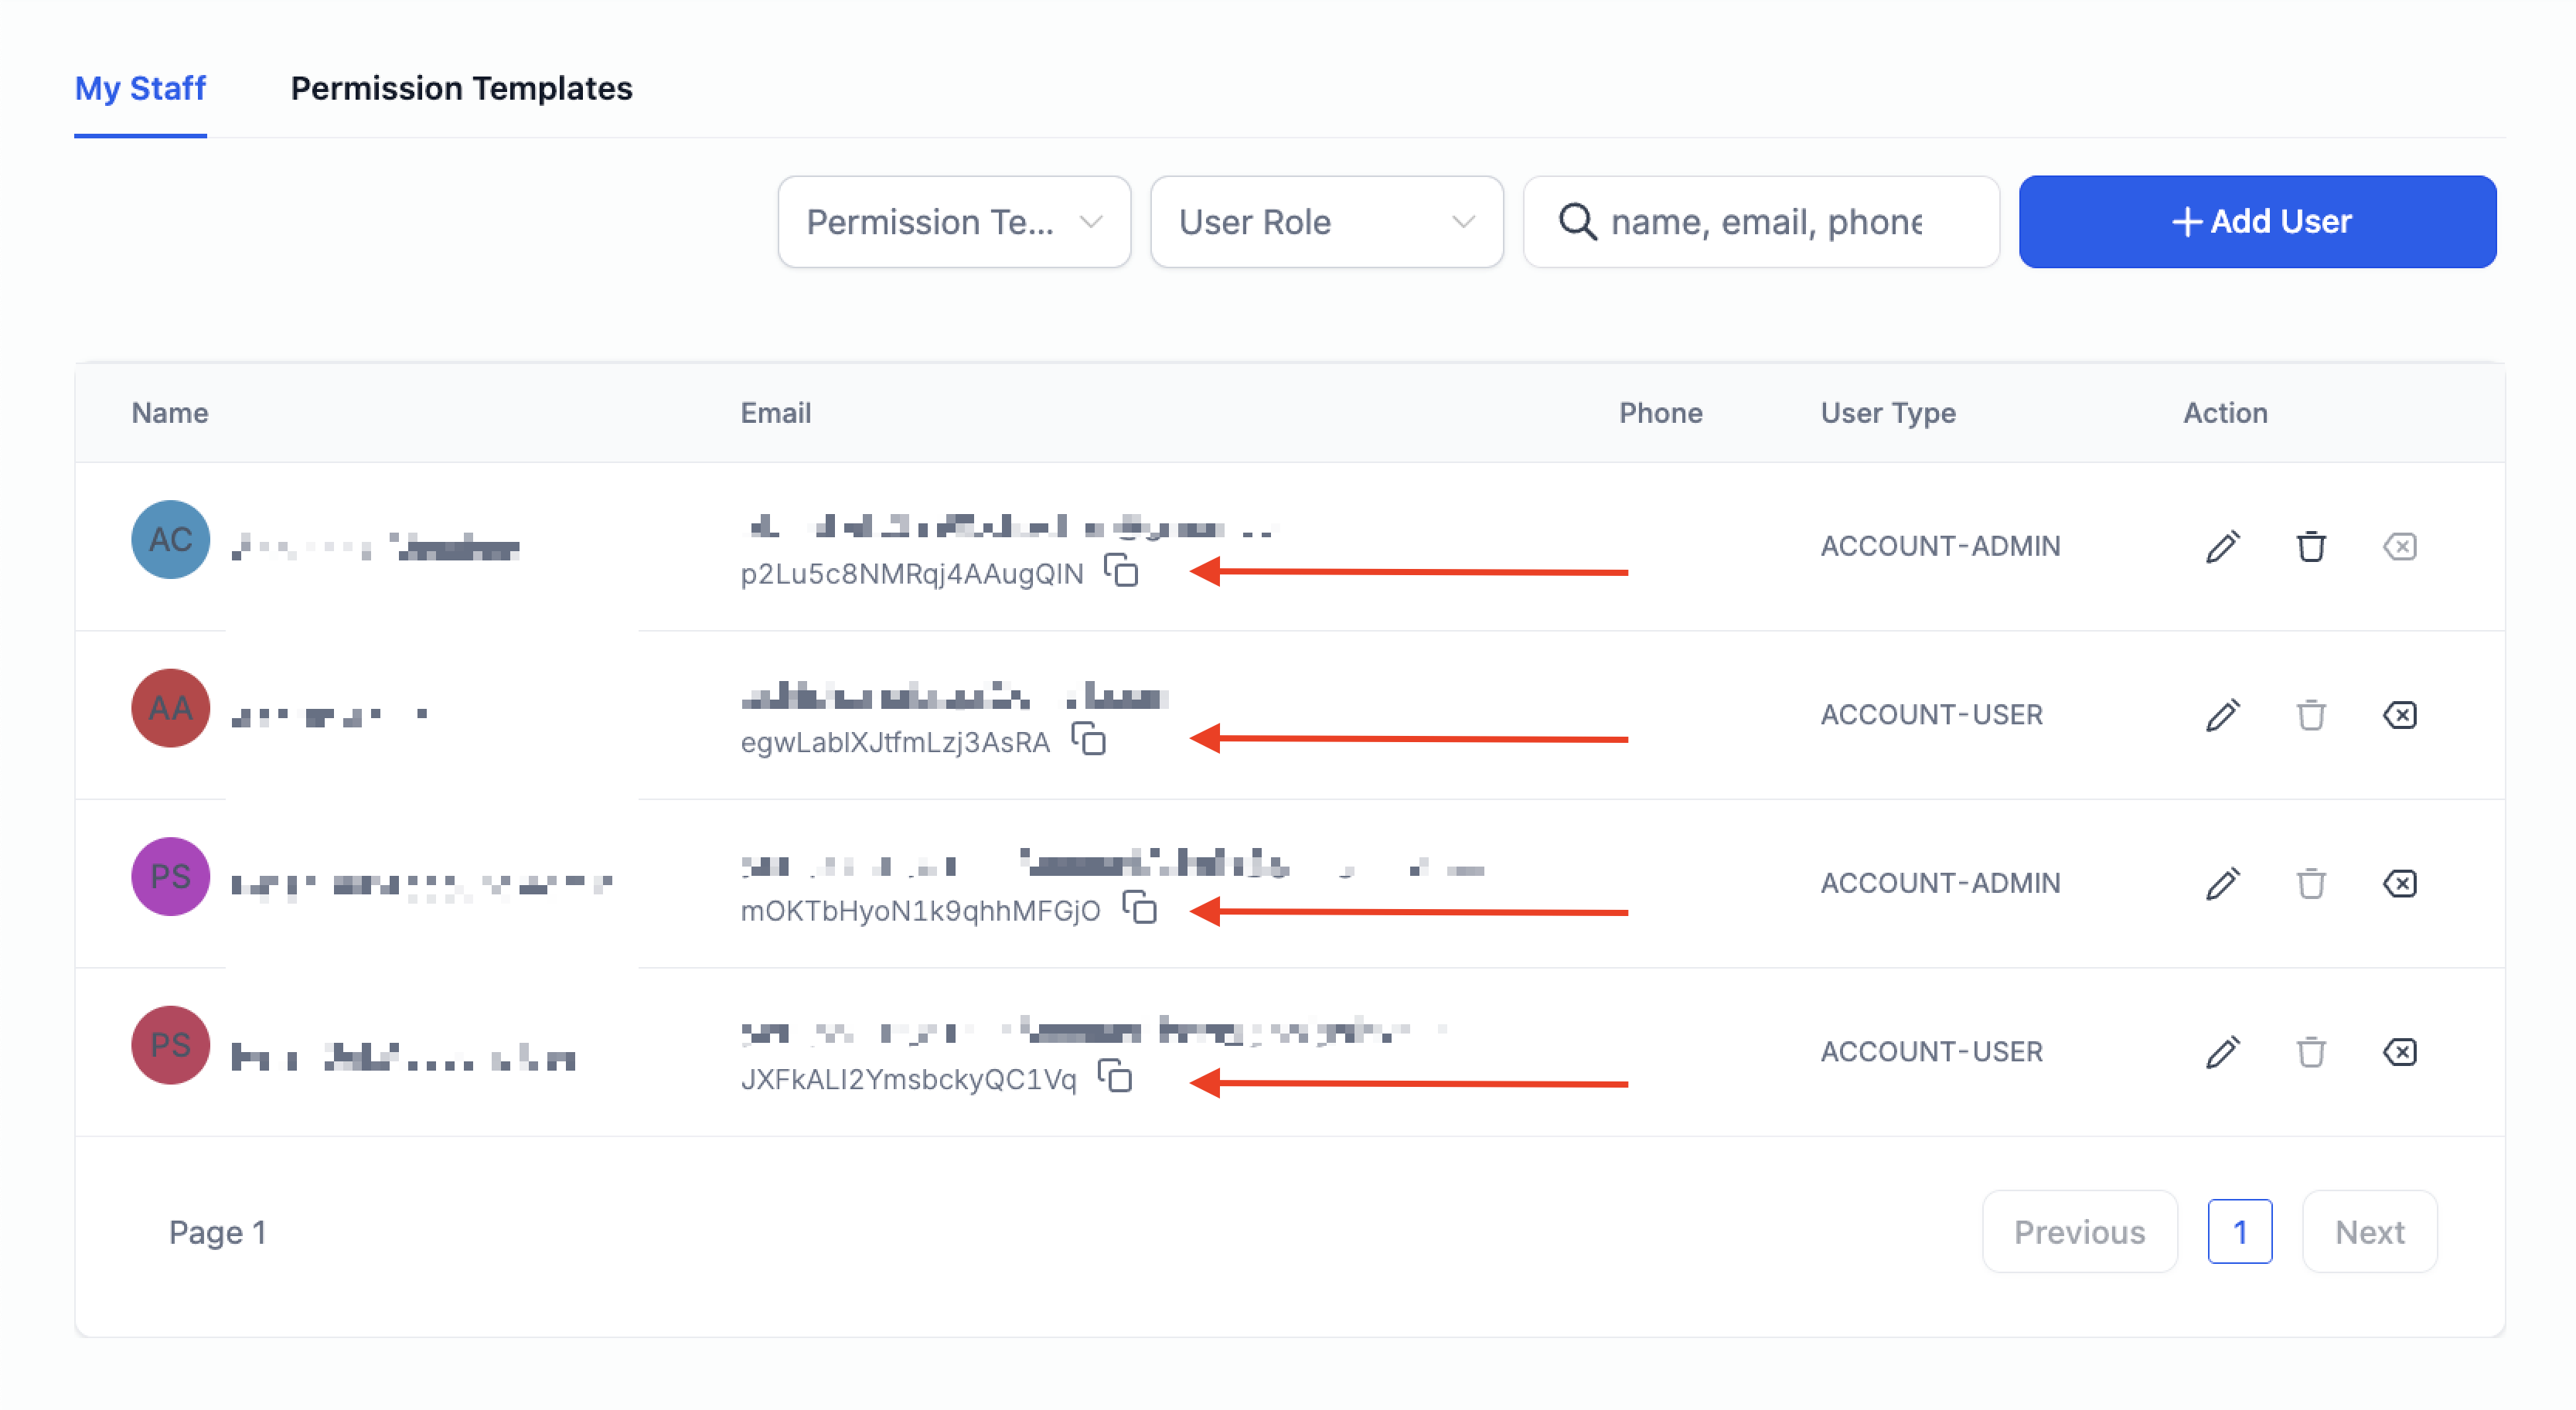
- Go to Settings > My Staff
- Find the user ID listed below each staff member's email address
How To Assign Users Dynamically
In most situations, use the Standard picker because your assignment rules are defined inside your Enrollio automation. However, some advanced users have more complex assignment logic running in external systems.
Example Advanced Use Case: A childcare center with multiple locations and specialized enrollment coordinators for different programs (infants, toddlers, preschool, after-school). Your external system evaluates each inquiry based on program interest, location, family size, and tour availability, then sends the appropriate coordinator's user ID to Enrollio.
Step 1: Create Your Automation
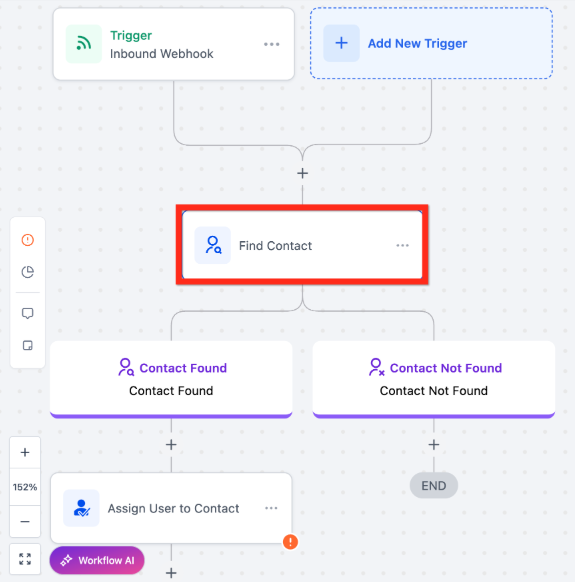
Create a new automation and add an Inbound Webhook Trigger, a Find Parent/Family Action, and an Assign User Action.
Step 2: Send Setup Webhook
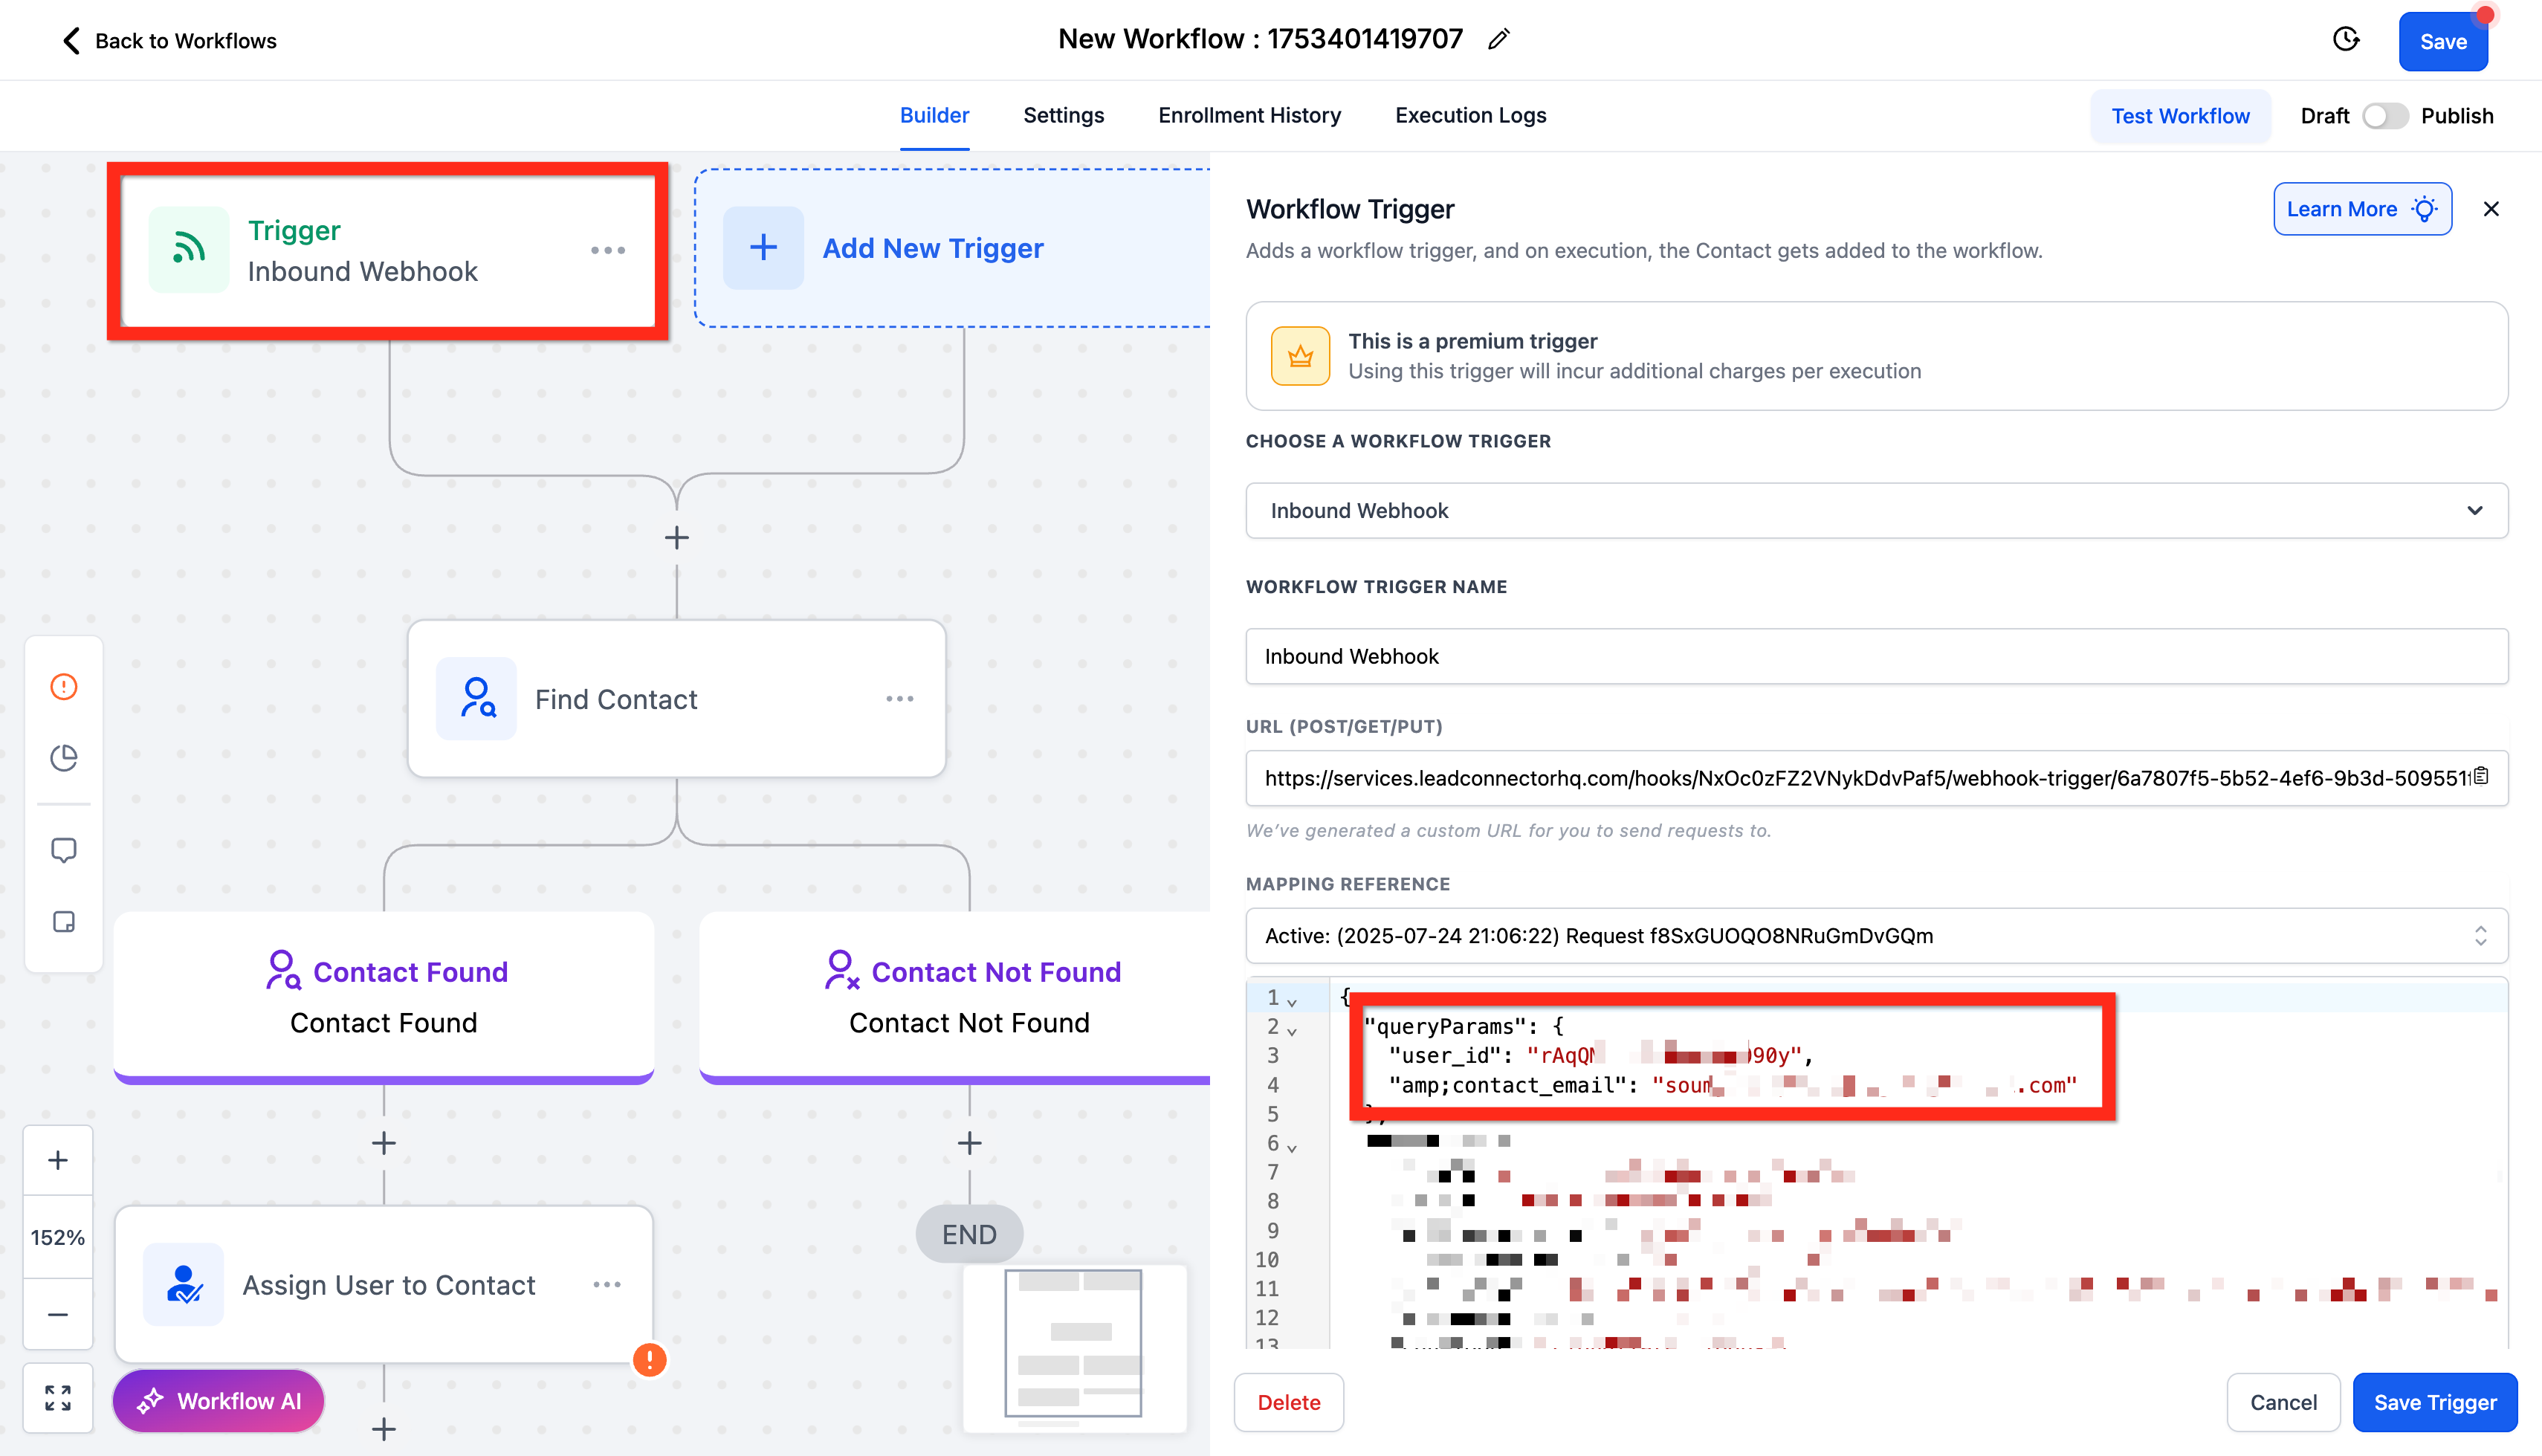
Set up the Inbound Webhook by using your system to send an example request to the URL provided. You'll need to include a user_id parameter and a contact_email parameter in your webhook.
You can use a tool like reqbin.com for testing. When you see "status: success: test request received," return to the Inbound Webhook Trigger.
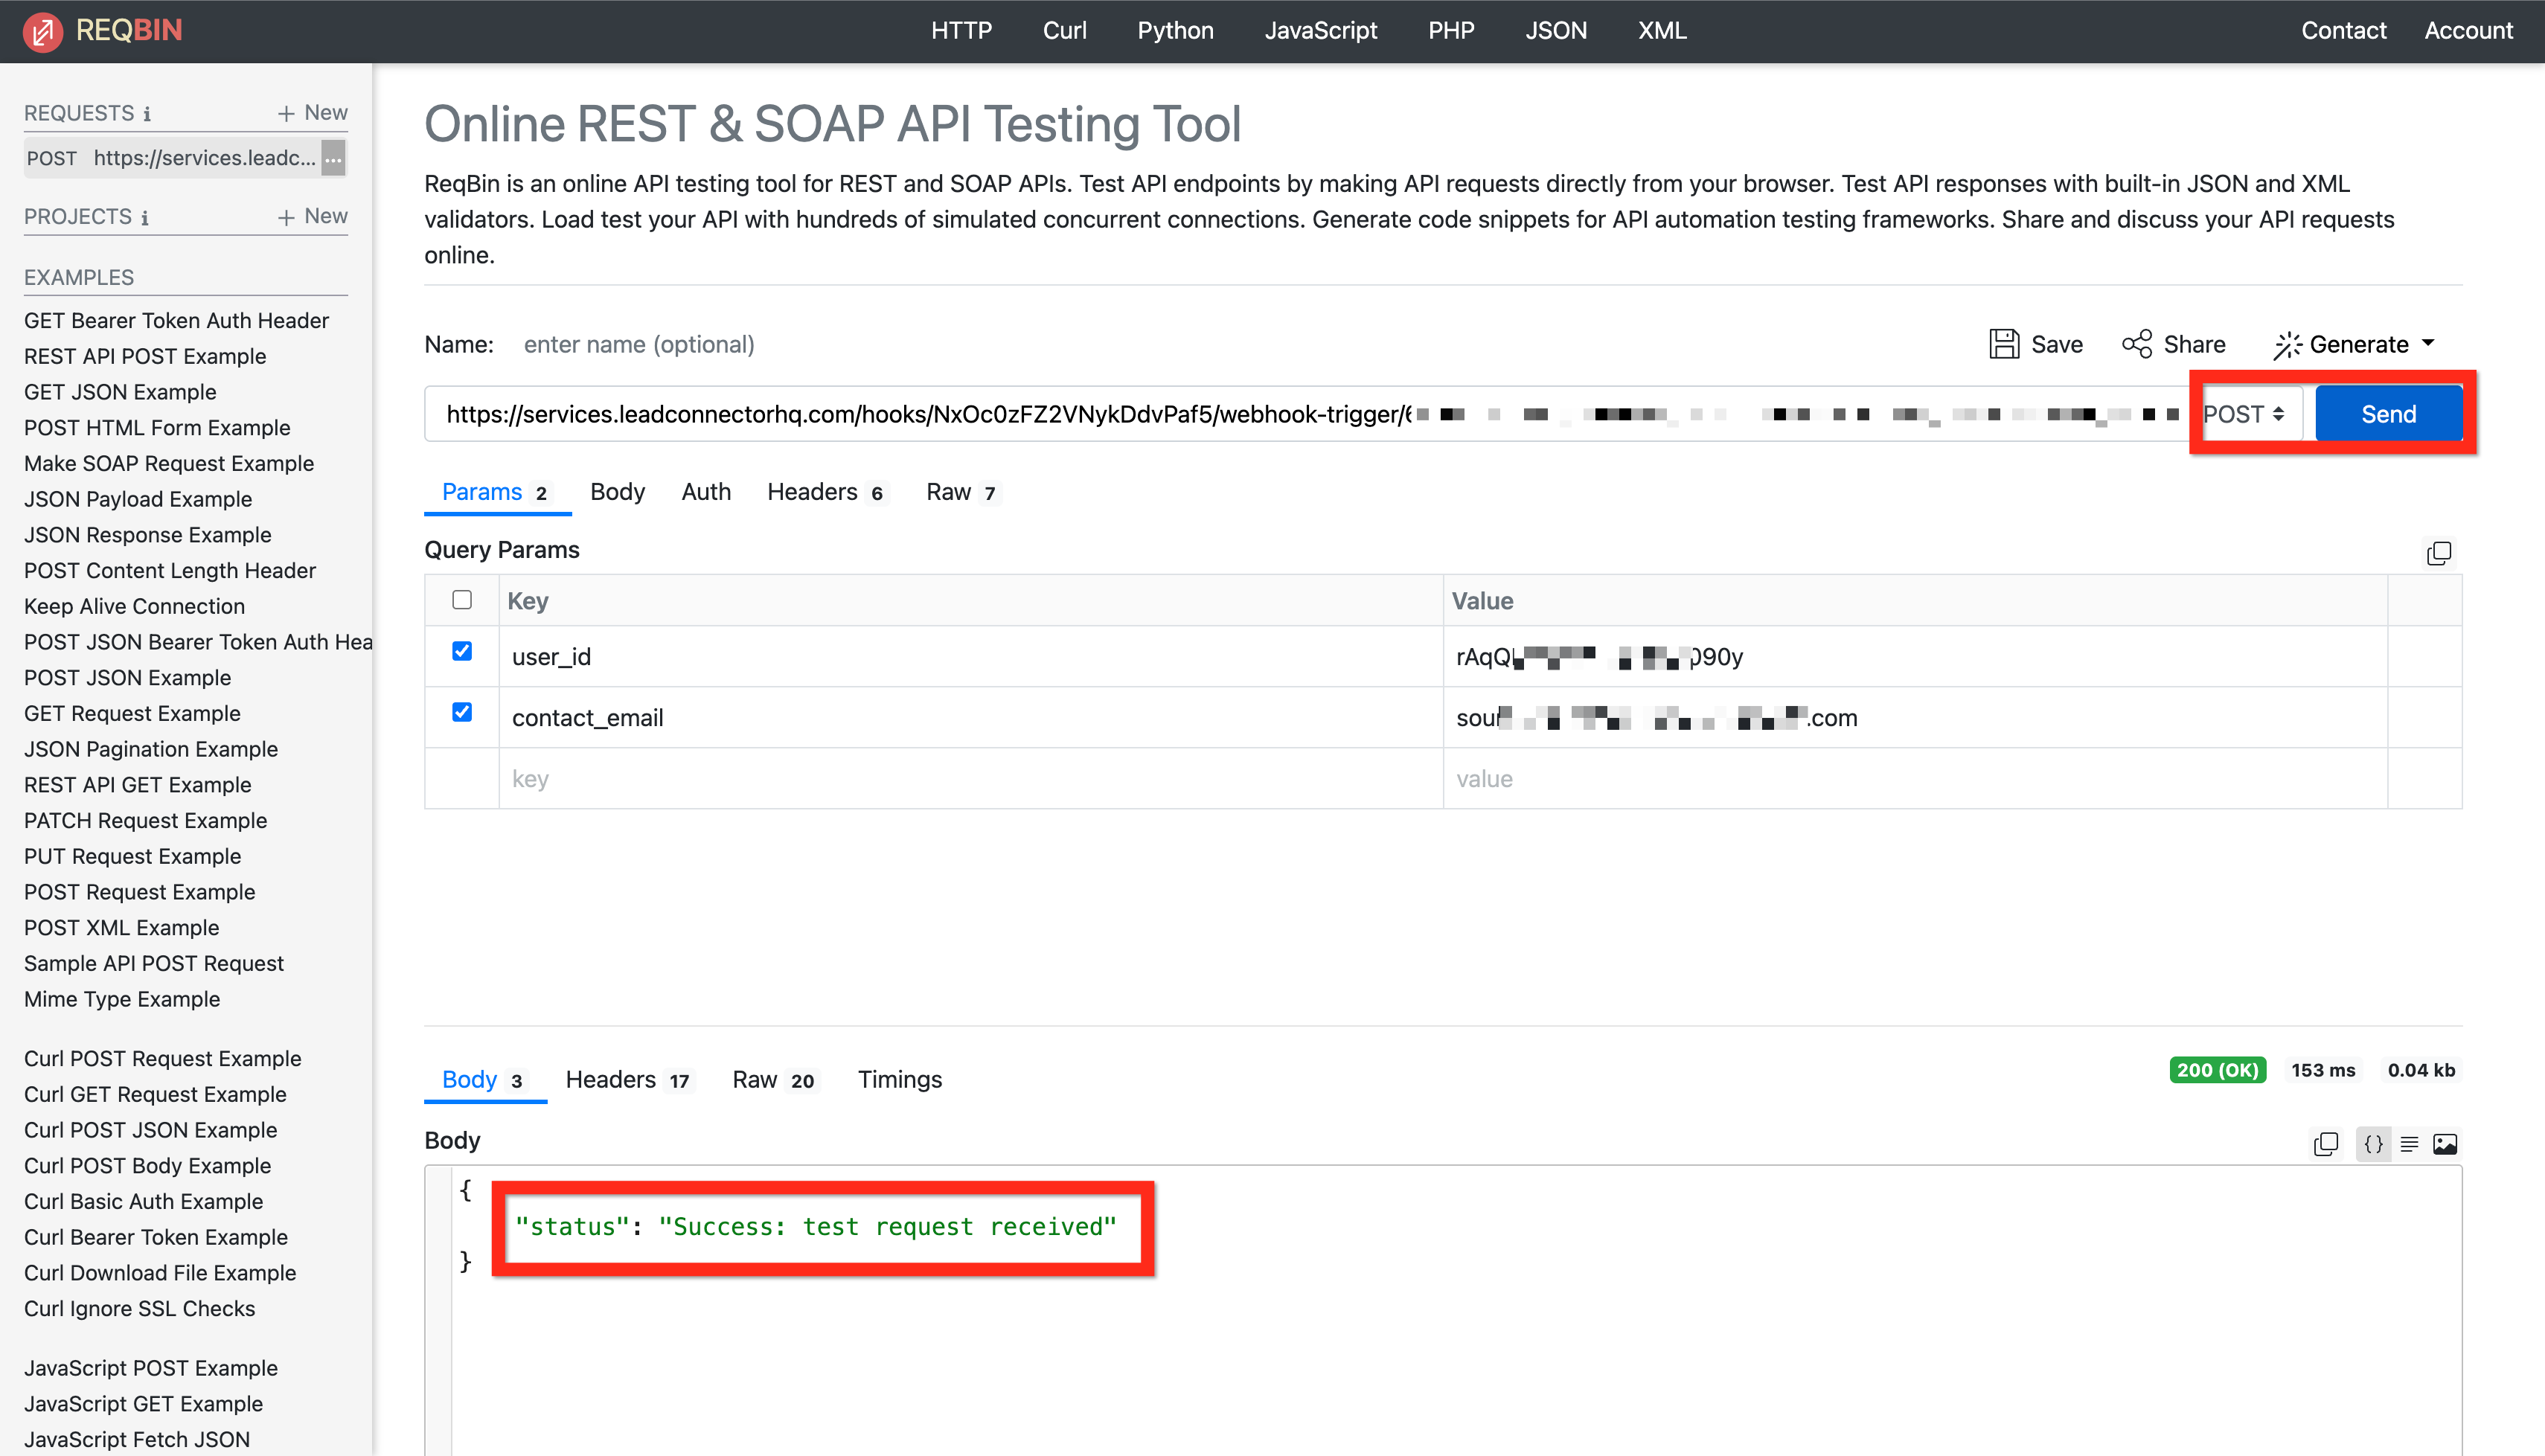
Step 3: Configure Inbound Webhook Trigger
Return to the Inbound Webhook Trigger, find the successful request, check the parameter mapping, and save the trigger. Now the webhook trigger and its parameters will be available in later steps of your automation.
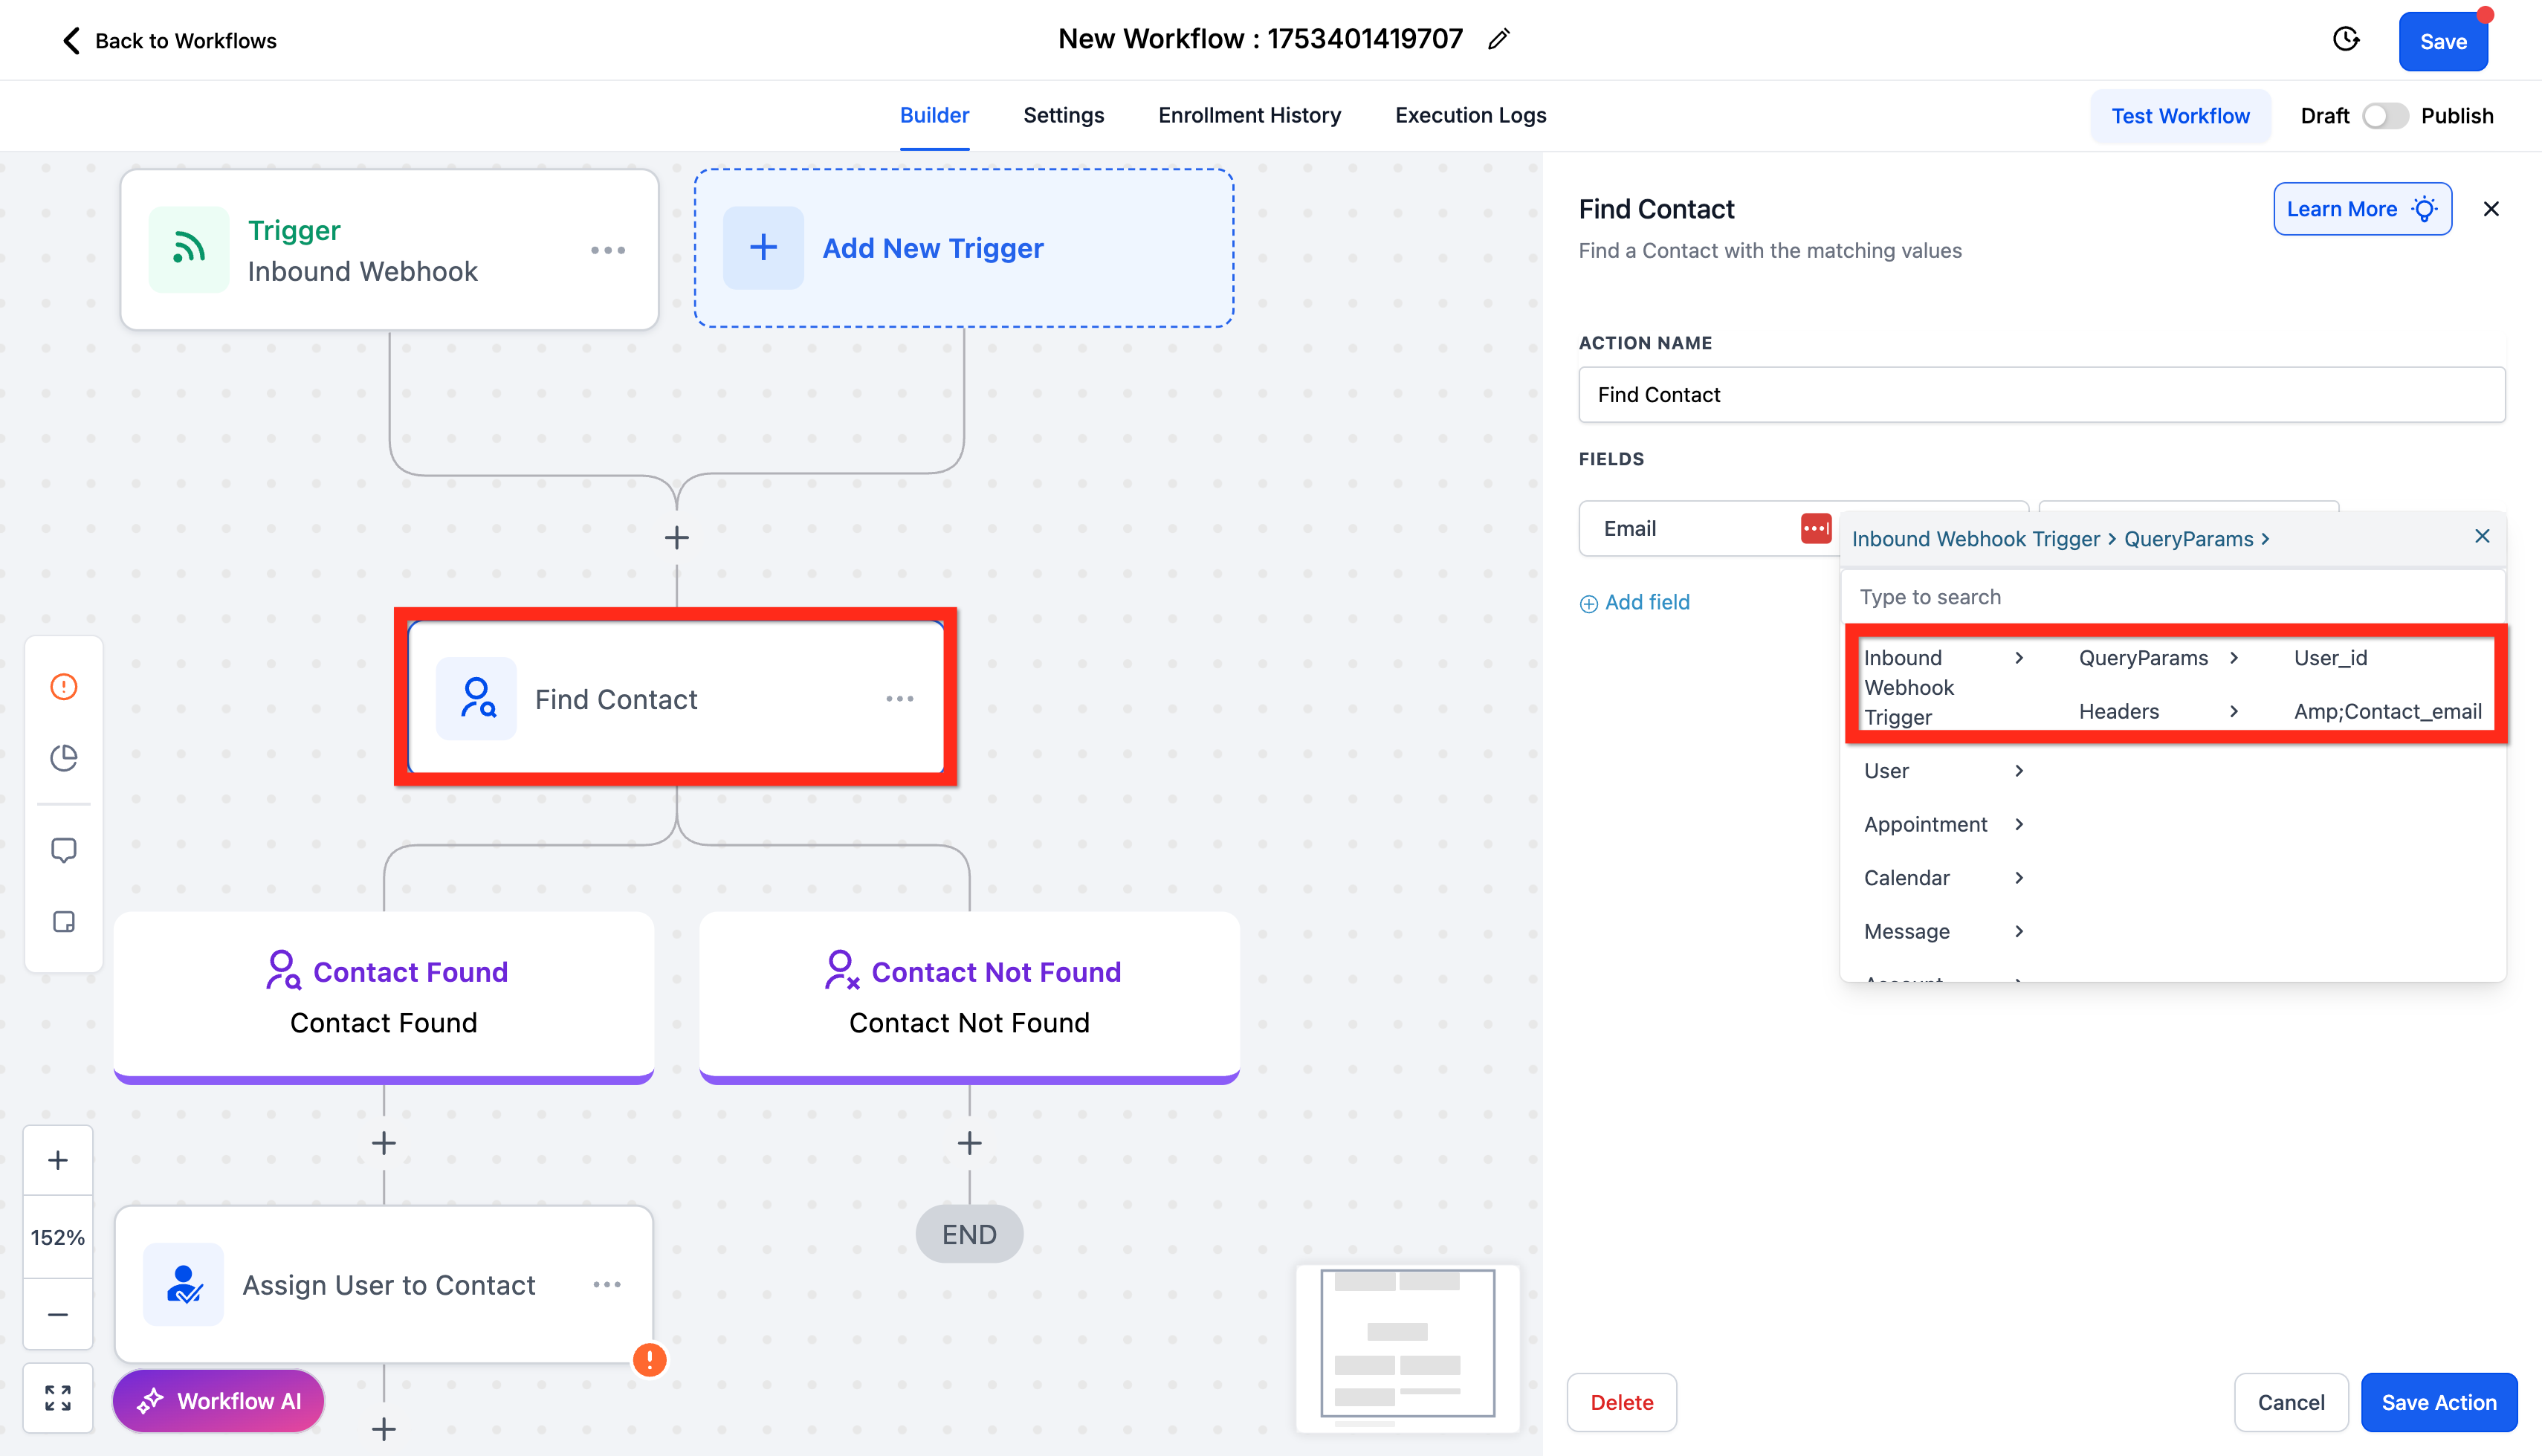
Step 4: Configure Find Parent/Family Action
Edit the Find Parent/Family Action by selecting the User > Email field and mapping it to the Inbound Webhook > QueryParams > contact_email field.
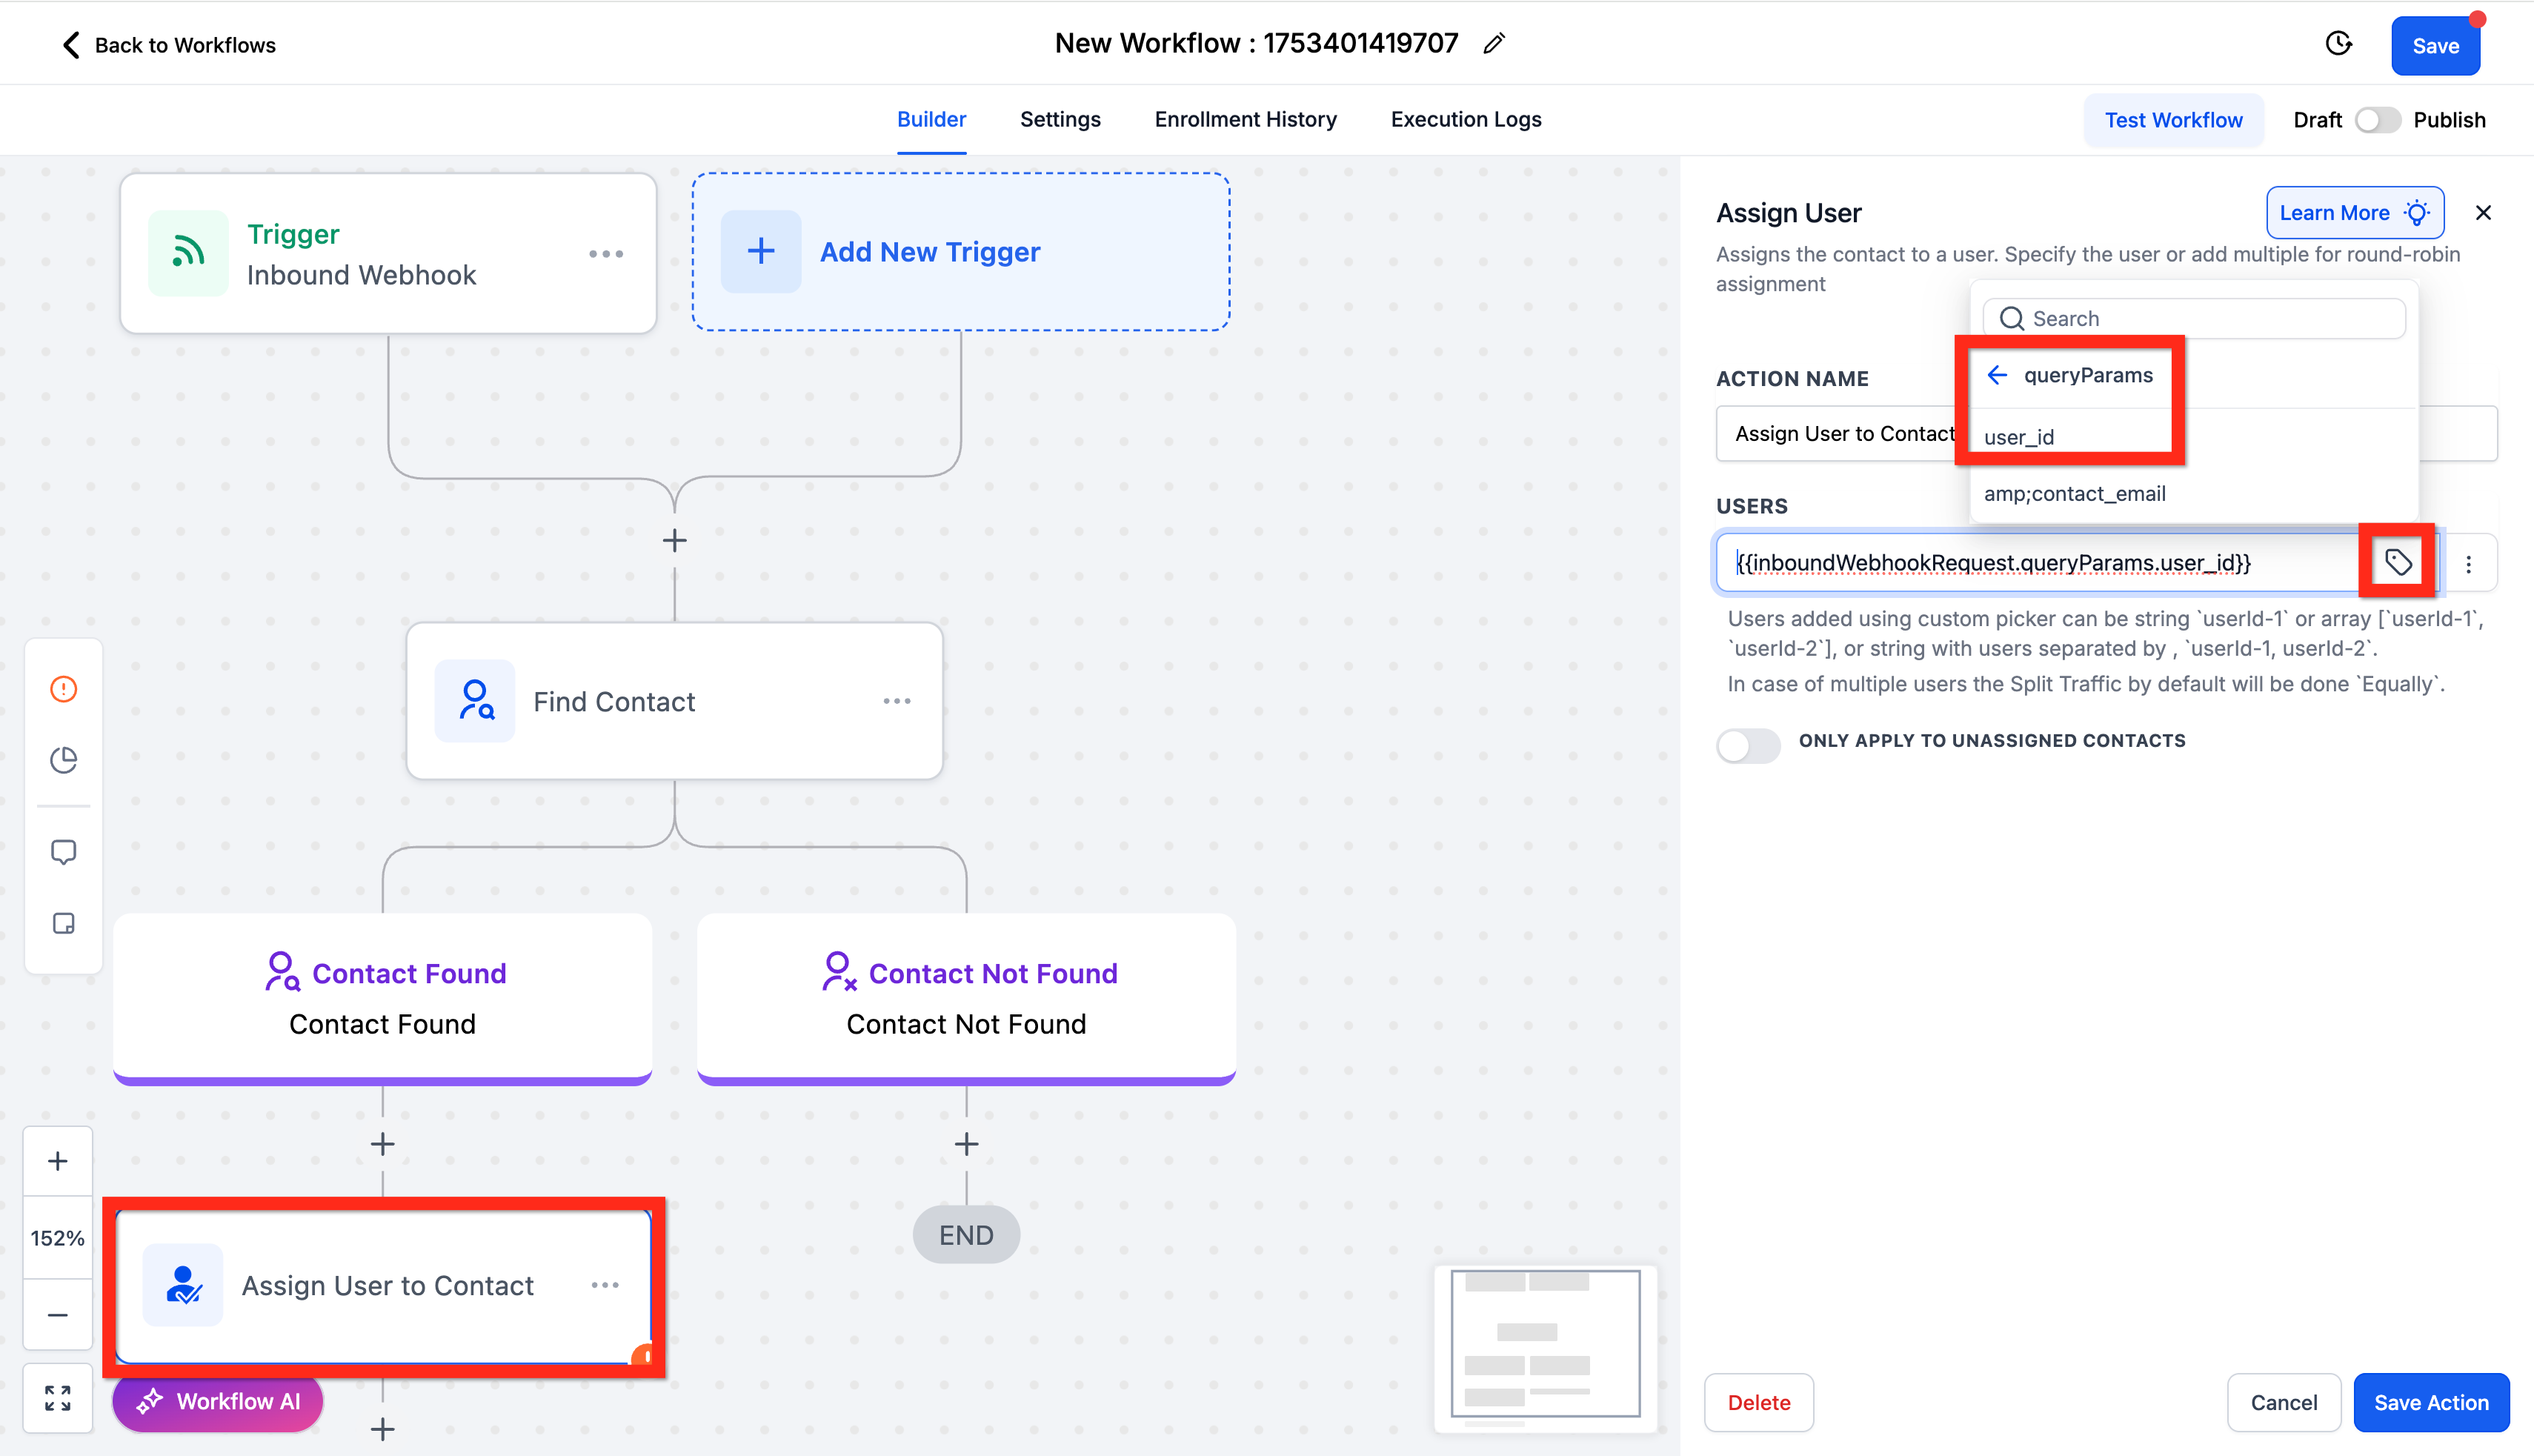
Step 5: Configure Assign User Action
Edit the Assign User Action by switching from Standard to Dynamic. Then in the custom field picker, select the Inbound Webhook Trigger > QueryParams > user_id field.
Step 6: Test & Save
Test your automation with different scenarios to make sure assignments work correctly. When you're satisfied, save your automation and publish it when you're ready to go live.
Frequently Asked Questions
What is the purpose of the "Assign to User" action in an automation?
The "Assign to User" action automatically assigns families to specific staff members, ensuring your team's workload is distributed fairly and everyone knows who's responsible for each family.
What happens if I select only one user in the "Assign to User" action?
All families will be assigned to that single staff member. This is useful when one person handles all enrollment inquiries or tour requests at your center.
Can I change how families are distributed among multiple staff members?
Yes. You can distribute equally (round-robin) or unevenly based on each staff member's capacity. For example, your full-time enrollment coordinator can receive more assignments than your part-time coordinator.
What happens if a family is already assigned to someone?
If "Only Apply to Unassigned Families" is enabled, the automation will skip families who already have a staff member assigned. If it's disabled, the automation will reassign the family to a new staff member.
When should I use Dynamic user assignment?
Dynamic assignment is for advanced scenarios where complex assignment logic runs outside Enrollio. Most centers should use the Standard user picker, which shows your staff members in a simple dropdown menu.
Can I assign families based on their program interest or location?
Yes. Use filters or conditions earlier in your automation to route families to different "Assign to User" actions based on their program interest, location, tour preferences, or any other criteria you collect.
How do staff members know when they've been assigned a new family?
When a family is assigned to a staff member, they become the owner of that parent/family record in Enrollio. You can set up notification automations to alert staff members when they receive new assignments.