
Overview
The "Add to Notes" action lets you automatically insert specific notes into a parent or family's record. This keeps important details organized and accessible for your team — whether it's tour preferences, enrollment requests, or follow-up reminders.
Action Name
Add to Notes
Action Description
This action adds custom notes to a family's record automatically when triggered. Use it to document anything important: special requests from parents, tour outcomes, enrollment status changes, or personal details that help personalize future interactions.
You can include dynamic information using the custom value picker (like family name, child's age, or tour date). Notes appear in the family's record under the "Notes" section where your entire team can see them.
Setting Up the Action
Follow these steps to add the "Add to Notes" action to your automation:
- Choose the Action Type: Select "Add to Notes" from the list of available actions.
- Name Your Action: Give it a clear name like "Log Tour Details" or "Note Enrollment Request."
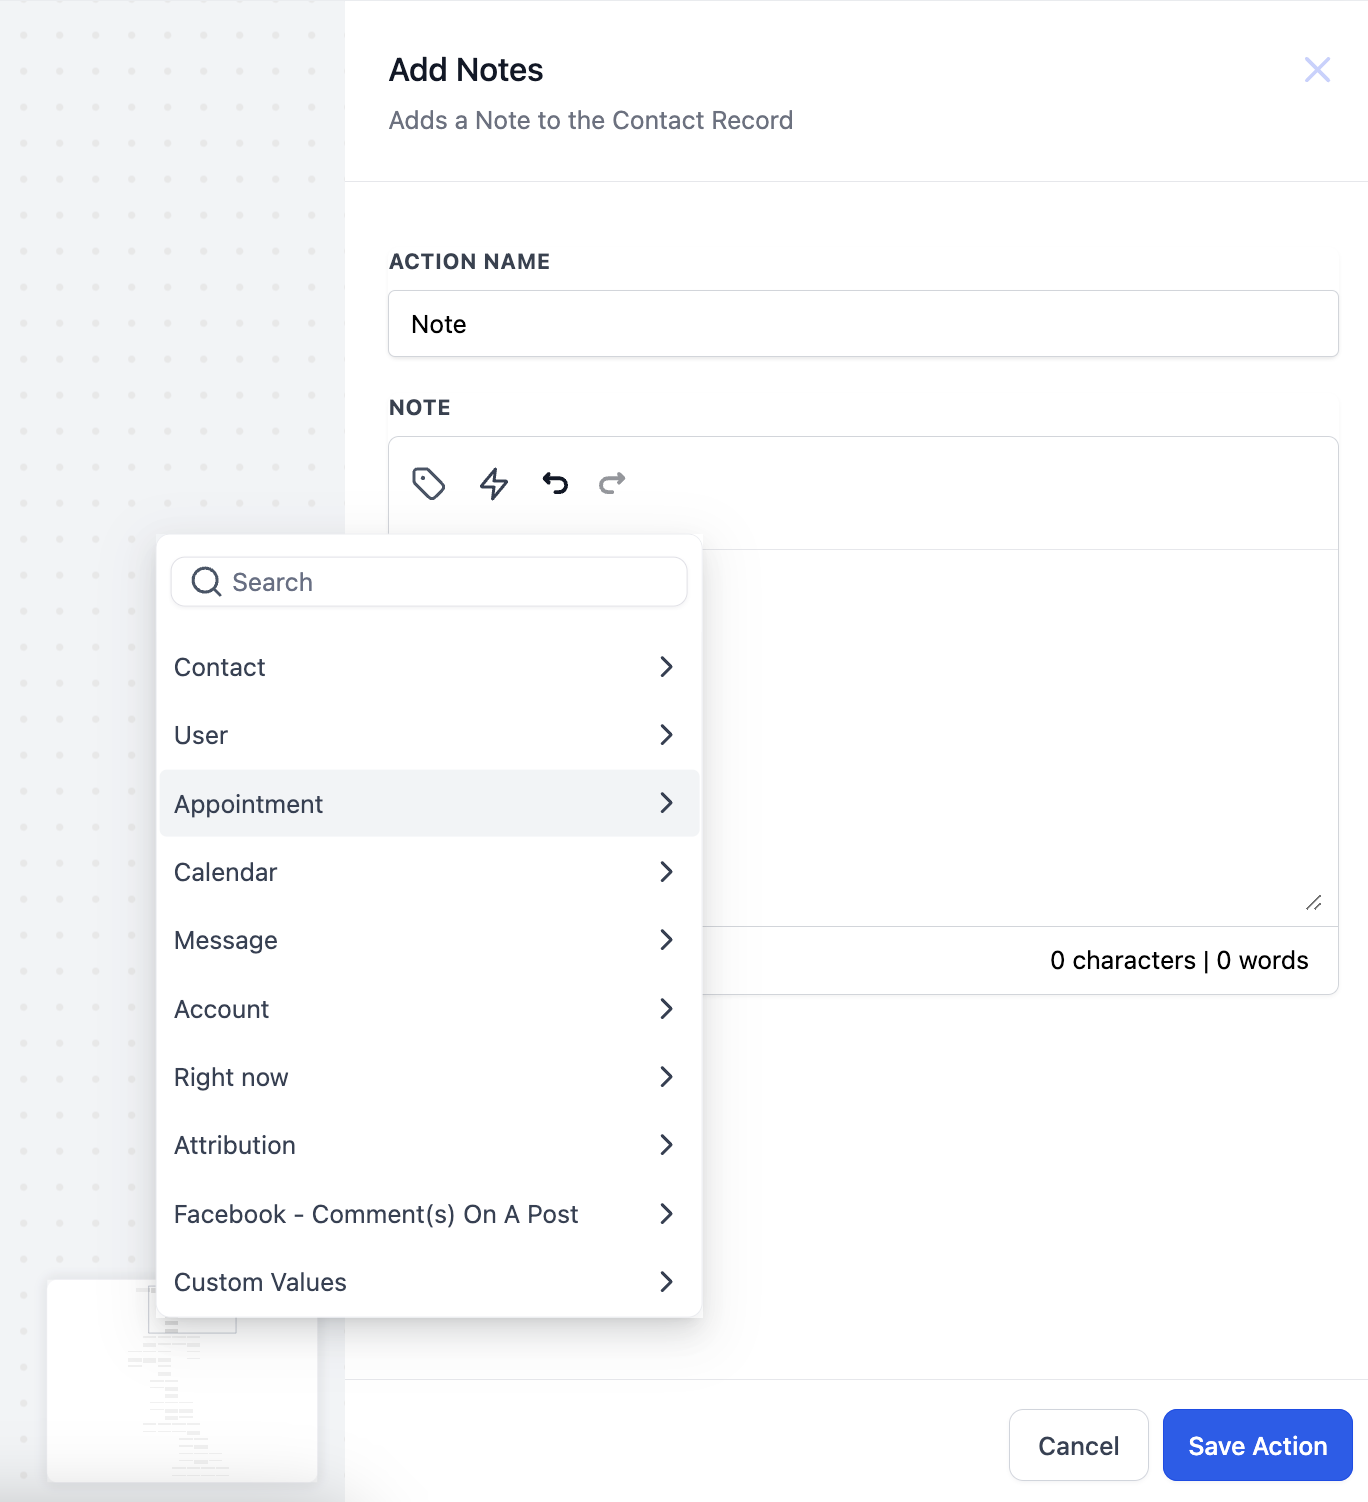
- Write Your Note: Type the note content in the text editor. Keep it clear and useful for your team.
- Add Custom Values: Click the custom value picker to insert dynamic information like {{family.name}}, {{child.age}}, or {{appointment.date}}.
- Use Trigger Links (Optional): Add trigger links using the "Trigger Links" icon if you want to create clickable actions within the note.
Rich Text Formatting
The Add to Notes action uses the same rich text editor available throughout Enrollio. You can format your notes with:
- Bold, italics, underline, and strikethrough
- Bulleted and numbered lists
- Hyperlinks
Example: Log Tour Bookings
Scenario
You want to automatically add a note when a parent books a tour, capturing key details about the appointment for your staff.
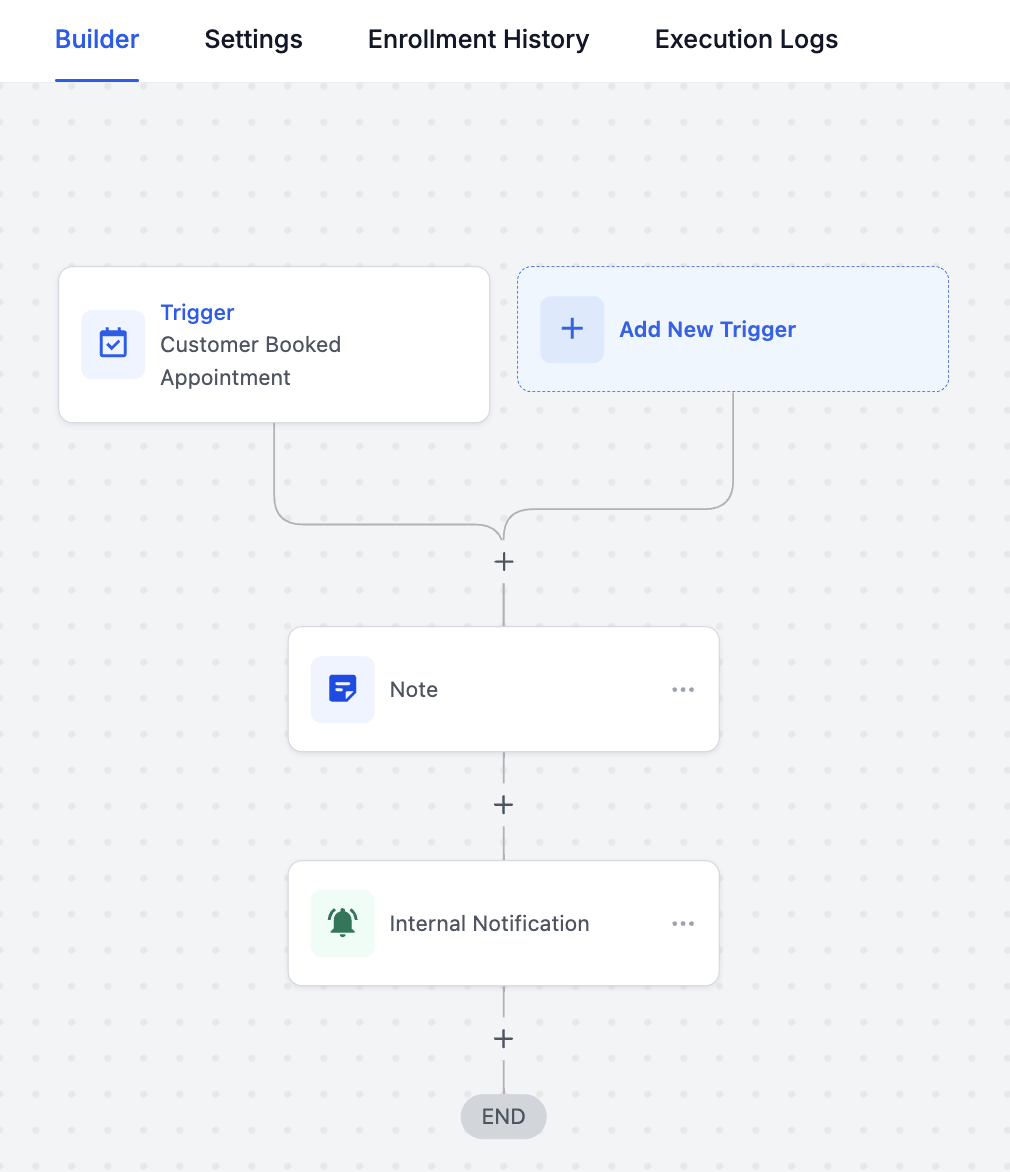
Automation Setup
Trigger: Appointment Booked
Actions:
- Add to Notes
- Send Internal Notification
How It Works
Step 1 - Trigger: When a parent books a tour appointment, they enter the automation.
Step 2 - Add to Notes: The automation adds a note like this:
Tour scheduled with {{family.name}} for {{appointment.date}} at {{appointment.time}}.
Child: {{child.name}}, Age: {{child.age}}
Requested program: {{custom_field.program_interest}}
Step 3 - Send Internal Notification: Your team receives a notification about the new tour booking.
Outcome
Every tour booking is automatically documented in the family's record. Your staff can review these notes before the tour to personalize the experience and address the family's specific needs.
Related Articles
- Automation Action - Create Parent/Family
- Automation Action - Find Parent/Family
- Automation Action - Update Family Field
- Automation Action - Add Family Tag
- Automation Action - Remove Family Tag