
The Add Parent Tag automation action lets you automatically organize and segment your families based on behaviors, enrollment stage, or tour activity. Using tags helps you keep your database organized, personalize your communications, and build smarter automations.
This article explains how the action works, how to set it up, and how to use it effectively in your automations.
What Is the Add Parent Tag Automation Action?
This action applies one or more tags to families automatically when they reach a specific step in your automation. Tags help you organize families, create segments, trigger additional automations, and track engagement.
For example, you might tag families who attend a tour, request sibling discounts, or complete your enrollment forms. Once tagged, you can send targeted messages, route them into different automations, or filter them in reports.
Key Benefits of Using Parent Tags
Tagging families automatically keeps your database organized and ensures your automations run smoothly. Here's how tags help:
- Segmentation: Group families by enrollment stage, tour attendance, program interest, or referral source
- Automation: Trigger follow-up sequences based on family behavior or actions
- Personalization: Send tailored messages based on what families have done or requested
- Organization: Keep your family records structured as your center grows
- Reporting: Filter families in lists and reports using tag-based criteria
Add Parent Tag Options
Understanding each setting ensures you apply the right tags without creating duplicates or misclassifying families.
Select Tags
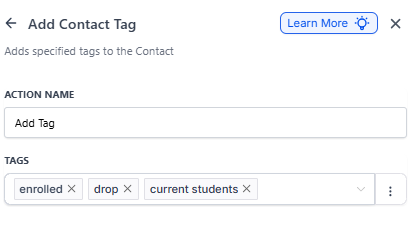
Choose one or multiple existing tags from the dropdown. You can search for tags by typing in the field. Selected tags appear as labeled items above the dropdown.
Delete Tags
Click the "x" icon to remove a tag from your action setup. This only removes the tag from this automation step—it doesn't remove tags from family records.
Add New Tag
If you need a tag that doesn't exist yet, type the new tag name in the dropdown field. Click Add New Tag to create it instantly. Your new tag becomes available immediately for other automations and manual tagging.
How to Set Up the Add Parent Tag Action
Follow these steps to add tags automatically in your automations:
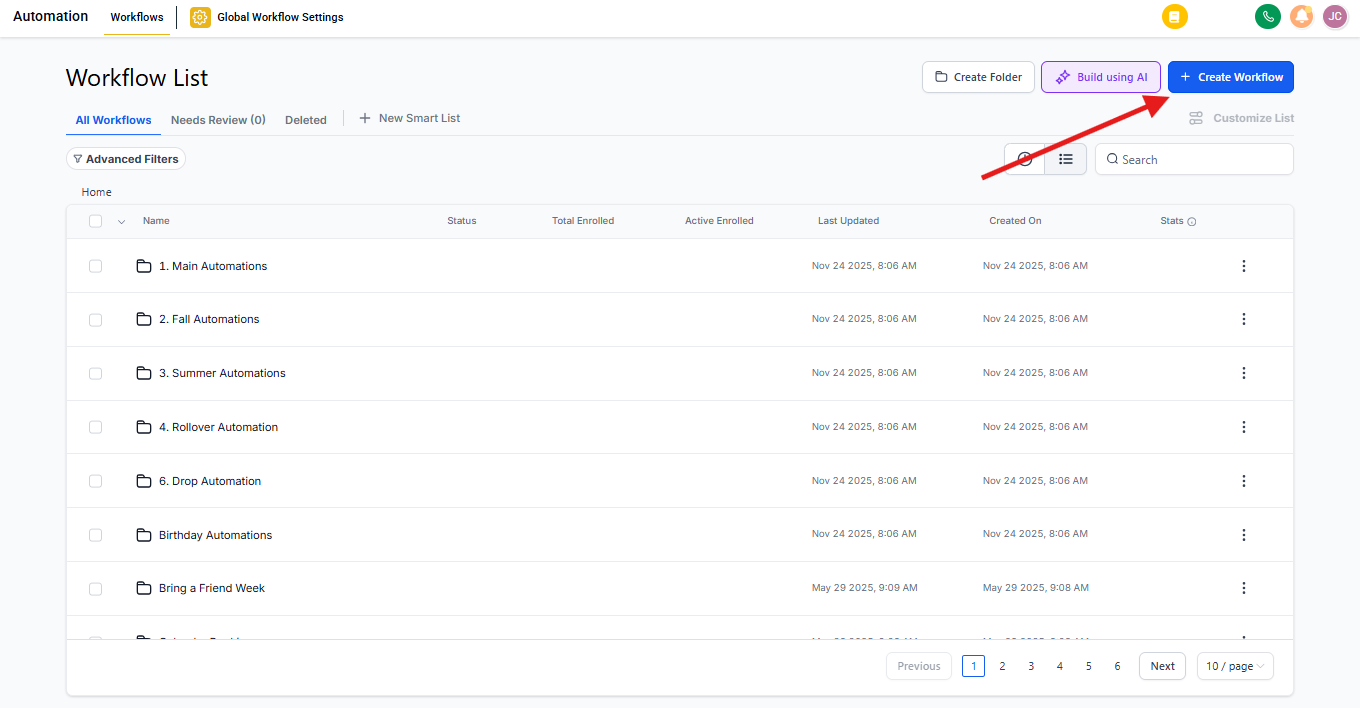
1. Create an Automation
Go to the Automations tab in your left menu. Click Create Automation in the upper-right corner to start building a new automation from scratch or choose a template.
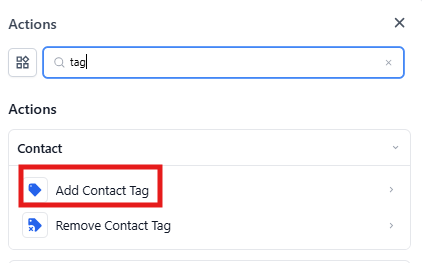
2. Select Add Parent Tag
In the automation builder, open the Actions panel. Scroll to the Parent/Family section and select Add Parent Tag.
3. Name the Action
Enter a clear, descriptive name in the Action Name field. Use names like "Tag as Tour Attended" or "Tag Sibling Enrollment" so you can quickly understand what each step does when reviewing your automation later.
4. Select a Tag
Use the Tags dropdown to choose an existing tag. You can select multiple tags if needed. To remove a selected tag, click the X next to it.
5. Create a New Tag (If Needed)
If the tag you need doesn't exist, type the new tag name into the field. Click Add New Tag to create it and add it to your action in one step.
6. Choose Tag Mode
Click the three-dot menu beside the Tags field to switch between Standard and Dynamic tagging modes. Standard mode applies tags exactly as you've selected them. Dynamic mode generates tags based on automation data like enrollment dates or program names.
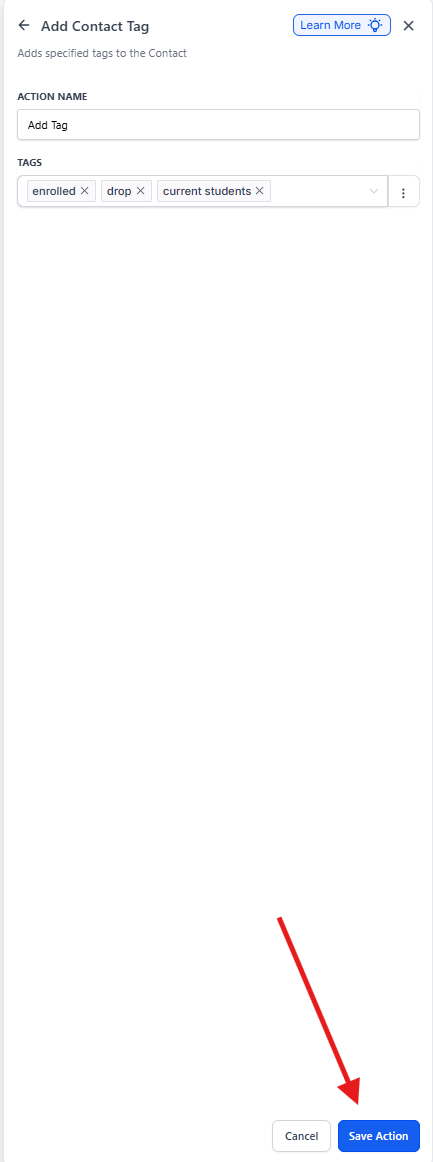
7. Save the Action
Click Save Action to finalize your settings. The selected tags will now be applied automatically whenever a family reaches this step in your automation.
Frequently Asked Questions
Can I add multiple tags at once?
Yes. The Add Parent Tag action lets you select as many tags as you need in a single action.
Can I automatically add tags based on an enrollment opportunity's custom field value?
Yes. Use the Enrollment Opportunity Custom Field Changed trigger or add conditional logic in your automation to check the field value. Then apply the appropriate tag using the Add Parent Tag action.
Can I remove tags using this action?
No. To remove tags, use the Remove Parent Tag action instead.
Can anyone create new tags?
Tag creation depends on your user permissions in Enrollio. Check with your account administrator if you're unable to create new tags.
Are tags case-sensitive?
Yes. "Tour" and "tour" would be treated as separate tags. Keep this in mind when creating or selecting tags to avoid duplicates.
Will adding a tag trigger another automation?
Yes, if you have an automation that uses the Parent Tag Added trigger. This lets you chain automations together based on tag activity.
Can I use tags to segment my communications?
Absolutely. Tags are one of the primary ways to filter families for text messages, emails, and targeted campaigns.