
Overview
The Trigger Link Clicked trigger starts an automation whenever a parent or family member clicks a specific tracking link you've created. This lets you follow up automatically based on what interests them most — whether it's a tour signup link, a tuition guide download, or a special promotion.
Use this trigger to send personalized follow-ups, tag engaged families, or move them through your enrollment process based on the links they click.
Trigger Name
Trigger Link Clicked
How It Works
This trigger activates when a parent clicks on a specific trigger link you've set up. You can use these links in emails, text messages, or anywhere you communicate with families.
Only the parents who click the exact link you specify will enter the automation — making this perfect for targeted follow-up based on their interests.
How to Configure
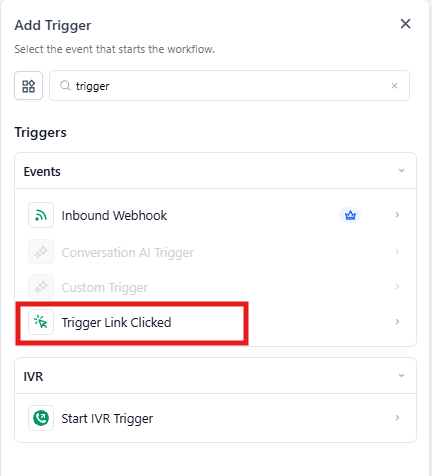
- Choose Your Trigger: When creating a new automation, select Trigger Link Clicked from the list of available triggers.
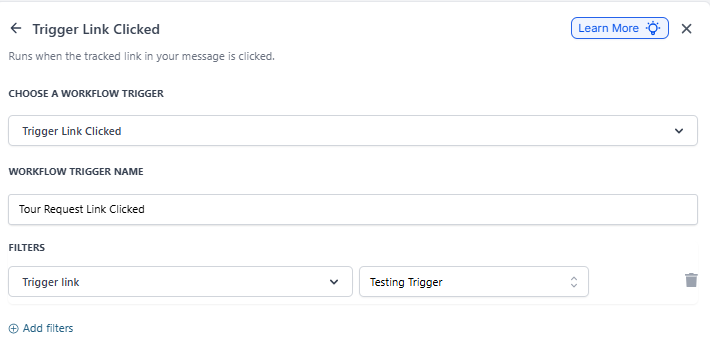
- Name Your Trigger: Enter a descriptive name that tells you what this trigger does, like "Tour Request Link Clicked" or "Tuition Guide Download Link."
- Select Your Trigger Link: Use the dropdown menu to choose which specific trigger link will activate this automation. You must select a trigger link you've already created in Enrollio.
Required Settings
| Setting | Description | Required |
|---|---|---|
| Trigger Link | The specific tracking link that will activate this automation when clicked | Yes |
Example: Tour Interest Follow-Up
Let's say you send an email to prospective families with a link to schedule a tour. You want to automatically follow up with anyone who clicks that link.
Setup:
- Trigger Name: "Tour Scheduling Link Clicked"
- Trigger Link: "Schedule Your Tour" (select from dropdown)
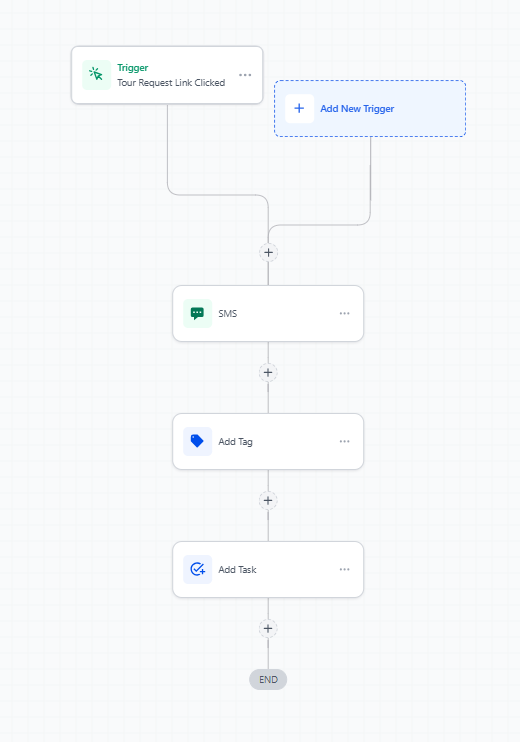
Automation Steps:
- Trigger: Trigger Link Clicked (configured as above)
- Action: Send Text Message — "Thanks for your interest! We can't wait to show you around. Reply if you have any questions before your visit."
- Action: Add Tag — Tag the family as "Tour Link Clicked" so you can segment them for future communications
- Action: Create Task — Remind your enrollment coordinator to prepare materials for the upcoming tour
Common Use Cases
- Tour Scheduling: Follow up when families click your tour booking link
- Tuition Inquiries: Send detailed pricing information to families who click your tuition guide link
- Program Information: Share age-specific details when parents click links about infant care, toddler programs, or after-school care
- Enrollment Applications: Send reminders and support to families who start but don't complete your enrollment form
- Special Promotions: Follow up with families who click on limited-time offers or sibling discounts
Related Articles
- Trigger Links - Overview
- Automation Actions - Add/Remove Tags
- How to Create an Automation