
What are Automations?
At its core, an automation helps you complete repetitive tasks in your childcare center. You set it up once and it runs automatically—no action required from you or your staff. This saves massive amounts of time and lets you focus on caring for families instead of managing administrative tasks.
In more formal terms, an automation is a series of tasks triggered by a specific event. For example, when a parent submits a tour request form, you can automatically send a confirmation text, notify your enrollment coordinator, and add the family to your tour follow-up sequence. All of this happens instantly without lifting a finger!
Every automation has two main parts: Triggers and Actions.
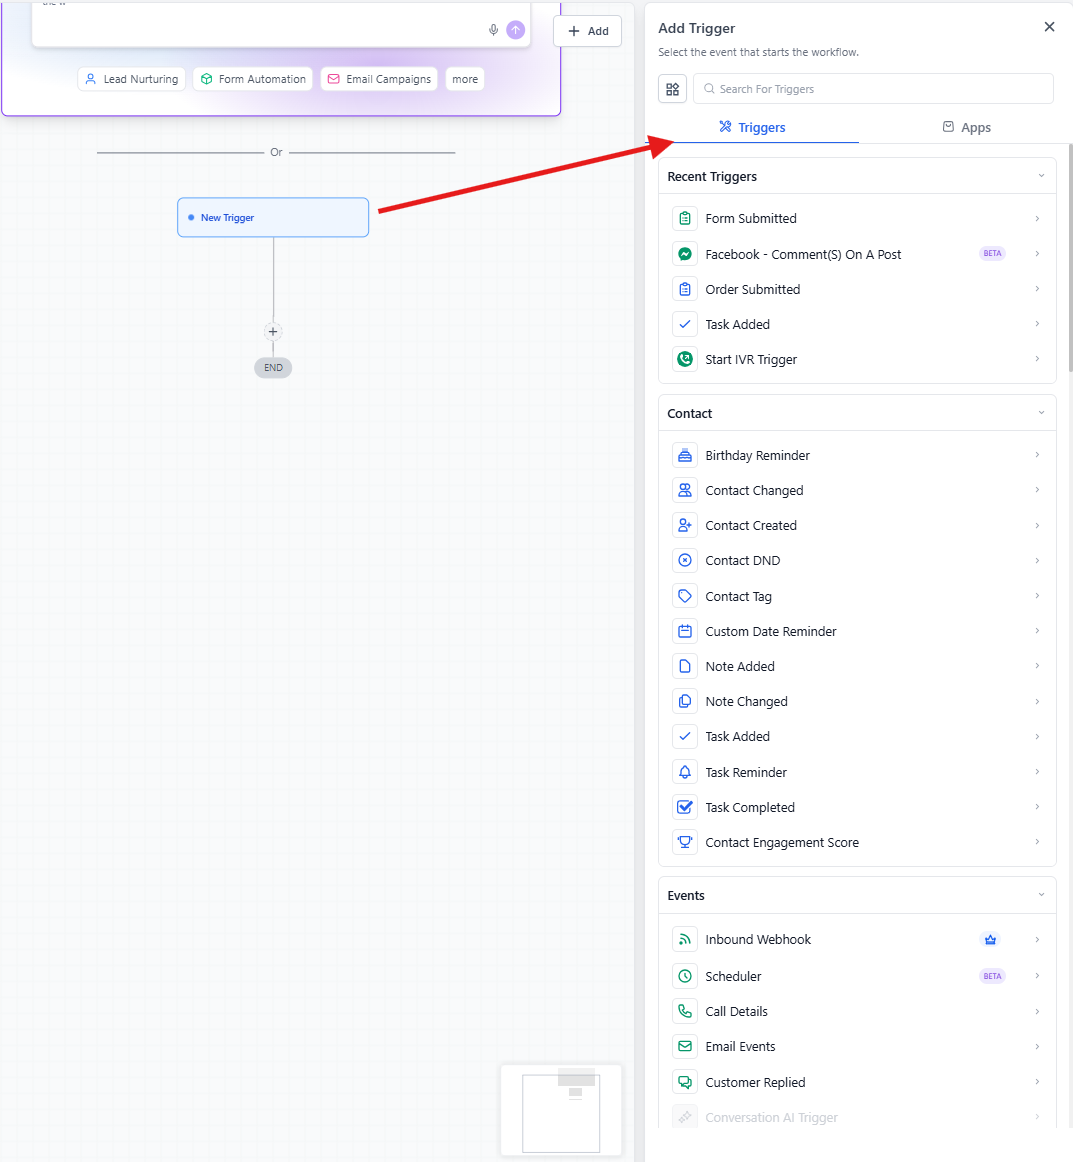
Triggers
This is the event that starts your automation. The trigger is the circumstance (or set of circumstances) that needs to happen before any actions take place.
Example: Add a family to an automation when they book a tour on your calendar. Or start an automation when a parent completes an enrollment form.
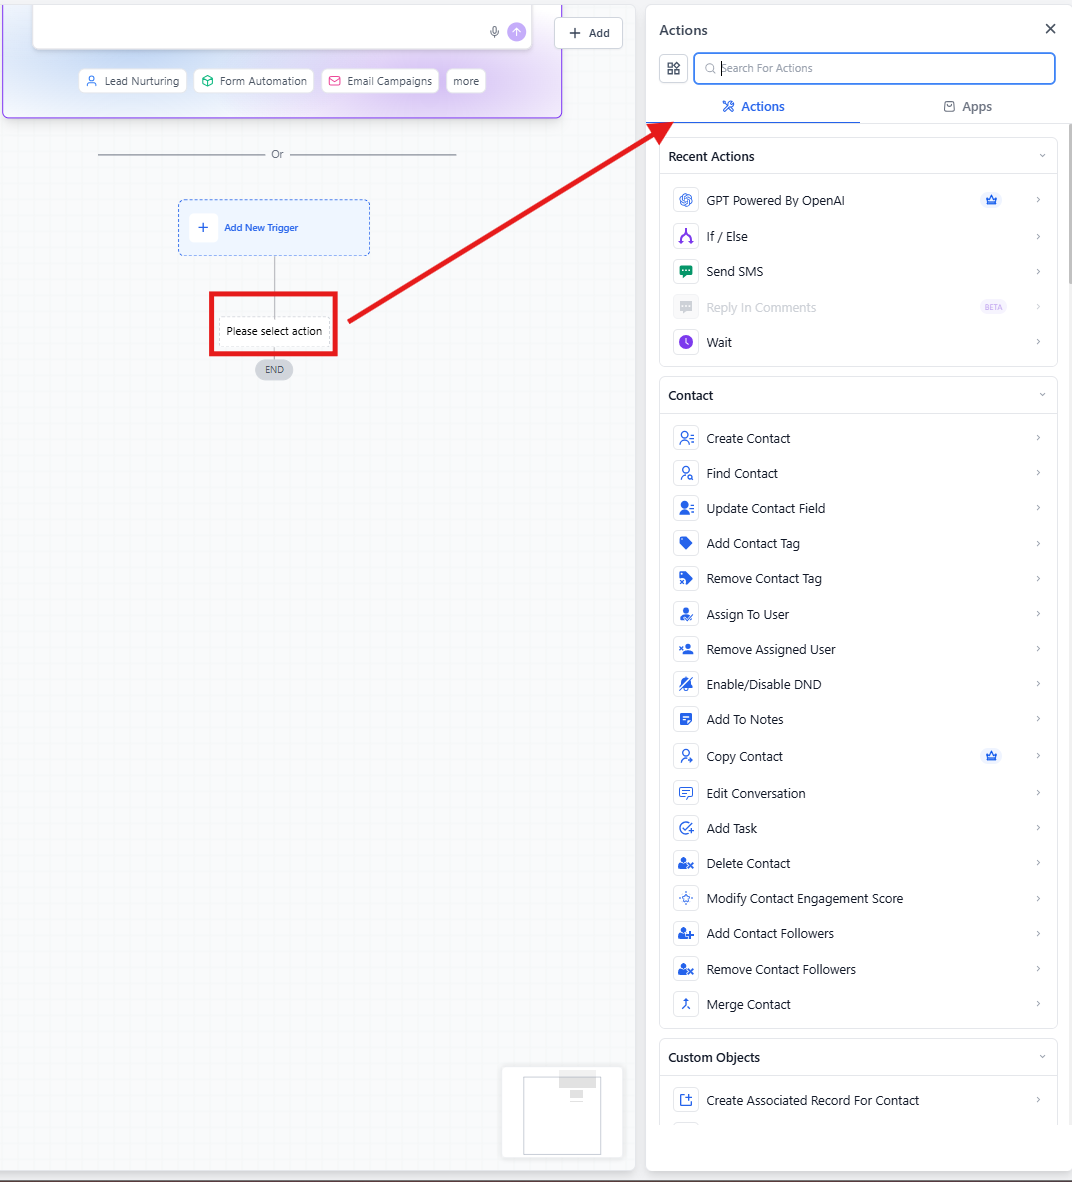
Actions
Actions happen after a family is added to an automation via a trigger. These are the steps Enrollio will execute automatically once the trigger fires.
Example: After a parent fills out a tour request form, send them a confirmation email with directions to your center and what to expect. Then notify your staff via text that a new tour is scheduled.
In summary: automations save you time by handling repetitive tasks automatically. A triggering event begins a sequence of actions that follow without any manual work from your team.
Tasks Worth Automating
What should you automate in your childcare center? The simple answer: anything repetitive or repeatable.
Automations work faster than manual processes and, once set up properly, make almost no mistakes. Here are examples of tasks worth automating:
- Tour Follow-Ups: Send automatic reminder texts before scheduled tours and follow-up emails afterward asking for feedback.
- Enrollment Nurturing: Create email sequences that educate prospective families about your program, answer common questions, and guide them toward enrollment.
- Waitlist Management: Automatically notify families when spots open up in their desired classroom.
- Parent Communications: Send welcome sequences to new families with onboarding information, required forms, and first-day preparation tips.
- Payment Reminders: Automatically remind parents about upcoming or overdue tuition payments.
- Staff Notifications: Alert your team when new tour requests come in, enrollment applications are submitted, or families need immediate follow-up.
- Feedback Surveys: Automatically send parent satisfaction surveys after tours or at key points during enrollment.
- Birthday Messages: Send personalized birthday wishes to enrolled children automatically.
- Re-enrollment Campaigns: Remind current families to commit for the next school year with automated reminders.
These automations free up your time to focus on what matters most: providing excellent care and building relationships with families.
Automation Recipes: Pre-Built Templates
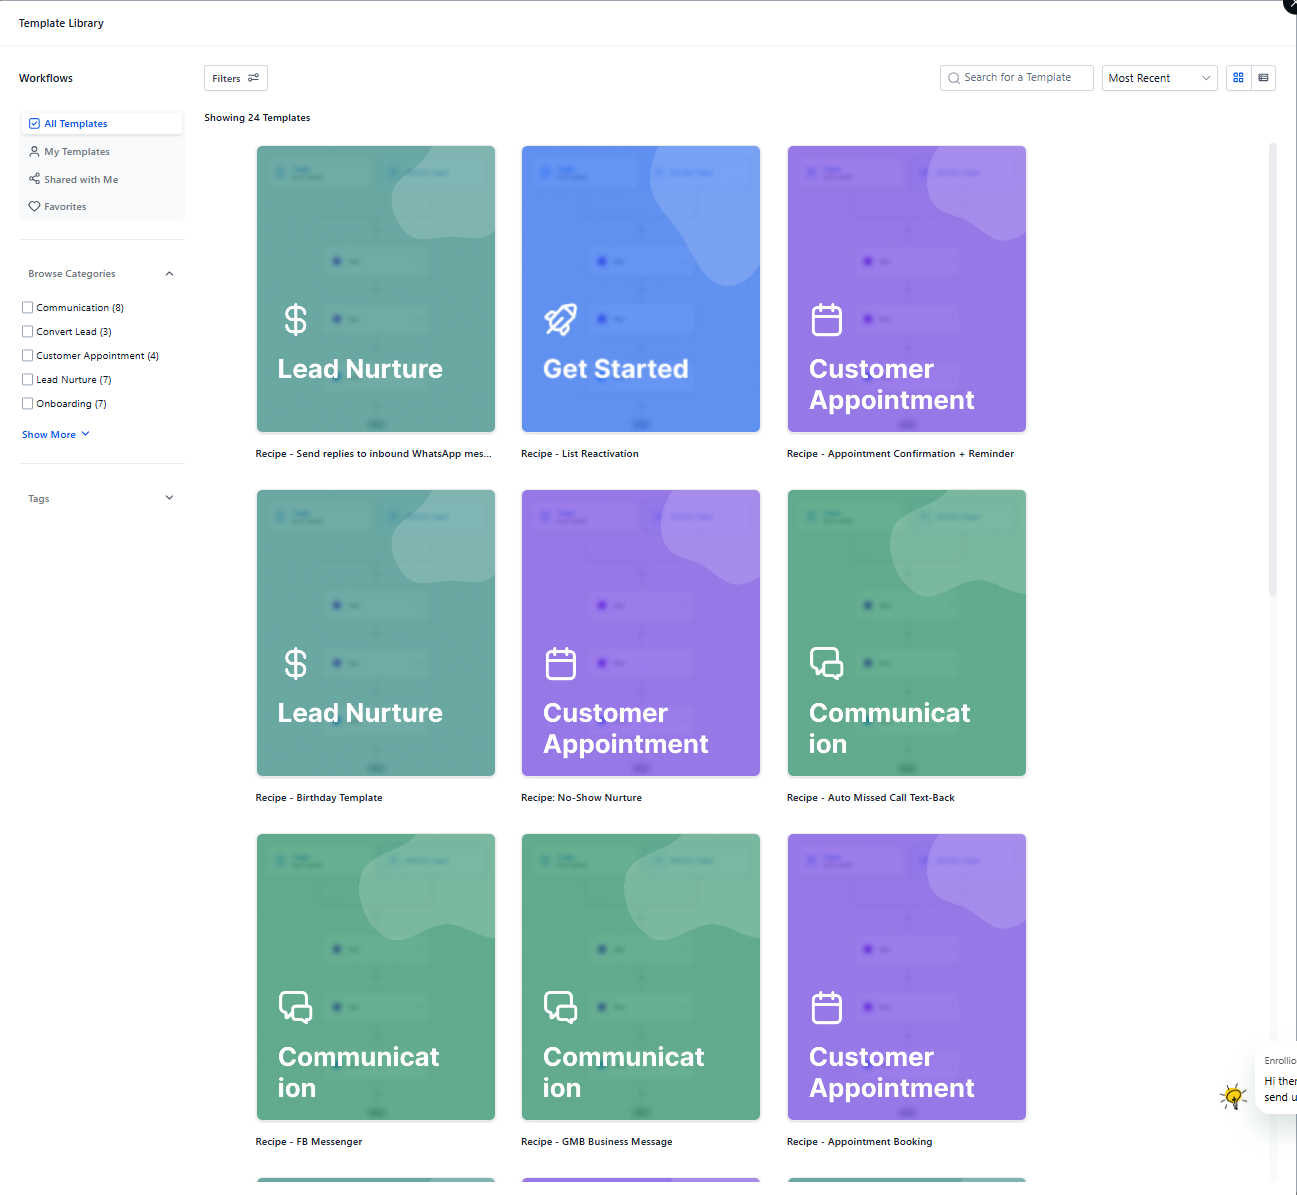
Did you know Enrollio includes pre-built automations ready for you to customize and use? These templates save you time and show you the most common ways childcare centers use automation.
To access recipes, create a new automation and select "Recipes" when prompted. We recommend starting with a recipe and editing it to fit your needs—this is especially helpful if you're new to automations.
How to Create an Automation
There are three steps to creating an automation in Enrollio:
- Choose a Trigger
- Add Trigger Filters (Optional)
- Add Actions
Let's walk through each step together.
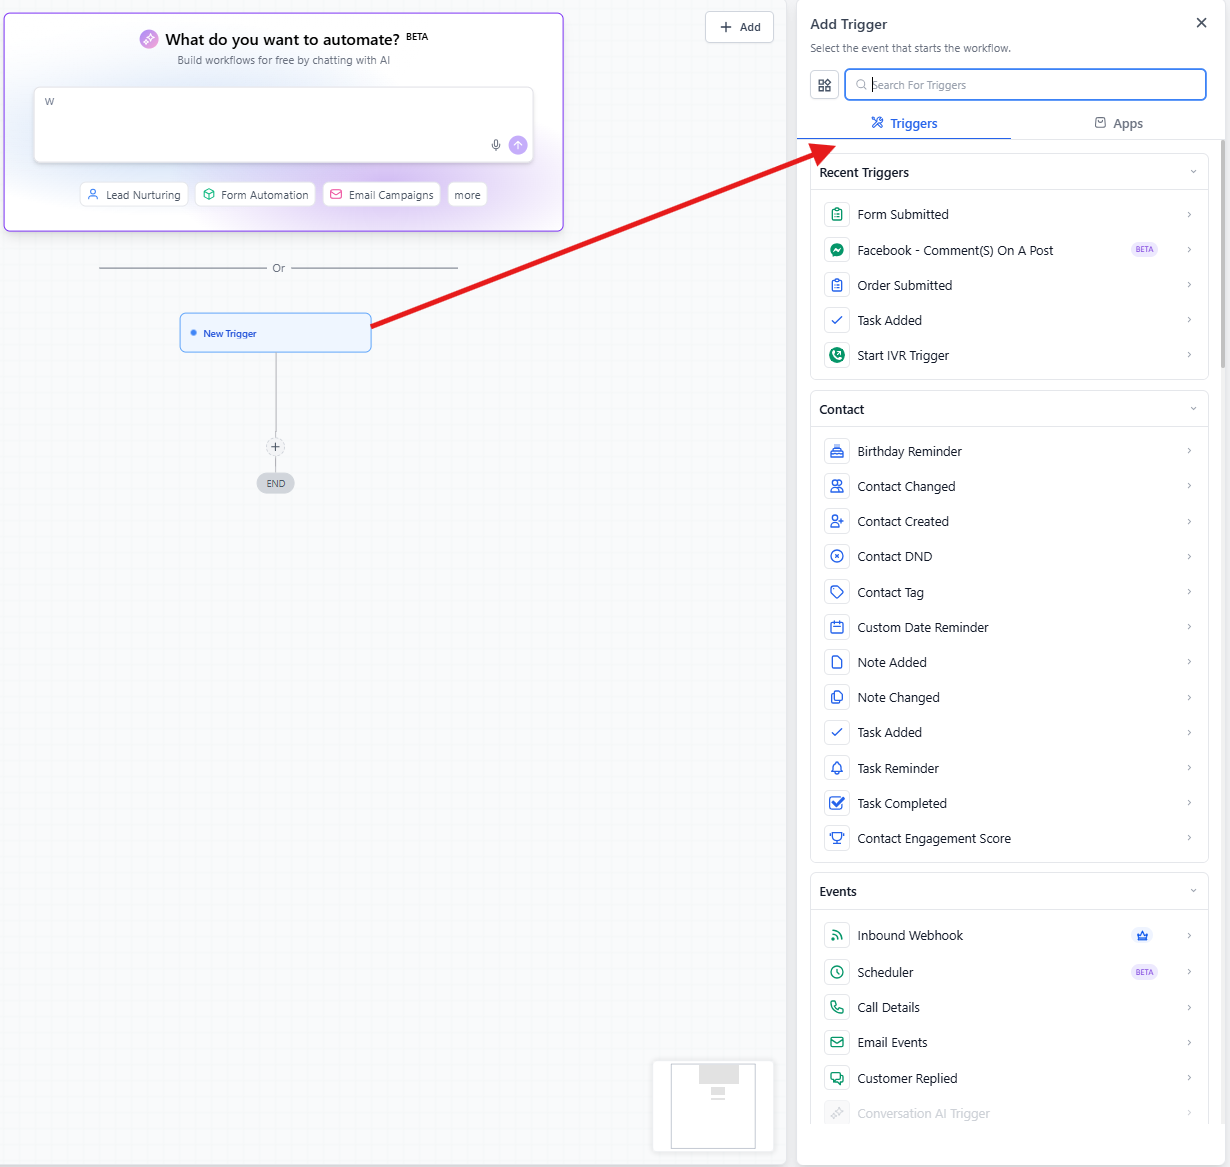
Step 1: Choose a Trigger
Triggers add families to your automation. The type of trigger you choose determines when the automation starts.
In the automation builder, click "Add Trigger." A menu will appear with available triggers. Select the one that fits your needs.
You can add multiple triggers to the same automation, bringing families in from different sources—like both tour bookings and form submissions.
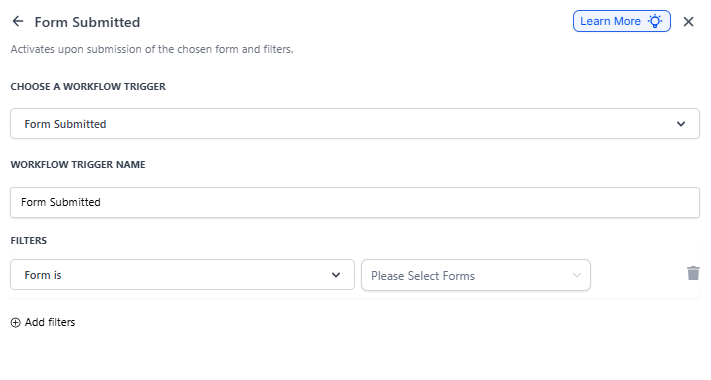
Step 2: Add Trigger Filters (Optional)
After selecting your trigger, you can add filters to make it more specific. Filters let you add additional conditions that must be met before the automation runs.
Example: Let's say you have a trigger for "Form Submitted." Without a filter, this would run for ANY form submission. But you only want it to trigger for tour request forms specifically. Add a filter to specify which form should trigger the automation.
Step 3: Add Actions
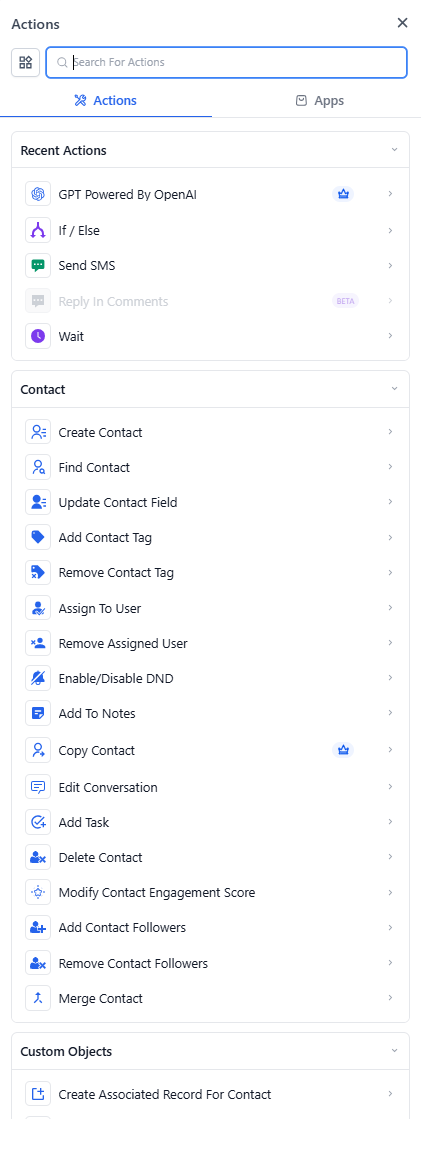
Actions are what your automation actually does after a family is added. You can send messages, update information, create tasks for your team, and much more.
Click "Add Action" to open the action menu with all available options. Select the actions you want to perform in the order you want them to happen.
That's it! You have a trigger, optional filters, and actions. This is your foundation for automation in Enrollio.
Types of Advanced Automations
As you get comfortable with basic automations, you'll discover you can accomplish almost anything. Here are some advanced techniques to take your automations to the next level:
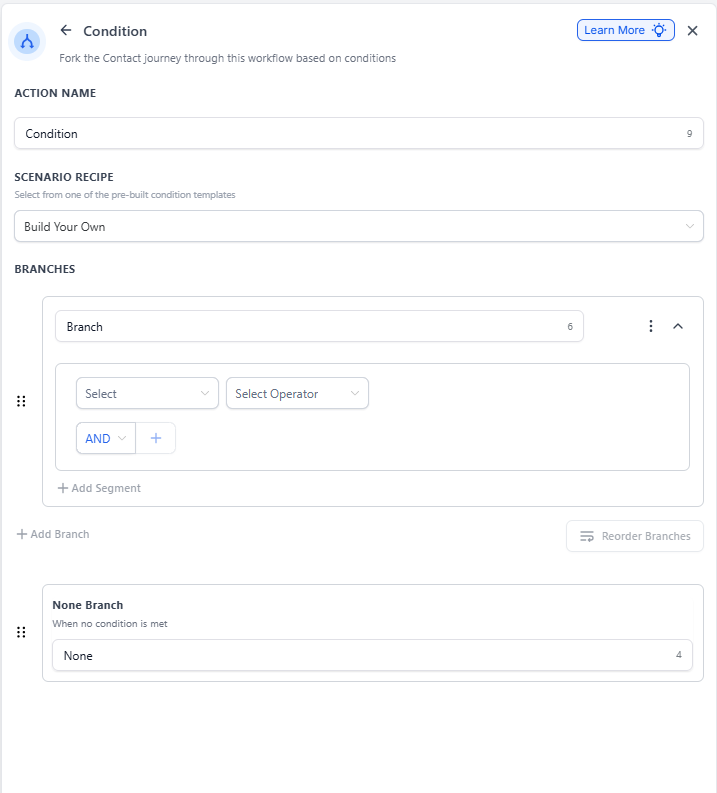
IF/Else Conditions
Use conditional logic to create different paths in your automation based on specific criteria. For example, send different follow-up messages to parents who toured on weekdays versus weekends, or route families to different staff members based on which classroom they're interested in.
Wait Steps
Add delays between actions to space out your communications naturally. Wait 2 days after a tour before sending a follow-up email. Wait 1 hour after a form submission before sending a reminder if they haven't responded.
Chaining Automations Together
Build complex sequences by having one automation add or remove tags that trigger other automations. This keeps individual automations simple while creating sophisticated multi-step processes.
Webhooks
Connect Enrollio to other systems you use by sending data to external platforms or receiving triggers from them. This is an advanced feature—reach out to support if you need help with webhook setup.
Troubleshooting
If your automation isn't working as expected, check these common issues:
- Trigger not firing: Make sure your trigger filters aren't too restrictive. Test with a broader filter first.
- Actions not executing: Verify the family was actually added to the automation by checking the automation history.
- Messages not sending: Confirm you have parent phone numbers and email addresses entered correctly.
- Timing seems off: Check your wait steps and make sure they're set to the correct duration.
Still stuck? Click the activity log icon in your automation to see exactly what happened when it ran.
Related Articles
- Automation Settings and Best Practices
- Complete List of Automation Triggers
- Complete List of Automation Actions
- Video: Automation Builder Walkthrough