
What's New with Google Sheets
We've upgraded the Google Sheets action in your automations. You can now create and update multiple spreadsheet rows at once — perfect for managing enrollment data, parent information, and staff records in bulk.
Create Multiple Spreadsheet Rows
Add new data rows to your spreadsheet automatically. Send parent contact information, enrollment details, or tour schedules directly from Enrollio to Google Sheets without third-party tools.
When to Use This
- Bulk import prospective family data into tracking sheets
- Export enrollment records to external reports
- Create batch records for new families or staff members
How to Set It Up
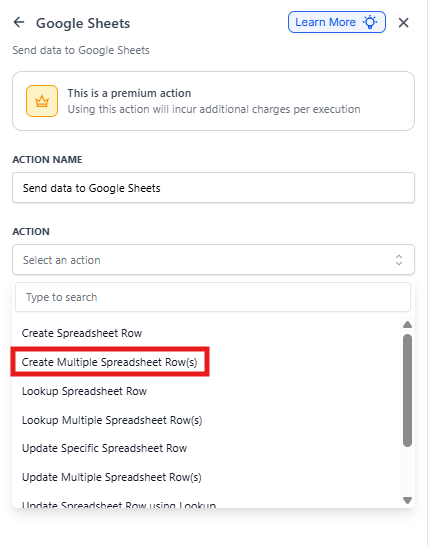
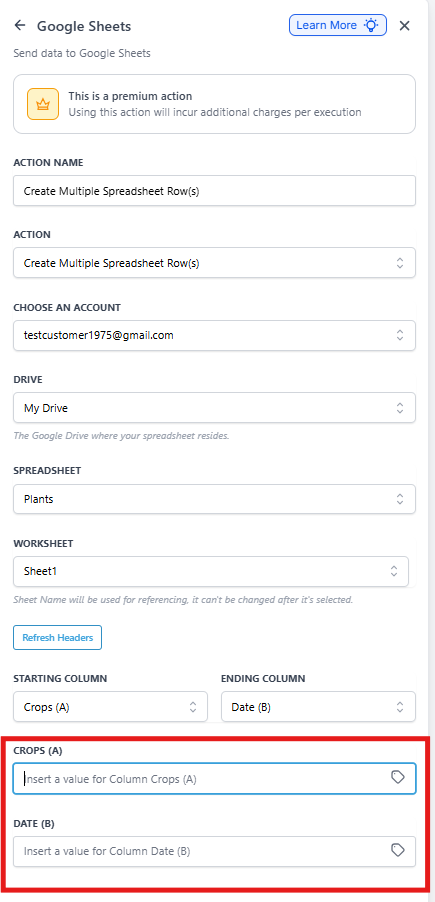
Step 1: In your automation, select Create Multiple Spreadsheet Rows from the Action dropdown.
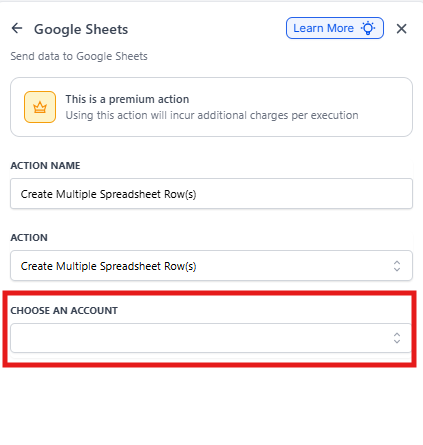
Step 2: Choose your Google account from the dropdown. All Google accounts you've connected to your Enrollio account will appear here.
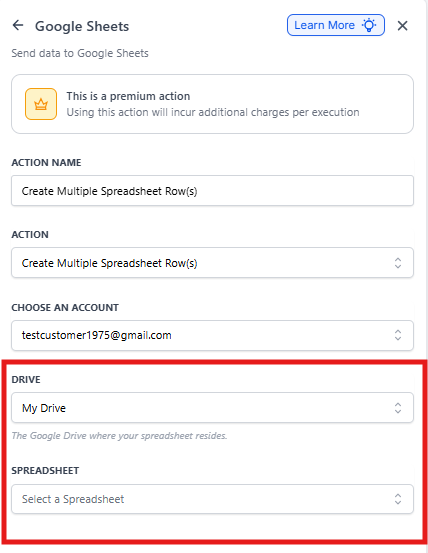
Step 3: Select the Google Drive where your spreadsheet lives.
Step 4: Choose the specific spreadsheet, then select the worksheet tab you want to update.
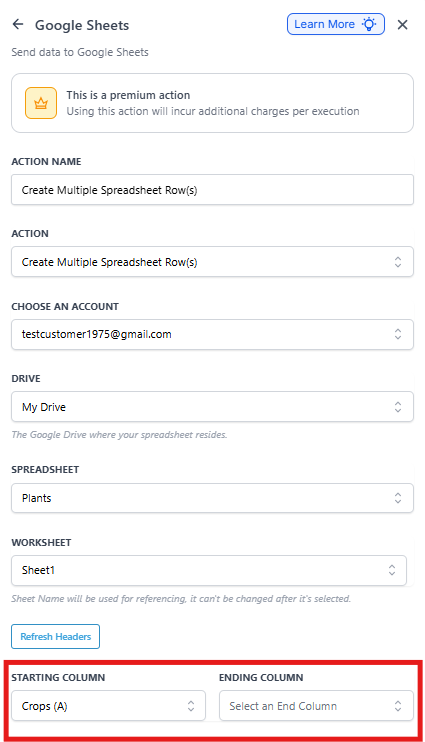
Step 5: Select your starting and ending columns. The first row of your sheet is treated as the header row, and columns are labeled based on those header values.
Step 6: Map your Enrollio fields to the corresponding spreadsheet columns. For example, map "Parent First Name" to your "First Name" column.
Update Multiple Spreadsheet Rows
Modify existing data in your spreadsheet based on specific rows. Use this to update parent contact details, enrollment status, or staff information in bulk.
When to Use This
- Update enrollment status for multiple families at once
- Refresh parent contact information in tracking sheets
- Bulk edit tour schedules or waitlist positions
How to Set It Up
Step 1: In your automation, select Update Multiple Spreadsheet Rows from the Action dropdown.
Step 2: Choose your Google account from the dropdown.
Step 3: Select the Google Drive, spreadsheet, and worksheet you want to update.
Step 4: Enter the row number where you want to start updating. For example, if you want to update rows 5 through 10, enter "5" as your starting row.
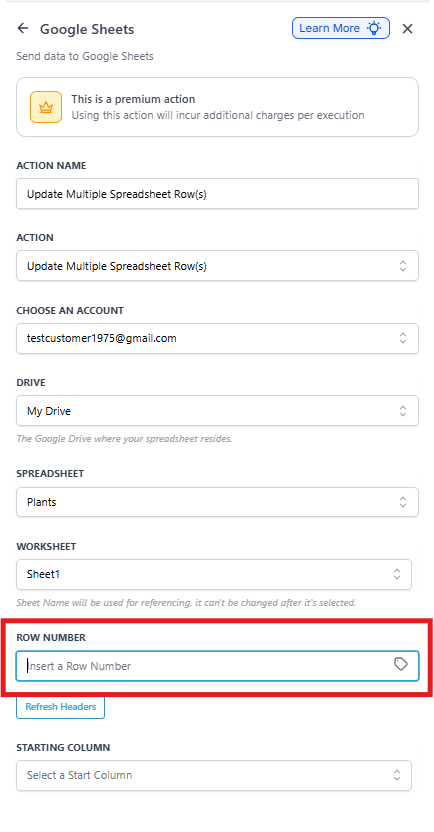
Step 5: Select your starting and ending columns, just like when creating rows. Click Refresh Headers if you've changed column names in your sheet.
Step 6: Map your Enrollio fields to the columns you want to update.
Frequently Asked Questions
Do I need to format my Google Sheet before using these actions?
Yes. Your sheet should have clearly labeled column headers in the first row. The automation relies on matching your Enrollio fields to these column names.
Will this overwrite my entire spreadsheet?
No. Only the specific rows and columns you map in your automation will be affected. Your other data stays untouched.
Can I use this with shared Google Sheets?
Yes, as long as the Google account you've connected to Enrollio has edit access to the spreadsheet.
What happens if I add new columns to my spreadsheet?
Click the Refresh Headers button in your automation action to pull in the new column names. Then remap your fields as needed.