
Automation Action - AI Decision Maker
This article shows you how to use AI Decision Maker to automatically route families through different paths based on their engagement, enrollment status, tour behavior, and more. With just plain English instructions, you can let AI decide the smartest route—no complex logic trees required!
Table of Contents
- What is AI Decision Maker?
- Key Benefits of AI Decision Maker
- How To Set Up AI Decision Maker
- Popular Use Cases
- Frequently Asked Questions
What is AI Decision Maker?
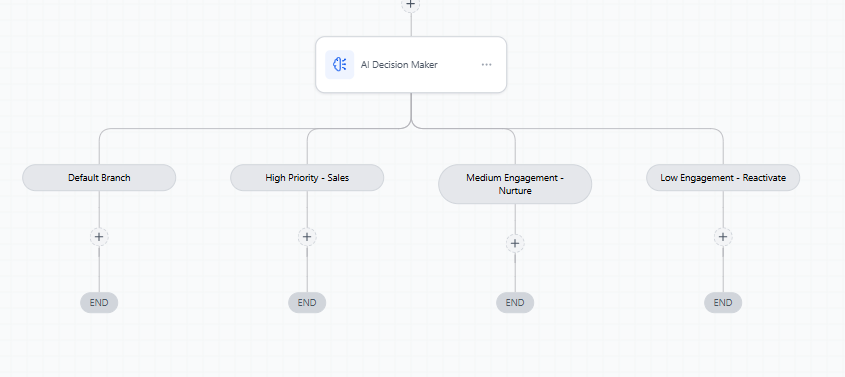
AI Decision Maker acts as an intelligent routing engine inside your automations. Instead of relying on if/then rules or manual logic, you simply describe the conditions using plain English. The AI evaluates each family's data and sends them down the most appropriate path.
Note: This is a premium action. Using this action will incur additional charges per execution.
Key Benefits of AI Decision Maker
Reduces Automation Maintenance: Once set up, the AI dynamically adapts to changes in family data, reducing the need to manually update multiple filters and logic rules.
Scales Easily with Growth: Whether you're routing dozens or hundreds of families, the AI handles complexity and volume without slowing down your operations.
Eliminates Human Error: By relying on logic-driven automation, you remove inconsistencies that come from manual decision-making or missed conditional paths.
Plain-English instructions: No coding or complex rules required.
How To Set Up AI Decision Maker
Learn how to insert the AI action into your automation and set up dynamic branches based on your criteria.
Step 1 - Choose or Create an Automation
- Log in to your account.
- Click on the Automation tab in the left menu.
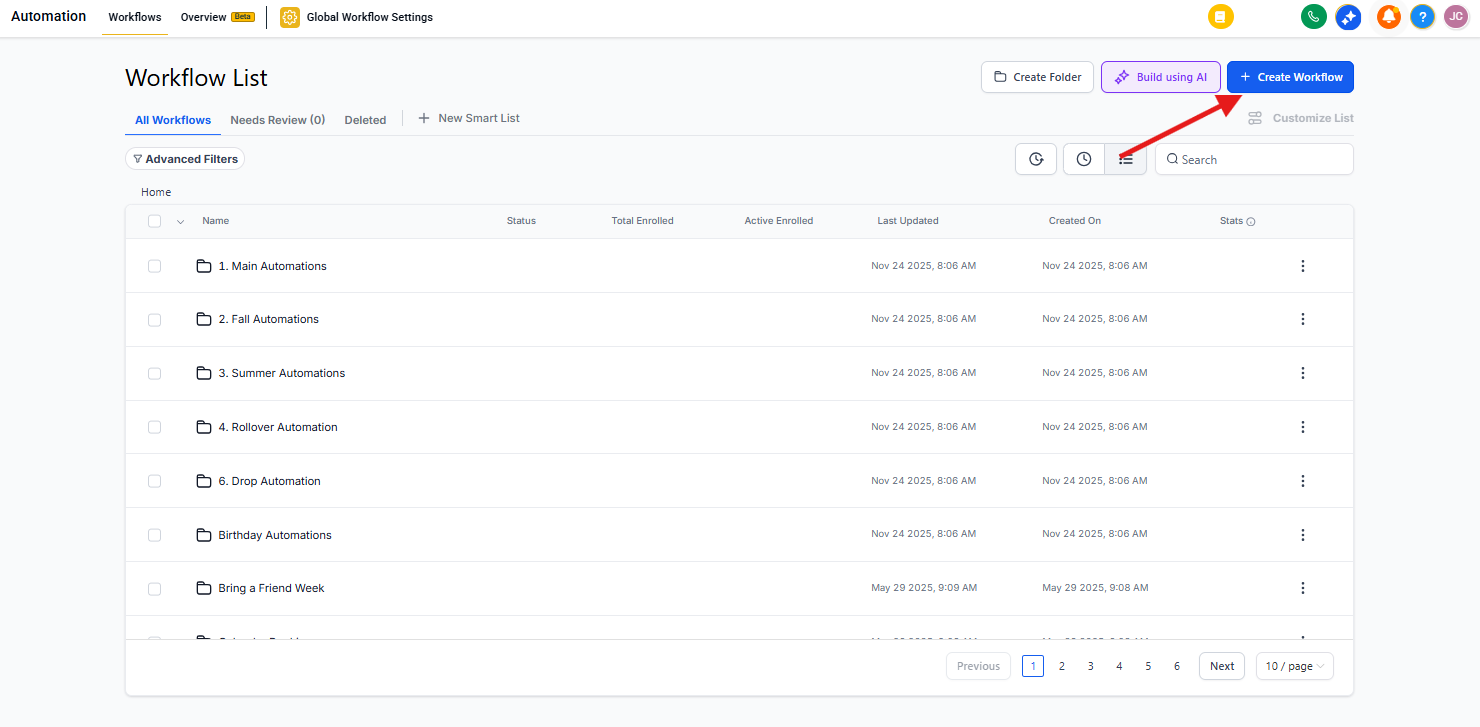
- You can edit an existing automation or click + Create Automation to build a new one from scratch, template, or recipe.
Step 2 - Add the AI Decision Maker Action
- Set up a trigger (like "Parent Changed" or "Form Submitted") before adding any actions.
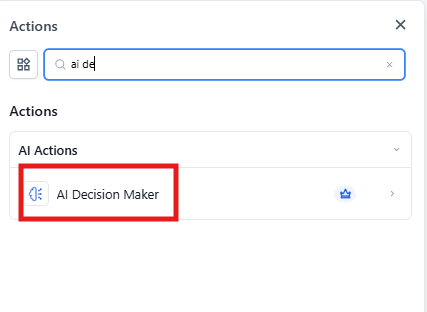
- Click the + icon inside your automation builder where you want to place the action.
- From the right-side panel, scroll down to AI Actions and select AI Decision Maker.
- Use a clear Action Name so you can find it quickly—especially in AI- or branching-heavy automations.
Step 3 - Write Clear AI Instructions
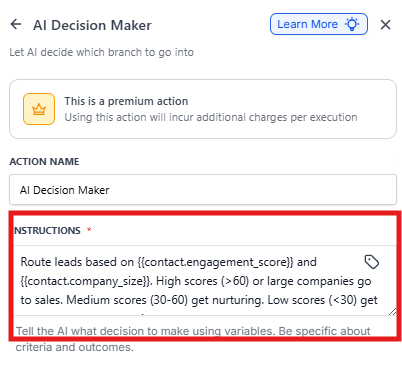
Use the Instructions field to describe what the AI should consider when routing families. Be specific about what to evaluate (e.g., engagement score, tour status, enrollment stage).
Use the custom value icon (tag icon) to insert family fields like {{contact.engagement_score}} or custom data. This ensures the AI uses actual family data to make decisions.
Good example:
Look at the family's engagement score and tour completion status. If the engagement score is over 60 OR they completed a tour, send them to enrollment follow-up. If the engagement score is between 30-60 and they haven't toured yet, send them to tour scheduling. If the engagement score is under 30, send them to a re-engagement sequence.
Examples of useful information:
- Parent details:
{{contact.email}},{{contact.phone}} - Custom fields:
{{contact.lead_score}},{{contact.tour_status}},{{contact.child_age}} - Tags:
{{contact.tags}} - Previous automation data: Results from forms, surveys, or other actions
Step 4 - Add Additional Context
In the Additional Context field, provide background data to help the AI make more informed decisions—like enrollment capacity, program types, or seasonal priorities.
The more relevant your context (e.g., family type, program interest, waitlist status), the more accurate and tailored the AI's routing logic will be.
Example:
We operate an infant/toddler program and preschool. Infant spots are limited to 12 children. Preschool has capacity for 40. Engagement scores range from 0-100. Our enrollment team can handle about 15 new tour requests per week. Priority goes to families seeking immediate enrollment over those with future start dates.
Step 5 - Default Branch
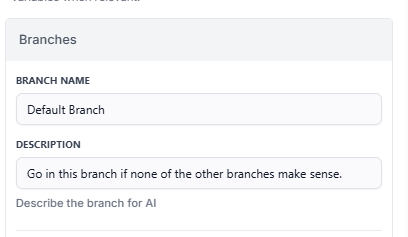
The Default Branch is automatically included and acts as a safety net for families who don't meet any of the other branch conditions.
Branch Name: This is locked in as "Default Branch." It ensures there's always a path for unmatched families.
Description: Explains when the family will land here—typically if none of your rules apply.
Note: You cannot delete or rename the Default Branch. It's essential for uninterrupted family flow.
Step 6 - Add Custom Branches
Create additional branches to route families based on unique criteria.
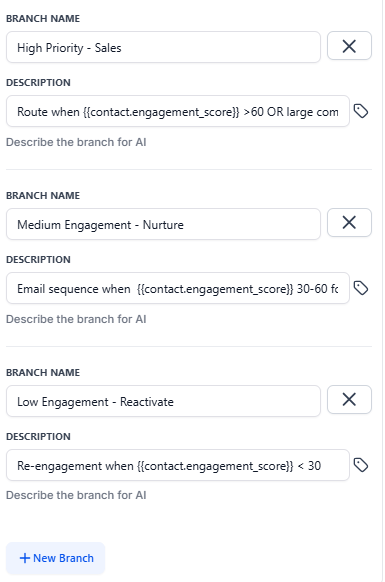
In this example, the "High Priority - Enrollment Team" branch routes families when {{contact.engagement_score}} is over 60 OR they've completed a tour.
Branch Name: Clearly label the outcome (e.g., "High Priority - Enrollment Team").
Description: Specify when families should enter this path.
Step 7 - Add More Branches
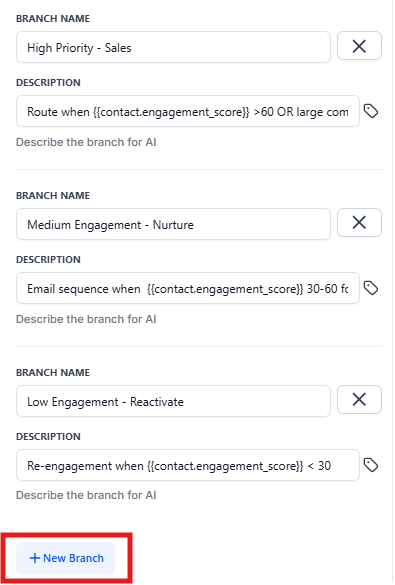
Click + New Branch to define additional paths for families based on unique conditions.
Each branch should include a clear name and a short description of when it's used.
This lets you tailor follow-ups for different audiences—like sending tour invitations, waitlist updates, or program information—based on what matters most to each family.
Example branches for a childcare center:
- Immediate Enrollment Interest: Families with start dates within 30 days
- Tour Scheduling: Engaged families who haven't scheduled a tour
- Waitlist Nurture: Families interested in full programs
- Re-engagement: Families with low engagement scores
Step 8 - Save the Action
Once all your branches are added and configured, click Save Action to finalize the AI Decision Maker setup.
This locks in your instructions and branch logic, allowing the automation to begin making smart, automated decisions.
Popular Use Cases
Identify Spam Submissions on Your Enrollment Forms
- Route form details to the AI Decision Maker.
- Ask it to categorize submissions as spam or authentic, providing examples of spam if possible for the AI to make better decisions.
- Create only authentic enrollment opportunities and save time.
Route Families by Program Interest and Capacity
Automatically send families to different follow-up sequences based on their program interest and your current availability. If infant care is full, route those families to waitlist nurture. If preschool has openings, route to immediate enrollment.
Prioritize Tour Scheduling by Engagement
Send highly engaged families directly to your enrollment team for personal outreach, while moderately engaged families receive automated tour scheduling invitations.
Frequently Asked Questions
Q: How does the AI decide where to send a family?
It reads your instructions and uses the family's data (like engagement score, tour status, child age) to select the matching branch.
Q: What if a family doesn't match any rules?
They automatically go to the Default Branch.
Q: Can I delete or edit the Default Branch?
No, it's permanent and ensures fallback routing.
Q: How do I check where a family went?
Use the Execution Logs tab in your automation to see the path taken.
Q: Can I use fields from forms or surveys?
Yes! Include data from previous steps or custom fields using the variable picker.
Q: Does this work with waitlist families?
Absolutely. You can create branches specifically for waitlisted families based on program interest, priority level, or expected start date.
Related Articles
- Automation Action - GPT Powered by OpenAI
- Automation Action - Remove Enrollment Opportunity
- Automation Action - AI Intent Detection
- Automation Action - AI Summarize
- Automation Action - AI Translate
- Enrollio AI: Multiple Messages in One Automation Action