
This article shows you how to use the Payment Received automation trigger to streamline follow-up actions after any successful payment. Whether it's a one-time enrollment fee, a tuition payment, or an invoice settlement, you can automate confirmations, updates, and team notifications—saving time and improving the parent experience.
What is the Payment Received Trigger?
The Payment Received trigger launches automated actions when a payment is successfully processed through your Enrollio account. This includes payments from enrollment pages, invoices, forms, and manual entries.
Whether it's a one-time registration fee or a recurring tuition payment, this trigger responds immediately—without any manual work from your team.
Key Benefits of Payment Received Trigger
Use this automation to eliminate manual payment follow-ups, improve response times, and keep your team instantly updated. It creates a seamless post-payment experience for both your center and your families.
Send Instant Confirmations
Automatically deliver confirmation emails or text messages the moment a payment processes, keeping parents informed and reassured.
Update Parent Records
Apply tags, update custom fields, or add internal notes to reflect payment status in the parent's profile—no manual data entry required.
Notify Your Team Immediately
Alert your enrollment coordinator, billing team, or director in real-time so they can take timely action after a successful transaction.
Trigger Next Steps
Kick off enrollment welcome sequences, send first-day preparation materials, or update enrollment pipeline stages based on the payment received.
Automate Failed Payment Follow-Up
Set up automations to respond to failed transactions with friendly reminders, retry alerts, or personalized communication to recover missed payments.
Simplify Tuition & Invoice Tracking
Track recurring tuition payments or invoice completions and tie them to specific follow-up actions or parent record updates effortlessly.
How to Configure Payment Received Trigger
Setting up this trigger ensures your system responds to payments instantly. Here's your step-by-step guide.
Step 1: Start a New Automation
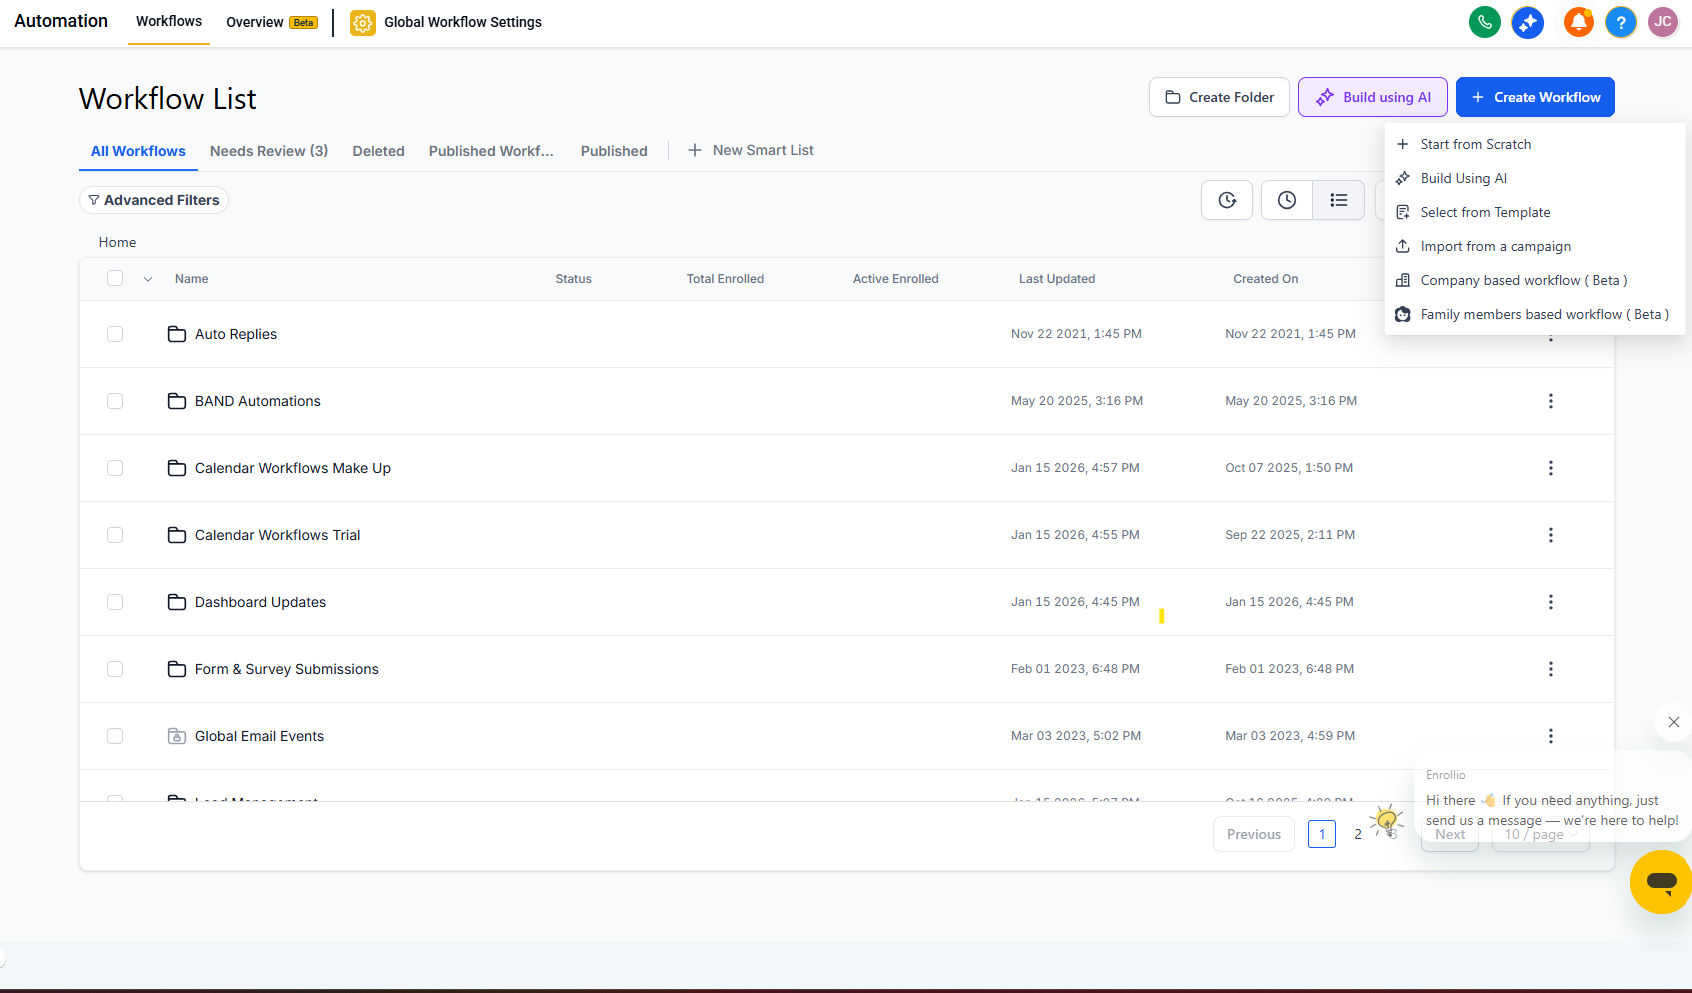
Navigate to Automations in the left menu, then click + Create Automation in the top right. From the dropdown, select Start from Scratch to begin building your custom automation.
Step 2: Select Trigger Type
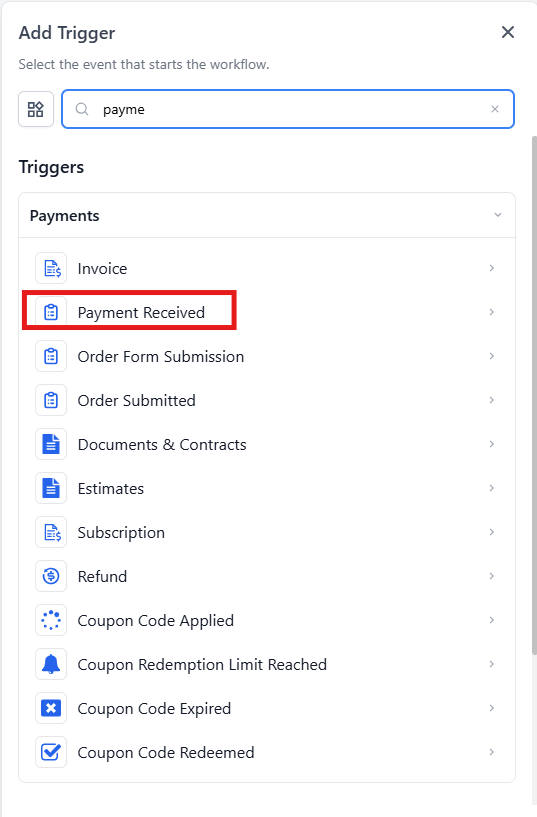
Click + Add New Trigger to open the trigger options. Scroll to the Payments section and choose Payment Received.
Step 3: Name Your Trigger
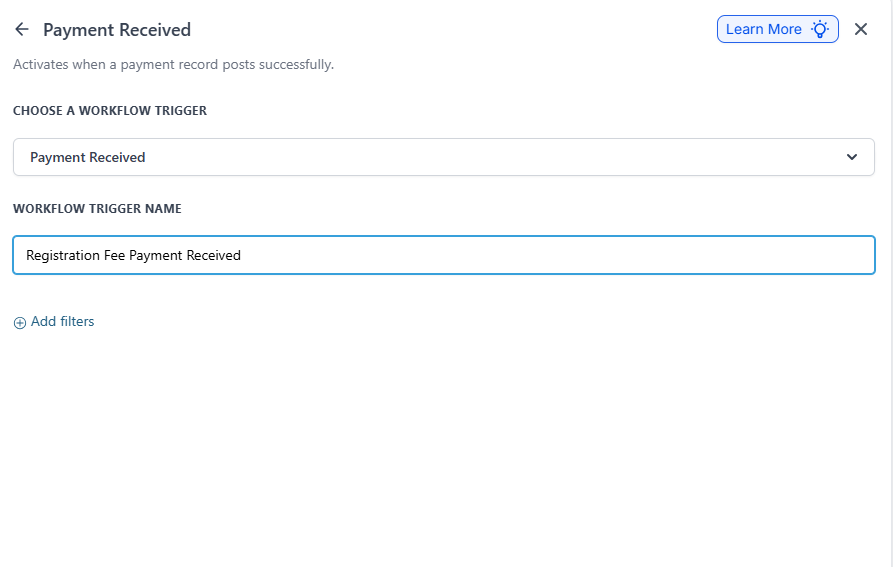
Enter a clear and descriptive name for your trigger (e.g., "Registration Fee Payment Received"). Naming helps keep automations organized, especially when you're managing multiple payment triggers.
Step 4: Add Filters
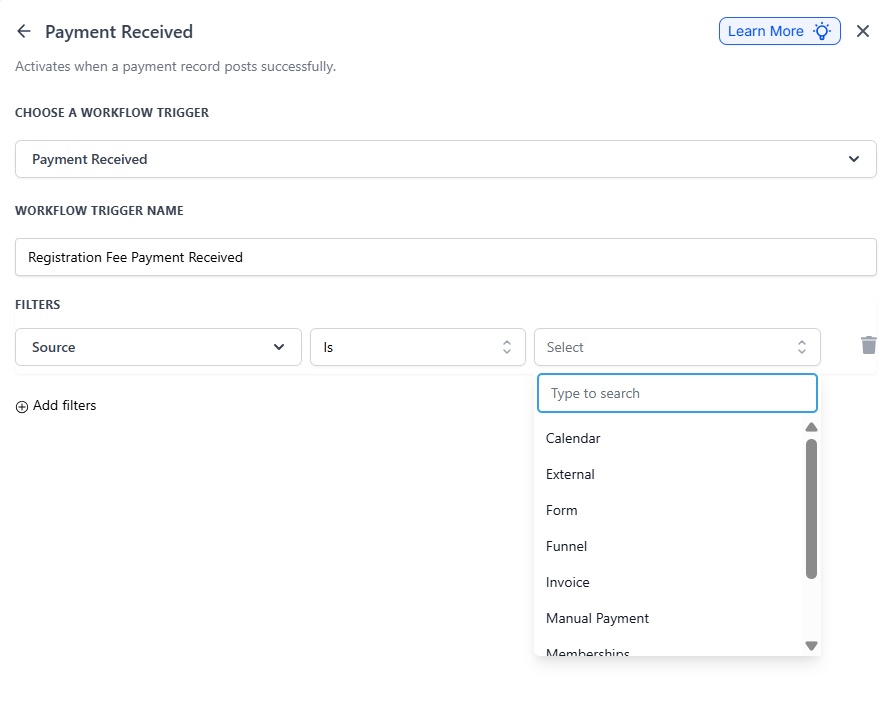
Click + Add filters to narrow down which payment events trigger this automation. Filters let you target specific transaction types, sources, or statuses.
Source Filter Options
Specify where the payment originated to tailor your automation based on the payment channel:
- External: Payment made through third-party sources like Stripe or PayPal
- Form: Payment submitted through a form that includes a payment element
- Enrollment Page: Payment made through an enrollment page or landing page
- Invoice: Payment completed via an invoice sent through Enrollio
- Manual Payment: A payment recorded manually in the platform
- Enrollment Site: Payment made through your enrollment site (products or subscriptions)
Step 5: Choose Filter Criteria
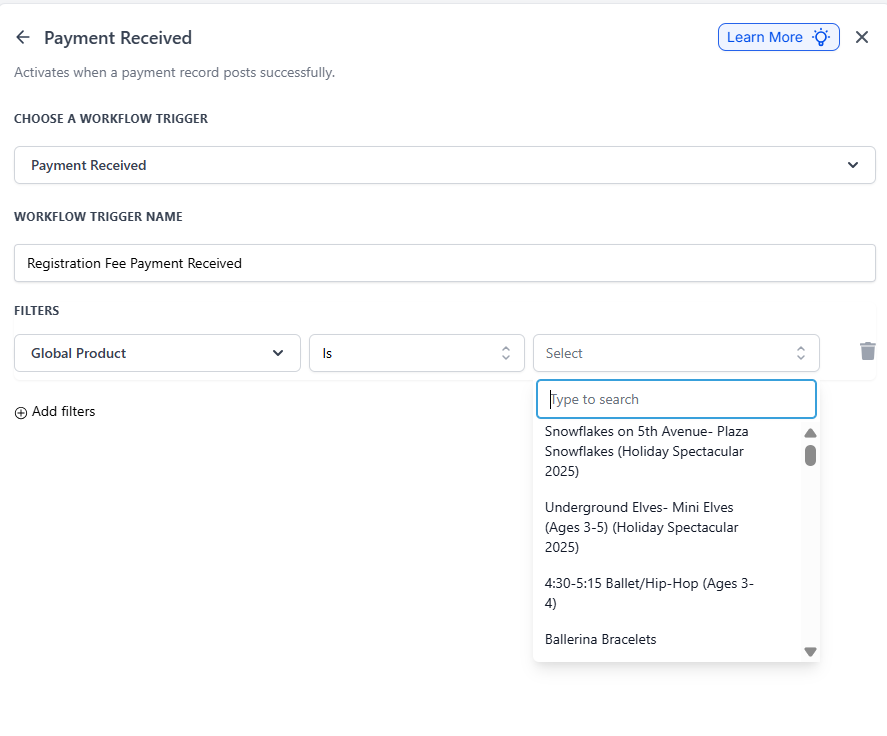
Select from available fields like Global Product, Payment Status, or Source. These filters help you target specific types of transactions for precise control.
Example: Filter by Product
Choose Global Product as your filter type and select the specific product name (e.g., "Registration Fee"). This ensures the automation only triggers when a payment is received for that exact product.
Example: Filter by Payment Status
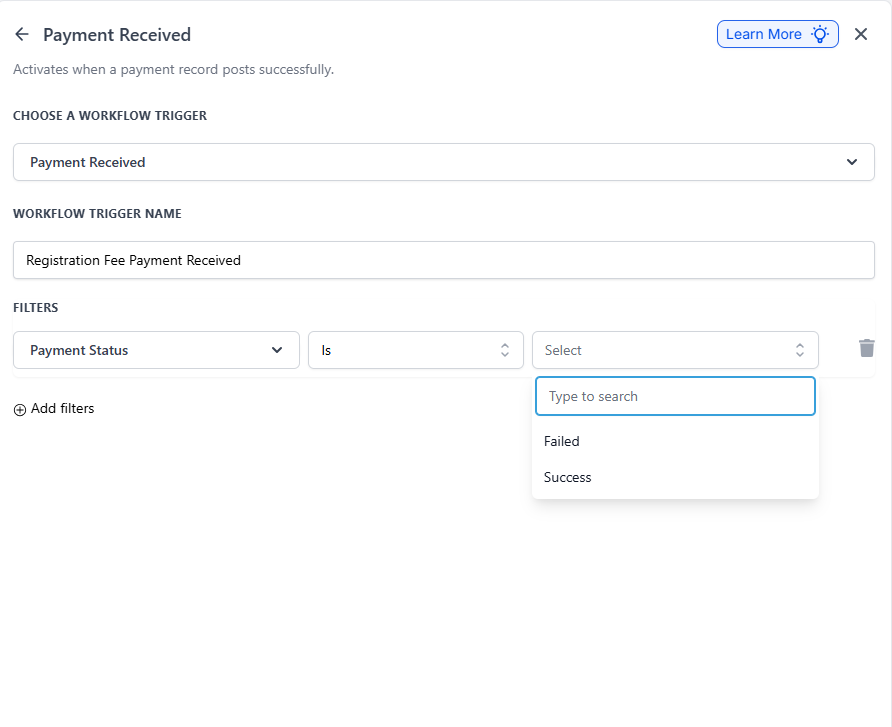
Add a Payment Status filter and set it to Success. This ensures the automation only runs when a payment is successfully completed.
Example: Combine Multiple Filters
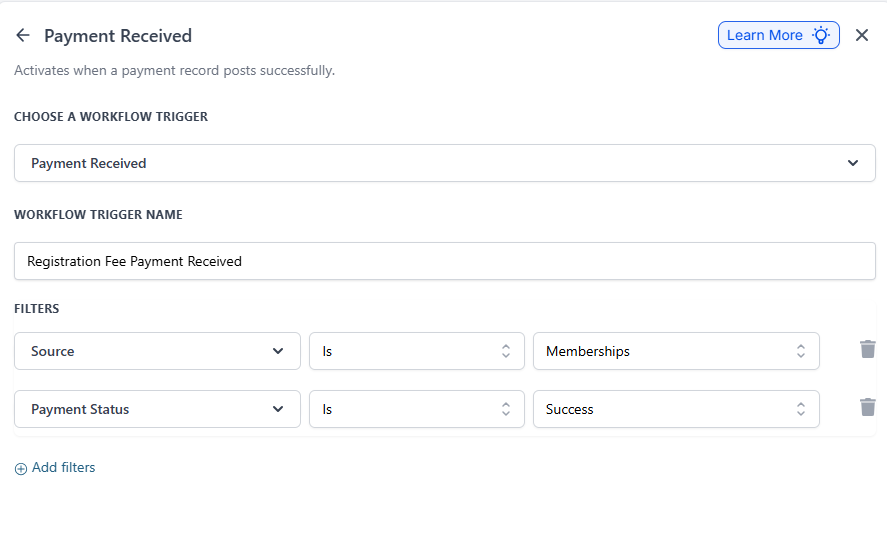
You can stack multiple filters for precise targeting. For instance, combine Source = Invoice with Payment Status = Success to trigger only on successful invoice payments.
Step 6: Save the Trigger
Once all filters are applied, click Save Trigger to finalize your configuration. Your automation will now activate only under the conditions you've defined.
Frequently Asked Questions
Can I filter by specific products or fee types?
Yes! Use the Global Product filter to target payments for specific items like registration fees, tuition, or supply fees.
Can this trigger capture failed payments too?
Absolutely. Use the Payment Status = Failed filter to create follow-up automations for payment retries or friendly reminder messages to parents.
Can I use payment details in my messages?
Yes! You can use dynamic fields like {{Payment Amount}}, {{Transaction ID}}, and {{Product Name}} in your emails or text messages to personalize communications.
How do I test the trigger?
Process a test payment using sandbox payment environments or create a small test product. Make sure your automation is activated before testing. You can track the automation's activity in the automation history.
Can I combine this with other triggers?
Yes! You can include multiple triggers in a single automation or use If/Else branches to split actions based on payment source, amount, or status. This lets you create sophisticated payment response systems.
What happens if a parent makes multiple payments?
The trigger fires each time a qualifying payment is received. If you only want to trigger once per parent, add additional filters checking for tags or custom fields that indicate whether they've already received the communication.