
How to Save Email Elements for Quick Reuse
Creating professional, consistent email campaigns for parents and prospective families can be time-consuming. Instead of rebuilding common elements from scratch each time, save your best-performing layouts and content blocks for instant reuse.
This guide shows you how to save design elements, organize them with clear names, and quickly find what you need when building your next email.
What You Can Save
You can save any element or section from your email campaigns:
- Content blocks — welcome messages, tour reminders, enrollment deadlines
- Layout sections — header designs, footer templates, feature highlights
- Complete structures — entire email layouts you use regularly
Pro Tip: Saved items are available across all your email campaigns and templates, so you only need to create them once.
How to Save an Email Element
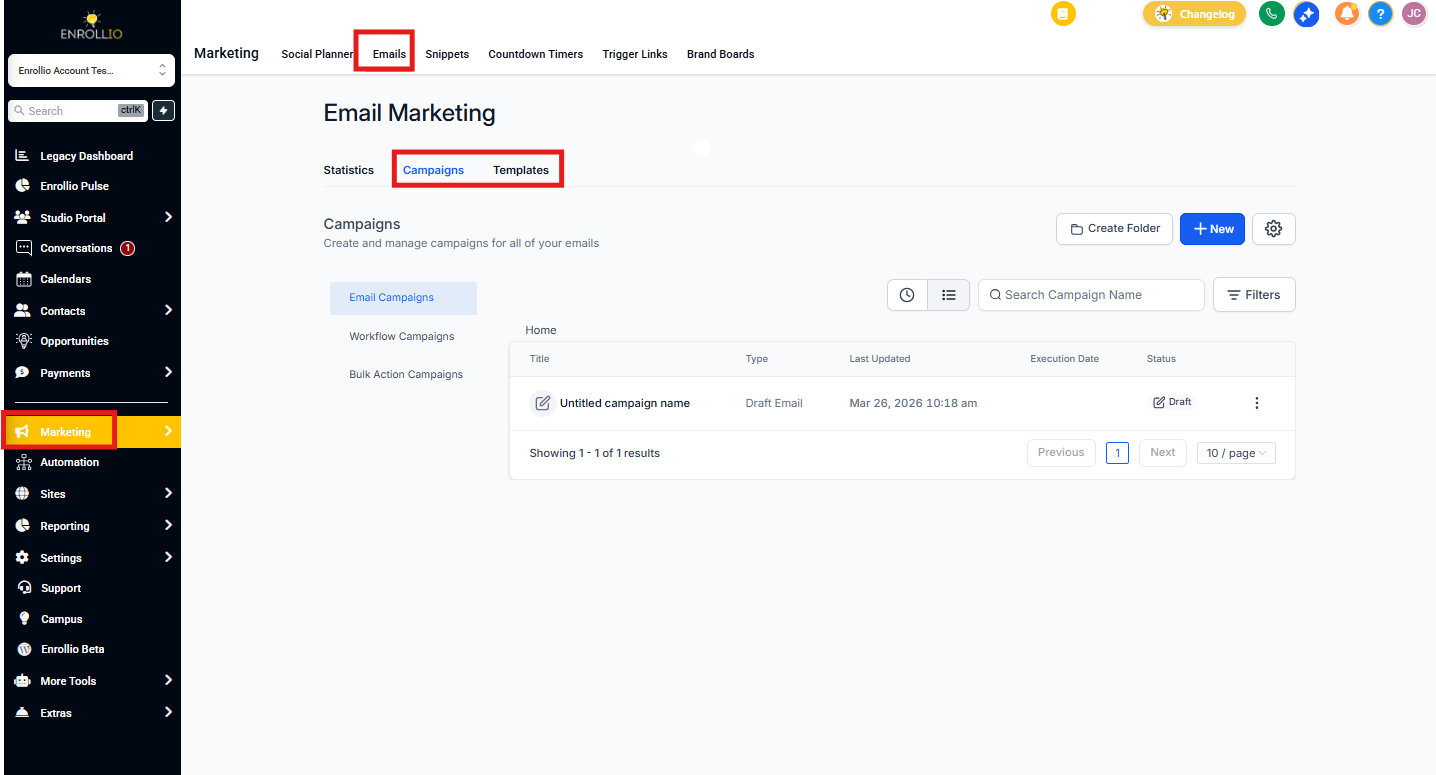
Step 1: Open the Email Builder
Navigate to Marketing → Email Marketing and open any campaign or template.
Step 2: Create Your Element
Build the layout or content block you want to save. This could be a welcome message for new families, a tour reminder section, or your standard email footer.
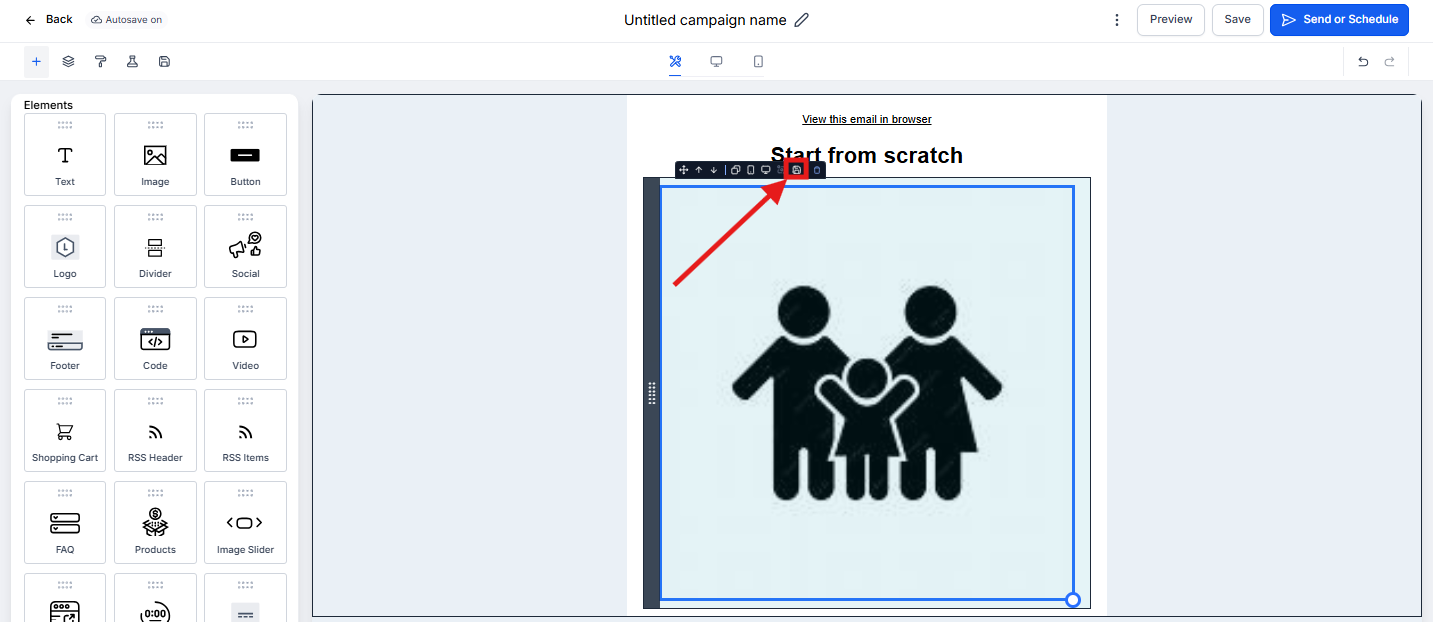
Step 3: Save the Element
Hover over the element or section you created. Click the Save icon that appears.
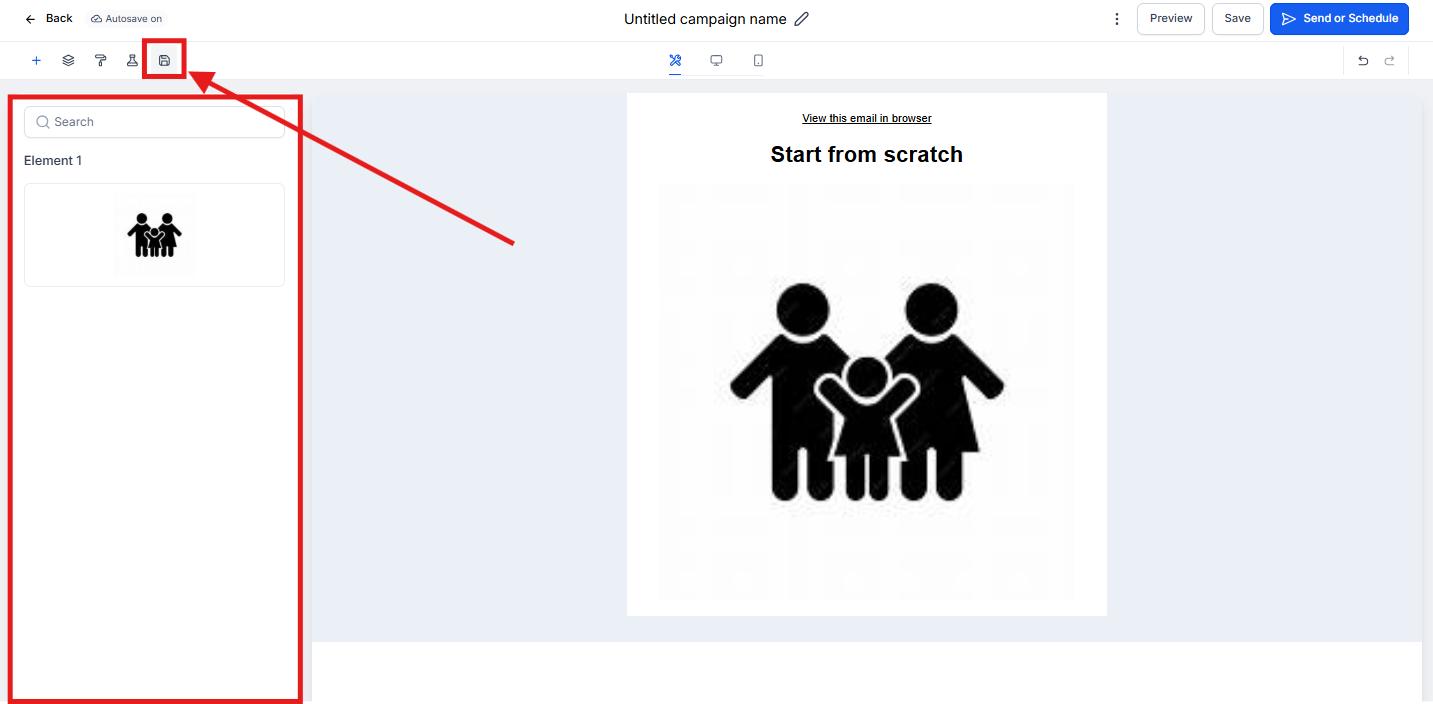
Step 4: Access Your Saved Items
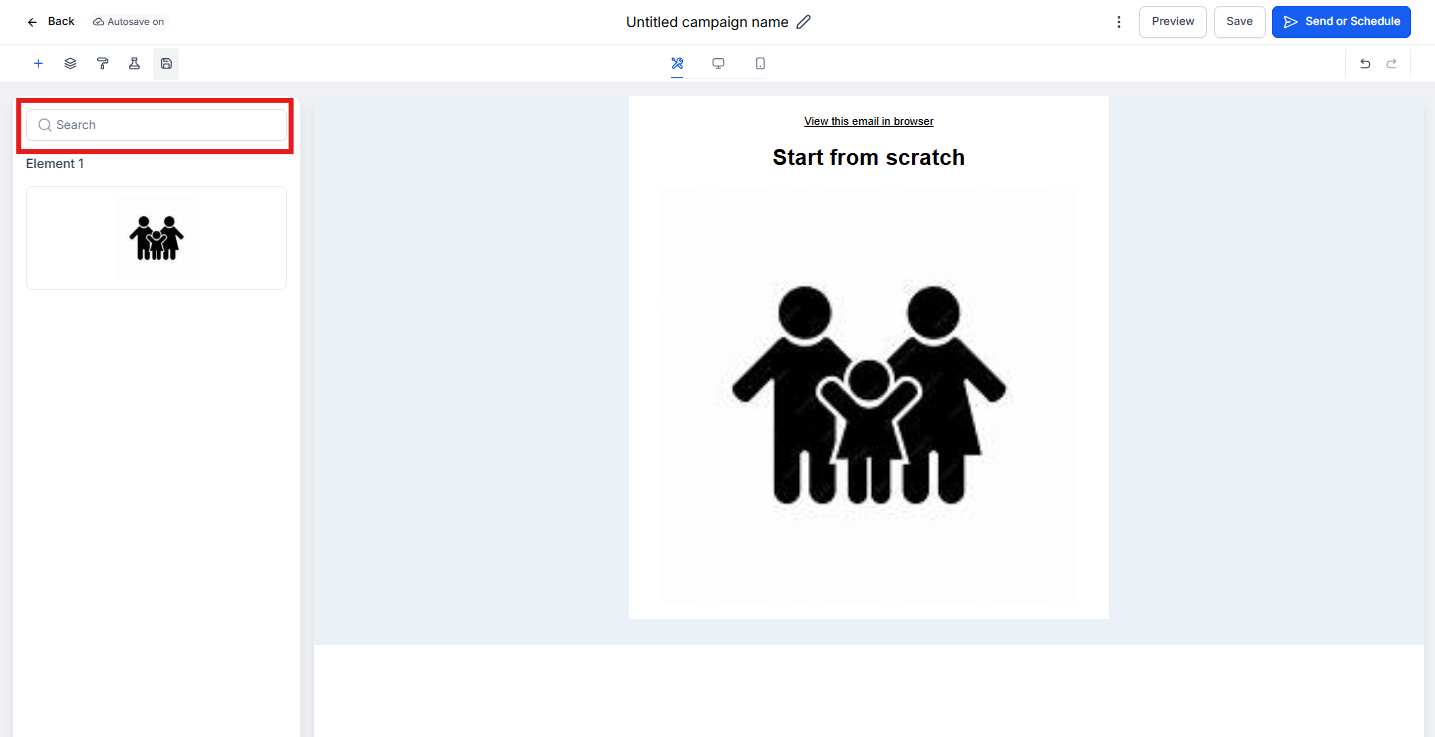
Your saved element now appears in the Saved Items section at the top right of the email builder. You can drag and drop it into any email campaign or template.
Organize Your Saved Elements
Rename for Easy Searching
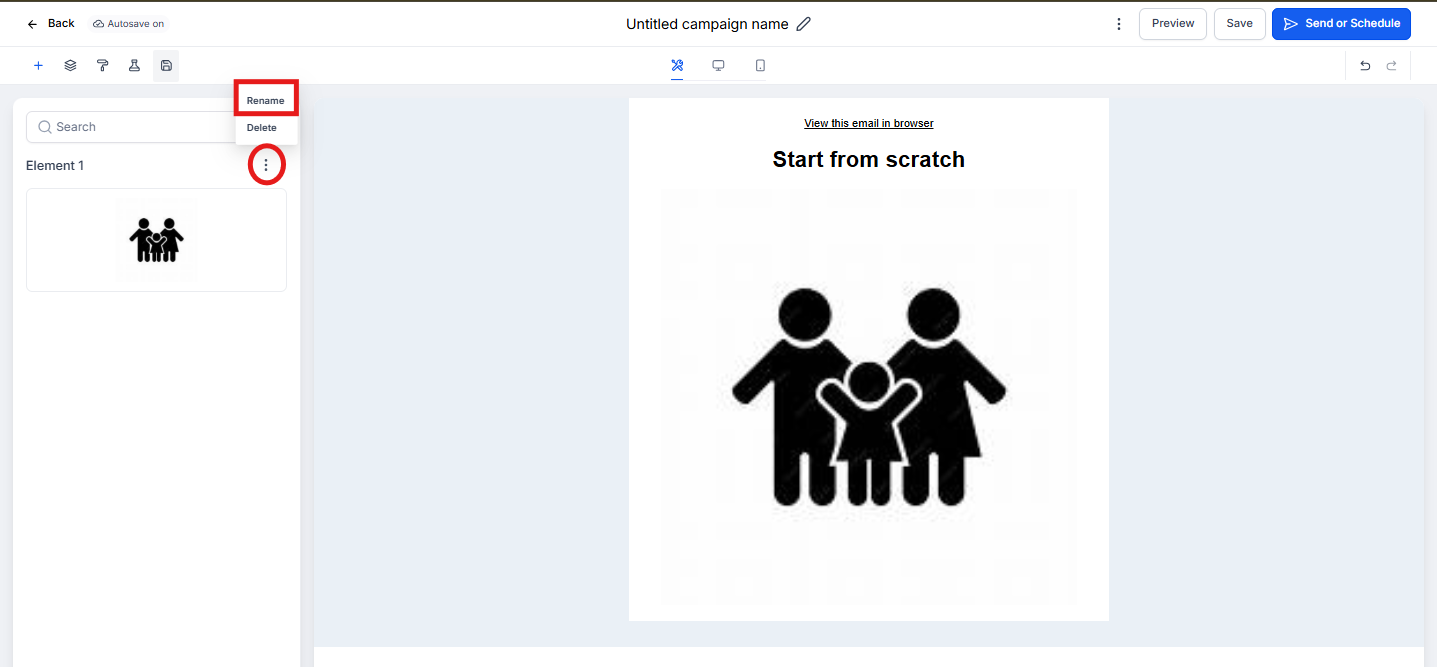
Give your saved elements clear, descriptive names so you can find them quickly:
- In the Saved Items section, click the three dots next to any saved element
- Select Rename
- Enter a descriptive name like "Tour Confirmation Header" or "Weekly Update Body"
- Click Rename to save
Search Saved Items
Use the search bar at the top of the Saved Items panel to quickly find what you need. Type keywords like "tour," "welcome," or "footer" to filter your saved elements.
Best Practices
Use consistent naming: Start with the email type, then the section — "Enrollment Confirmation - Header" or "Tour Reminder - CTA Block"
Save your brand elements: Create saved items for your logo placement, color schemes, and standard footer with contact information
Build a library: Over time, you'll have a complete library of elements for every type of parent communication