
Shopping Cart Element in Email Builder
The Shopping Cart Element lets you display product information, pricing, and checkout links directly in your emails. Use it to promote retail items like branded apparel, promote parent resources, or send reminders about unpaid enrollment fees — all while keeping your emails visually appealing and conversion-focused.
What is the Shopping Cart Element?
The Shopping Cart Element is a drag-and-drop block that adds product details and checkout links to your emails. It's perfect for:
- Abandoned cart reminders for families who started but didn't complete enrollment
- Product recommendations for center merchandise or educational materials
- Limited-time promotions on summer camps or special programs
You can customize each item's image, name, description, price, and button link — giving you full control over how products appear in your email layout.
Key Benefits
Using the Shopping Cart Element in your emails offers several advantages:
- Professional presentation: Showcase product details and pricing in a clean, structured layout
- Clear calls-to-action: Add "Buy Now" or "Complete Enrollment" buttons with direct checkout links
- Drive conversions: Send visually optimized reminders that encourage families to take action
- Brand consistency: Customize colors, spacing, and fonts to match your center's branding
- Mobile-friendly: Fully responsive design displays beautifully on both desktop and mobile devices
How to Set Up the Shopping Cart Element
Follow these steps to add and configure the Shopping Cart Element in your email template:
- Navigate to Marketing → Emails → Templates from your dashboard.
- Open an existing template or click + New to create one.
- In the Email Builder, click the Add Elements (+) icon in the left sidebar.
- Locate the Shopping Cart Element under the Elements section.
- Drag and drop the Shopping Cart Element into your desired section of the email layout.
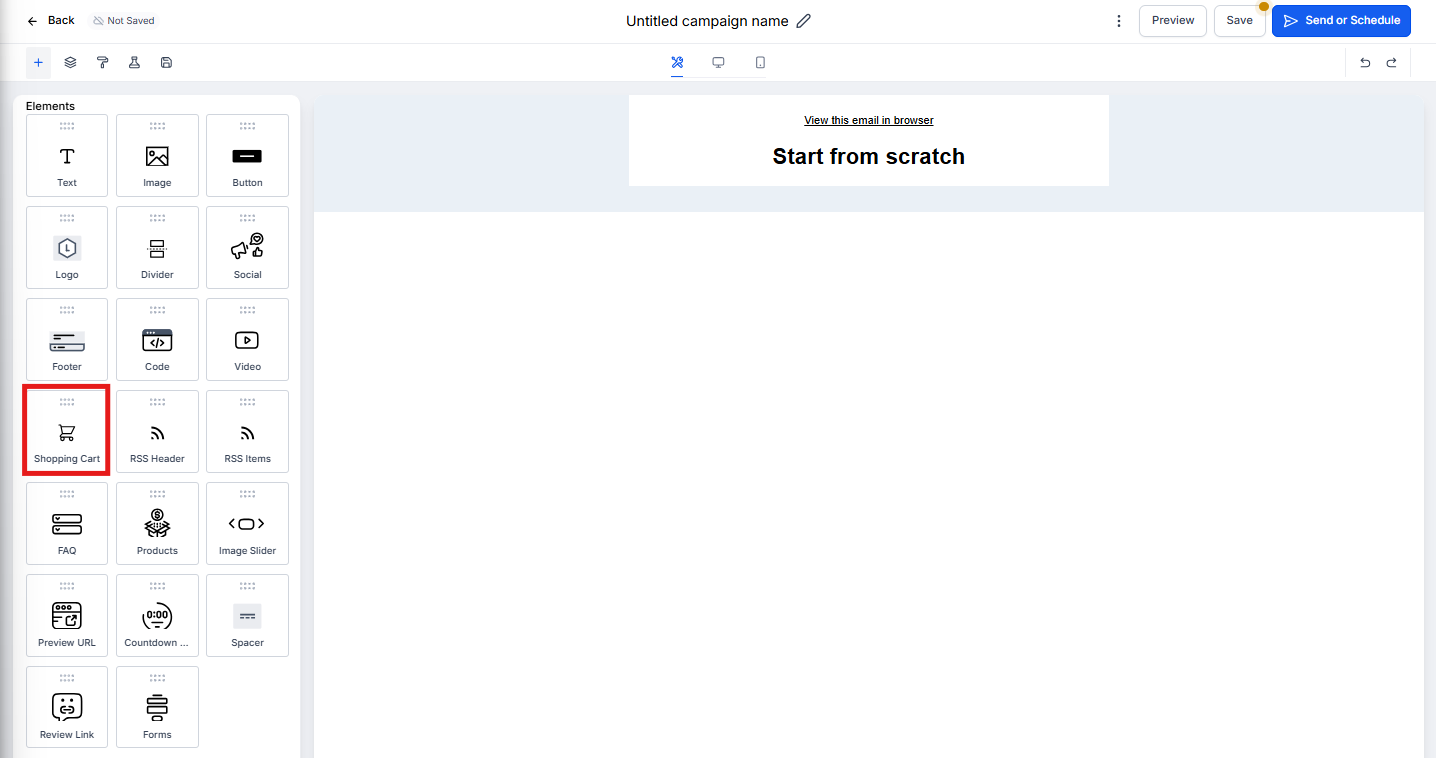
Configure Your Shopping Cart
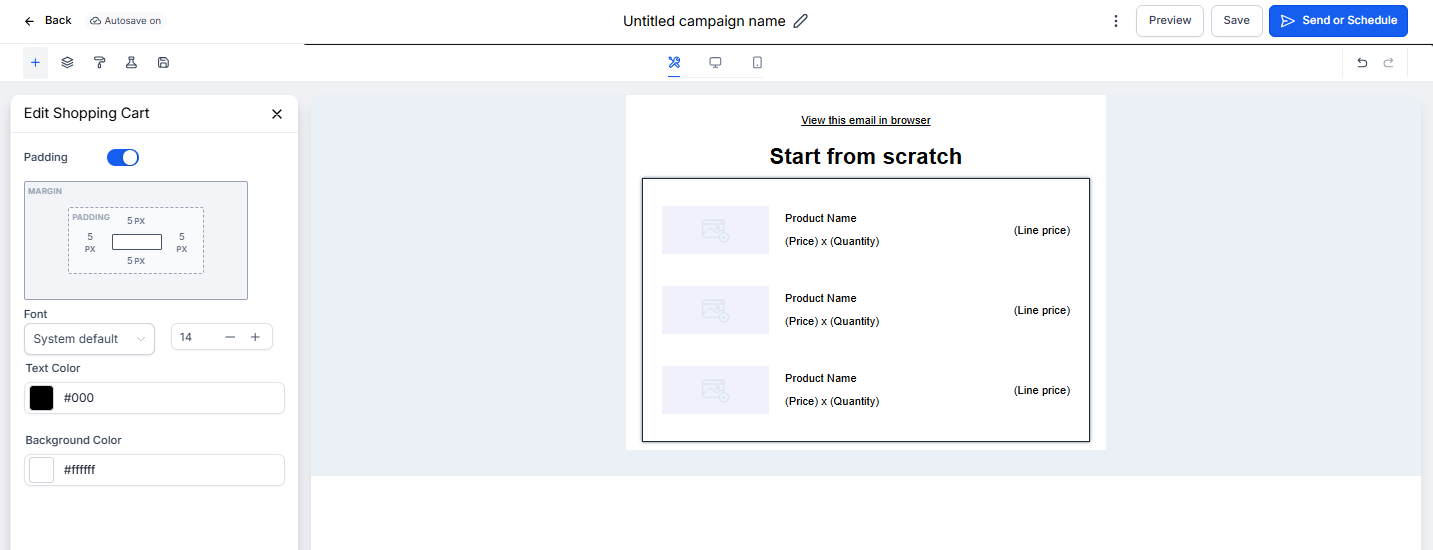
- Click on the Shopping Cart Element to open the Edit tab in the left panel.
- Here you can:
- Add products: Click to add product items with images, names, descriptions, and prices
- Set button links: Link each product's button to your checkout page or enrollment form
- Adjust layout: Control padding, margins, and alignment to create a clean product grid
- Customize styling: Match colors, fonts, and button styles to your center's brand
- (Optional) Use the Visibility tab to configure device-based visibility or conditional sending rules.
- Preview your email on desktop and mobile to ensure products display clearly and links work correctly.
Best Practices
- Keep it simple: Don't overwhelm families with too many products. Focus on 2-3 key items per email.
- Use quality images: Clear, professional product photos increase click-through rates.
- Write compelling descriptions: Brief but persuasive copy helps families understand the value.
- Test your links: Always verify that checkout buttons lead to the correct pages before sending.
- Mobile-first design: Most parents check email on their phones — preview on mobile to ensure everything looks great.