
Text Element in Email Builder
The Text Element in Enrollio's Email Builder lets you add and style written content like headings and paragraphs in your parent communications. With flexible formatting options, you can create professional, on-brand emails that match your center's voice and keep families engaged.
What is the Text Element?
The Text Element is a drag-and-drop block you can place anywhere in your email layout. It supports rich text formatting including font customization, color selection, alignment, hyperlinks, and bullet points.
Use it to create attention-grabbing headlines, add body text for enrollment updates, or format important information about tour scheduling and registration deadlines. The Text Element is mobile-responsive, so your message looks great whether parents read it on their phone or computer.
Key Benefits
The Text Element gives you powerful tools to communicate with families:
- Effortlessly add and style headings, paragraphs, and announcements
- Full control over typography, color, and formatting for brand consistency
- Add clickable links for tour bookings, enrollment forms, or payment portals
- Customize spacing and alignment for clean, professional layouts
- Automatically optimized for both desktop and mobile devices
How to Set Up the Text Element
Follow these steps to add and configure text in your email template:
- Navigate to Marketing → Emails → Templates from your dashboard.
- Open an existing email template or click + New to create one.
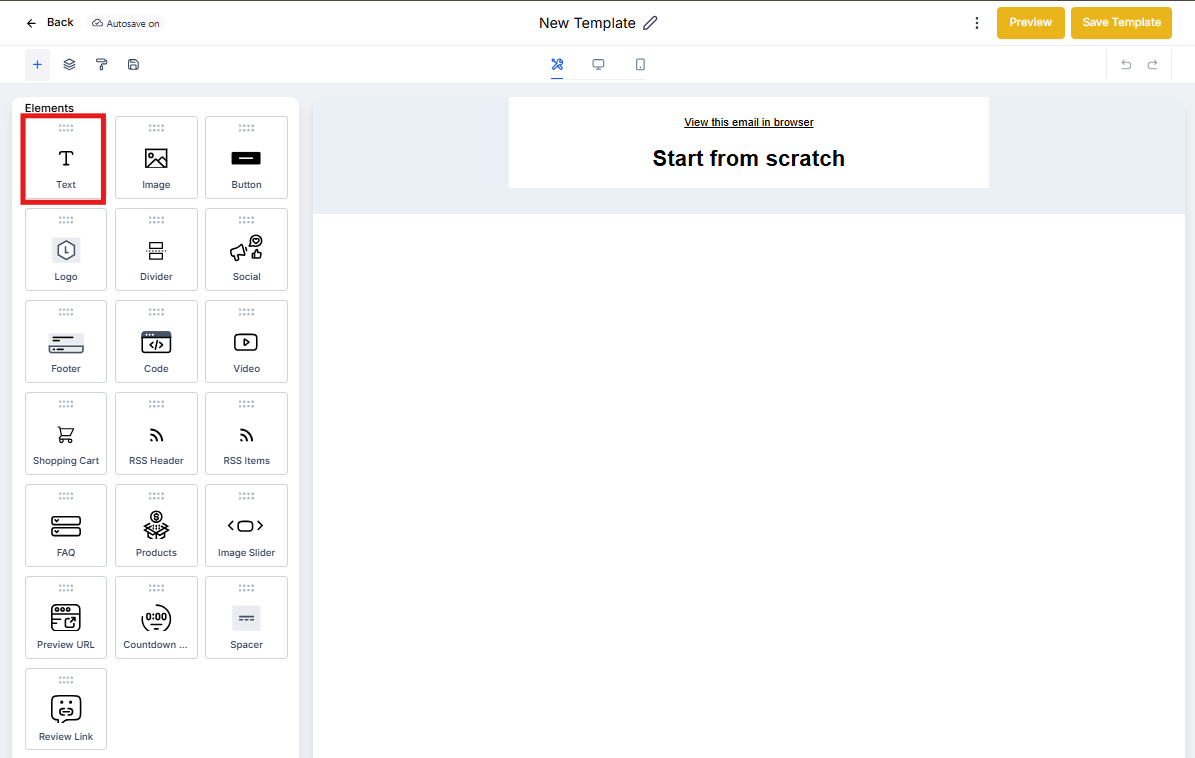
- In the Email Builder, click the Add Elements (+) icon on the left sidebar.
- Locate the Text Element and drag it into your desired position in the layout.
- Click on the Text Element to open the Edit tab.
Formatting Your Text
Once you've added the Text Element, you can customize it to match your needs:
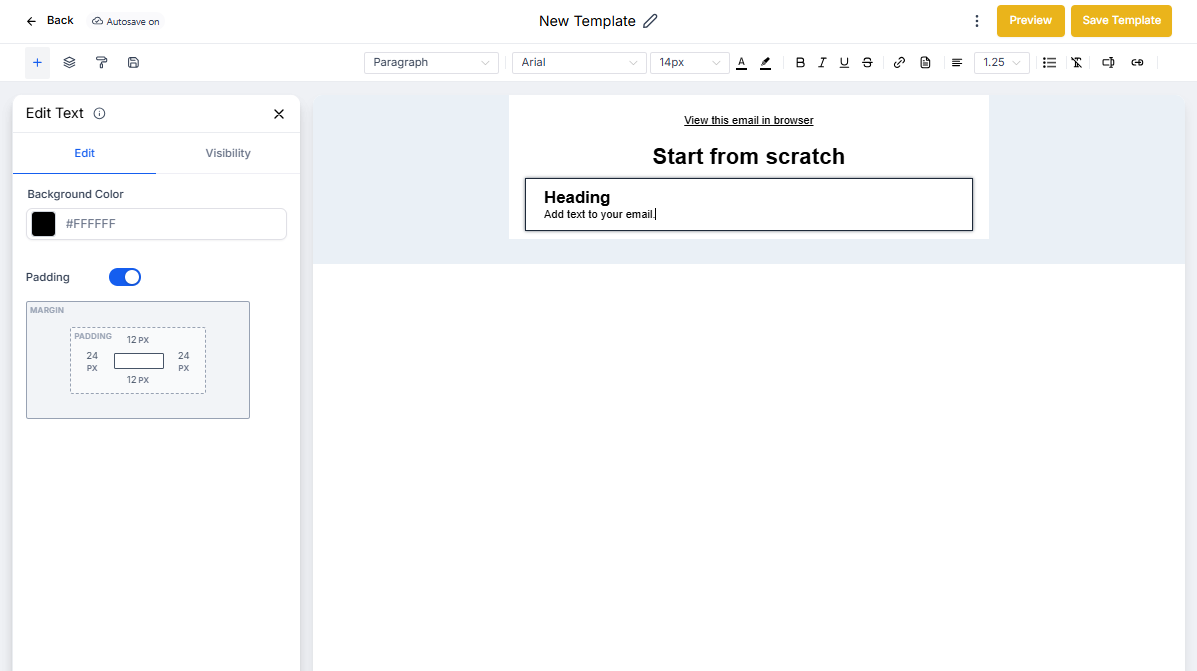
- Type or paste your content directly into the text area
- Use the toolbar to format text (bold, italic, underline, lists, alignment, etc.)
- Apply heading styles (H1–H4) and use the Bold (B) button to control bold styling independently
- Adjust font size, color, and spacing for better readability
- Add hyperlinks to phrases like "Schedule a Tour" or "Complete Enrollment"
- Use the Padding options to control spacing around your text
Visibility Options
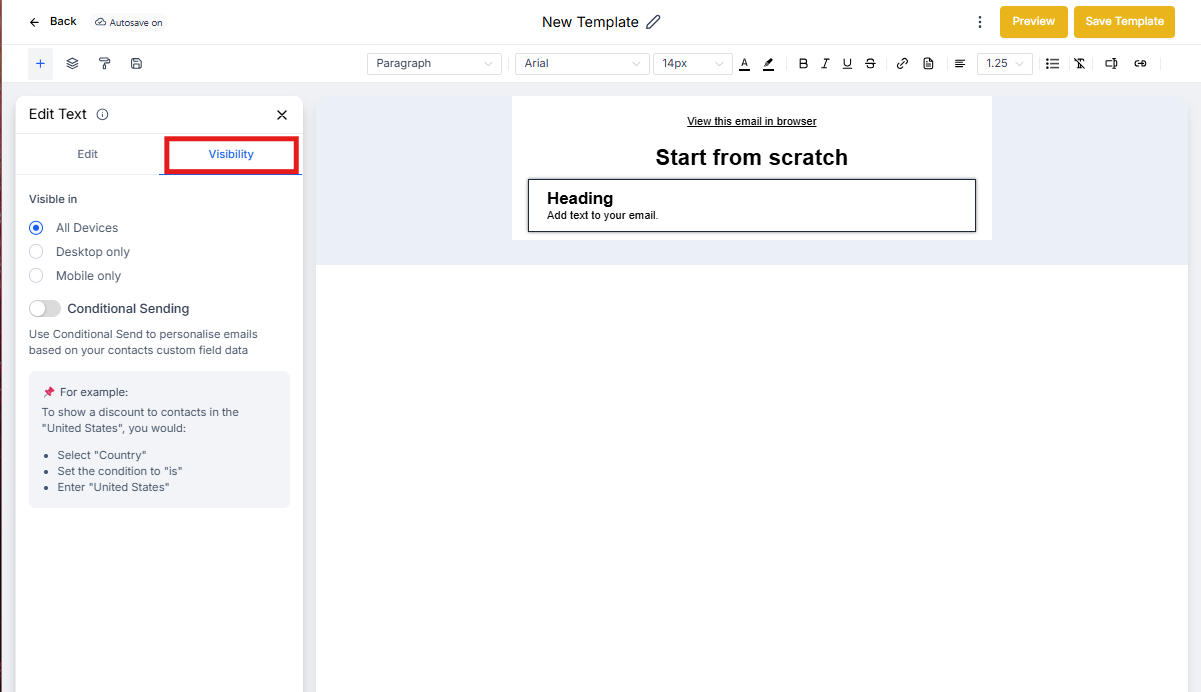
Click the Visibility tab to adjust device-based display settings or set up conditional sending rules. This lets you show different messages to different family segments.
Before sending, preview your email in both desktop and mobile modes to confirm everything looks right.
Frequently Asked Questions
Can I use different fonts or sizes for different parts of the text?
Yes. Highlight specific text and adjust the font, size, or color individually using the inline text toolbar.
How do I add a hyperlink to text?
Highlight the text you want to link, click the link icon in the toolbar, and enter your URL. This is perfect for linking to your enrollment page, tour scheduler, or parent portal.
Does the Text Element support bullet points and numbered lists?
Yes. You can create both bulleted and numbered lists directly from the formatting toolbar—great for outlining program features or enrollment steps.
Is the Text Element mobile responsive?
Absolutely. The Text Element automatically adjusts for smaller screens, ensuring parents can easily read your messages on any device.
How can I remove a Text Element from my layout?
Click on the Text Element and select the trash/delete icon to remove it from your email.
Can I remove bold from heading text (H1–H4)?
Yes. Select the heading text inside the Text Element, then click B in the inline toolbar to toggle bold on or off without changing the heading level.