
How to Personalize Your Email Campaigns with Conditional Content
Show the right message to the right family — automatically. Conditional content lets you display or hide specific sections of your emails based on each family's information, making every message feel custom-tailored.
What is Conditional Content?
Conditional content allows you to show or hide parts of your email — like images, text blocks, or buttons — based on criteria you set. For example, you could show different tour invitation language to families with infants versus toddlers, or display location-specific information for families in different zip codes.
You can set conditions based on any parent or family data in Enrollio, including:
- Location-based content: Show different facility photos or program details based on the family's location
- Program interest: Display relevant class schedules based on the child's age or enrollment stage
- Custom field data: Tailor messaging based on tour status, waitlist position, or any other information you track
Why Use Conditional Content?
Personalization at scale. Every family receives content that feels relevant to their specific situation — without you creating dozens of separate campaigns.
Save time. Instead of building separate email campaigns for different family segments, create one campaign with conditional blocks that adapt automatically.
Higher engagement. Personalized content gets better results. When families see information that matters to them, they're more likely to click, respond, and take action.
Simpler campaign management. Manage all your message variations in one place instead of juggling multiple campaigns and family lists.
How to Add Conditional Content
Step 1: Open your email in the Email Builder (Marketing Emails Campaigns or Templates).
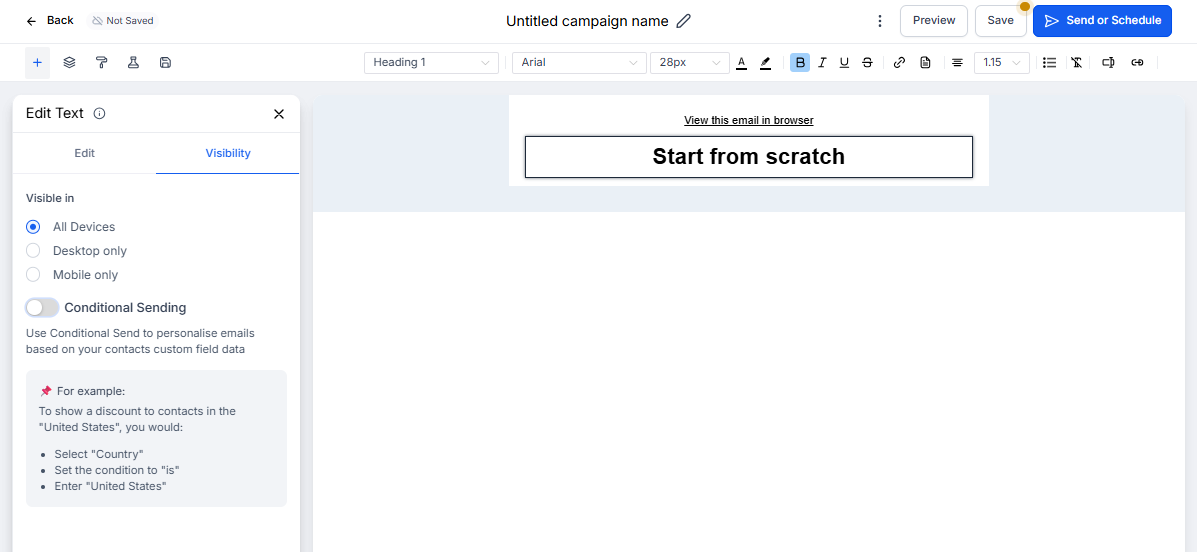
Step 2: Click on the element you want to make conditional — this could be a text block, image, button, or entire row.
Step 3: In the right panel, click the Visibility tab. Or click the conditional element icon that appears when you hover over any element.
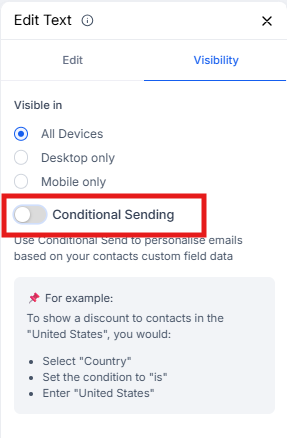
Step 4: Toggle on Conditional Sending.
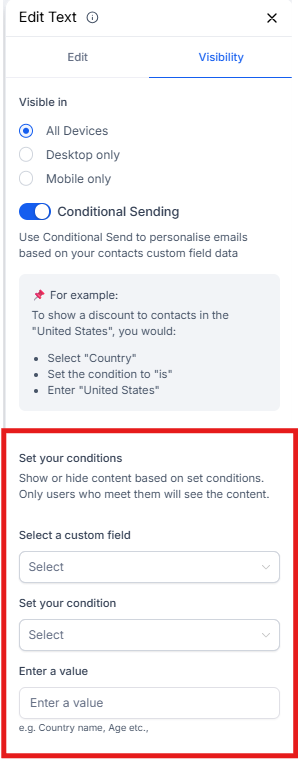
Step 5: Set your condition:
- Choose a Field (like "Child Age" or "Program Interest")
- Set a Condition (is, is not, is empty, is not empty)
- Enter a Value to match against
Pro tip: Leave the value blank to show content only when a field is empty. This is perfect for highlighting missing information or prompting families to complete their enrollment details.
Common Use Cases
Program-specific invitations: Show infant room tour times only to families with babies, and toddler program details to families with older children.
Location-based content: If you operate multiple centers, display the right facility address, staff photos, and local details automatically.
Enrollment stage messaging: Show different calls-to-action based on whether a family is on your waitlist, has toured, or is ready to enroll.
Incomplete profile prompts: Use empty field conditions to remind families to complete missing information like emergency contacts or immunization records.
Frequently Asked Questions
Can I type "NULL" to target empty fields?
No. If you type "NULL" in the value field, Enrollio will look for fields that literally contain the text "NULL" — not empty fields.
To show content only when a field is empty, leave the value blank and set the condition to "is empty." Make sure there are no spaces or placeholder text.
Which field types work with conditional content?
You can use conditional content with:
- Single-line text fields
- Number fields (use plain numbers without $ or other symbols)
- Radio button fields (match the exact option value)
- Single-select dropdown fields (match the exact option value)
Can I add multiple conditions to one element?
Currently, each element supports one condition. To show content based on multiple criteria, you can nest elements inside conditional rows or sections.
Related Articles
- How to Use the Email Builder
- Working with Text Elements in Emails
- How to Preview and Test Your Email Campaigns
- Understanding Custom Fields for Families