
Overview
The Event Start Date action lets you set a specific date and time to trigger Wait actions or schedule future steps in your automation. Use it to control exactly when follow-up messages, tasks, or reminders are sent to families.
Perfect for scheduling tour reminders, enrollment deadline notifications, or any time-sensitive communication with prospective or current families.
What It Does
This action sets a reference point—a specific date, time, or value from a custom field—that your automation uses to schedule subsequent actions. Think of it as marking an important date on the calendar that triggers everything else.
Common uses include:
- Scheduling follow-ups after a tour date
- Setting reminders before enrollment deadlines
- Automating communications based on a child's start date
- Creating recurring monthly reminders for tuition or forms
Configuration Options
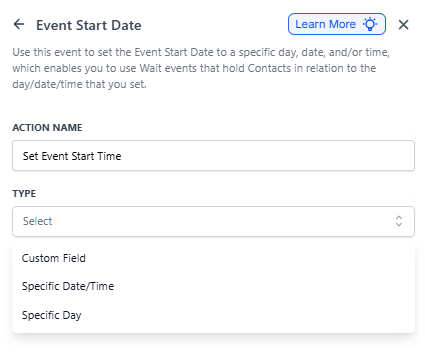
You have three ways to set your event start date:
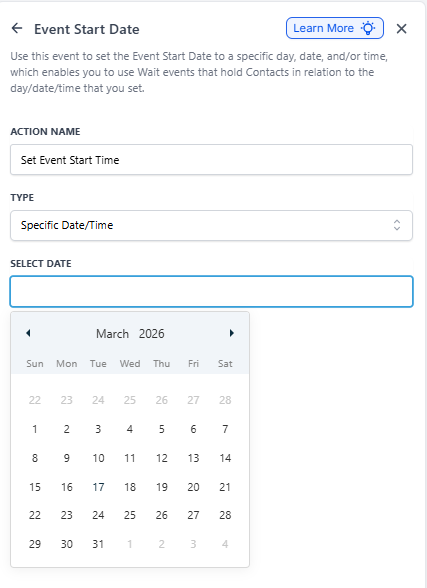
1. Specific Date and Time
Pick an exact date and time from the calendar. Use this when you know the precise moment you want the automation to reference.
Example: You're hosting an open house on September 14, 2024 at 10:00 AM. Set this as your event start date, then add a Wait action to send a reminder email 2 days before.
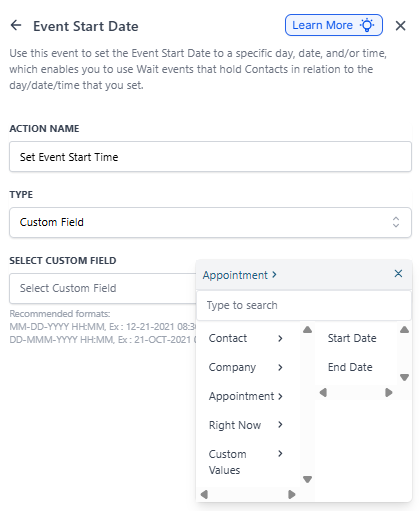
2. Custom Field
Pull the date from a custom field you've already created. This is powerful when each family has their own unique date—like a tour date, enrollment start date, or child's birthday.
Example: You collect each family's preferred tour date in a custom field called "Tour Date." Your automation pulls that date and sends a confirmation immediately, then a reminder the day before their specific tour.
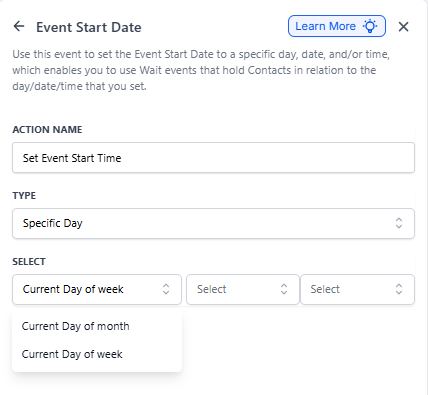
3. Specific Day
Set recurring actions based on the current day of the month or week. Great for monthly reminders or weekly tasks that don't depend on a specific date.
Example: Send tuition reminders on the 1st of every month by selecting "Current Day of Month."
How to Set It Up
- Add the Event Start Date action to your automation
- Give it a descriptive name (e.g., "Tour Date Reference" or "Enrollment Deadline")
- Choose your Type:
- Specific Date/Time: Pick the exact date and time from the calendar
- Custom Field: Select which custom field contains your date
- Specific Day: Choose whether to use current day of month or week
- Save the action
Configuration Fields
| Field | Description | Required |
|---|---|---|
| Action Name | Label that appears in your automation (make it descriptive) | Yes |
| Type | Choose: Specific Day, Specific Date/Time, or Custom Field | Yes |
| Select Custom Field | Appears when Type is "Custom Field" — choose which field stores the date | No |
| Select Date | Appears when Type is "Specific Date/Time" — pick from calendar | No |
| Current Day of Month/Week | Appears when Type is "Specific Day" — set day or week-based triggers | Yes |
Real-World Examples
Tour Follow-Up Automation
Scenario: Send a thank-you email 1 day after a family's tour, then a follow-up call reminder 3 days later.
Setup:
- Type: Custom Field
- Select Custom Field: "Tour Date"
- Add Wait action: 1 day after event start date
- Add Send Email action: Thank you message
- Add Wait action: 3 days after event start date
- Add Create Task action: Follow-up call reminder
Enrollment Deadline Reminder
Scenario: You have an enrollment deadline on September 30, 2024. Send reminders at 2 weeks before, 1 week before, and 2 days before.
Setup:
- Type: Specific Date/Time
- Select Date: September 30, 2024 at 9:00 AM
- Add Wait action: Until 14 days before event start
- Add Send Email: First reminder
- Add Wait action: Until 7 days before event start
- Add Send Email: Second reminder
- Add Wait action: Until 2 days before event start
- Add Send Email: Final reminder
Monthly Tuition Reminder
Scenario: Automatically remind families about tuition payments on the 1st of each month.
Setup:
- Type: Specific Day
- Current Day of Month/Week: Day of Month (1st)
- Add Send Email action: Monthly tuition reminder
💡 Pro Tip
Always combine Event Start Date with Wait actions to create time-based automations. The Event Start Date sets your reference point, and Wait actions count forward or backward from that date.
Important Notes
- Date Format: Enrollio handles date formatting automatically, but make sure your custom fields are set to "Date" type
- Time Zones: All dates and times use your account's default time zone setting
- Past Dates: If the event start date is in the past when a family enters the automation, subsequent Wait actions will trigger immediately or skip depending on your Wait configuration
⚠️ Common Mistake
Don't forget to add Wait actions after setting your Event Start Date. The date itself doesn't trigger anything—it just sets the reference point for other actions to use.