
Managing Email Templates in Automations
Learn how to use email templates inside automations without accidentally changing the original template. This guide explains how template behavior works, how to safely customize email content within an automation, and how to manage updates across multiple steps.
By the end, you'll be able to confidently manage email templates while keeping your parent communications organized and on-brand.
What are Email Templates within Automations
In Enrollio automations, the "Send Email" action lets you add a saved email template to automate parent communication—like welcome emails, tour confirmations, or enrollment reminders. While templates help standardize messaging, each automation often needs small tweaks, like a different subject line or call-to-action.
When you add a template to a Send Email action, Enrollio creates a copy for that automation step. This protects your original template from accidental changes.
Here's how syncing works:
- Sync Edits to Template OFF (default): Edits stay local to the automation step and don't change the original template
- Sync Edits to Template ON: Changes in the automation email and the original template update each other (bi-directional sync)
Key Benefits of Managing Email Templates in Automations
- Safe Customization: Edit emails directly in automations without impacting the original template or other automations
- Flexible Reuse: Use the same template across automations and adjust it for different scenarios—tours, enrollments, waitlists, etc.
- Global Sync (When Needed): Push updates from a template to selected automation steps using a manual sync process
- Template Library Growth: Save any customized automation email as a new template for future use
- Reduced Risk: Prevent unintended changes during team collaboration or campaign edits
How to Use Email Actions in Automations
Step 1: Navigate to Automations
There are 2 ways to navigate to automations:
- Go to Marketing → Emails → Campaigns → Automation campaigns
- Go to Automations
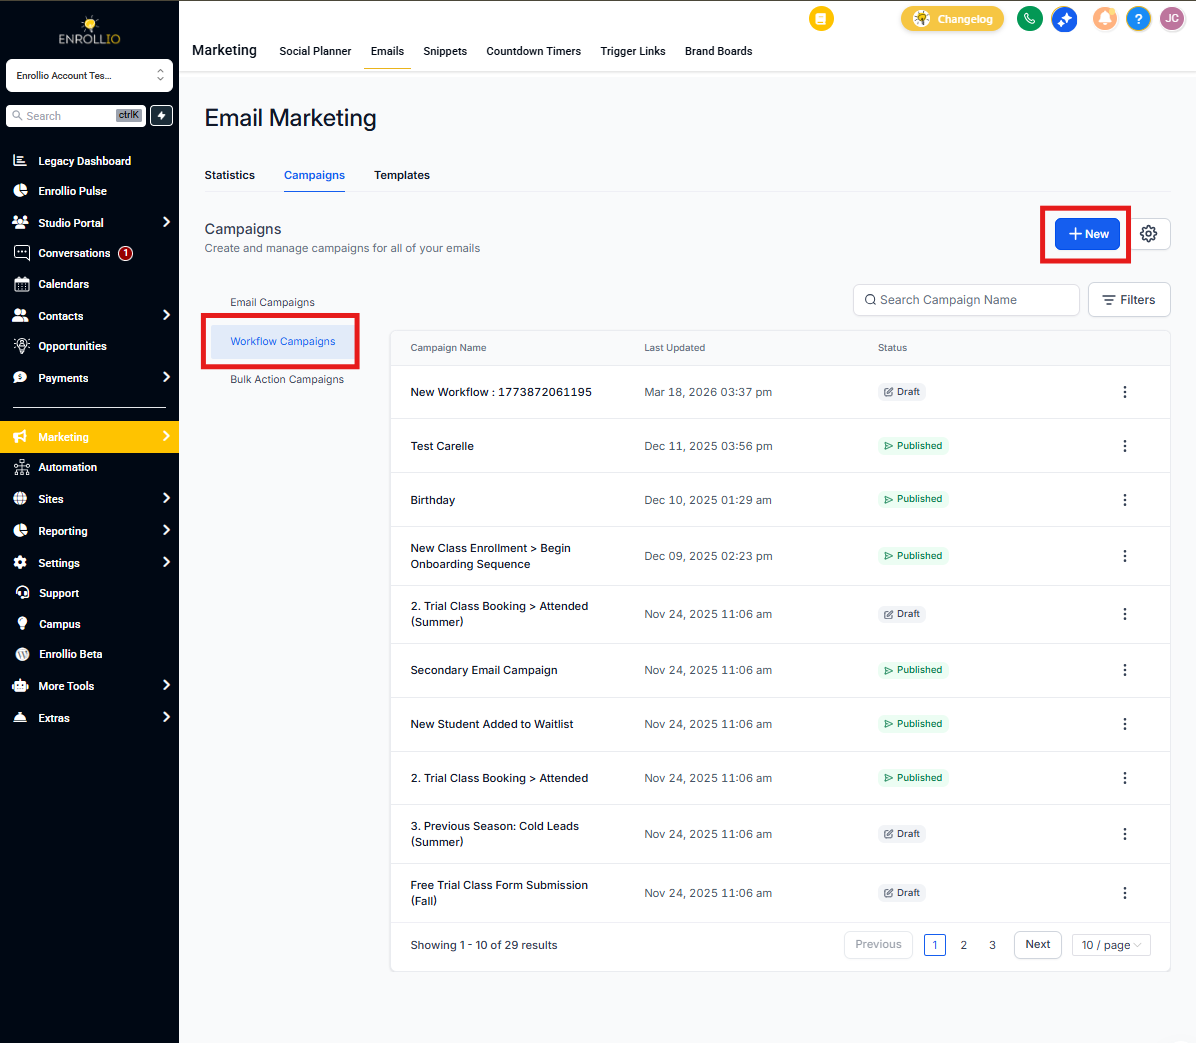
Step 2: Add Send Email Action
- Open an existing automation or create a new one
- Add or edit a Send Email action
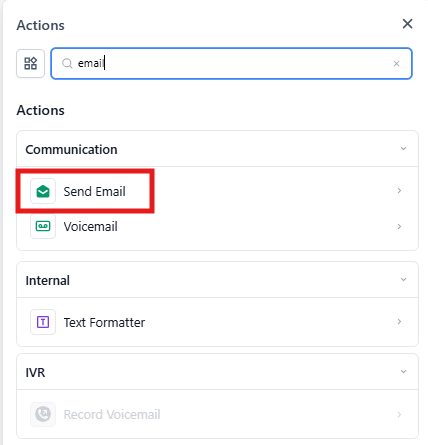
Step 3: Choose How to Start
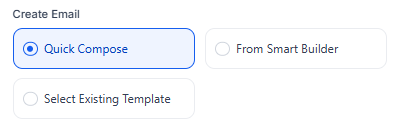
Choose the path that matches your use case under Create Email. You have three options:
- Quick Compose (default): Simple editor for fast messages like tour reminders or enrollment updates
- Smart Builder: Select Design, Code, or Plain Text editor to build from scratch with full control
- Select Template: Pick from My Templates or Templates Library to reuse proven emails
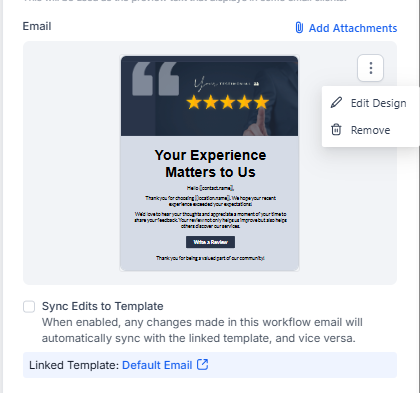
Step 4: Preview Template (Optional)
If using a template:
- Use the Templates dropdown to select the email you want to use in this automation step
- Click the 3 dots icon in the template preview's menu to Edit Design or Remove
- Clicking Edit Design opens the Email Template Editor
- Decide whether to Sync Edits to Template using the checkbox below
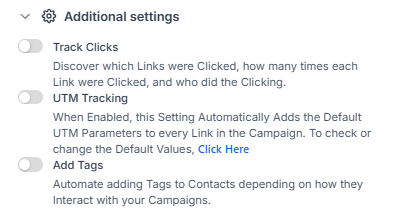
Step 5: Advanced Settings
Expand Advanced Settings to enable:
- Link Tracking: See clicks and CTR for each link in your parent emails
- UTM Parameters: Add campaign tracking tags to measure enrollment page visits
- Tags on Actions: Automatically tag families based on opens/clicks
Step 6: Save and View Statistics
- Click Save Action
- Publish the automation when ready
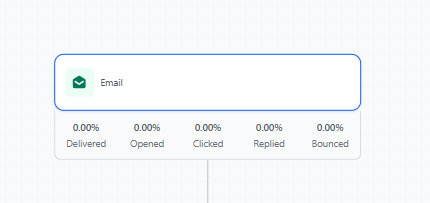
- After sending, reopen the Email action to view Statistics
- Click View Details or Click Performance for deeper insights into parent engagement
Email Template Editor within Send Email Action
To open the Email Template Editor from the Send Email action, click the 3 dots icon in the template preview and select Edit Template. This lets you customize the template specifically for this automation step.
Overview of Email Editor Tools and Layout Options
The email editor includes several tools that help you customize the structure, design, and content of your template. Understanding these interface sections will make it easier to create professional, responsive emails for your families.
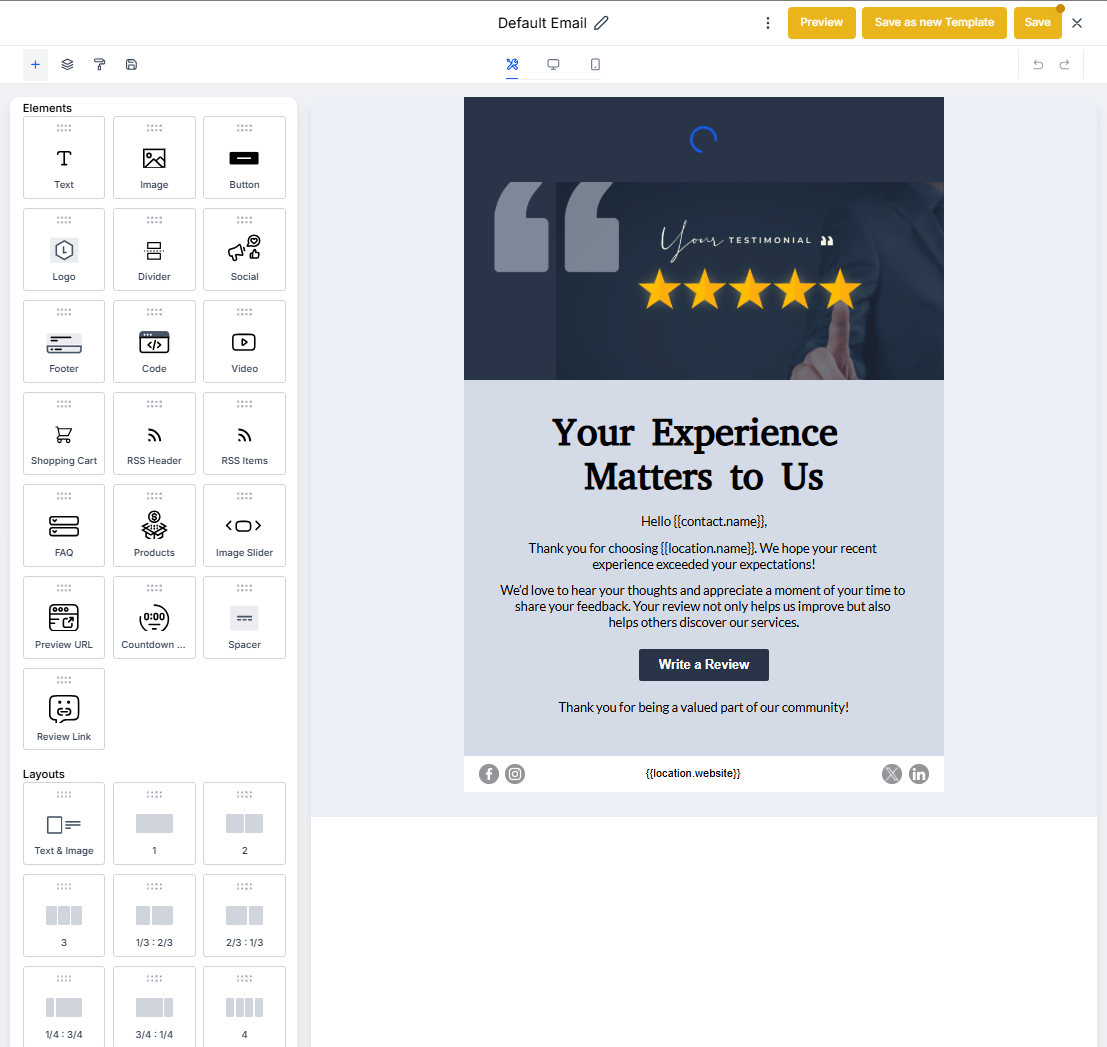
Template Title and Name Editing
At the top-center, you can see the name of your email template. Click the pencil icon next to the title to rename the template. This helps you keep templates organized, especially when managing multiple versions for different enrollment stages.
Top Action Toolbar (Layout Controls)
The row of icons below the title allows you to manage the layout and structure of your email:
- Add Elements icon opens layout blocks
- Manage Element icon manages layers
- Appearance icon sets global text styles
- Saved Item icon handles template-level settings like width and padding
These tools give you foundational control over how your email is visually arranged.
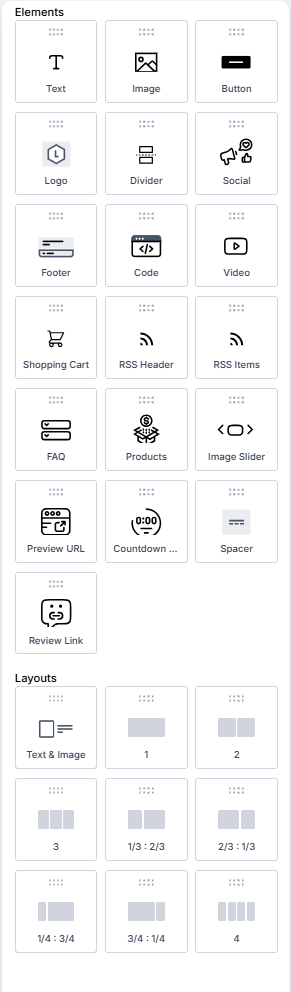
Element Library (Drag-and-Drop Blocks)
The vertical panel on the left displays all available drag-and-drop content blocks. You can add text, images, buttons, logos, dividers, social links, videos, footers, product grids, countdown timers, and more.
These elements allow you to build rich, visual emails tailored to your message—whether it's a tour invitation, enrollment welcome, or waitlist update.
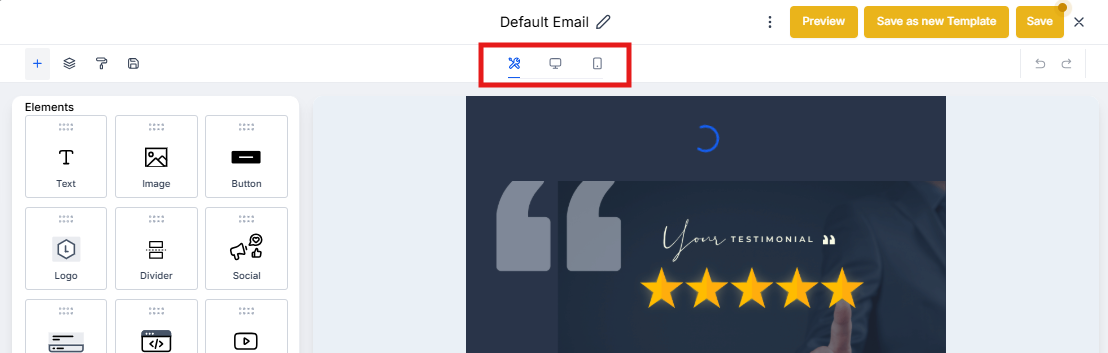
View Mode and Editing Options
The section at the top-center lets you switch between editing and preview modes. You can also toggle between desktop, tablet, and mobile views to see how your email will appear on different devices.
This is essential for ensuring responsive design—most parents check emails on their phones.
Settings and Version History
Click the 3 dots icon to open a dropdown with See Version History and Settings:
- Version History: View previous drafts of the template
- Settings: Update the Subject and Preview Text
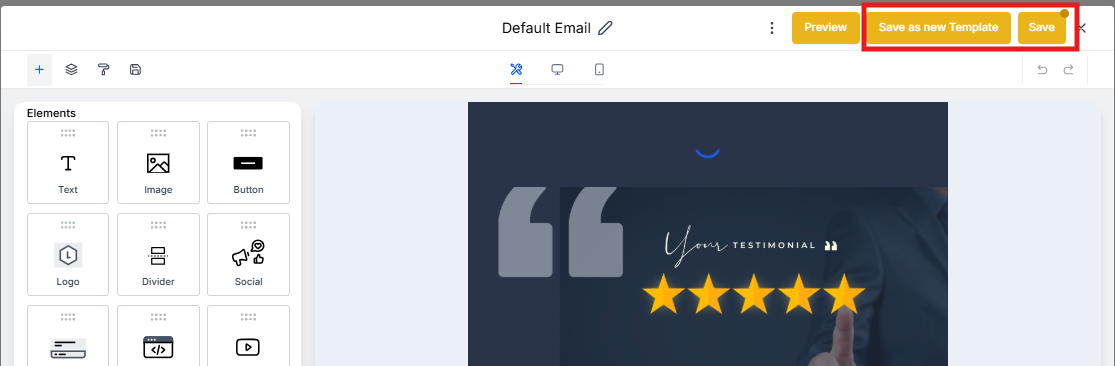
Save and Save as New Template
After customizing your email, you have two save options:
Save as New Template: Click this button in the top-right corner to store it for future use. This creates a new version in your template library without altering the original.
- After clicking Save as New Template, enter a name to identify your custom version (e.g., "Tour Confirmation - Summer 2024")
- Click Continue to save it to your email template library for future use in other automations
Save: Click this button in the top-right corner to update the email within this automation step only. This saves your changes locally to the step and does not create a new template in your email template library.
Sending a Test Email to Review Your Customizations
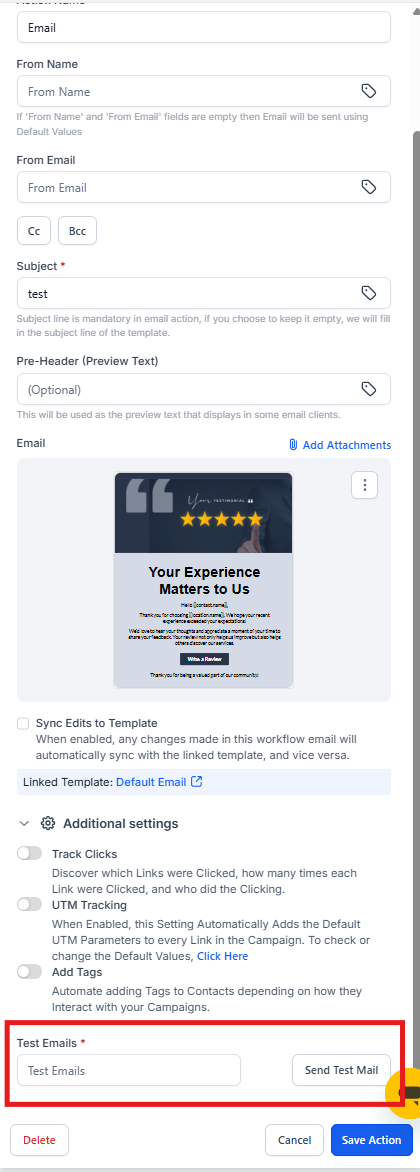
After editing your email template within the automation, use the Test Emails field to enter one or more recipient addresses, then click Send Test Mail.
This allows you to preview the customized email in an actual inbox and verify formatting, personalization, and design before saving the automation action. Send it to yourself or your team to review before it goes to families.
Frequently Asked Questions
Can I link an automation email back to the original template after editing it?
Yes—if the email action uses an existing template, you can turn Sync Edits to Template ON or OFF later. Enrollio confirms the change in a modal.
When sync is ON, edits in the automation email and the template update each other. Use this carefully to avoid unintended changes across multiple automations.
Can I track which automation steps are using a specific template?
Yes. The Sync Changes tool in the Templates section shows a list of automation steps that are currently linked to the selected template for syncing purposes. This helps you understand the impact before making template-wide changes.
What's the best practice for managing templates across multiple automations?
Keep Sync Edits to Template OFF by default. Only turn it ON when you intentionally want to update multiple automations at once. This prevents accidental overwrites and keeps your parent communications predictable.