
Overview
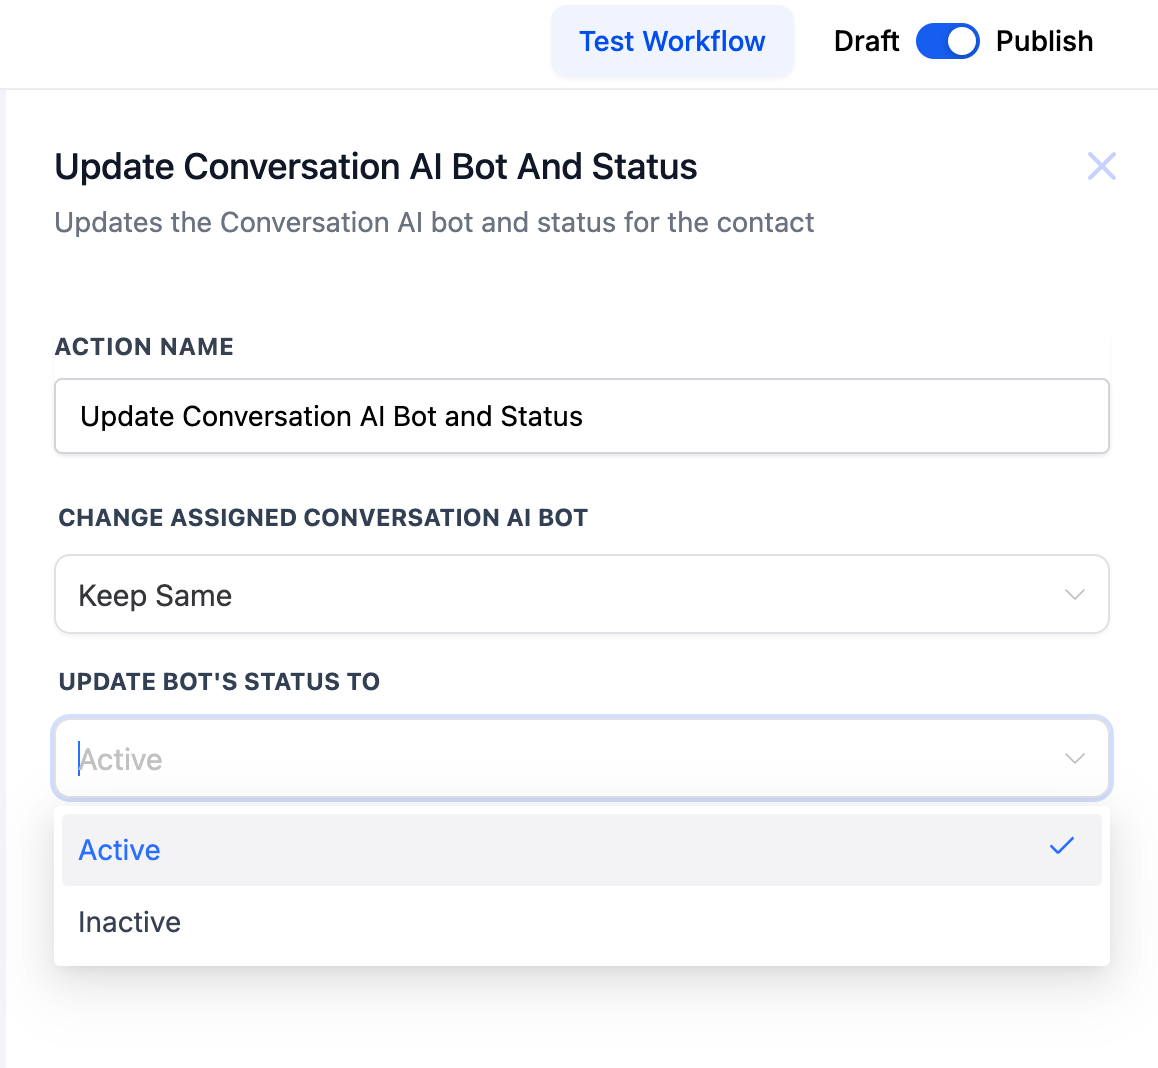
The "Update Enrollio AI Bot and Status" action lets you assign a specific Enrollio AI bot to a parent or family and automatically set its status to Active or Inactive. This streamlines how you manage AI conversations with families throughout their enrollment journey.
By automating bot assignments and status changes, you eliminate manual updates and ensure families get the right support at the right time — whether they're touring, enrolling, or already part of your program.
What This Action Does
The "Update Enrollio AI Bot and Status" action allows you to:
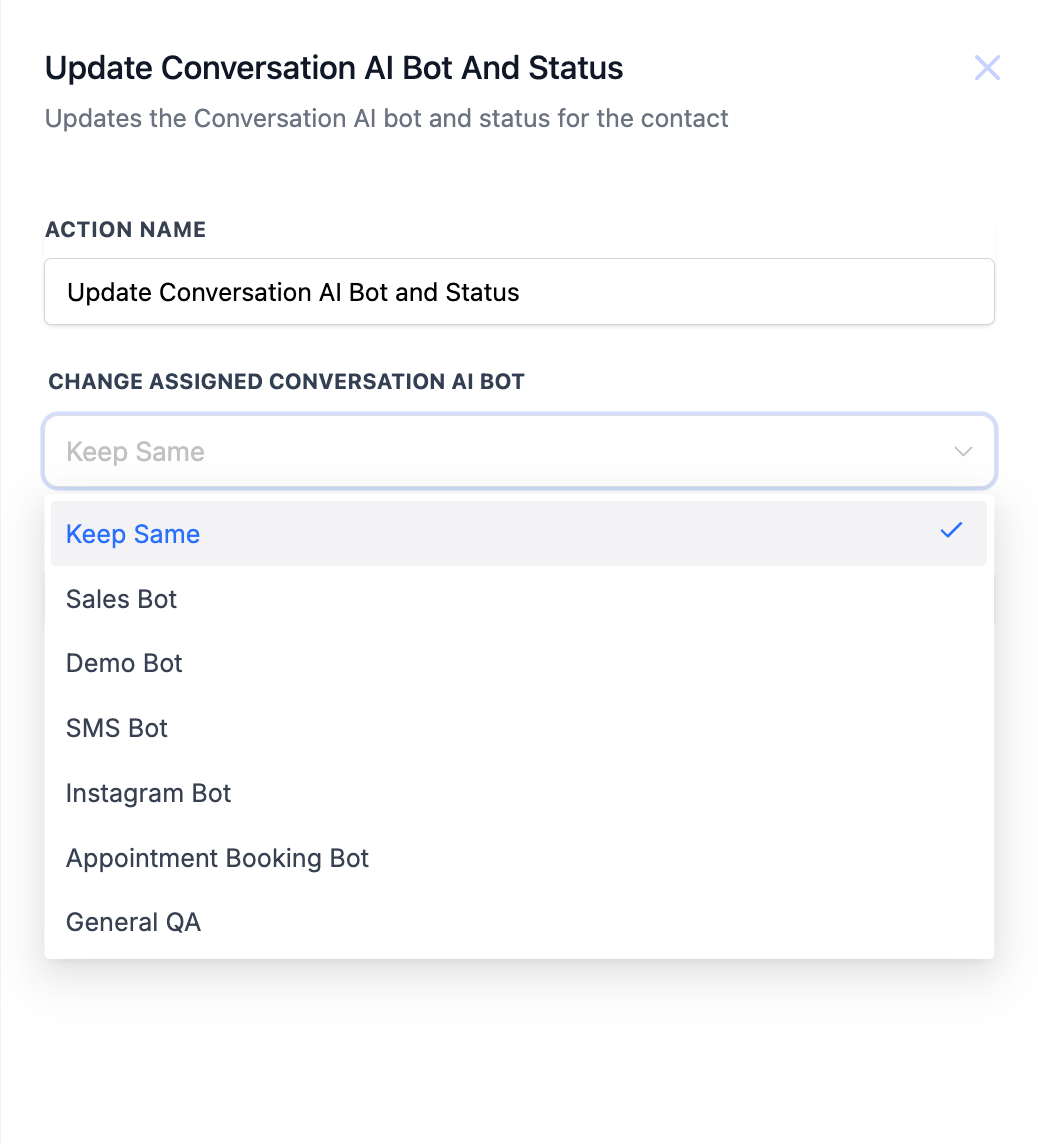
- Select which Enrollio AI bot handles conversations with a specific family
- Set the bot's status to Active or Inactive based on automation triggers
This gives you precise control over how and when your AI bot interacts with each family.
Common Use Cases
Here's how childcare centers use this action:
- Assign different bots for different communication channels (text, email, chat)
- Trigger bot conversations based on actions like tour bookings, enrollment submissions, or tuition payments
- Assign bots based on family tags (new inquiry, waitlist, active enrollment)
- Create dedicated bots for your website chat widget
- Use conditional logic to assign the right bot based on family status or program interest
Important Notes
How Branching Works: This action assigns a bot and immediately continues to the next step in your automation. It doesn't wait for the conversation to finish before moving forward.
Action Settings
Keep Same: Choosing "Keep Same" means the family keeps their currently assigned bot — nothing changes.
Real-World Examples
Example 1: Dedicated Bot for Text Messages
Scenario: You want a specific bot to handle all text message conversations.
How to set it up:
- Create a new automation
- Select the trigger: "Parent replied via text message"
- Add the action: "Update Enrollio AI Bot and Status"
- Choose your SMS bot from the dropdown (e.g., "Tour Inquiry Bot")
- Set the bot status to Active
- Publish the automation
Now whenever a parent texts you, this dedicated bot automatically takes over the conversation.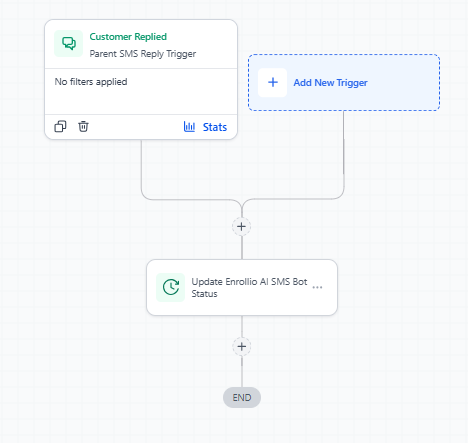
Example 2: Dedicated Bot for Website Chat
Scenario: You want a specific bot to handle conversations that start from your enrollment site's chat widget.
How to set it up:
- Create a new automation
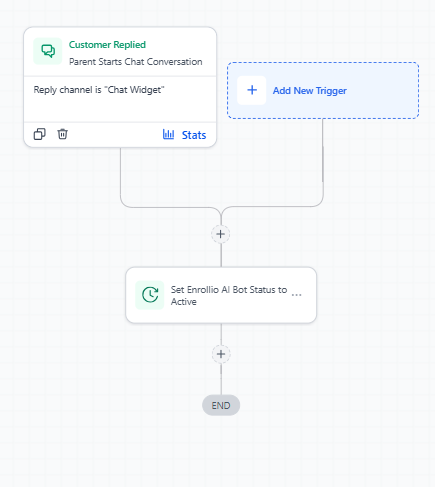
- Select the trigger: "Parent started chat conversation"
- Add a filter to specify which chat widget (if you have multiple sites)
- Add the action: "Update Enrollio AI Bot and Status"
- Choose your website chat bot
- Set the bot status to Active
- Publish the automation
This creates a seamless experience where website visitors get instant answers from a bot trained specifically for enrollment questions.
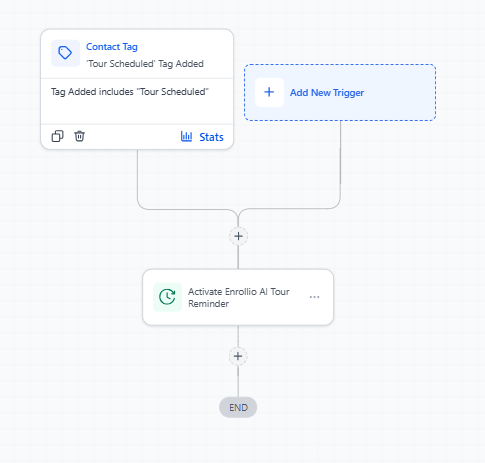
Example 3: Assign Bots Based on Tags
Scenario: You want different bot conversations for families based on where they are in your enrollment process.
How to set it up:
- Create a new automation
- Select the trigger: "Tag added: Tour Scheduled"
- Add the action: "Update Enrollio AI Bot and Status"
- Select your tour reminder bot
- Set the bot status to Active
- Publish the automation
This ensures families who book tours get personalized pre-tour information and reminders through AI conversations.
Example 4: Activate Bot After Enrollment Payment
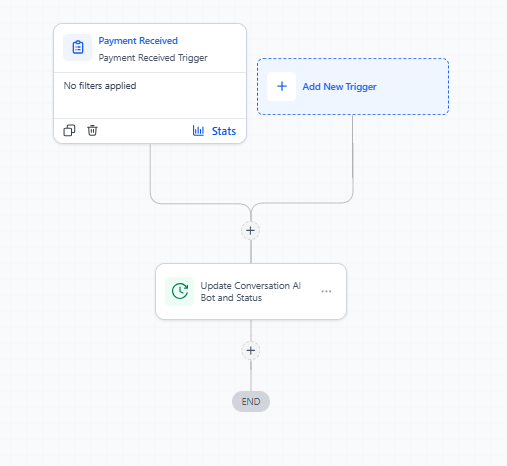
Scenario: You want your AI bot to interact only with families who have completed their enrollment payment.
How to set it up:
- Create a new automation
- Add the trigger: "Payment received"
- Add the action: "Update Enrollio AI Bot and Status"
- Select your onboarding bot (e.g., "New Family Welcome Bot")
- Set the bot status to Active
- Publish the automation
Now only enrolled families receive welcome messages and onboarding support from your AI bot, making conversations more relevant and valuable.
Additional Tips
- Create separate bots for different programs (infant care, preschool, after-school) to provide more specific answers
- Use automation conditions to assign bots based on the family's location, program interest, or enrollment stage
- Bots can be dynamically reassigned as families move through your enrollment pipeline
- Test your bot assignments by going through the enrollment process yourself to ensure smooth handoffs