
How to Use the Email Builder and Inline Editor
Create professional, personalized emails for your families with Enrollio's Email Builder. The inline editor gives you real-time control over your message design — no technical skills required.
What is the Email Builder Inline Editor?
The inline editor is your built-in tool for creating and customizing emails within Enrollio's Templates and Campaigns. It uses a "What You See Is What You Get" (WYSIWYG) approach, so as you make changes — bolding text, adding images, changing colors — you see exactly how your email will look.
This means you can create beautiful, on-brand emails for parent communications without any guesswork.
Key Features
- Text styling: Multiple heading formats, font choices, sizes from 8px to 96px
- Precise color control: Use hex codes to match your brand colors exactly
- Text formatting: Bold, italic, underline, strikethrough, and hyperlinks
- Custom values: Insert personalized details for each family
- AI-assisted content: Generate engaging email copy faster
- Spacing control: Adjust padding around content for perfect layouts
Note: Default padding is set to maintain clean, consistent email structure:
- Top: 12px
- Bottom: 12px
- Left: 24px
- Right: 24px
You can adjust these settings to match your preferred layout style.
When to Use the Email Builder
Here are common scenarios where childcare centers use the email builder:
Enrollment Communications
Welcome Sequence: Create a series of emails introducing new families to your center. Use a single-column layout with your logo, clear headings, and step-by-step information. Add dynamic content to personalize with the child's name.
Tour Follow-Up: Send a warm follow-up after a family tours your facility. Use a clean, single-column design with photos from your center and a clear call-to-action to complete enrollment.
Waitlist Updates: Keep families informed about their waitlist status. A simple, personal layout works best — think letter-like format with warm colors and a direct message.
Parent Engagement
Weekly Newsletter: Share updates, photos, and upcoming events. A multi-section layout works perfectly — one section for announcements, another for photos, another for upcoming events. Use brand-aligned colors and easy-to-read fonts.
Event Invitations: Announce parent nights, open houses, or holiday celebrations. Keep it clean and straightforward with a prominent call-to-action button and essential event details in large, clear text.
Parent Appreciation: Show gratitude to your families. Use personalized content with each family's name and specific details about their time at your center. Warm colors and a single-column layout create an intimate feel.
Operational Communications
Tuition Reminders: Send gentle payment reminders. Use a multi-section layout — one section for the reminder, another highlighting the benefits of your program. Keep the tone professional and supportive.
Policy Updates: Communicate changes to schedules, policies, or procedures. A straightforward single-column layout with bullet points for key information ensures clarity.
Re-enrollment Campaigns: Encourage families to re-enroll for the next session. Use vibrant colors, highlight program benefits, and include a clear call-to-action button. Dynamic content can reference their child's current classroom.
Marketing & Growth
Promotional Campaigns: Announce limited-time enrollment offers or new programs. Use eye-catching colors that match your brand, high-quality images of your facility, and a prominent call-to-action button. Single-column layouts work best for mobile viewing.
Referral Requests: Ask happy families to refer friends. Keep the design simple and personal with a direct call-to-action and easy sharing options.
Open House Announcements: Create excitement for upcoming open houses. Include compelling headlines, date/time details in large text, and high-quality photos of your center.
Feedback & Reviews
Testimonial Requests: Ask established families for reviews. A simple, personal single-column email with a friendly tone and direct call-to-action encourages responses.
Survey Invitations: Gather parent feedback. Use a clean design with a clear explanation and prominent button to start the survey. Keep text concise.
Special Communications
Birthday Wishes: Celebrate children's birthdays. Use fun colors, festive images, and personalized content with the child's name.
Milestone Celebrations: Acknowledge transitions like moving to a new classroom. Personal tone, relevant images, and dynamic content make these emails memorable.
Year-End Review: Share highlights from the year. Use a multi-section layout with photos, key moments from each season, and gratitude for families' partnership.
How to Use the Email Builder
Follow these steps to create emails in Enrollio:
Navigating the Interface
- Navigate to Marketing → Email Templates or Marketing → Campaigns
- Click Create Template or New Campaign
- Choose Start from Scratch or select a template
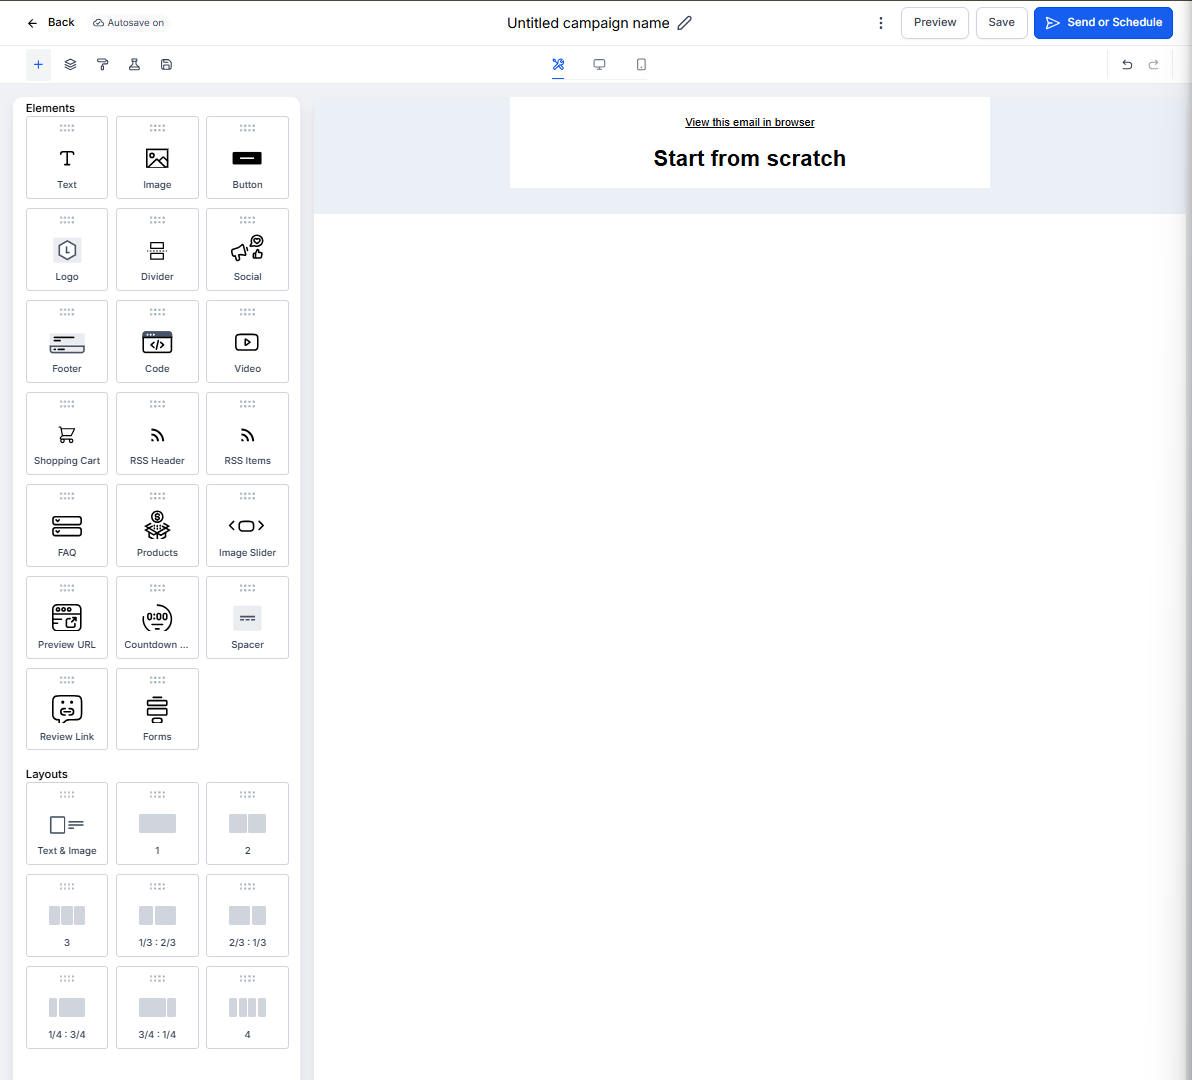
- The editor opens with your canvas on the right and tools on the left
Managing Text and Formatting
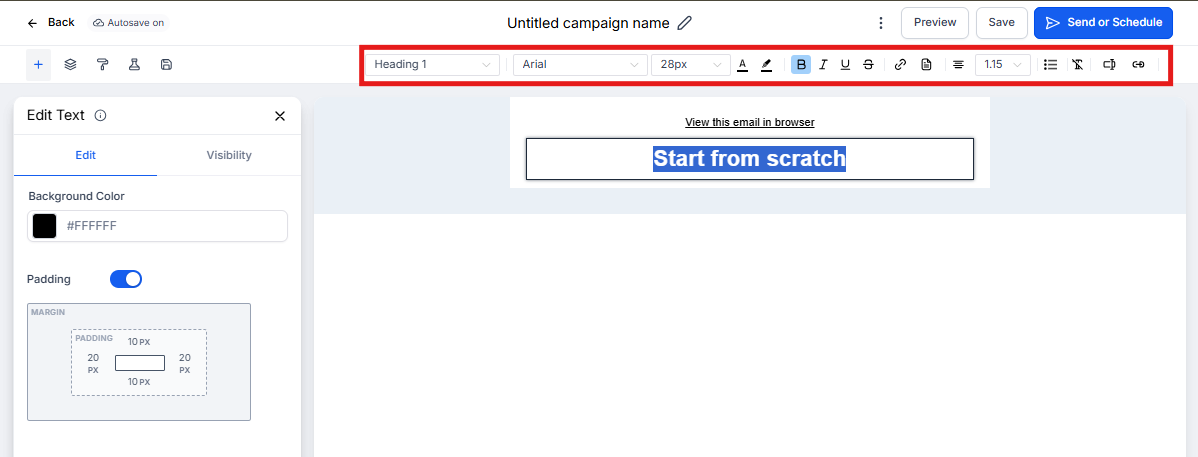
- Click any text block to activate the inline editor
- Highlight text to see formatting options appear
- Use the toolbar for:
- Headings: Choose from H1-H6 for hierarchy
- Font style: Select from available fonts
- Font size: Set anywhere from 8px to 96px
- Text color: Click the color picker and enter hex codes
- Formatting: Bold, italic, underline, strikethrough
- Alignment: Left, center, right, or justified
- To add a link: Highlight text → click link icon → enter URL → Save
Pro Tip: Use your brand's hex codes for consistent colors across all family communications.
Using Advanced Editing Options
Adding Dynamic Content:
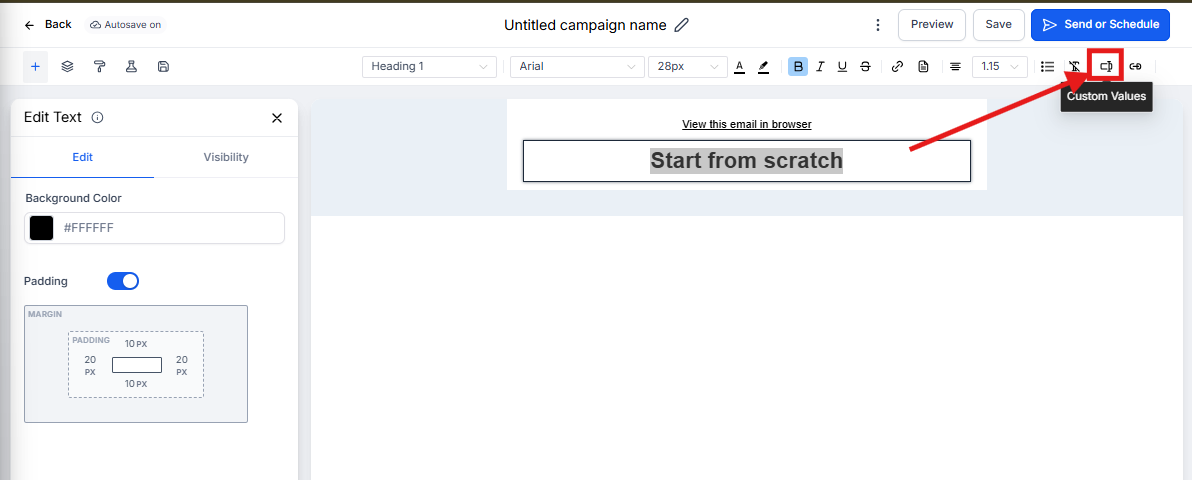
- Place cursor where you want personalized content
- Click the Custom Values button
- Select from options like:
- Parent first name
- Child's name
- Enrollment date
- Current classroom
- The merge field inserts automatically
Using AI Content Generation:
- Click in any text block
- Select the AI Assistant icon
- Describe what you need (e.g., "Write a friendly reminder about tomorrow's field trip")
- Review the generated content
- Edit as needed and insert
Managing Elements
Adding Elements:
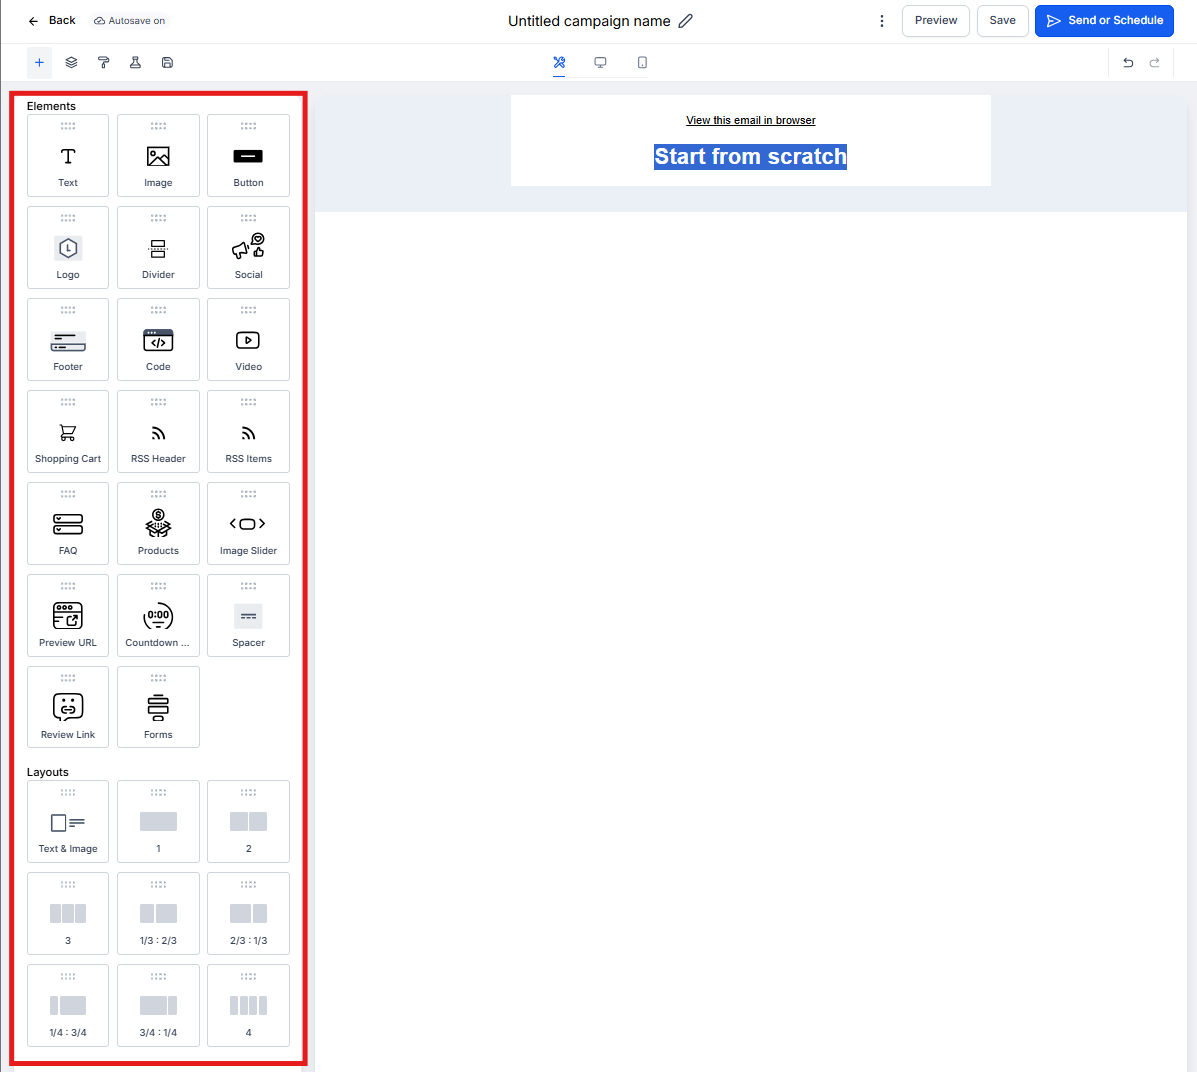
- In the left sidebar, browse available elements:
- Text blocks
- Images
- Buttons
- Dividers
- Social media icons
- Spacers
- Drag and drop elements onto your canvas
- Click any element to customize it
Working with Images:
- Drag an image element to your canvas
- Click Upload Image or select from your library
- Adjust image settings:
- Width and alignment
- Alt text (important for accessibility)
- Link destination (optional)
- Add padding or borders as needed
Creating Buttons:
- Add a button element
- Edit button text (e.g., "Schedule a Tour", "Complete Enrollment")
- Set the destination URL
- Customize appearance:
- Background color
- Text color
- Border radius for rounded corners
- Padding and alignment
Pro Tip: Use bold, contrasting colors for call-to-action buttons to make them stand out.
Adjusting Appearance and Styling
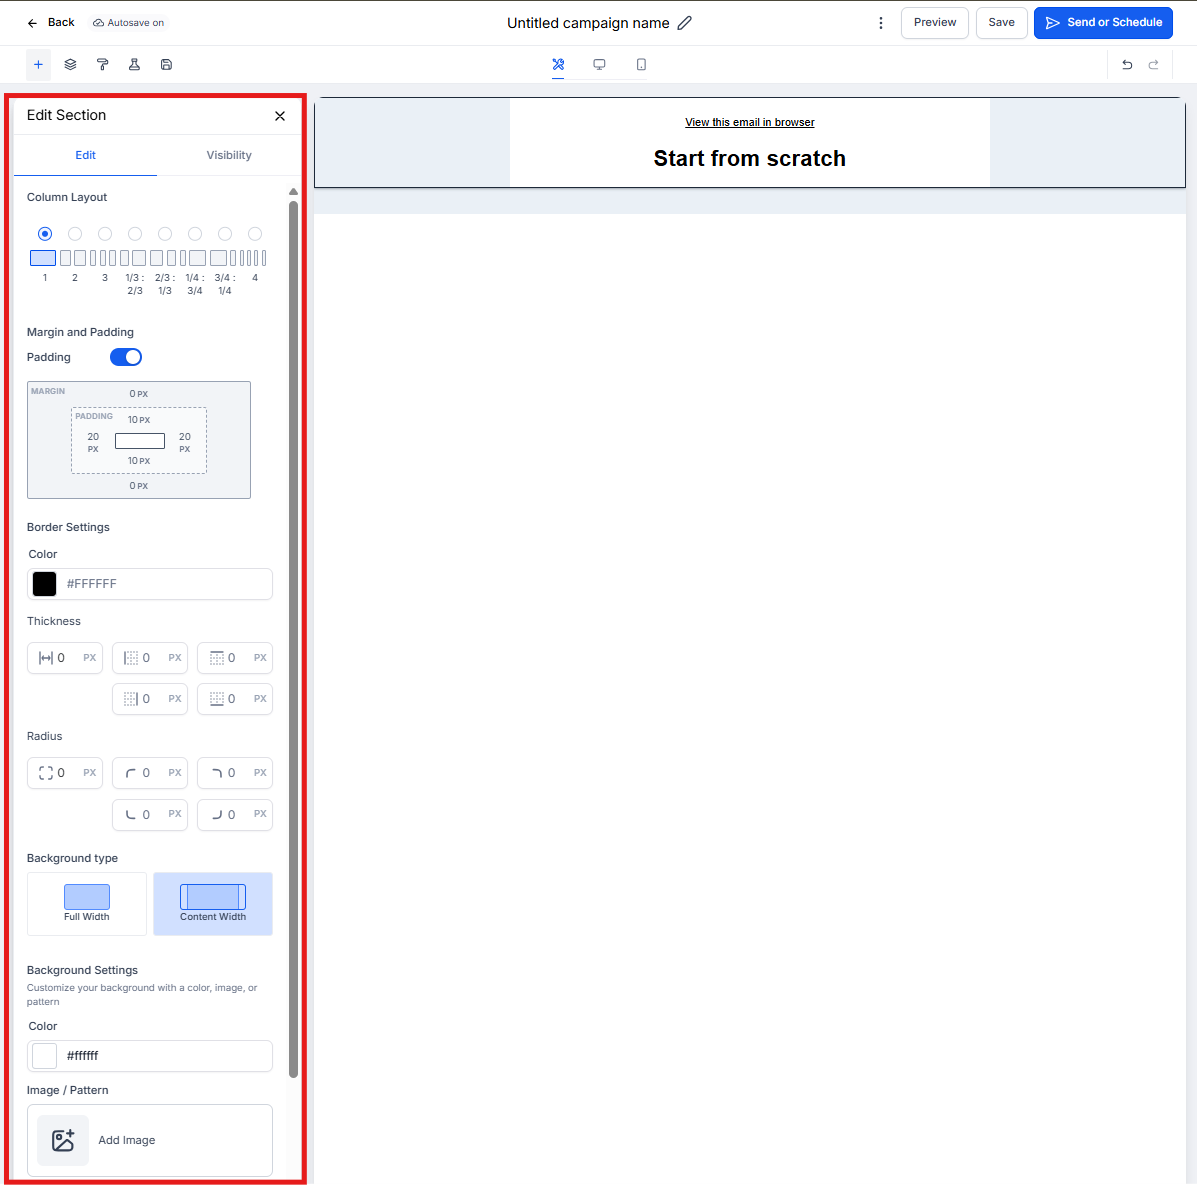
Layout Settings:
- Click on a section or container
- Access the settings panel on the right
- Adjust:
- Background color: Set section backgrounds
- Padding: Control spacing around content (default: 12px top/bottom, 24px left/right)
- Borders: Add visual separation between sections
- Column layout: Choose single or multi-column
Multi-Column Layouts:
- Add a Columns element
- Choose number of columns (2-4 typically)
- Drag content into each column
- Adjust column width ratios if needed
Note: Single-column layouts are more mobile-friendly. Use multi-column sparingly and test on mobile.
Mobile Formatting
Most parents check email on their phones, so mobile optimization is critical.
Mobile View Configuration
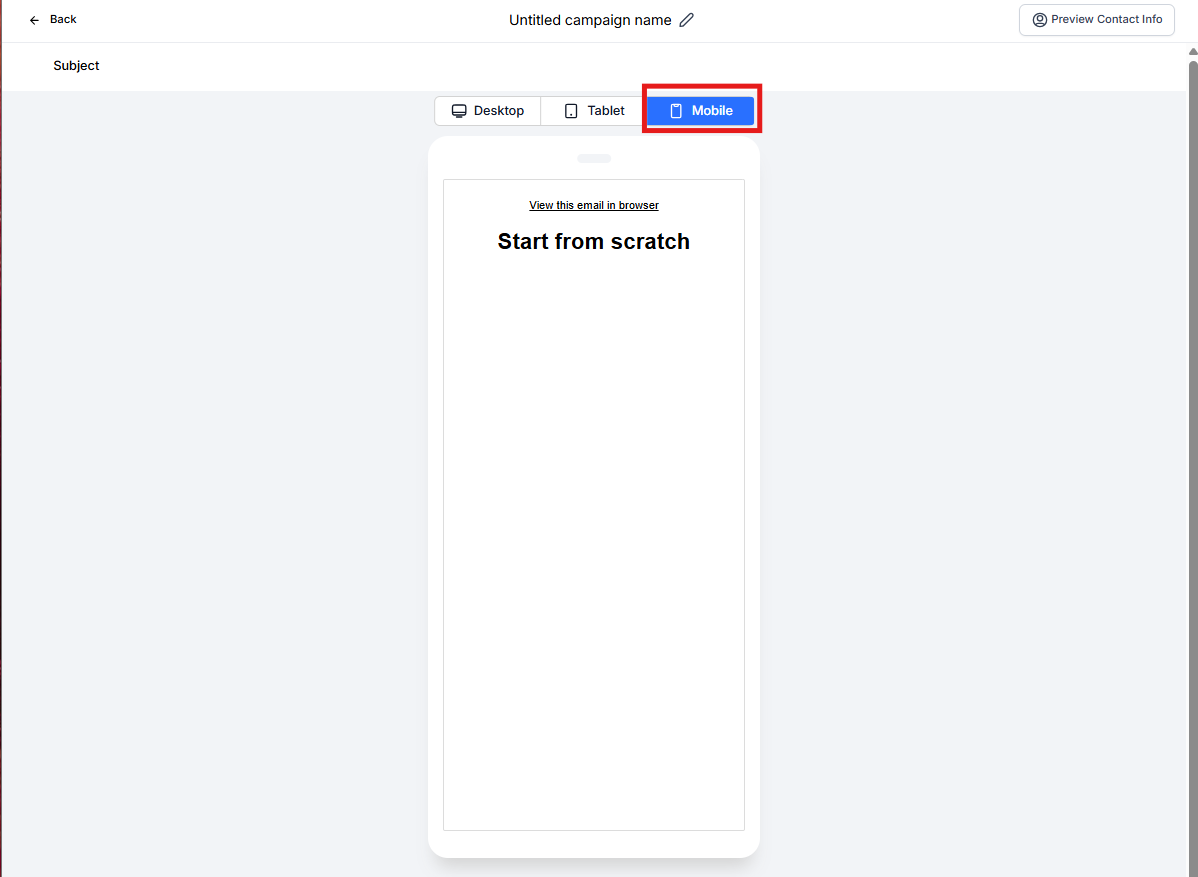
- Click the Mobile View toggle at the top of the editor
- Review how your email appears on phones
- Make mobile-specific adjustments:
- Reduce font sizes if text feels too large
- Stack columns vertically for easier reading
- Increase button sizes for easier tapping
- Adjust image sizes to fit smaller screens
- Toggle back to desktop view to ensure both versions look good
Best Practices for Mobile
- Keep it simple: Single-column layouts work best
- Large text: Minimum 14px for body text, 22px for headings
- Tappable buttons: At least 44px tall with clear spacing
- Short paragraphs: 2-3 sentences maximum
- Compressed images: Optimize for faster loading
- Clear hierarchy: Use headings to break up content
Preview and Testing
Using Preview in Browser
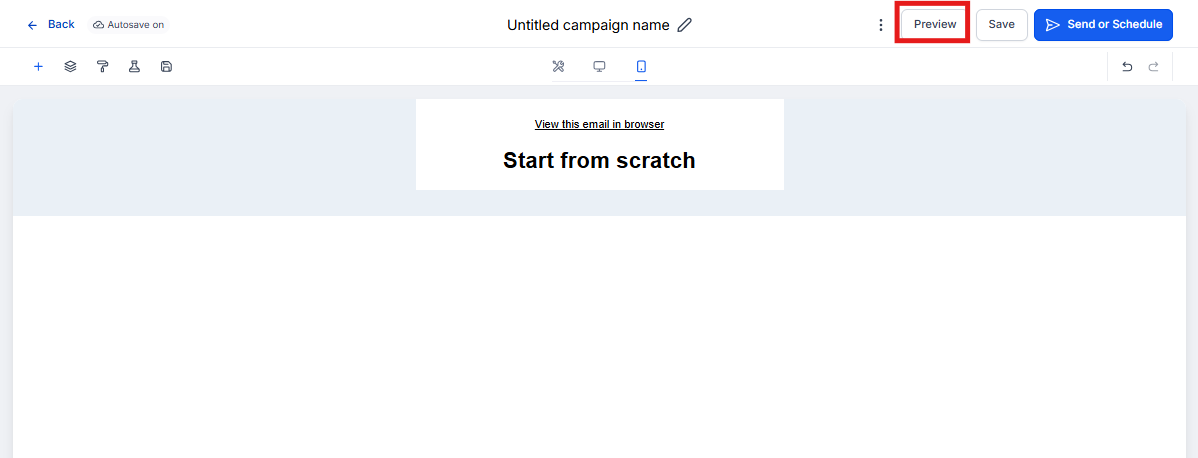
- Click Preview in the top right
- Your email opens in a new browser tab
- Review the full email as families will see it
- Check all links work correctly
- Review personalization fields render properly
- Test on both desktop and mobile browsers
Send Test Email:
- Click Send Test
- Enter your email address
- Send and review in your actual inbox
- Check how it displays in different email clients (Gmail, Outlook, etc.)
Pro Tip: Always send a test to yourself before sending to families. Check it on your phone too.
Saving and Using Templates
- When you're happy with your design, click Save
- Give your template a clear name (e.g., "Monthly Newsletter - Fall 2025")
- Add to a category for easy finding later
- Saved templates appear in your Templates library
- Reuse templates for consistent family communications
Common Questions
Can I save custom brand colors for easy reuse?
Yes. Save your center's brand colors as custom values or keep a document with hex codes handy to paste in.
What image formats work best?
JPG and PNG work best. Aim for images under 1MB for faster email loading.
Can I include videos?
Email doesn't support embedded videos well. Instead, add an image thumbnail linked to a video hosted on your website or YouTube.
How do I ensure my email doesn't go to spam?
Avoid spam trigger words ("free," "urgent," excessive caps), maintain a good text-to-image ratio, and always include an unsubscribe option.
Can I A/B test different email versions?
Yes, when creating campaigns, you can set up A/B tests to see which subject lines or content performs better.
What's the ideal email width?
Stick to 600-650px wide for desktop. The builder handles mobile responsiveness automatically.
Next Steps
Ready to communicate with your families? Start with a simple template and build from there. The more you use the email builder, the faster you'll create beautiful, effective parent communications.
Need inspiration? Check out our pre-built templates designed specifically for childcare centers — from welcome sequences to event invitations.