
Event Start Date Automations
Event Start Date automations let you send messages or take actions based on a specific date tied to a family or enrollment opportunity. This is perfect for childcare businesses that need to send reminders before a child's start date, follow up after orientation, or check in on enrollment milestones.
What Are Event Start Date Automations?
Unlike automations that trigger immediately when something happens, Event Start Date automations wait for a specific date you've set. Think of them as calendar-based automations.
Common uses in childcare:
- Send paperwork reminders 2 weeks before a child's start date
- Welcome messages on the first day of enrollment
- Follow-up surveys 30 days after a family starts
- Orientation reminders before scheduled tour dates
How to Set Up an Event Start Date Automation
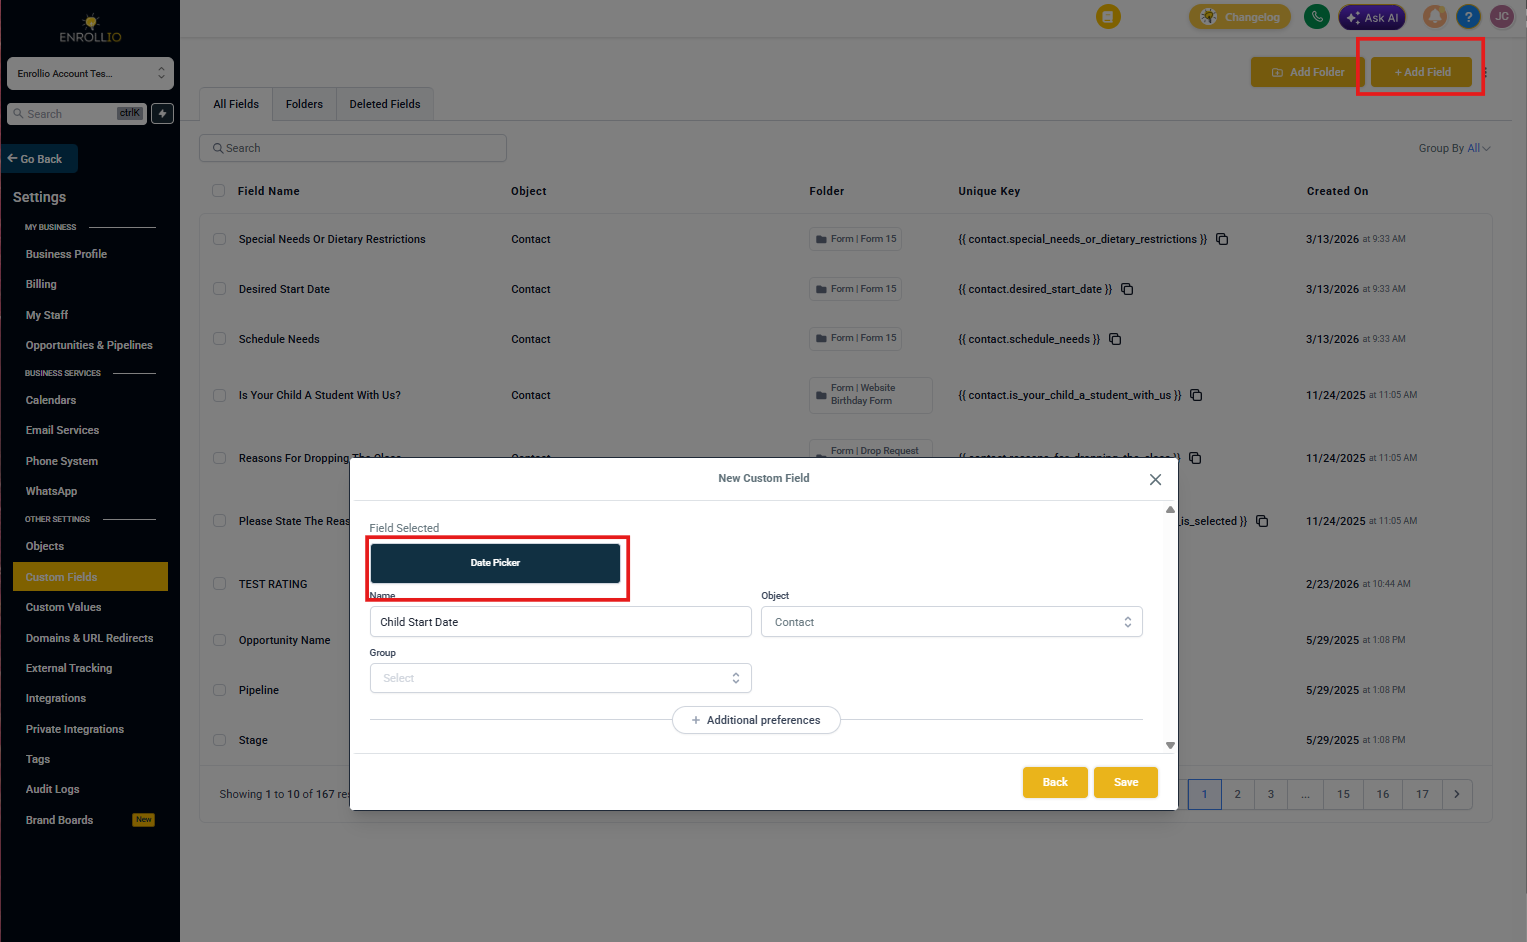
Step 1: Create a Custom Date Field
First, you need a date field to trigger the automation. This could be "Child Start Date," "Orientation Date," or any milestone date.
- Go to Settings → Custom Fields
- Click Add Custom Field
- Choose Date as the field type
- Name it something clear like "Start Date" or "Enrollment Date"
- Save the field
Step 2: Build Your Automation
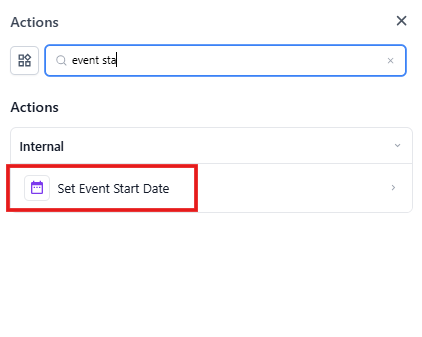
- Navigate to Automations from your dashboard
- Click Create Automation
- Select Event Start Date as your trigger
- Choose the custom date field you created
- Set when the automation should run (before, on, or after the date)
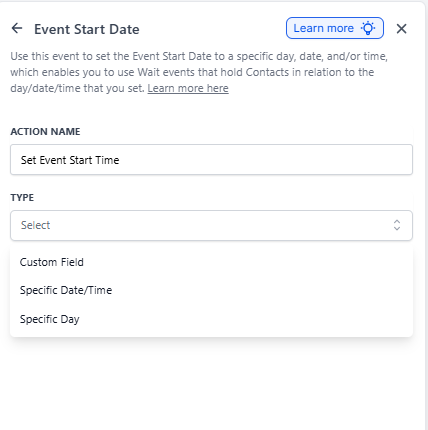
Step 3: Set Your Timing
Tell Enrollio when to trigger this automation relative to your event date:
- Days Before: Send a reminder 7 days before the start date
- On the Date: Welcome message on day one
- Days After: Follow-up survey 30 days after starting
You can also set a specific time of day (like 9:00 AM) to control when messages go out.
Step 4: Add Your Actions
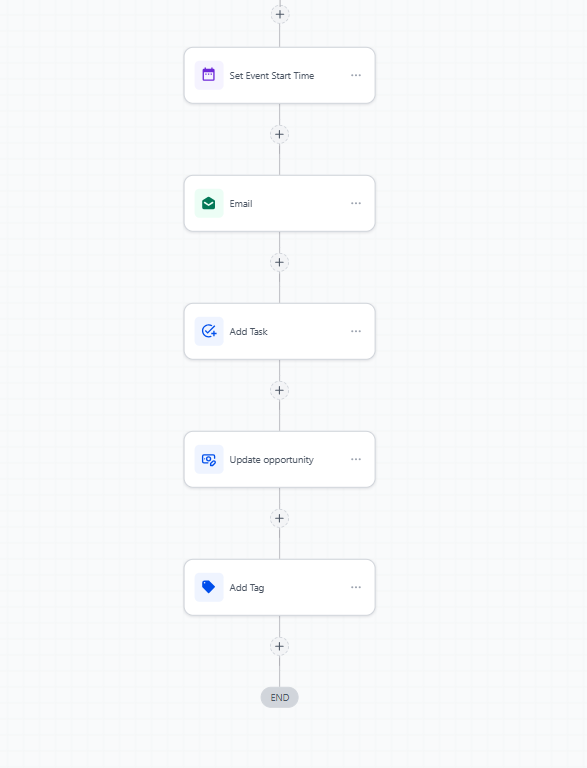
Now build what happens when the automation triggers:
- Send an email or text message
- Create a task for your team
- Update the family's stage in your enrollment pipeline
- Add tags to organize your contacts
Click the + button to add each action, then configure the details.
Step 5: Activate Your Automation
Once you're happy with your automation, toggle it to Active in the top right corner. It will now run automatically for any family with that date field populated.
Pro Tips
Tip: Add filters to your automation so it only runs for specific enrollment types or locations. This keeps your messaging relevant.
Tip: Test your automation by creating a test family record with a date set to tomorrow. You'll see exactly what families will receive.
Tip: Use merge fields in your messages to personalize them with the child's name, start date, or classroom assignment.
Common Questions
What happens if I change the date after the automation runs?
If you move a start date to a new date, the automation won't re-trigger for dates that have already passed. It will only trigger for future timing you've set.
Can I use the same date field for multiple automations?
Yes! You might have one automation that sends a reminder 7 days before, another that sends a welcome message on the date, and a third that follows up 30 days after.
What if a family doesn't have a date set?
The automation simply won't trigger for that family until you add a date to their record.
Related Articles
- Creating and Managing Custom Fields
- Building Your First Automation
- Using Merge Fields in Messages
- Automation vs. Manual Campaigns