
Automation Action - Internal Notification
Internal Notifications keep your childcare team instantly updated on important events. Whether it's a new tour request, a completed enrollment form, or a family moving off the waitlist, this automation action ensures the right staff members are notified via email, in-app alerts, text message, or WhatsApp.
This article shows you how to set up and use Internal Notifications in your automations.
Table of Contents
- What is an Internal Notification?
- Key Benefits of Internal Notifications
- How To Set Up Internal Notifications
- Technical Notes & Limitations
- Running Internal Notifications Without a Family
- Frequently Asked Questions
What is an Internal Notification?
Internal Notifications are automated alerts sent to selected users, roles, or teams within your Enrollio account. These notifications are triggered by specific conditions in your automations and ensure staff members receive timely updates directly in their preferred channel.
Internal notifications are perfect for directors, enrollment coordinators, and front desk staff who need immediate visibility on critical events like new tour bookings, enrollment submissions, or pipeline updates.
Key Benefits of Internal Notifications
Internal Notifications streamline team communication and help ensure no important update gets missed.
- Real-time updates: Notify staff instantly about important automation triggers
- Multi-channel support: Send via email, in-app notification, text message, or WhatsApp
- Role-based targeting: Send notifications to individual users, user roles (e.g., all admins), or specific teams
- Improved accountability: Ensure the right people are informed when families or tasks are assigned
- Customizable content: Personalize notifications with templates, trigger links, and dynamic fields
How To Set Up Internal Notifications
Setting up Internal Notifications in automations takes just a few minutes. Here's how:
Access Automation Builder
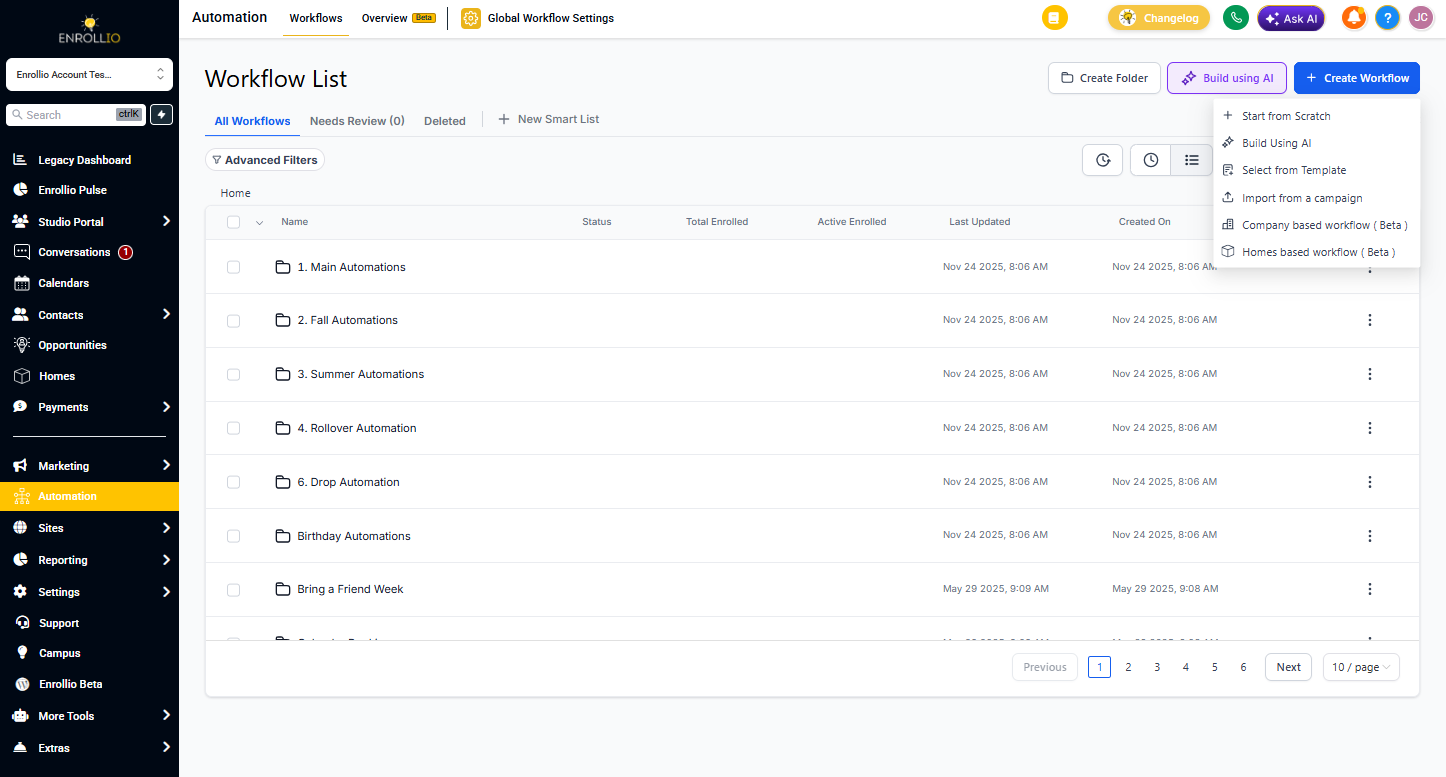
- Navigate to the Automation tab in the left-hand menu
- Click the + Create Automation button at the top-right
- Choose whether to start from scratch, use a template, or select a recipe
Select Internal Notification Action
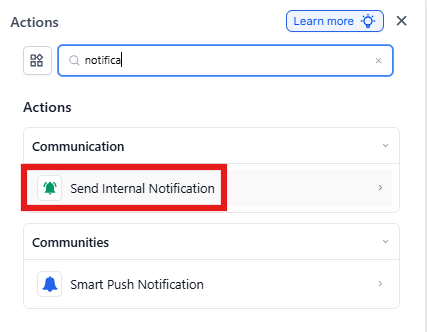
- In your automation builder, click the + button to add a new action
- From the actions list, scroll down and select Send Internal Notification
- This opens the configuration panel where you'll set up alerts for your team
Name the Action
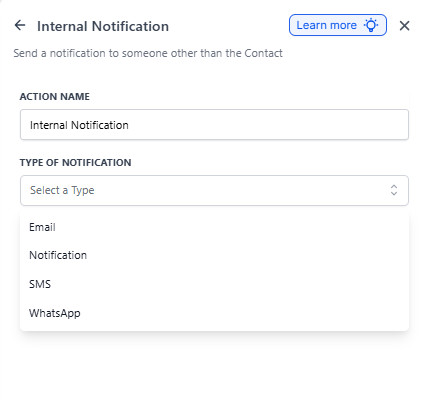
Enter a clear and descriptive Action Name for your internal notification. Use specific names like "Notify Director – New Tour Request" to keep automations organized and easy to manage.
Select Notification Type
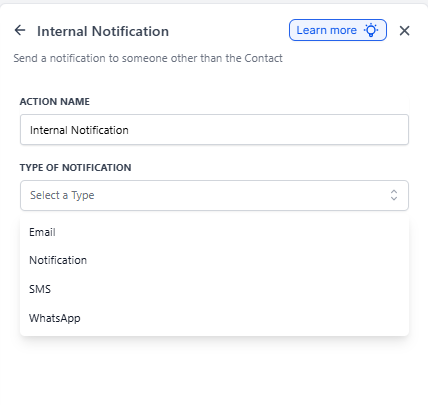
Choose the Type of Notification from the dropdown menu. Your options include:
- Email for detailed updates with formatting and attachments
- In-App Notification for quick alerts inside Enrollio
- Text Message for urgent notices
- WhatsApp for chat-style communication
Select the channel that best fits your scenario. For example, use email for enrollment confirmations, in-app for daily updates, or text messages for urgent parent concerns.
Email Notification Type
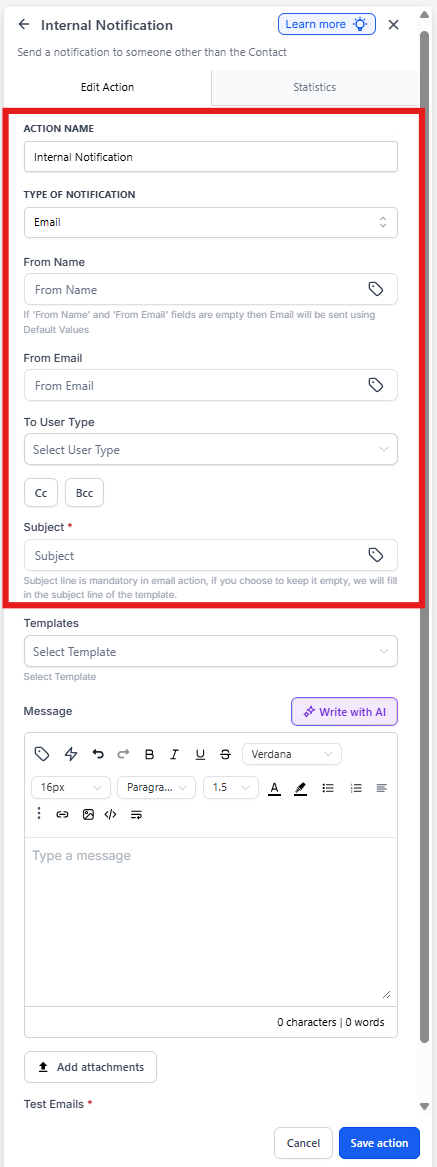
When setting up Email Notifications, you'll configure fields that define how the message is delivered and displayed to recipients.
Email Settings
- From Name: Enter the display name that appears in the recipient's inbox. Use the tag icon to insert dynamic values
- From Email: Specify the email address the notification should be sent from. You can insert custom values with the tag icon
- To User Type: Select which internal users should receive the email (e.g., admins, assigned users, or specific roles)
- CC/BCC: Add additional recipients with CC (visible to everyone) or BCC (hidden from others). Each entry counts as a separate email
- Subject: Enter a subject line to clearly indicate the email's purpose. You can use custom values to personalize it dynamically
Email Content Setup
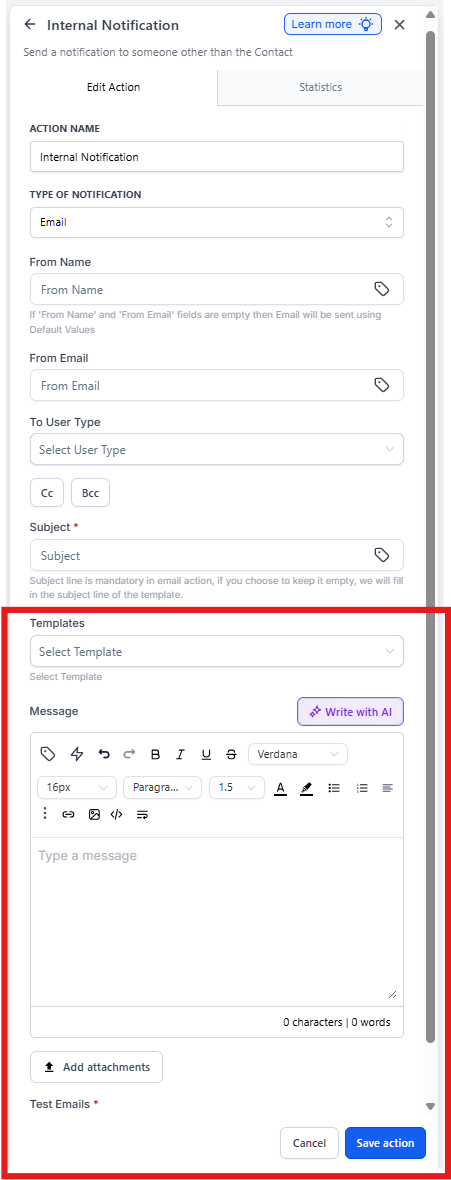
- Templates: Select a pre-built email template from the dropdown to save time and maintain consistency
- Message: Write or edit your custom message. Use the toolbar for formatting and the tag icon to insert dynamic values like family name or enrollment details
- Write with AI: Click this button to generate suggested content for your email. You can edit the AI-generated text to fit your needs
- Add Attachment: Click to include files in your notification—useful for sharing forms, contracts, or resources
Notification Type – In-App Notification
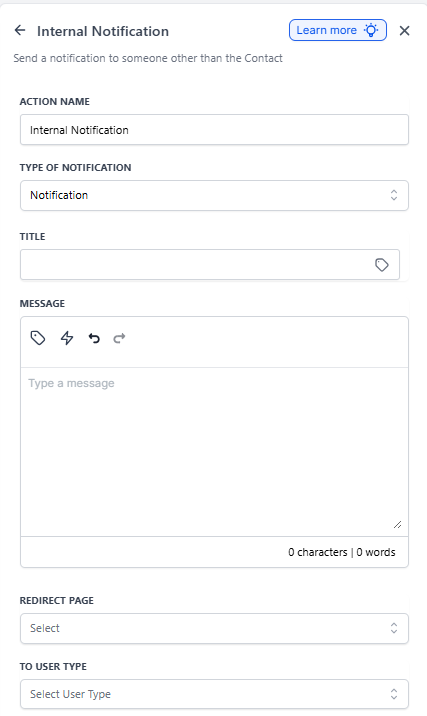
When you select Notification as the type, the alert appears inside Enrollio under the bell icon. This is perfect for quick updates that don't require an email or text message.
In-App Settings
- Title: Enter a concise title that appears at the top of the notification. Use the tag icon for dynamic values
- Message: Write the main content. Keep it brief and actionable, and use formatting tools or custom values for relevant details
Notification Redirect & Recipients
- Redirect Page: Select the page users land on when they click the notification. Guide them to the family record, enrollment opportunity, or relevant screen
- To User Type: Choose which user type receives this notification (specific roles, assigned users, or teams)
Notification Type – Text Message
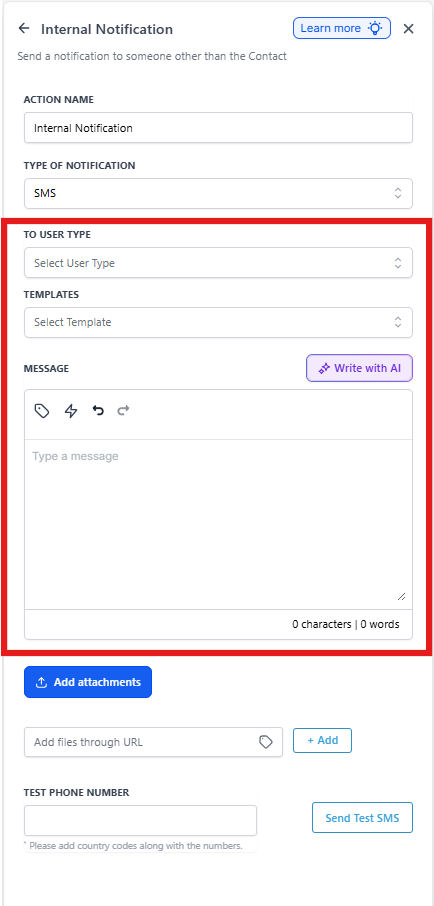
Selecting Text Message as the notification type sends alerts directly to a user's registered phone number. This works best for urgent or time-sensitive updates.
Text Message Settings
- To User Type: Select which user type should receive the text message (e.g., admins, assigned users, or teams)
- Templates: Pick from pre-built text message templates for faster setup, or leave blank to write a custom message
- Message: Write your text message content. Keep it short and clear, and use the tag icon for custom values or the Write with AI option for assistance
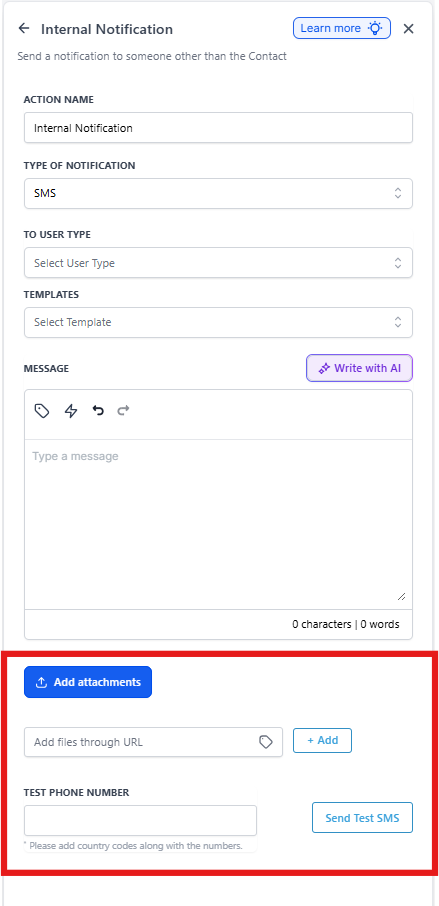
Text Message Attachments & Testing
- Add Attachment: Click to include files in your text notification—useful for sharing supporting documents
- Add Files via URL: Paste a file URL and click + Add to attach files directly to the message
- Test Phone Number: Enter a valid phone number (with country code) and click Send Test to preview the message before activating the automation
Notification Type – WhatsApp
Selecting WhatsApp sends notifications through WhatsApp to users who have the app connected. This is ideal for teams that prefer chat-style communication.
Configuration options are similar to text messages, including recipient selection, templates, message content, and attachments.
Technical Notes & Limitations
- Users must have valid contact information (email address, phone number, or WhatsApp connection) to receive notifications
- CC and BCC recipients each count as a separate email send
- Text message and WhatsApp notifications require users to have registered phone numbers in their profiles
- In-app notifications appear under the bell icon and remain until dismissed
- File attachments have size limits depending on the channel (check platform documentation for specifics)
Running Internal Notifications Without a Family
You can trigger Internal Notifications even when there's no family record attached to the automation. This is useful for system alerts, daily reports, or team reminders.
When setting up these notifications, you won't be able to use family-specific custom values (like parent name or child age), but you can still personalize with user information, date/time stamps, and static content.
Frequently Asked Questions
Can I send notifications to multiple users at once?
Yes. Select a user role (like "All Admins") or use CC/BCC for email notifications to reach multiple team members with a single action.
What happens if a user doesn't have a phone number on file?
Text message and WhatsApp notifications will fail for that user. Make sure staff profiles include current phone numbers to avoid missed alerts.
Can I customize the notification based on the trigger?
Absolutely. Use custom values (the tag icon) to insert family names, enrollment details, tour times, or any other information from the automation trigger. This makes notifications more relevant and actionable.
How do in-app notifications work?
In-app notifications appear under the bell icon in the Enrollio interface. Users see a badge with the number of unread notifications and can click through to the relevant page you configured.
Can I test notifications before activating the automation?
Yes. For text messages, use the "Test Phone Number" field to send a preview. For emails, you can send yourself a test by adding your email to the CC field temporarily.
Do Internal Notifications count toward my message limits?
Email and text message notifications count toward your account's sending limits. In-app notifications and WhatsApp messages may have different counting rules—check your plan details.