
Overview
This article will guide you through importing enrollment opportunities into Enrollio using a CSV file. Learn how to prepare your data, map fields, and ensure a smooth import process to keep your enrollment pipeline organized and up-to-date.
Prerequisites for Importing
Before starting the import process, make sure you meet these requirements:
- User Permissions: Only users with Admin access can import data
- File Format: The file must be in CSV (.csv) format
- File Size Limit: Your CSV file must be under 30 MB. If it's larger, split it into smaller files
- Single Sheet Requirement: Your CSV file must contain only one sheet/tab
- Header Row: The first row should NOT be blank. Include a header row where at least one column header corresponds to a field in Enrollio
Common Mistakes to Avoid
Watch out for these common issues that can cause import failures:
- ❌ Mismatched headers: Ensure CSV headers match Enrollio fields
- ❌ Blank required fields: Every row should have at least one required field (Name, Email, or Phone)
- ❌ Special characters in phone numbers: Remove spaces, dashes, or letters
- ❌ Duplicate records within CSV: Clean your list before importing
Why Import Enrollment Opportunities?
Importing enrollment opportunities allows you to bulk add or update prospective enrollments in your Enrollio platform. This streamlines data entry when onboarding new families or transitioning from another system, ensuring your enrollment pipeline stages are aligned and enrollment activity is tracked accurately.
Benefits of using CSV imports:
- Save time: Upload dozens or hundreds of enrollment opportunities in one go
- Maintain data accuracy: Structured fields prevent common errors
- Improve consistency: Ensure pipeline stages and enrollment values follow a standard format
- Speed up onboarding: Quickly integrate prospective families from previous systems
- Update existing enrollments: Easily modify opportunity stages or values
- Sync families and opportunities: Ensure enrollment data links directly to family records
How to Import Enrollment Opportunities
Follow these steps to successfully import enrollment opportunities into Enrollio using a CSV file.
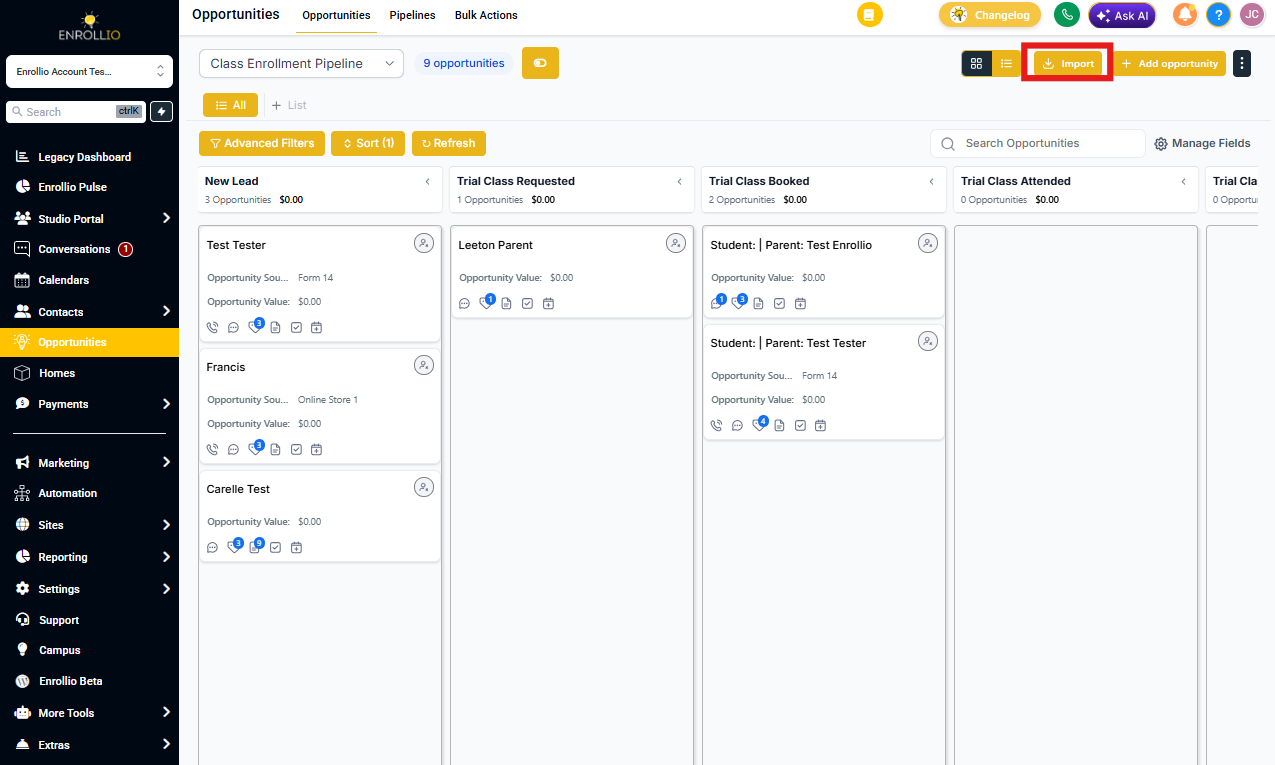
Step 1: Navigate to the Opportunities Tab
From the Opportunities Tab, click the Import button to get started.
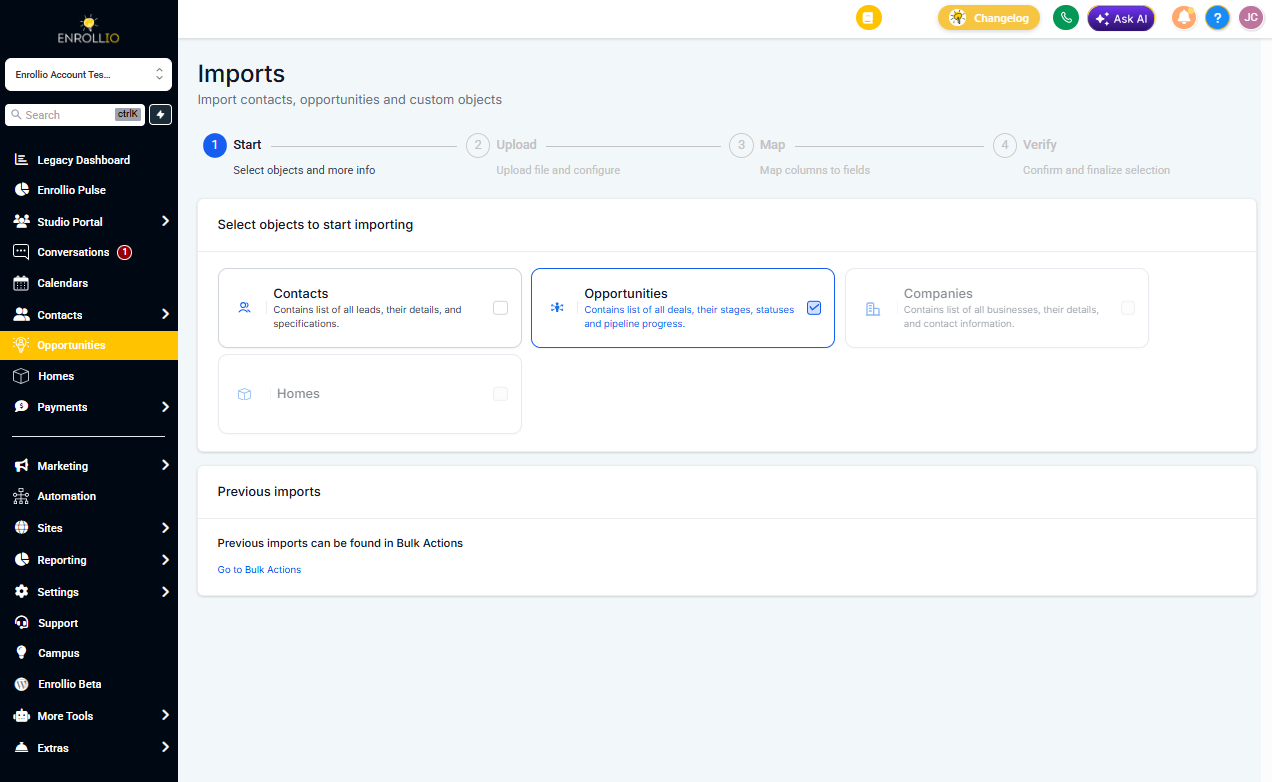
Step 2: Select What to Import
Choose whether you're importing only Enrollment Opportunities or both Families and Enrollment Opportunities.
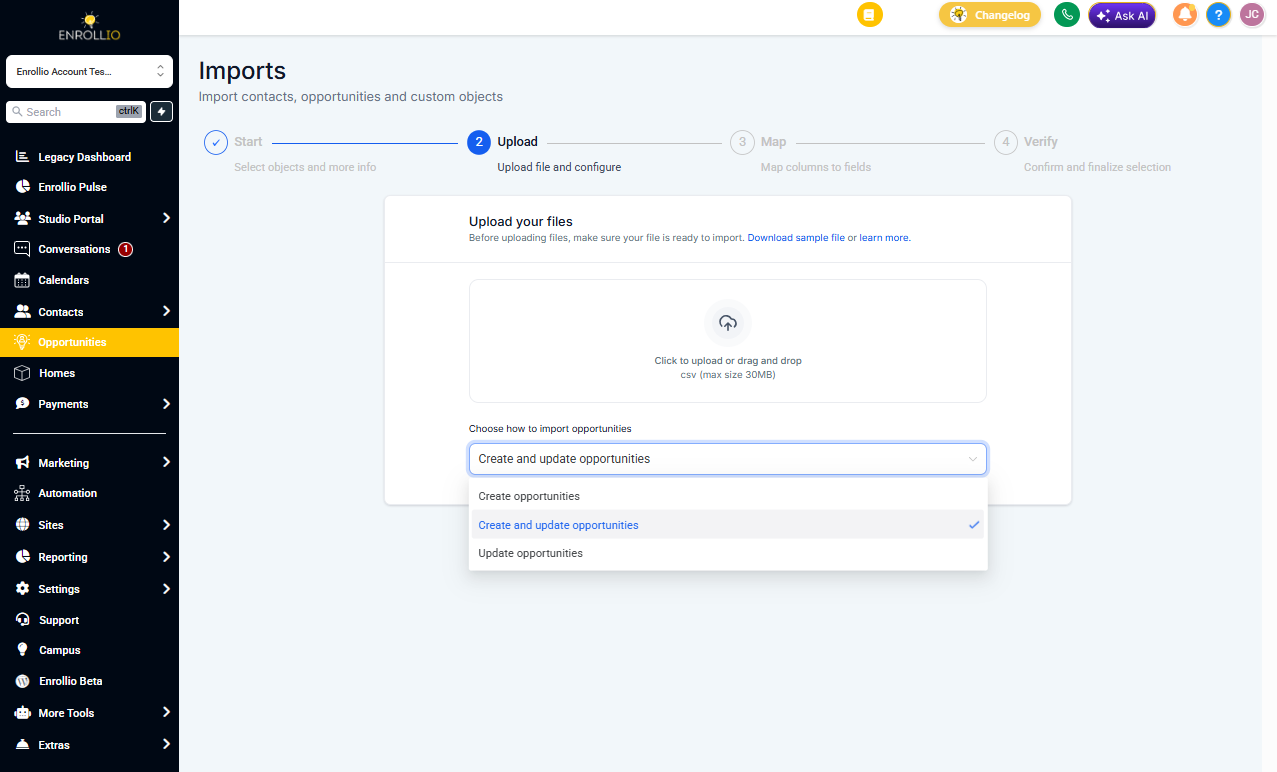
Step 3: Upload Your CSV File
After selecting Import Opportunities, click Next, then upload your CSV file. Select the correct import type depending on whether you're adding new families or updating existing ones.
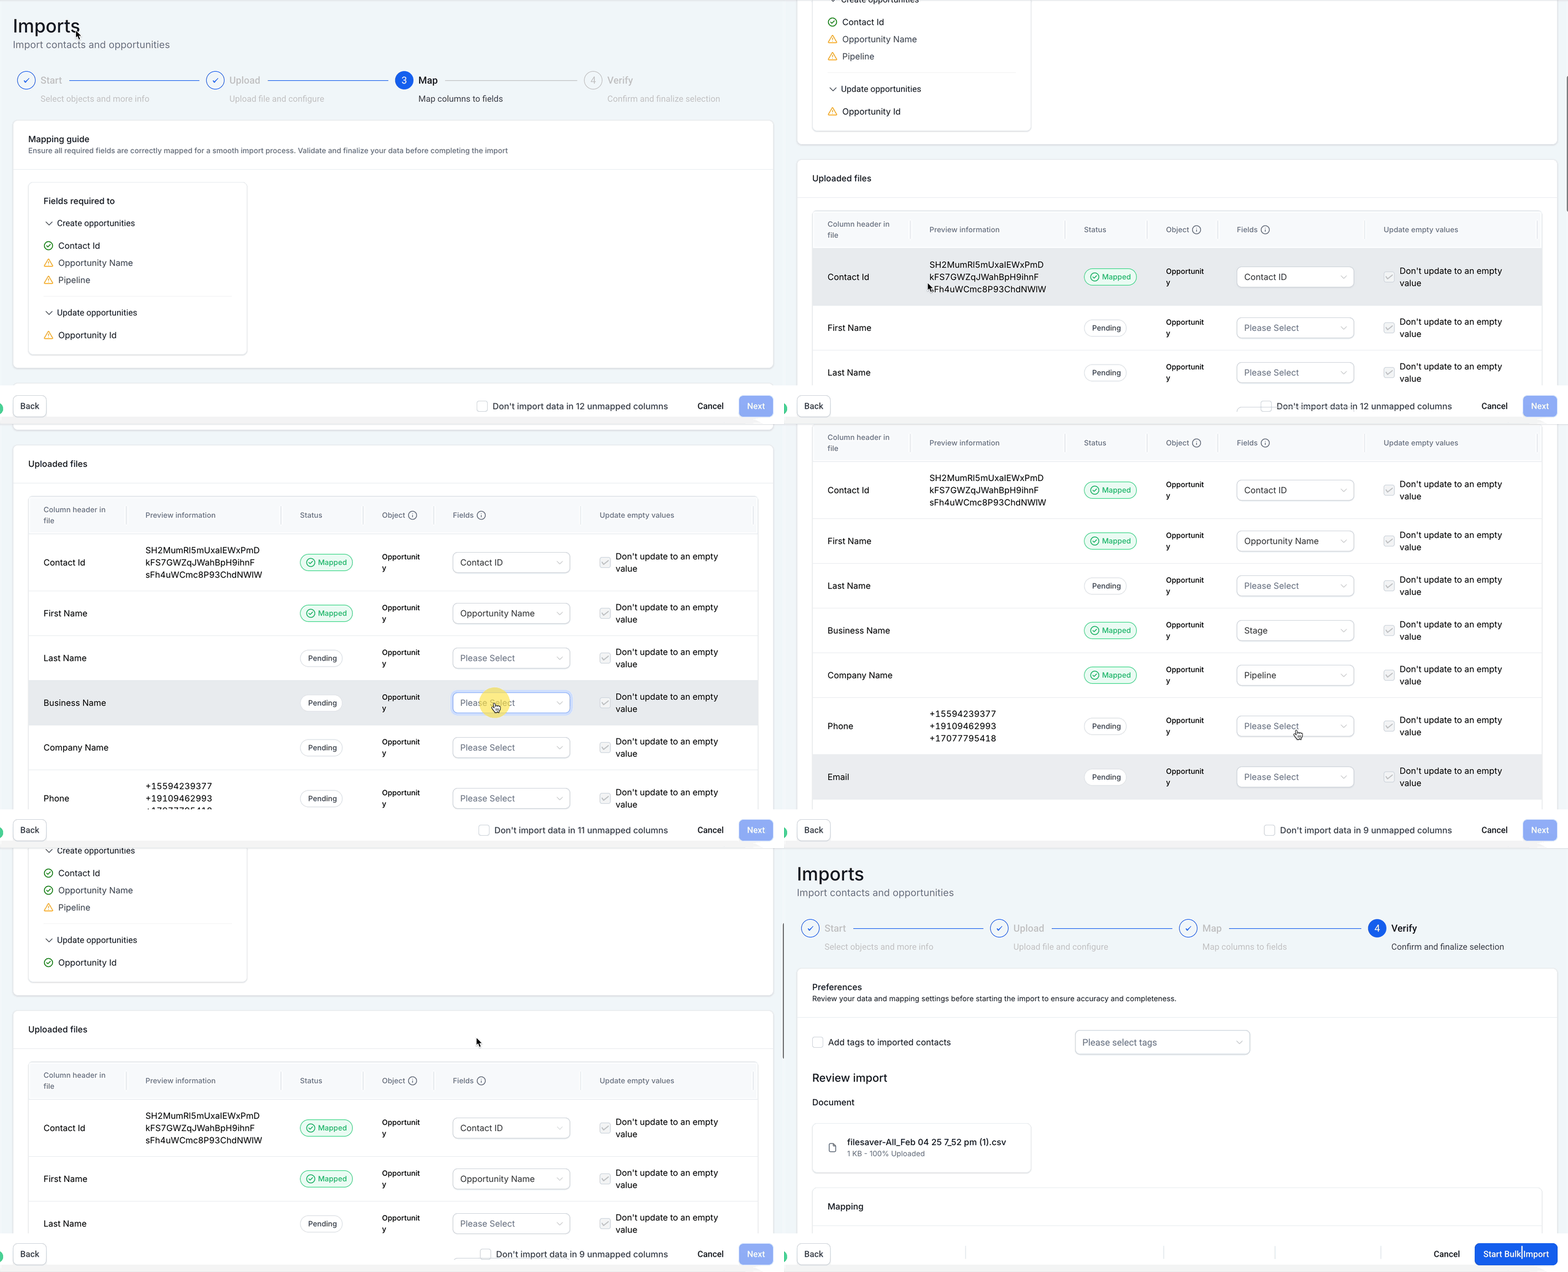
Step 4: Map Columns to Fields
Ensure each column in your file is correctly mapped to the corresponding field in Enrollio. This step is critical for accurate data import.
Required fields to map:
- Family ID (required if updating existing records)
- Enrollment Opportunity Name (required)
- Enrollment Pipeline (required)
- Other fields: Opportunity Value, Opportunity ID (if updating existing opportunities)
Important mapping options:
- Checking "Don't update Empty Values" will preserve existing data if your imported file has empty values for that field
- If you decide not to import a certain field, you can leave it unmapped and check the box at the bottom to proceed
- If Families and Enrollment Opportunities are on the same line in your CSV, they will be automatically linked to each other
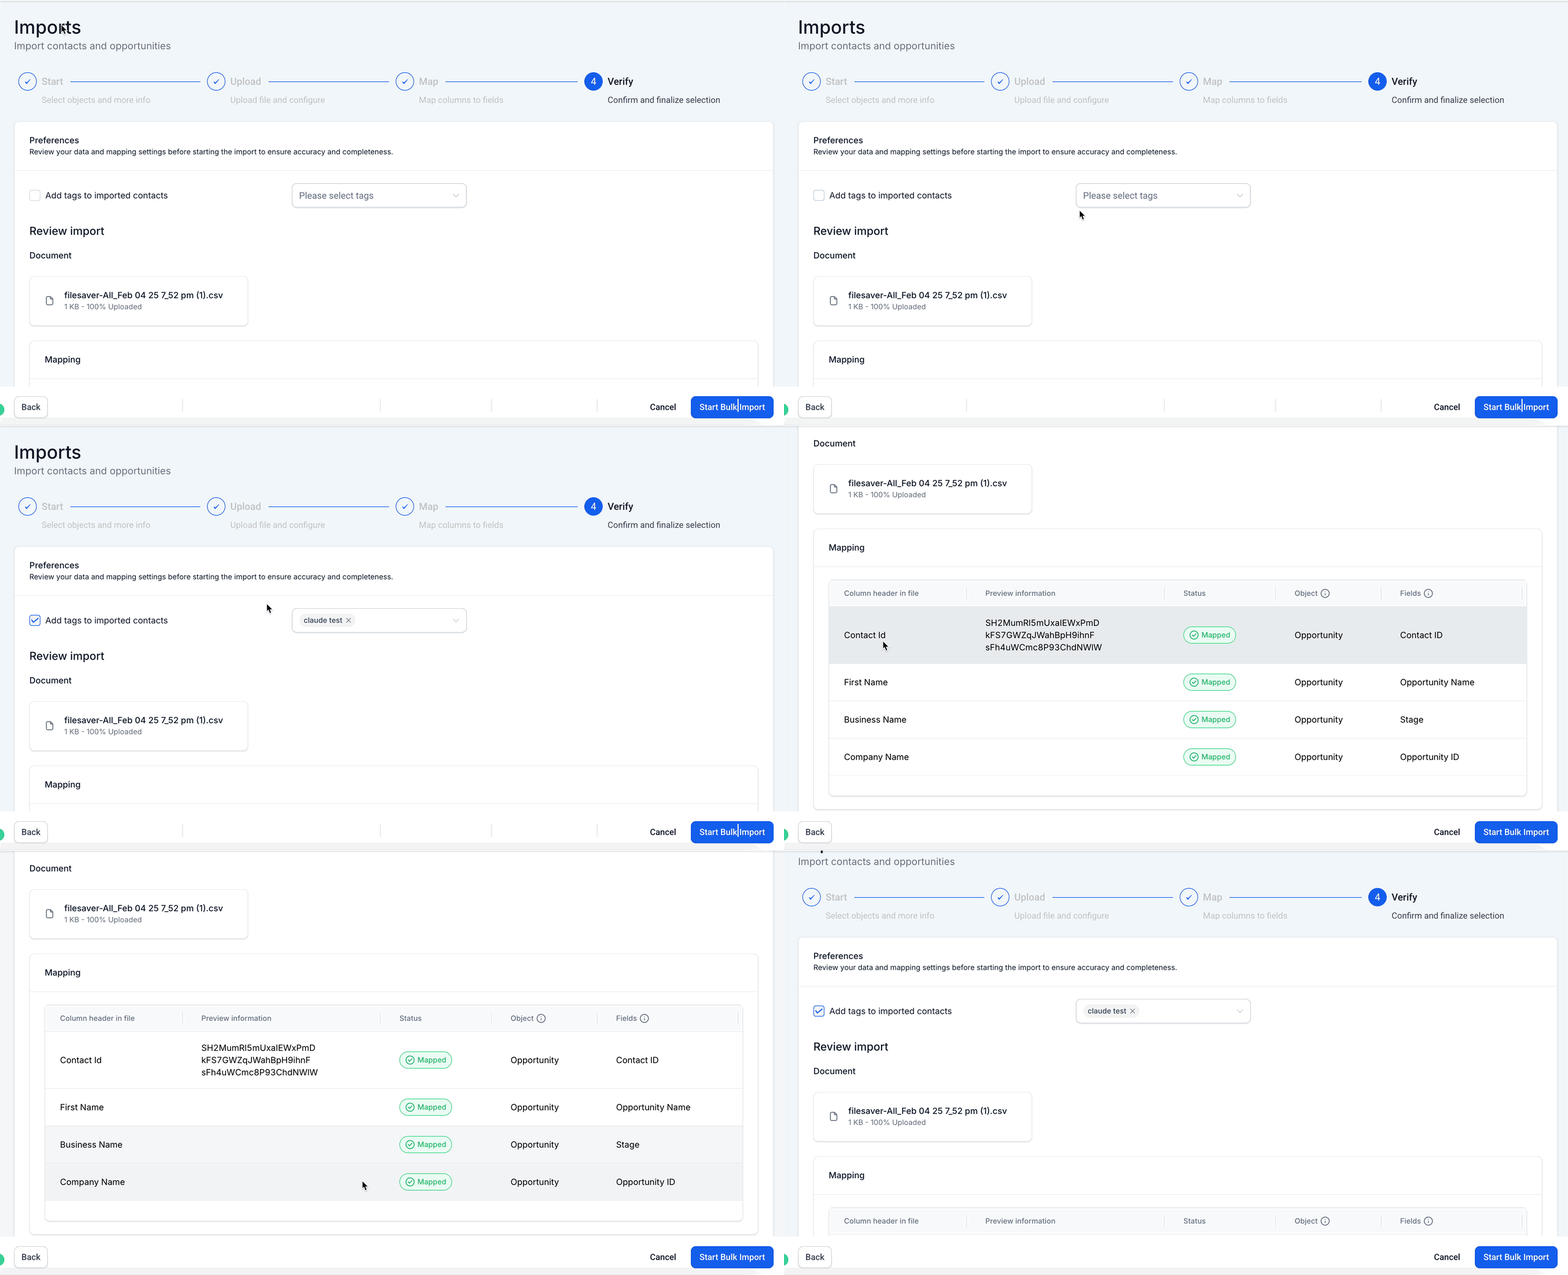
Step 5: Verify, Confirm, and Finalize
Review your preferences, check field mappings, and confirm before starting the import. This final step ensures that families are correctly tagged, sorted, and added to automations, with your data fully verified.
In the final step, you can:
- Add tags to imported families (optional)
- Review the document name and mapped fields
- Confirm that custom fields are assigned as intended
- Click Start Bulk Import to complete the process
Importing Families & Enrollment Opportunities Together
If your CSV includes both family information and enrollment opportunity details, you can import both at once using the same process. This is especially useful when onboarding new prospective families directly into your enrollment pipeline and associating them with a stage or enrollment value during import.
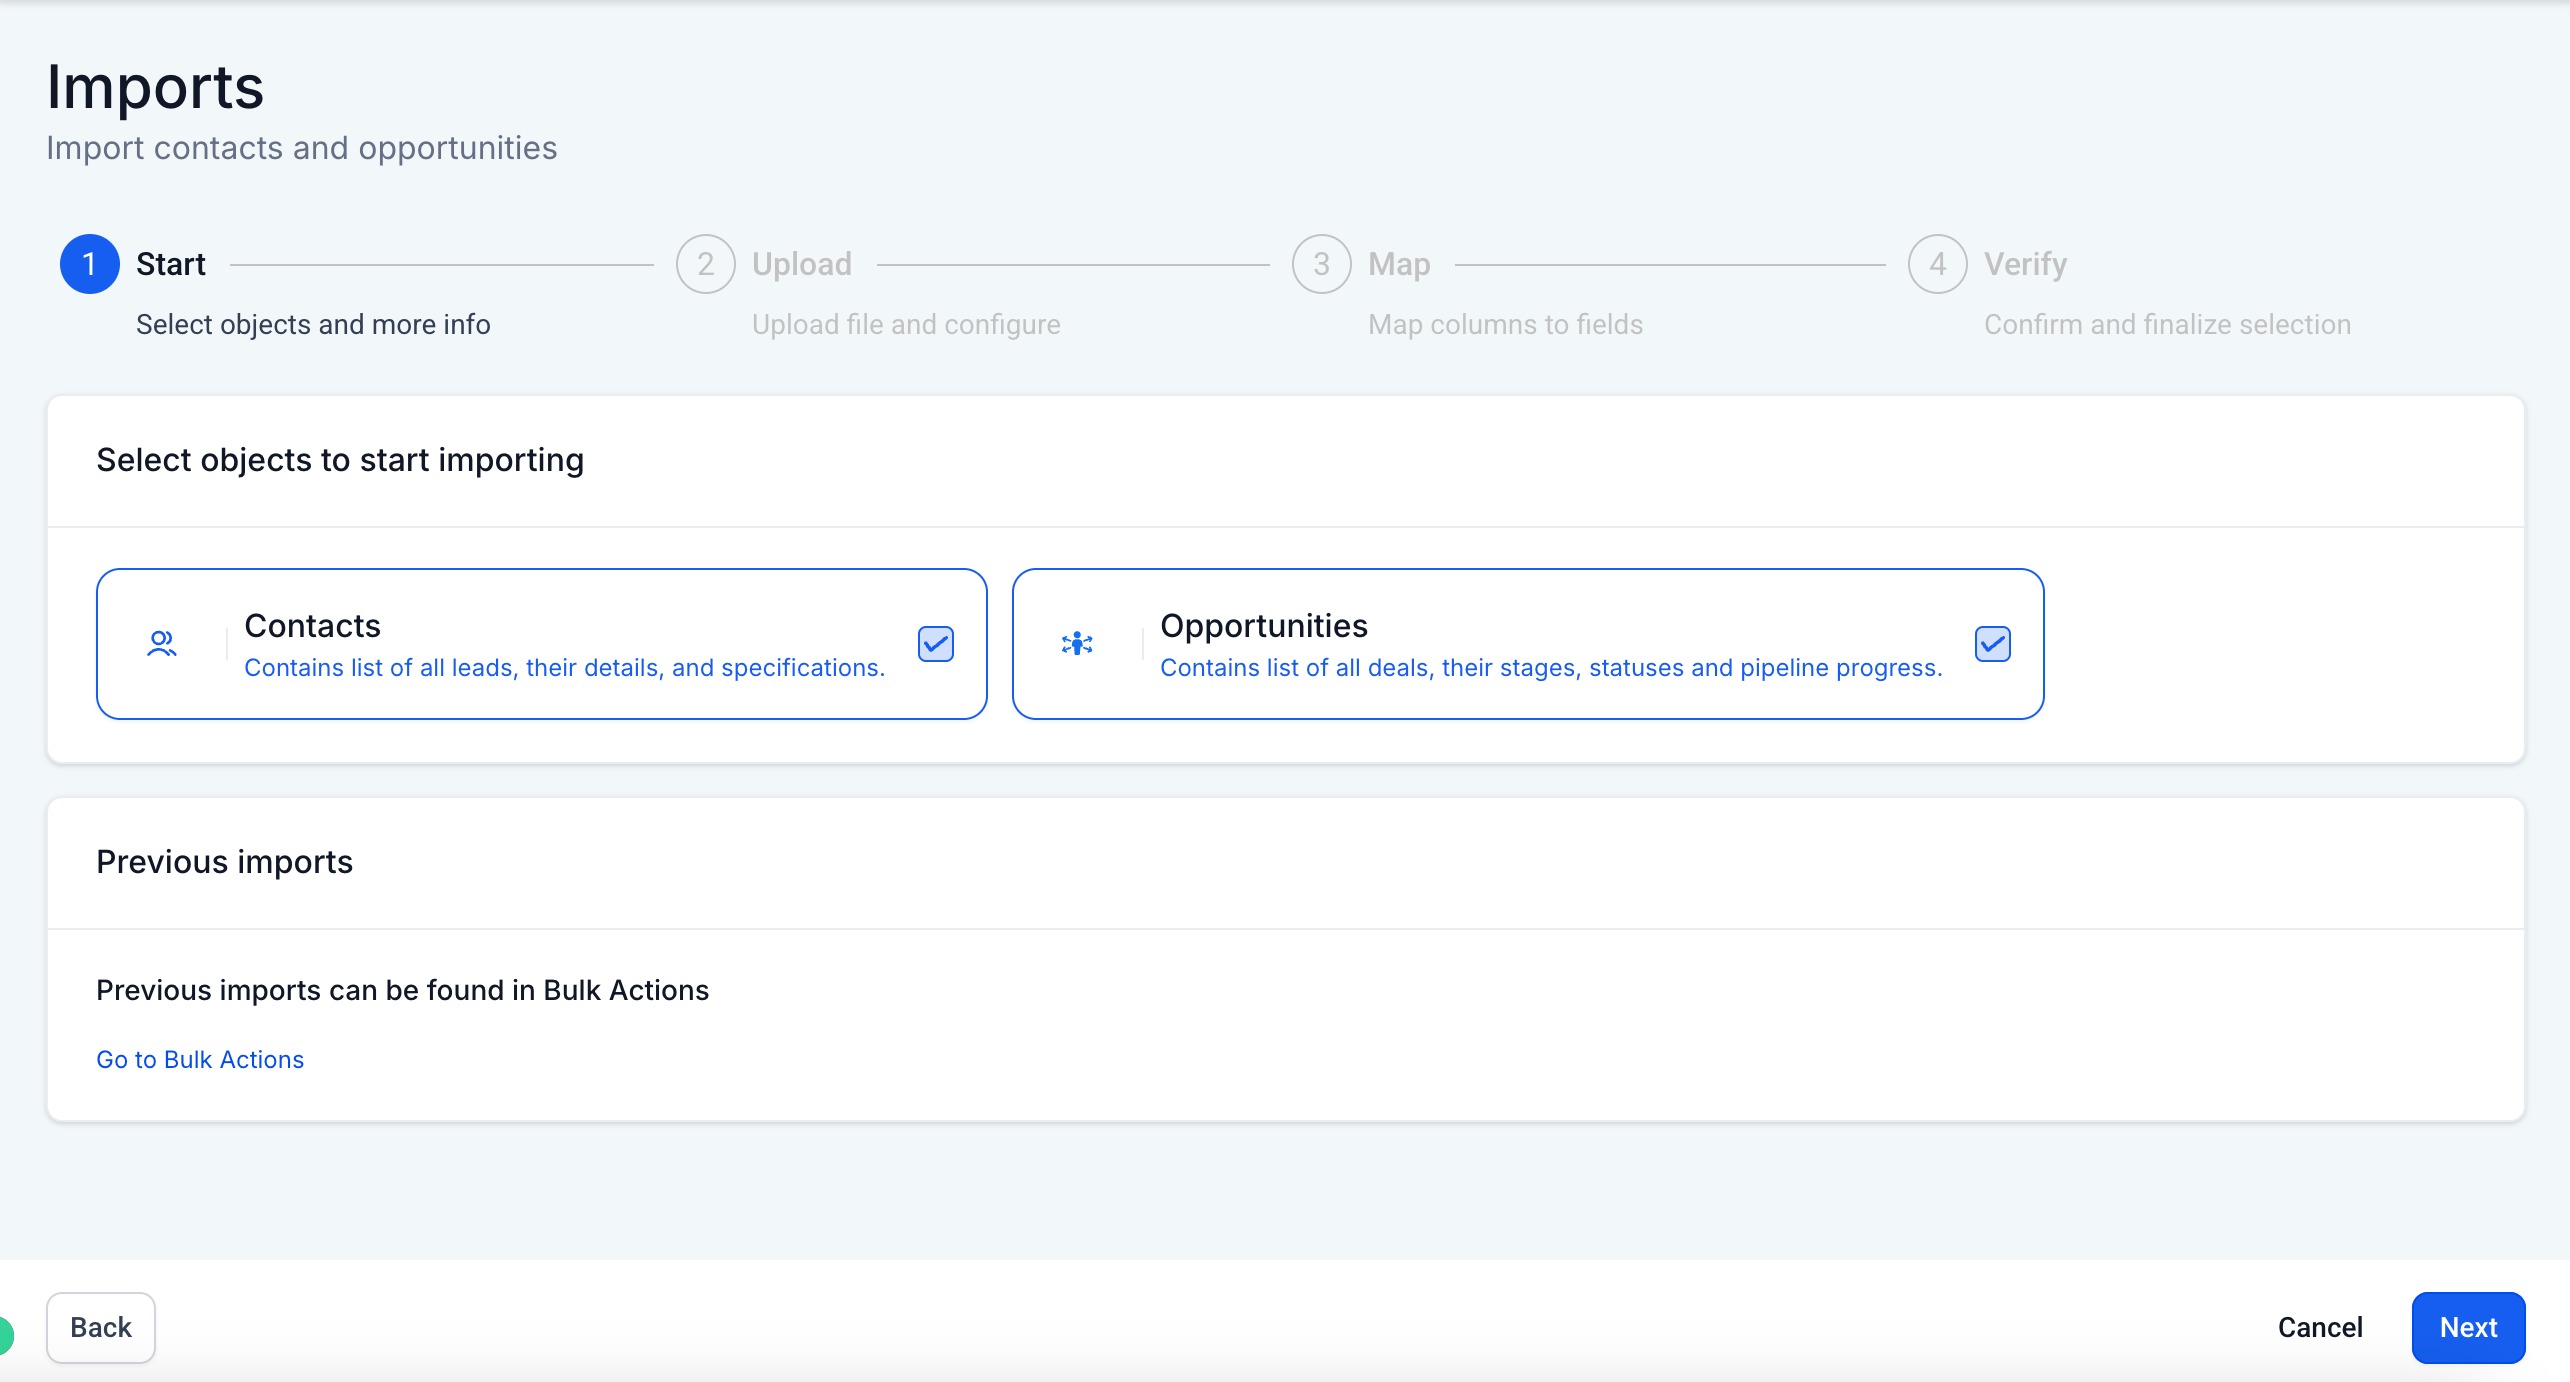
The process is exactly the same as importing families alone—the only difference is selecting both "Families" and "Opportunities" during the initial import setup.
After clicking the Import button, you'll be prompted to select objects to import. Simply check both options and proceed with the same steps outlined above.
Frequently Asked Questions
Can I import enrollment opportunities without family data?
No, each enrollment opportunity must be linked to a valid Family ID in your account. Opportunities represent a prospective enrollment for a specific family, so the family record must exist first.
What file format is required?
The file must be in CSV format with a maximum file size of 30MB. If your file is larger, split it into smaller files before importing.
Can I import opportunities into multiple enrollment pipelines?
Yes, as long as the Enrollment Pipeline name in your CSV matches one that already exists in your Enrollio account. Make sure pipeline names are spelled exactly as they appear in your account.
What happens if fields are mapped incorrectly?
The import will fail or skip affected rows. Always ensure all required fields are properly mapped and formatted before starting the import.
Can I preview or undo an import?
Imports cannot be undone, so always double-check your data before importing. You can review past imports in the Bulk Actions section of your account.
How do I handle families that already exist in my account?
When uploading your CSV, select "Update Existing" as your import type. Make sure your CSV includes the Family ID for each record you want to update. New families will be created for any rows without a matching Family ID.