
How to Send Beautiful HTML Emails in Enrollio
Enrollio's email builder lets you create professional, branded emails that help you connect with families. Whether you're sending tour confirmations, enrollment updates, or newsletters, you can design emails that look great on any device.
Getting Started with the Email Builder
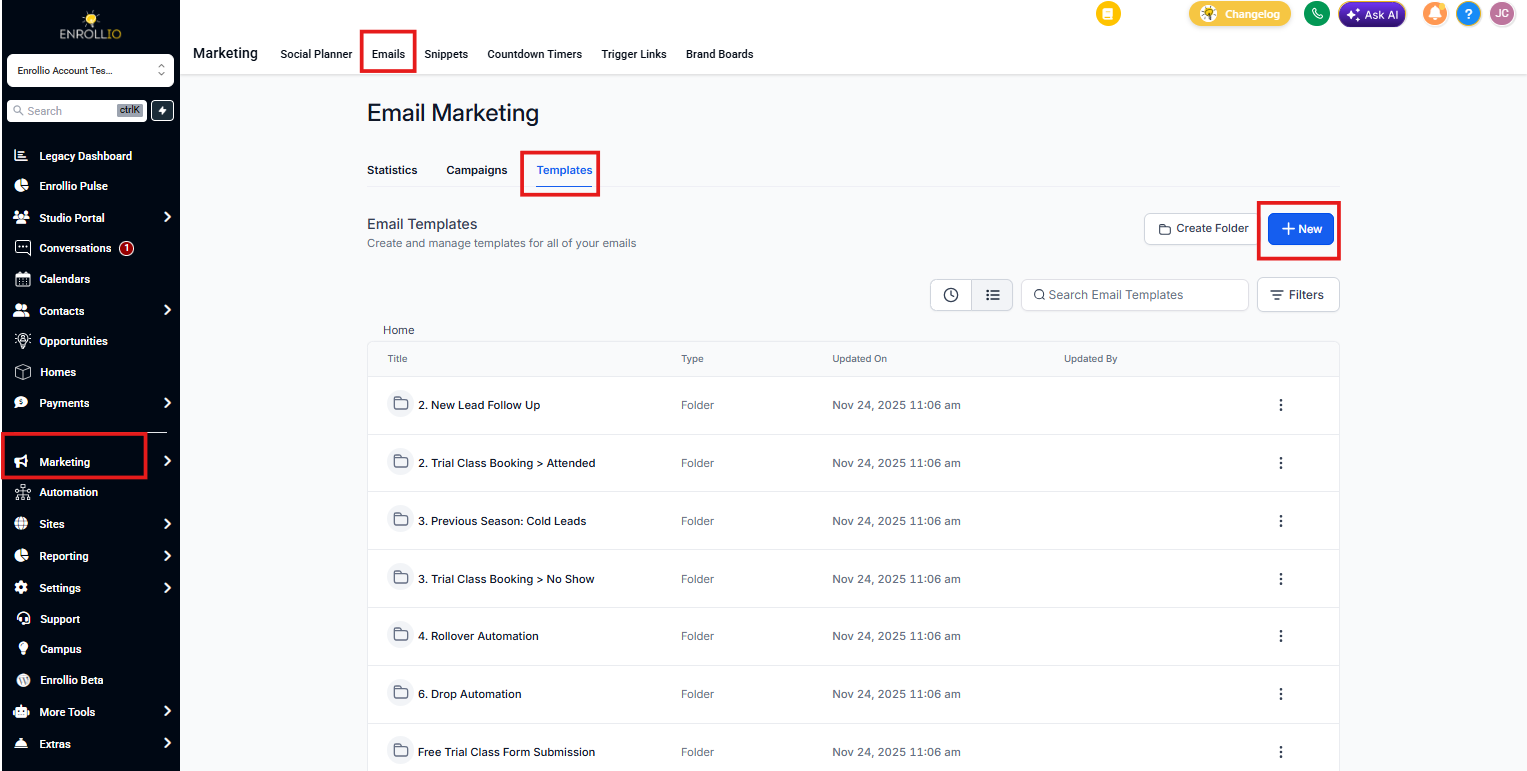
Navigate to Marketing → Emails in your Enrollio dashboard. Click Create Template to start building your email.
Choosing Your Email Type
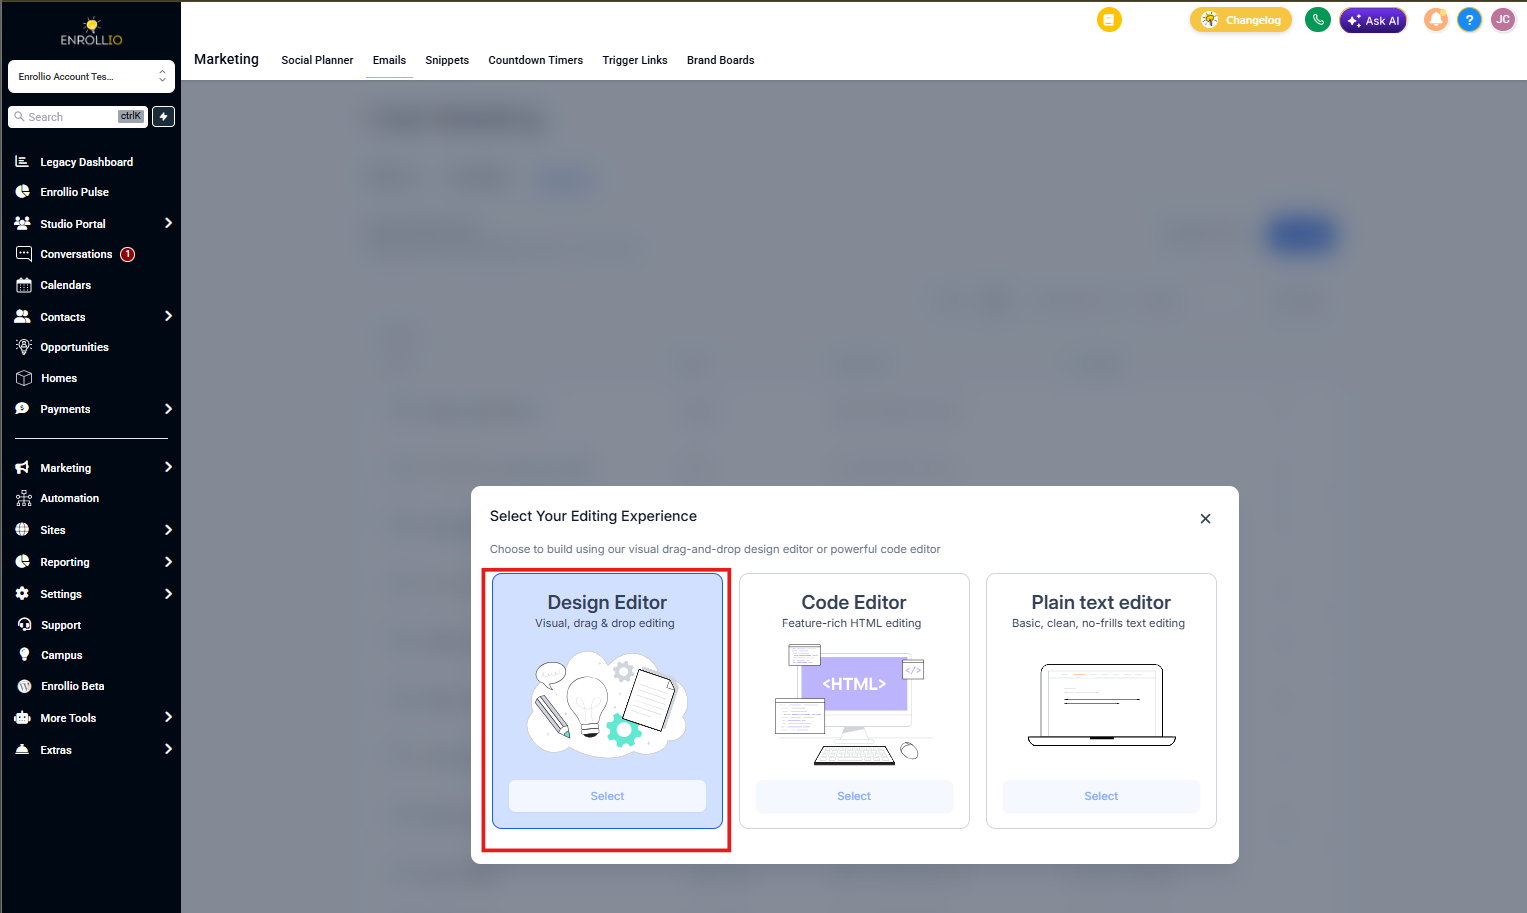
Enrollio offers several ways to build your email:
- Drag-and-Drop Builder — Best for quick, professional emails without coding
- Pre-Built Templates — Start with childcare-specific templates you can customize
- HTML Editor — Full control if you have HTML experience or want to import custom designs
Using the Drag-and-Drop Builder
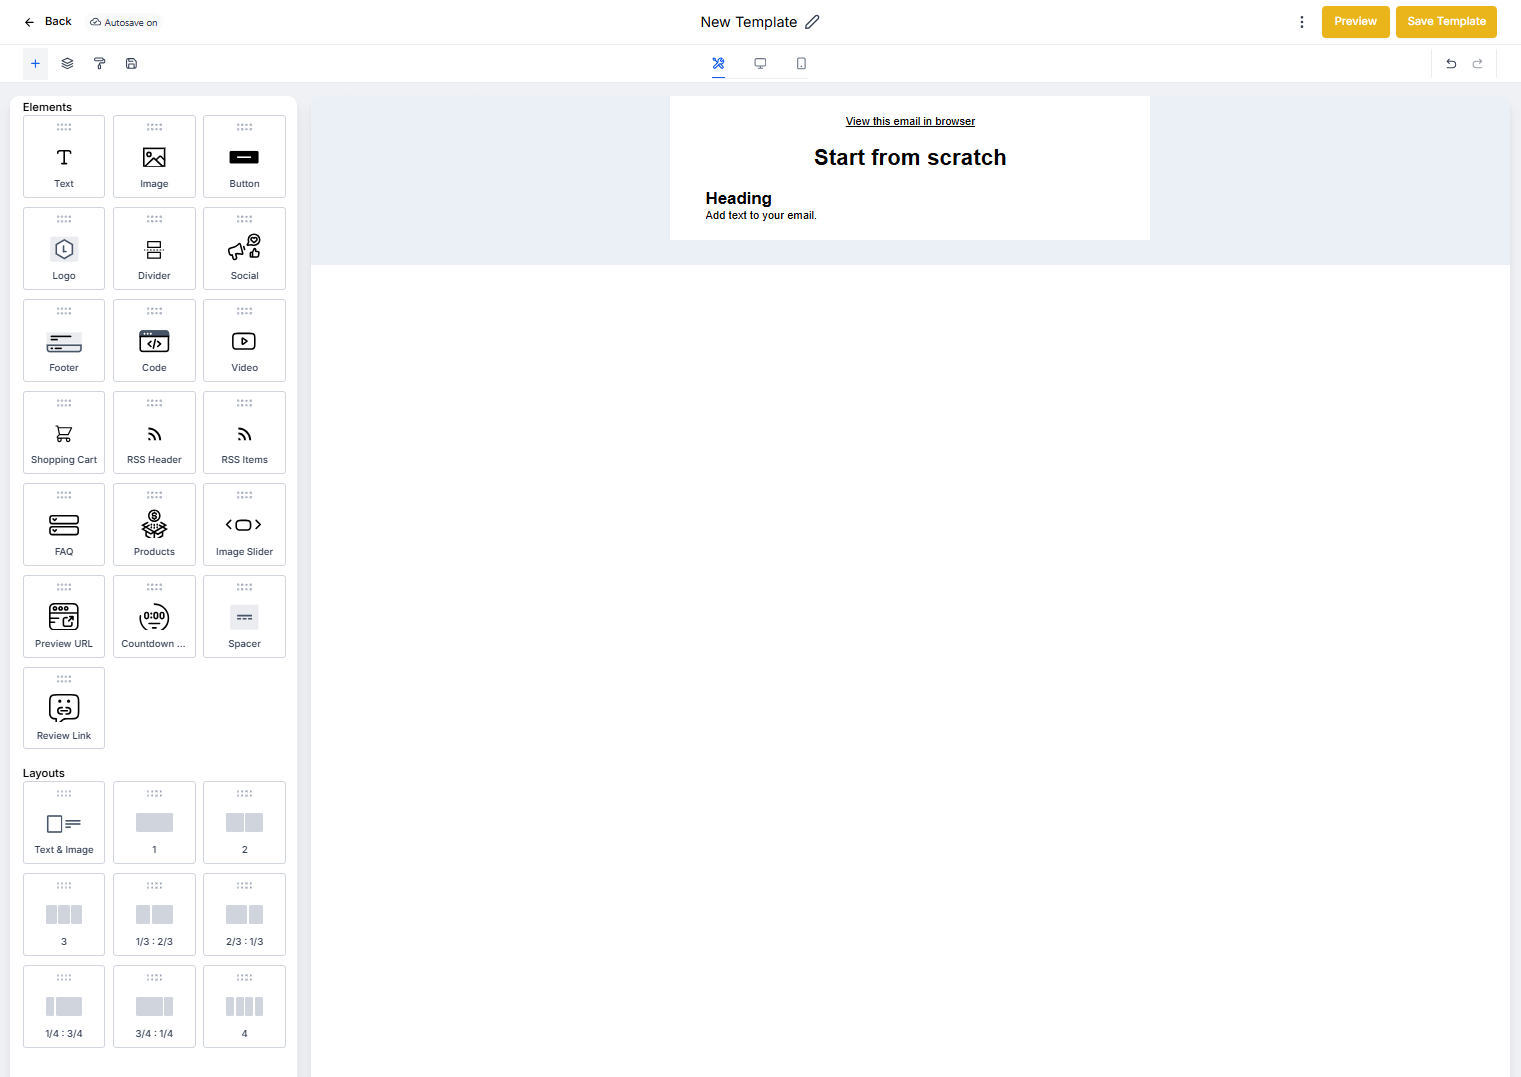
This is the fastest way to create beautiful emails. Simply drag elements like text, images, buttons, and dividers into your email layout.
Step-by-Step:
- Select Drag-and-Drop Builder from the template options
- Choose a layout (single column, two columns, etc.)
- Drag elements from the left sidebar into your email
- Click any element to customize text, colors, fonts, and spacing
- Preview your email on desktop and mobile before saving
Importing Custom HTML Templates
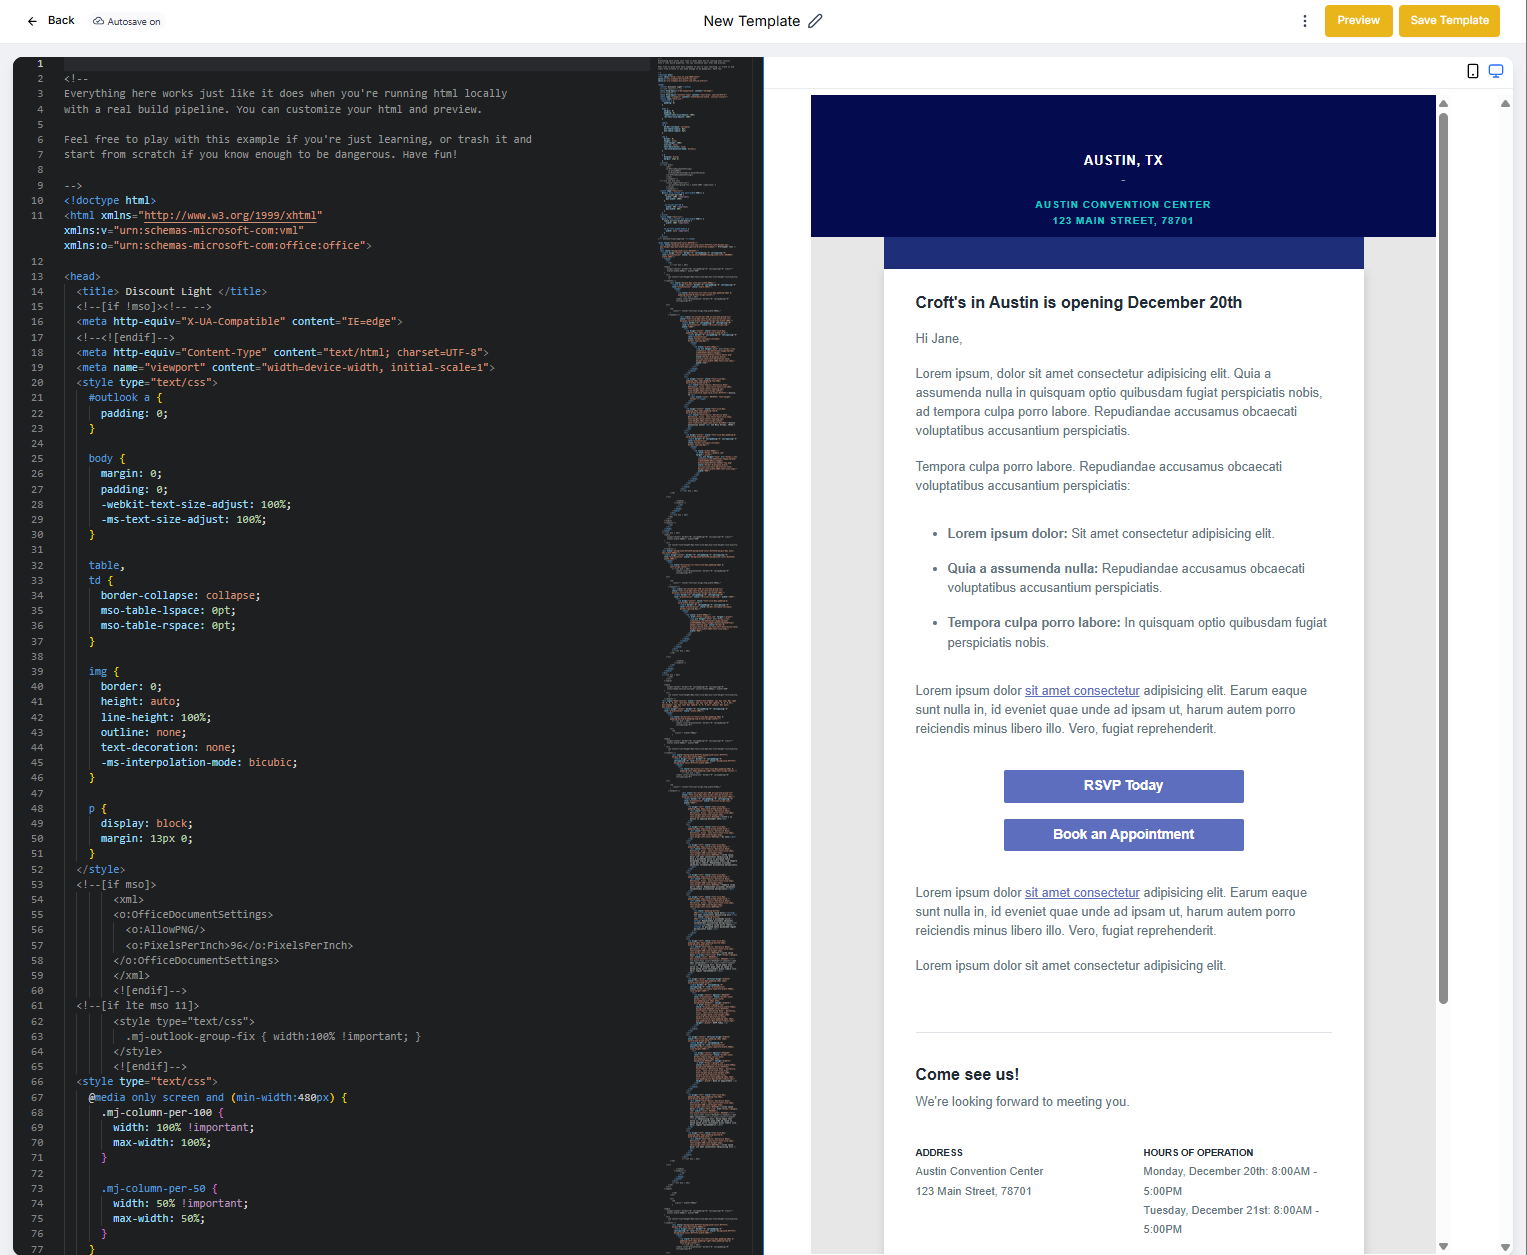
If you have a custom HTML email template from a designer or another platform, you can import it directly into Enrollio.
- Click Create Template and select Code Editor
- Paste your HTML code into the editor
- Add merge fields for personalization (like family name or child name)
- Test the email to ensure it displays correctly
Personalizing Your Emails
Make your emails feel personal by using merge fields. These automatically pull information from each family's record.
Common merge fields for childcare:
- {{contact.first_name}} — Parent's first name
- {{contact.last_name}} — Parent's last name
- {{contact.email}} — Parent's email address
- {{contact.phone}} — Parent's phone number
- Custom fields you've created (child name, age group, tour date, etc.)
Testing Your Email Before Sending
Always test your emails before sending them to families. Click Preview & Test to:
- See how your email looks on desktop and mobile
- Send a test email to yourself or your team
- Check that all links work correctly
- Verify merge fields populate properly
Saving and Reusing Templates
Once you've created an email you love, save it as a template. Give it a clear name like "Tour Confirmation" or "Weekly Newsletter" so you can find it easily later.
You can reuse templates in:
- Email campaigns to multiple families
- Automations triggered by specific actions
- One-off emails to individual families
Best Practices for Childcare Emails
- Keep it mobile-friendly — Most parents check email on their phones
- Use clear subject lines — "Your Tour is Confirmed for Thursday" beats "Upcoming Appointment"
- Include a clear call-to-action — Make it obvious what you want families to do next
- Brand consistently — Use the same colors, fonts, and logo in every email
- Keep it concise — Parents are busy; get to the point quickly
Troubleshooting Common Issues
Images not displaying? Make sure images are uploaded to Enrollio's media library and use the full URL.
Email looks different in Gmail vs. Outlook? Some email clients handle HTML differently. Stick to simple layouts for best compatibility.
Merge fields showing as {{contact.first_name}}? Test with a real family record, not a test email to yourself without contact data.
Next Steps
Once you've created your email template, you can use it in email campaigns or automations to stay connected with families throughout their enrollment journey.