
Guide to Custom Webhook Automation Action
The Custom Webhook Action enables real-time data exchange between Enrollio and third-party services. You can send tailored requests with various HTTP methods, authorization types, headers, and query parameters. This powerful feature ensures efficient and accurate automations while considering API responses and server limitations.
Note: Custom Webhook is a premium action. Once enabled, your account receives 100 free executions. Additional executions are billed based on usage.
What is the Custom Webhook Action?
The Custom Webhook Action lets you communicate in real-time between Enrollio and third-party services. You can configure and send custom data requests to specific URLs using different HTTP and authorization methods.
This action supports adding headers, query parameters, and mapping custom values to create requests that fit your exact needs. With autocomplete suggestions and a user-friendly interface, the Custom Webhook streamlines data exchange and ensures accuracy in your automations.
Keep in mind that API response success and server limitations can affect automation execution, so plan accordingly to prevent errors.
Who Should Use This Feature?
Custom webhooks are perfect for childcare centers that need to:
- Connect Enrollio with accounting software for payment tracking
- Send enrollment data to state reporting systems
- Sync parent information with background check services
- Update waitlist positions across multiple platforms
- Integrate with custom staff scheduling tools
Key Benefits
Accurate Integration: Creates seamless communication between Enrollio and third-party services, eliminating manual data entry errors. Autocomplete suggestions help you map data correctly.
Flexibility: Supports various HTTP methods, authorization types, headers, and query parameters. Create custom requests that match your exact requirements.
Real-Time Updates: Send instant notifications and updates to your other systems. Parents complete a tour? Your background check service can start immediately.
Scalability: Works across different childcare operations and grows with you. No changes needed as you add locations or expand services.
How to Set Up a Custom Webhook
Step 1: Add the Webhook URL
Enter the URL where you want to send data. This is the endpoint provided by the third-party service you're connecting to.
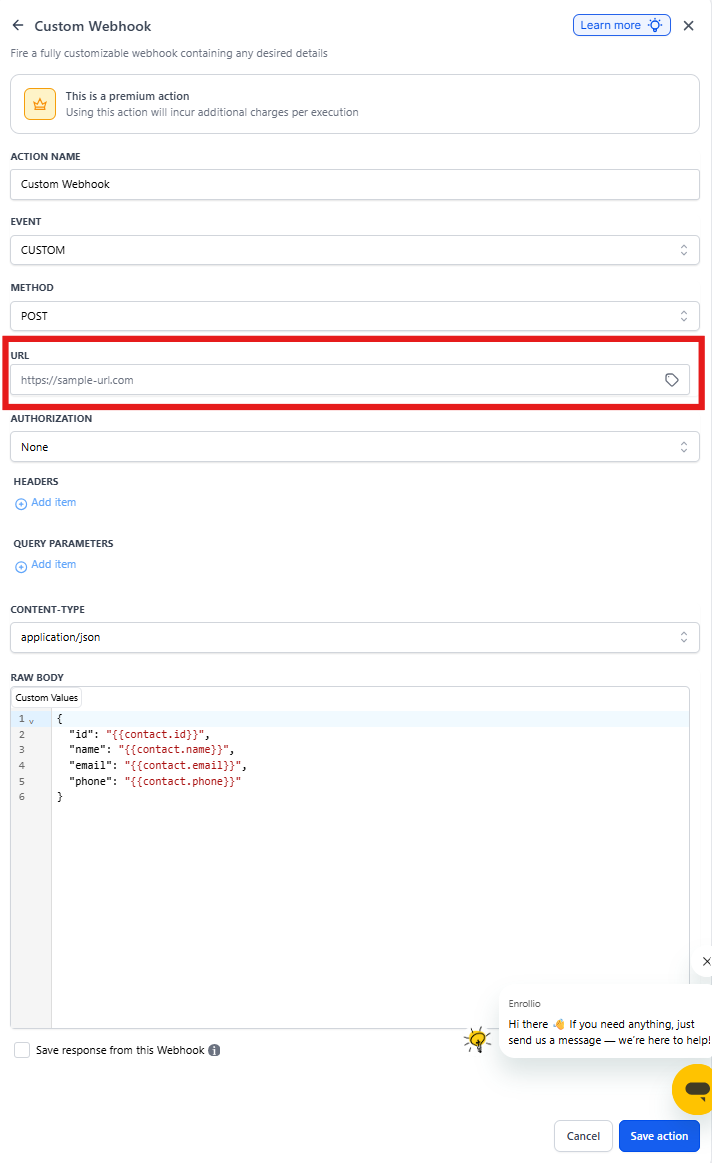
- Open your automation in the Automation Builder
- Click the + icon to add an action
- Select Custom Webhook from the action menu
- Paste your webhook URL in the URL field
Pro Tip: Always test your webhook URL in a separate tool first to make sure it's working before adding it to your automation.
Step 2: Select an HTTP Method
Choose the HTTP method that matches your needs:
- POST — Send new data (most common for webhooks)
- GET — Retrieve information from the service
- PUT — Update existing data
- DELETE — Remove data
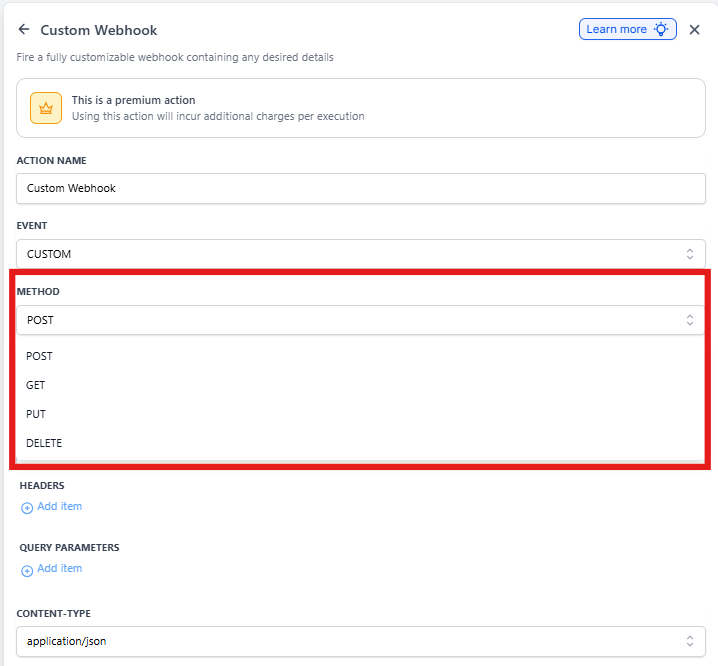
If you're not sure which method to use, check the documentation from your third-party service. They'll specify which method their API requires.
Step 3: Select Authorization Method
Choose how you'll authenticate with the third-party service. Enrollio supports multiple authorization types to match what your service requires.
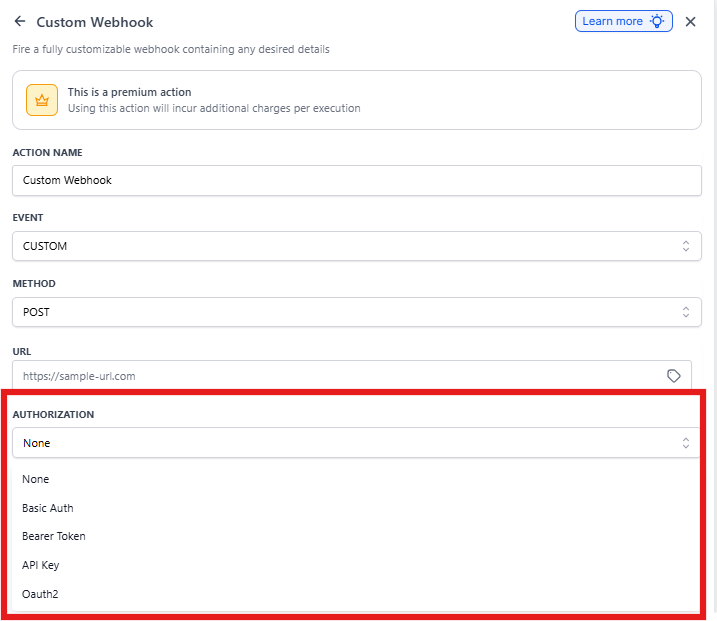
Common authorization methods include:
- API Key — Simple key-based authentication
- Bearer Token — Token-based security
- Basic Auth — Username and password authentication
- No Auth — For public endpoints that don't require authentication
Your third-party service will provide the specific credentials you need to enter here.
Step 4: Add Headers & Query Parameters
Headers provide additional information about your request, such as content type or authentication details. Query parameters let you filter or modify the data being sent.
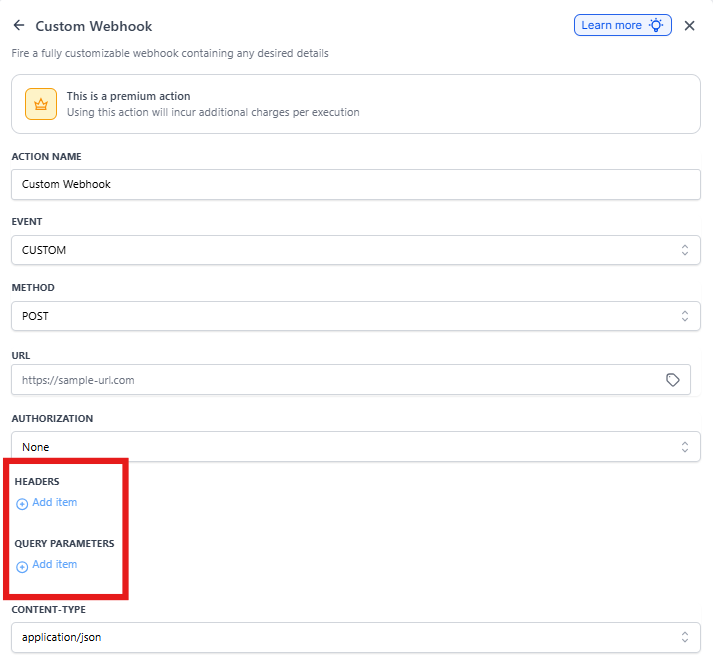
Adding Headers:
- Click Add Header
- Enter the header name (e.g., "Content-Type")
- Enter the header value (e.g., "application/json")
- Add multiple headers as needed
Adding Query Parameters:
- Click Add Query Parameter
- Enter the parameter name
- Enter the parameter value (can include custom values)
- Add multiple parameters as needed
Pro Tip: Common headers include "Content-Type: application/json" for JSON data and "Accept: application/json" to receive JSON responses.
Step 5: Configure the Data to Send
Map the data you want to send in your webhook request. You can structure the data in any format your third-party service requires.
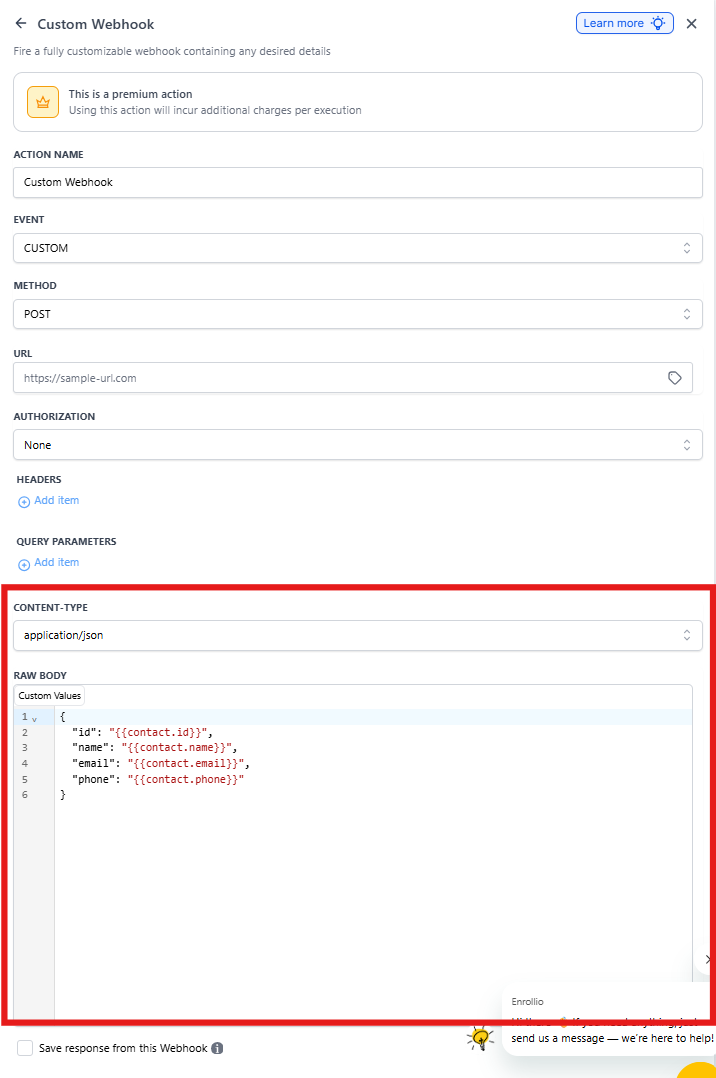
The request body editor includes autocomplete suggestions for all custom values, including:
- Parent/family contact information
- Child details
- Enrollment dates and status
- Tour information
- Custom field values
- Tags and source data
To add custom values:
- Start typing in the request body field
- Type {{ to see autocomplete suggestions
- Select the value you want to include
- Structure your data in the format required by your API
Example JSON structure:
{
  "parent_name": "{{contact.full_name}}",
  "email": "{{contact.email}}",
  "child_name": "{{contact.custom_fields.child_name}}",
  "enrollment_date": "{{contact.custom_fields.start_date}}",
  "program": "{{contact.tags}}"
}
Troubleshooting
Automation Action Failed
The Custom Webhook action depends on successful API responses from the third-party service. If the API sends back an error, the action will fail or retry with exponential backoffs.
To prevent failures:
- Test your webhook URL before adding families to the automation
- Verify your authorization credentials are correct
- Check that your request body matches the required API format
- Review the API documentation for required fields
Server Rate Limits
Make sure the receiving server can handle the number of webhook requests you're sending. If you add too many families to an automation at once, you might hit the third-party service's rate limits.
The Custom Webhook fires immediately when a family reaches that step in the automation. Plan your automation triggers with server limits in mind.
Best practices:
- Add delays between webhook actions if sending multiple requests
- Stagger enrollment of families into automations with webhooks
- Check the third-party service's rate limit documentation
- Monitor your automation execution logs for rate limit errors
Checking Webhook Execution
To see if your webhook executed successfully:
- Go to the family's contact record
- Click the Automation tab
- Find the automation with the webhook action
- Check the status — it should show "Completed" in green
If the status shows "Failed" in red, click on it to see the error message returned by the API.
Pro Tip: Set up a test automation with just one family before launching to your full waitlist. This helps you catch configuration issues early.