
This article provides a comprehensive guide to every option within the 'Settings' tab of the automation builder. Learn how to configure parent handling, communication timing, sender details, and more to ensure your automations run precisely as intended.
TABLE OF CONTENTS
- What are Automation Settings?
- Key Benefits of Configuring Automation Settings
- How to Access Automation Settings
- Parent Settings
- Communication Settings
- Frequently Asked Questions
What are Automation Settings?
Automation Settings are the master controls for an individual automation. Instead of configuring rules for each action, these settings apply to the entire automation, governing its fundamental behavior from start to finish.
They determine how parents enter and re-enter, when messages can be sent, and what happens when a parent responds, ensuring your automation is both powerful and precise.
Key Benefits of Configuring Automation Settings
Properly configuring your automation settings is crucial for creating effective and respectful communication with families. These options allow you to fine-tune the automation's behavior to match your enrollment process and improve the parent experience.
- Control Parent Flow: Decide if families can enter an automation more than once, preventing them from receiving duplicate sequences.
- Personalize Timing: Send messages at the most appropriate time for each parent by using their local timezone instead of a single, fixed one.
- Set Business Hours: Ensure communications are only sent during specific hours and days to respect families' time and increase engagement rates.
- Automate Conversation Management: Automatically stop nurturing sequences when a parent responds, which creates a seamless transition for your team to take over the conversation.
- Maintain Brand Consistency: Set default sender names, email addresses, and phone numbers for all communications within the automation to ensure a professional and consistent brand voice.
How to Access Automation Settings
Finding and adjusting your automation's core settings is straightforward. All configurations are centralized in one convenient tab within the automation builder.
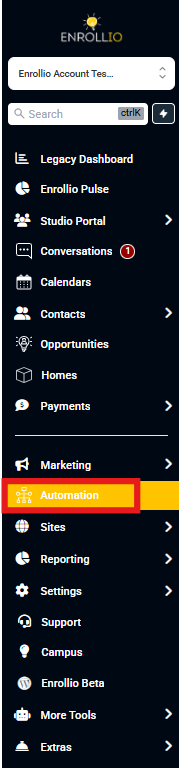
- Navigate to the Automation section in your dashboard.
- Open an existing automation or create a new one.
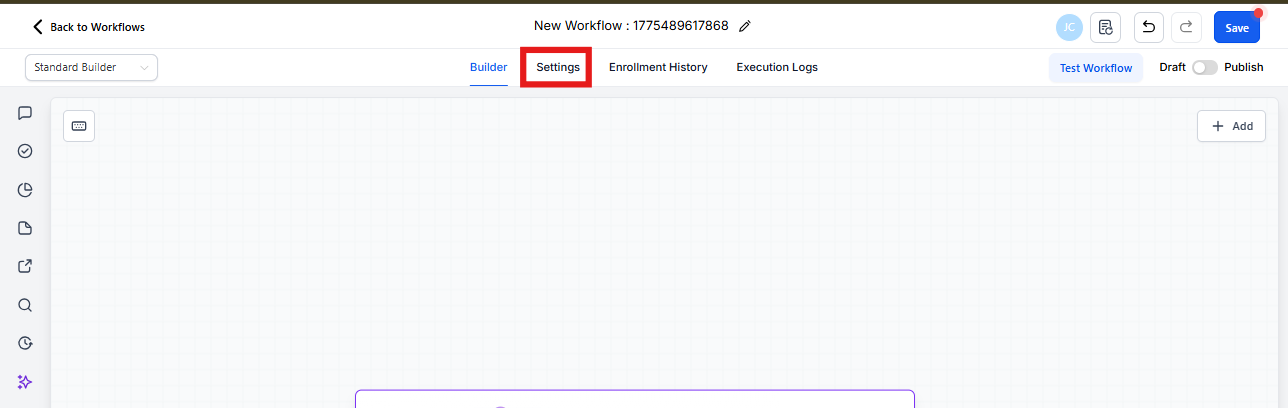
- Inside the automation builder, click on the Settings tab at the top of the page.
Parent Settings
This group of settings controls how parents and their associated data, like enrollment opportunities, are handled within the automation. These rules determine who can enter, how many times they can enter, and what actions will cause them to be removed.
Allow Re-entry
This toggle determines if a parent can enter this automation more than once.
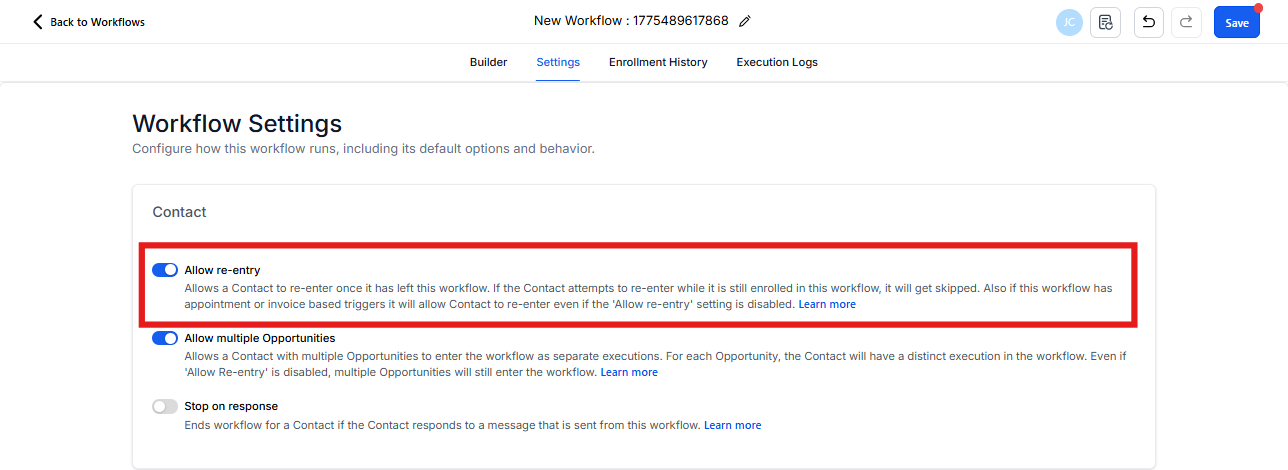
Enabled (blue): A parent can re-enter the automation after they have fully completed it or have been manually removed. This is useful for recurring processes, like tour reminders or follow-ups for siblings.
Note: A parent cannot re-enter if they are still active in the automation.
Disabled (gray): A parent can only enter and complete this automation one time only.
Allow multiple Enrollment Opportunities
This toggle is essential for automations that are triggered by enrollment opportunity-based actions (e.g., "Enrollment Pipeline Stage Changed").
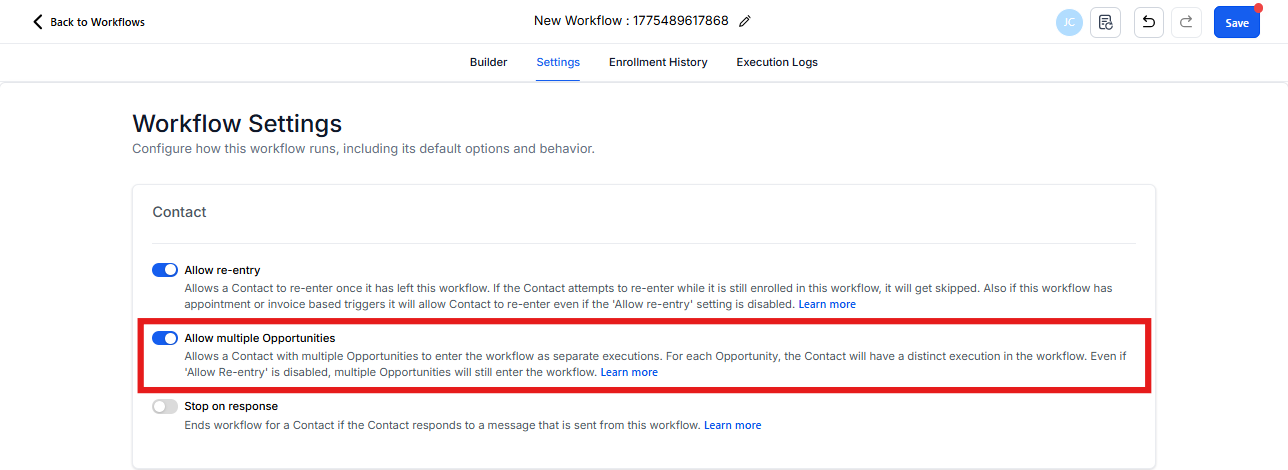
Enabled (blue): If a single parent has multiple enrollment opportunities (for example, enrolling multiple children), they can enter the automation as a separate instance for each opportunity. This allows you to run a unique automation sequence for every enrollment associated with a family.
Disabled (gray): The parent will only enter the automation for the first enrollment opportunity that meets the trigger criteria.
Default Behavior: For new automations, this setting is enabled by default. For automations created before this feature was released, it is disabled by default.
Update Behavior: If an enrollment opportunity's details are updated while it is active in the automation, the automation does not restart. It simply continues from its current step using the updated information.
Stop on Response
This checkbox allows you to automatically remove a parent from an automation when they engage in a conversation. This is critical for preventing automated messages from being sent after a parent has already replied and is expecting a human response.
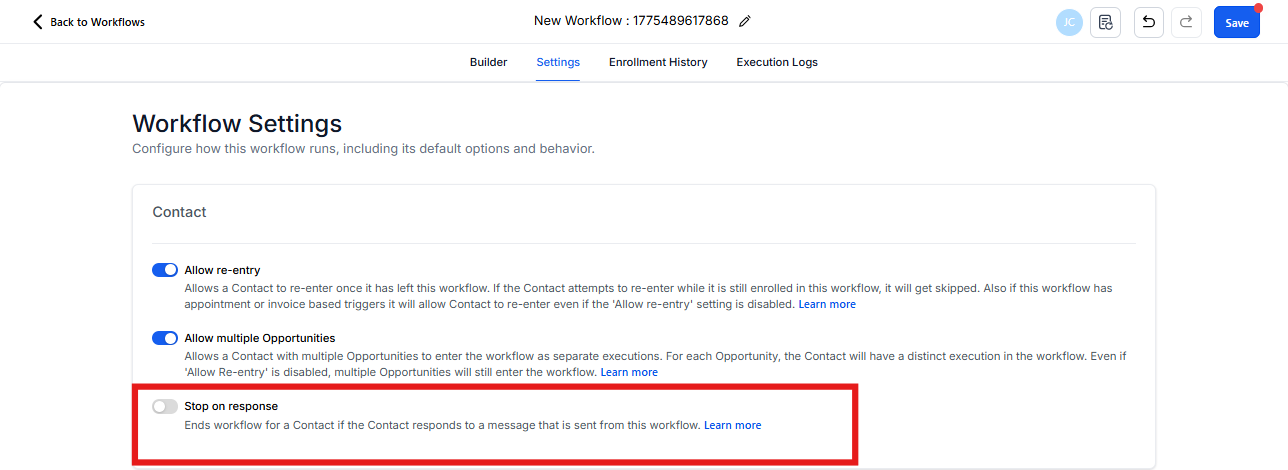
Enabled (checked): The automation will end for a parent if they respond to a message sent from this specific automation. This applies to all communication channels managed by the automation.
Disabled (unchecked): The parent will continue in the automation until the automation ends naturally.
How does Stop On Response work with the Call Action?
Voicemail Detection: By default, the automation system uses voicemail detection to determine if an outbound call was answered by a person or a machine. This prevents a voicemail from incorrectly triggering "Stop on Response." This detection adds a slight delay to the call connecting.
Inside a "Call" automation action, you can find an advanced setting to "Disable Voicemail Detect," which removes the delay but means a voicemail will be treated as a response and stop the automation. In that case you can set the call timeout to less than 20 seconds, short enough the call won't go to voicemail.
Communication Settings
These settings manage the timing, sender identity, and conversational properties of messages sent from the automation. Use them to ensure your communications are timely, professional, and properly managed.
Timezone
This dropdown determines the timezone used for any time-dependent steps in your automation, such as a "Wait" action or a "Time Window."
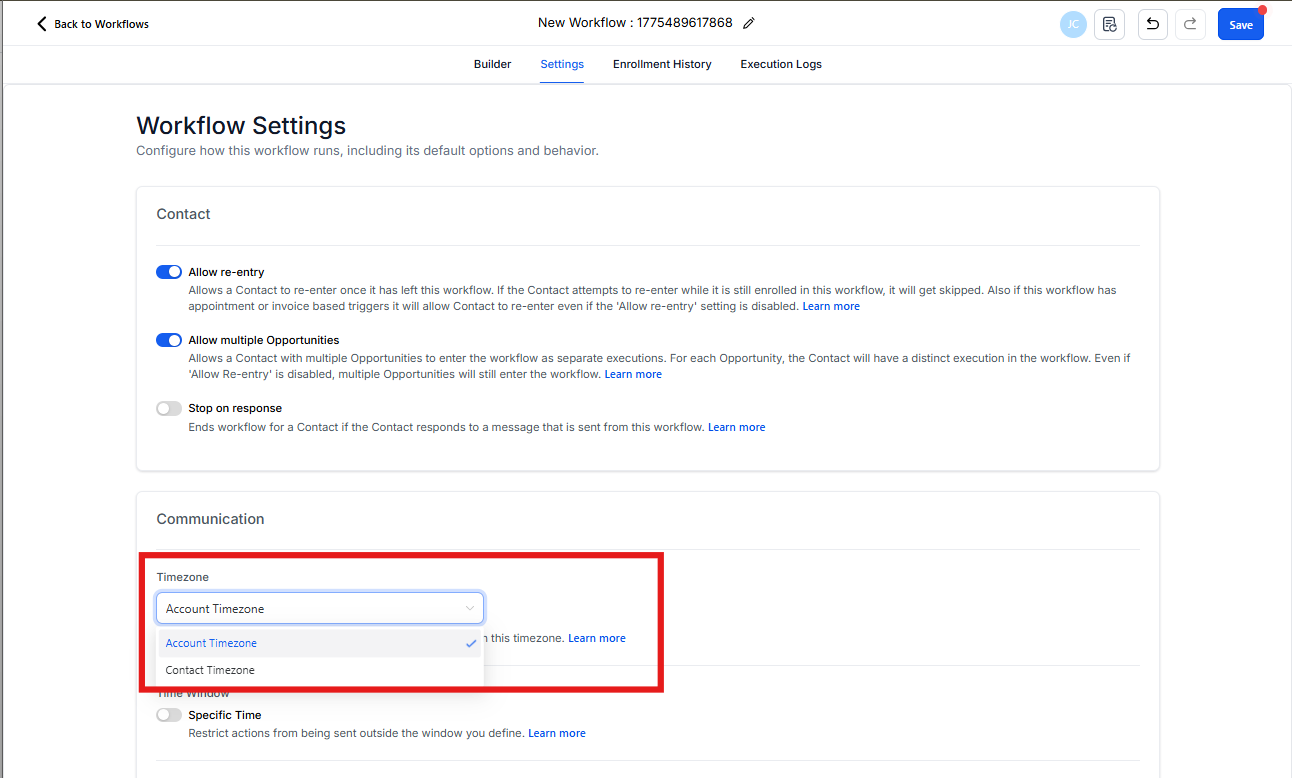
Account Timezone: All time-based actions will execute based on the timezone set for your entire center account.
Parent Timezone: Actions will execute based on the individual timezone of each parent. This is ideal for regional or national campaigns, as it ensures messages are sent at appropriate local times (e.g., 9 AM in the parent's city).
If a parent does not have a timezone set in their profile, the system will use the account timezone as a fallback.
History: In automation history you will see an entry for whether an action was undertaken in the Account Timezone or Parent Timezone.
Time Window
This feature restricts when communication actions (like sending a text message or email) can execute. If an action is scheduled to run outside the defined window, it will be paused and will resume at the next available time slot.
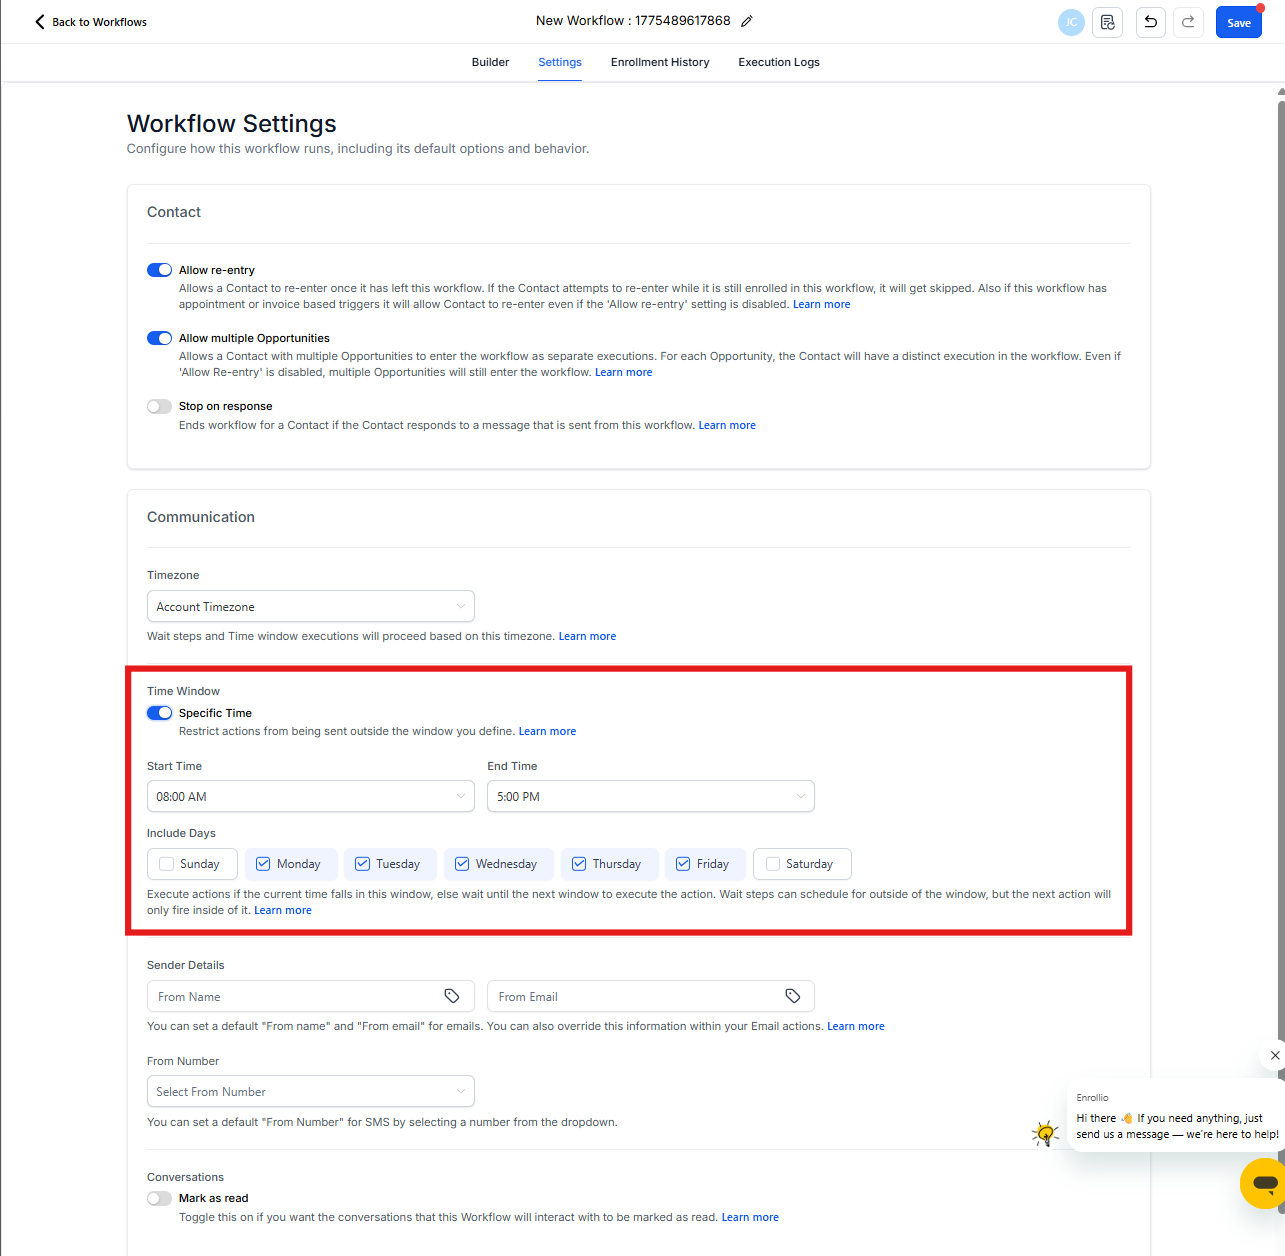
- Check the Specific Time toggle to enable the window.
- Start Time: Set the beginning of the execution window (e.g., 9:00 AM).
- End Time: Set the end of the execution window (e.g., 5:00 PM).
- Include Days: Select the specific days of the week when the window should be active.
Sender Details
This section allows you to set default sender information for all communications sent from this automation. This saves you from having to configure it in every individual message action.
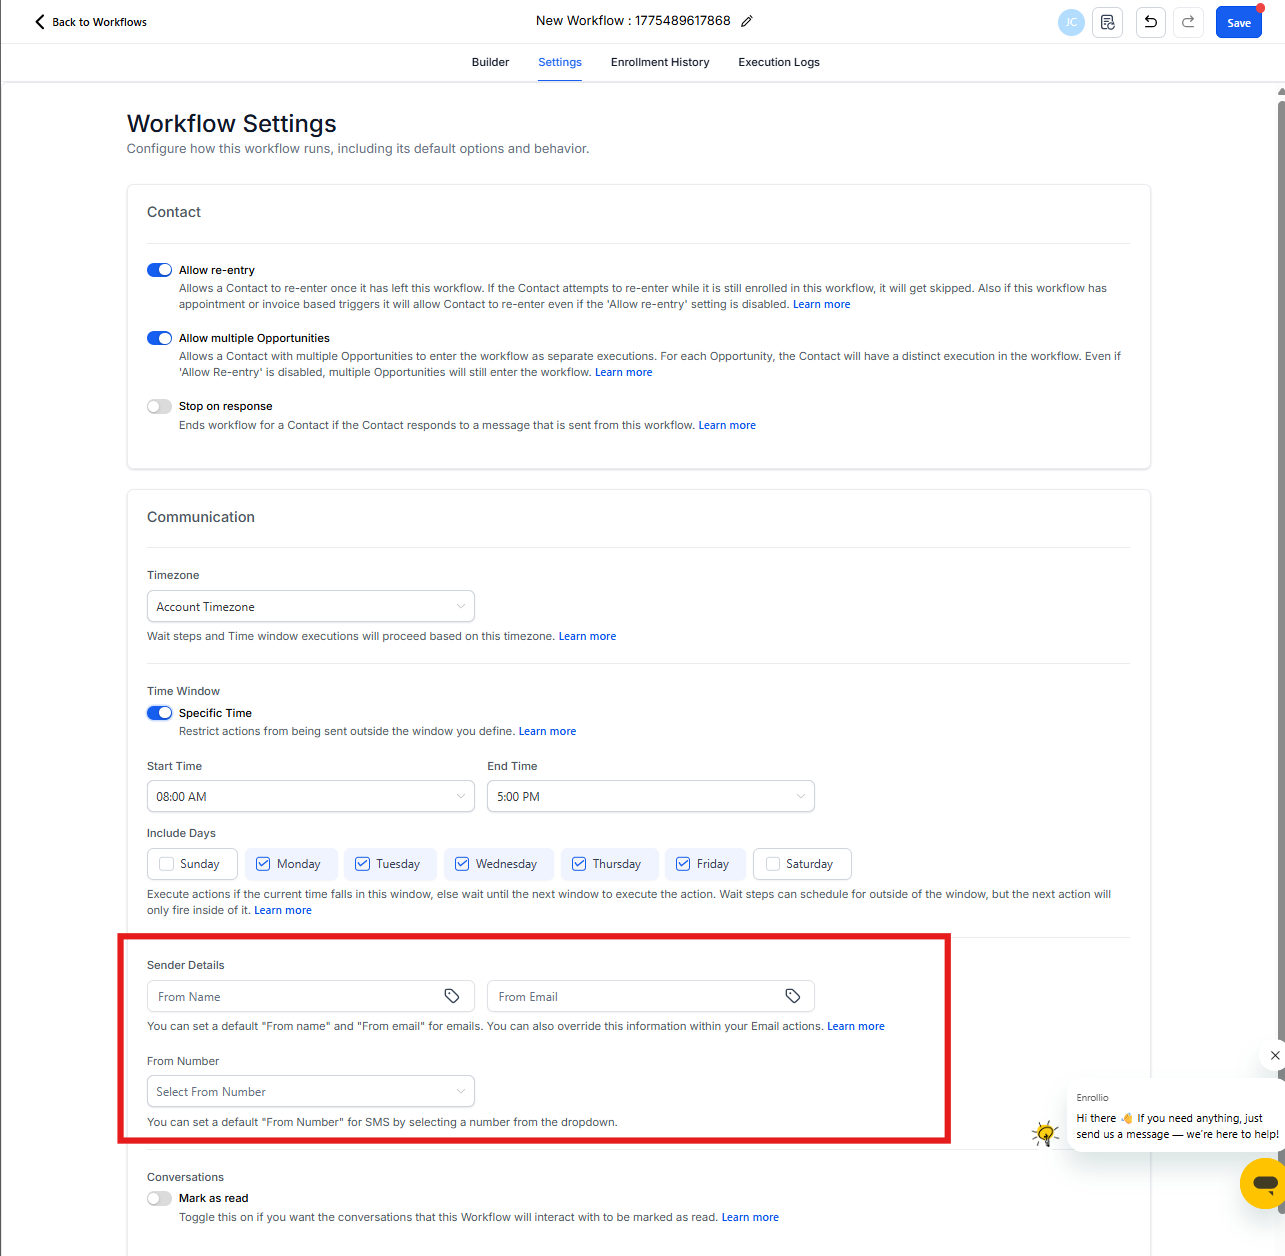
Default Sender Name: The name that appears as the sender in emails and text messages (e.g., "Little Stars Learning Center").
Default Email Address: The email address used for all email communications in this automation.
Default Phone Number: The phone number used for all text messages and calls in this automation.
Conversations - Mark as Read
This toggle determines whether automated messages are automatically marked as read in your conversations inbox.
Enabled (blue): Messages sent from this automation will be automatically marked as read, keeping your inbox clean and focused on conversations that need human attention.
Disabled (gray): Messages will appear as unread in your inbox, allowing you to review all automated communications.
Frequently Asked Questions
Can I change automation settings after the automation is already running?
Yes, you can modify automation settings at any time. Changes will apply to parents who enter the automation after you save the new settings. Parents already in the automation will continue with the settings that were active when they entered.
What happens if a parent doesn't have a timezone set?
If you've selected "Parent Timezone" in your settings and a parent doesn't have a timezone in their profile, Enrollio will use your account timezone as a fallback to ensure the automation continues running.
Can I override sender details for specific messages within an automation?
Yes, you can override the default sender details in individual email or text message actions within the automation. The automation-level settings serve as defaults when no specific sender is configured in an action.
Does Stop on Response work for all types of parent responses?
Yes, Stop on Response works for replies via text message, email, and phone calls (when voicemail detection is enabled). It triggers when a parent responds through any communication channel used in the automation.