
How to Create and Send Estimates in Enrollio
Estimates let you share pricing with families before finalizing an enrollment or service. Parents can review, accept, or decline your estimate — and once approved, you can convert it directly into an invoice with one click.
What You Can Do with Estimates
- Create and send estimates to prospective or current families
- Let parents accept or decline directly from the estimate
- Convert accepted estimates into invoices instantly
- Track all estimates by status: Draft, Sent, Accepted, Declined, or Invoiced
- Customize estimates with your center's branding and terms
How to Access Estimates
- Go to your Enrollio Dashboard
- Click Payments in the left sidebar
- Select Invoices and Estimates
- Click the Estimates tab
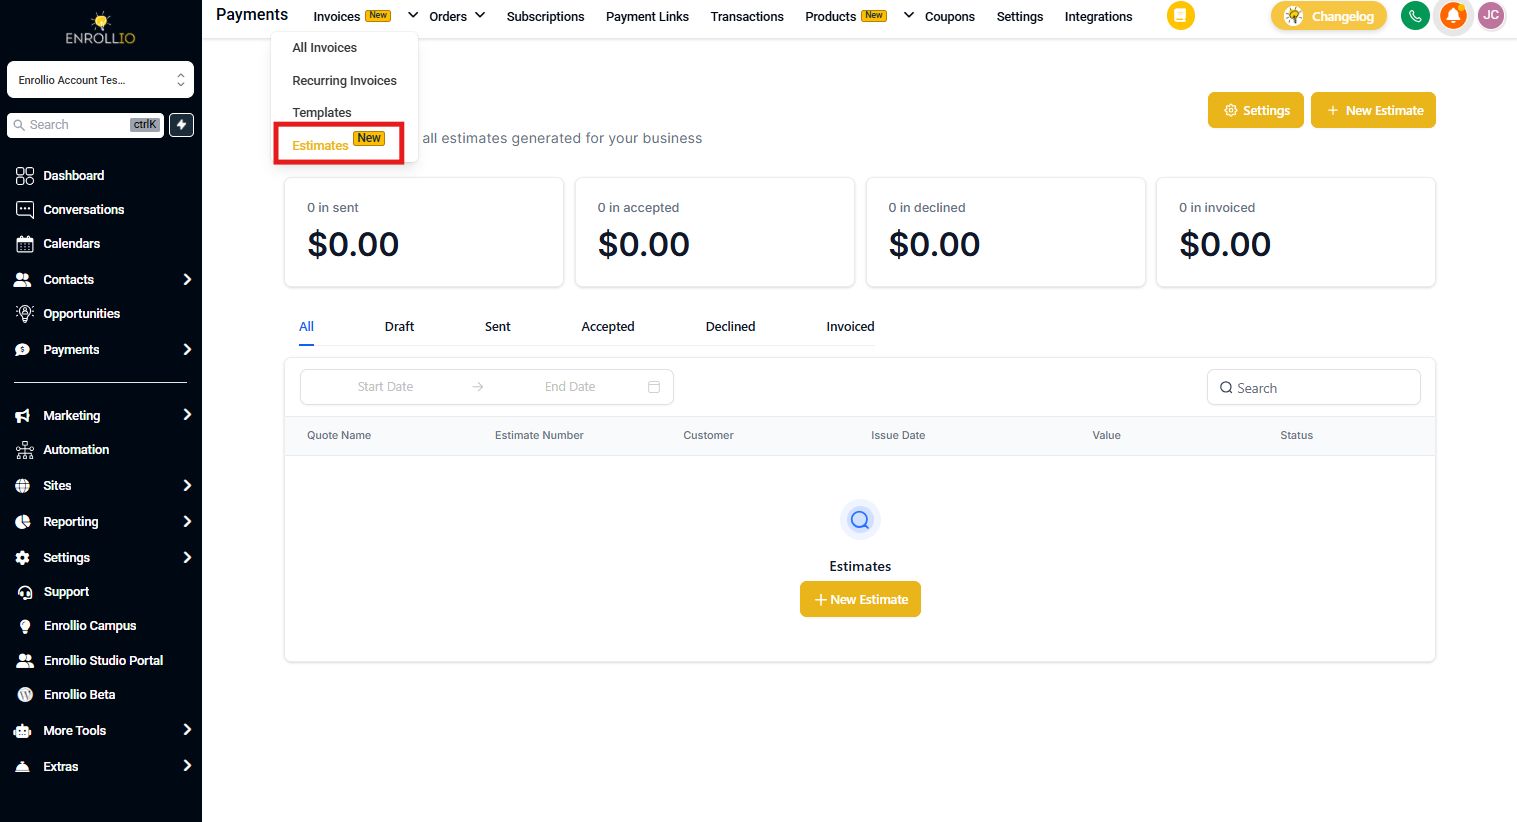
How to Create an Estimate
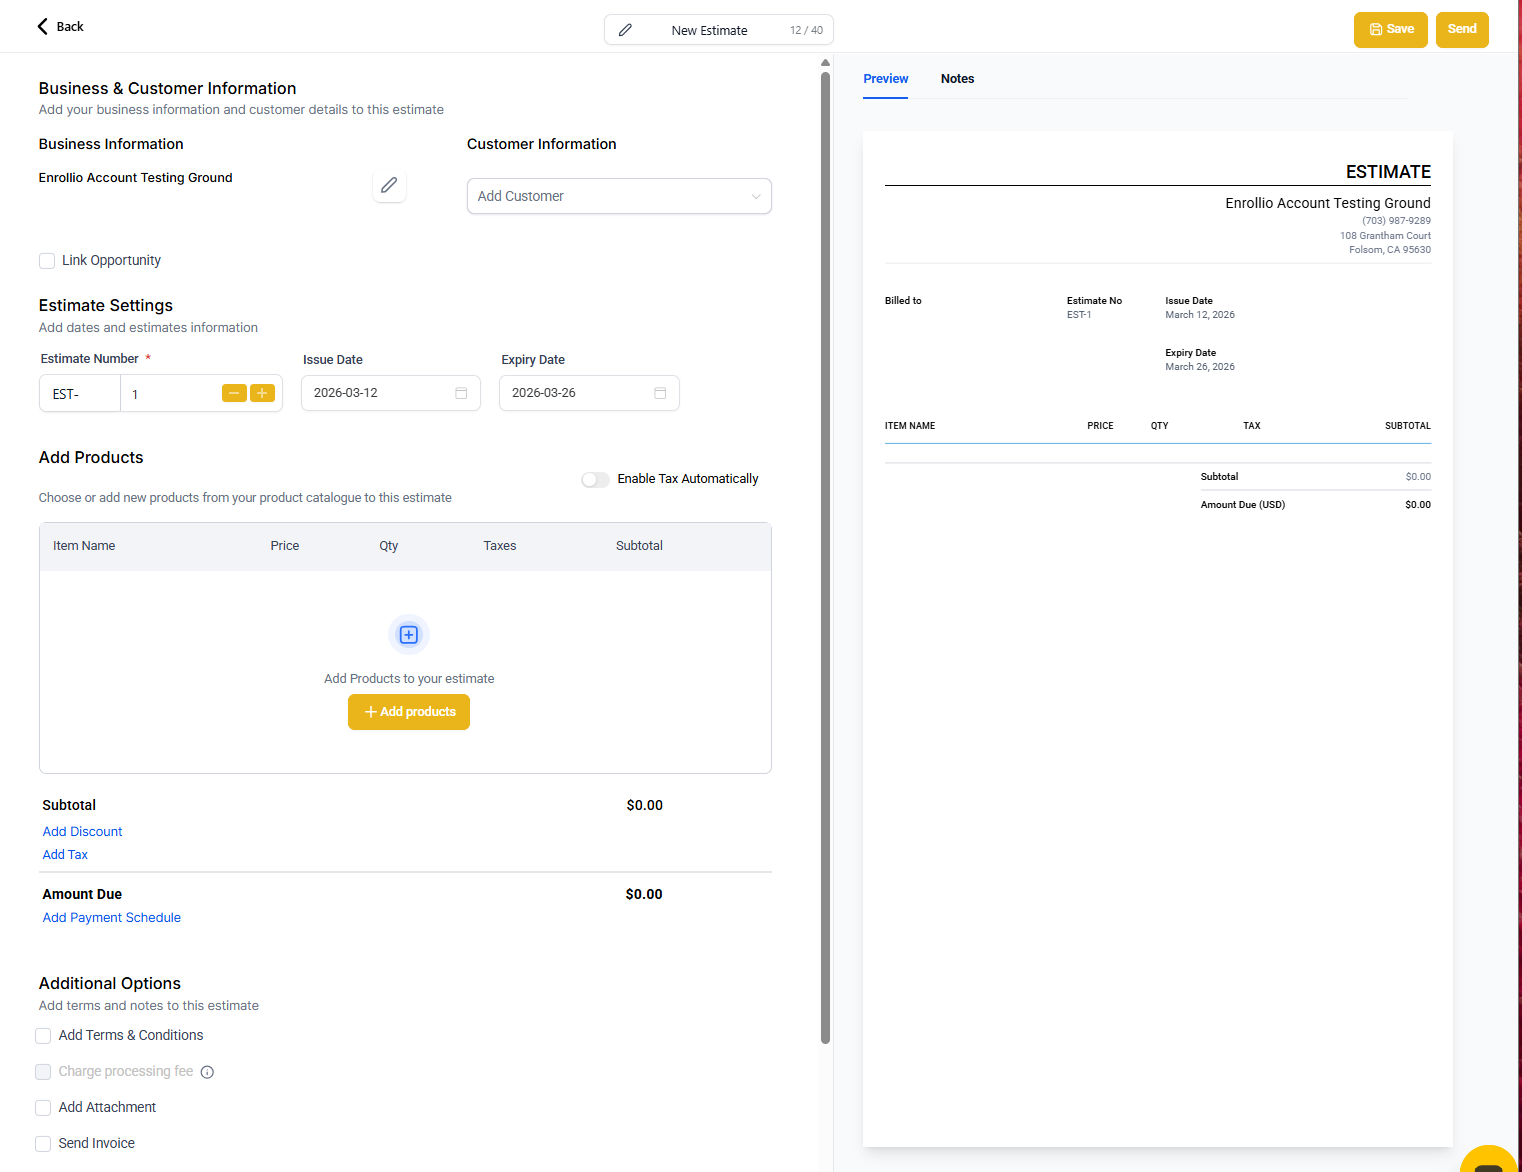
- Click the New button in the Estimates section
- Enter your business information (this should auto-populate from your settings)
- Add the family's contact information
- Enter an estimate number (auto-generated, but you can customize it)
- Set an expiry date for the estimate
- Add products or services (tuition, registration fees, supplies, etc.)
- Review the estimate details
- Click Send
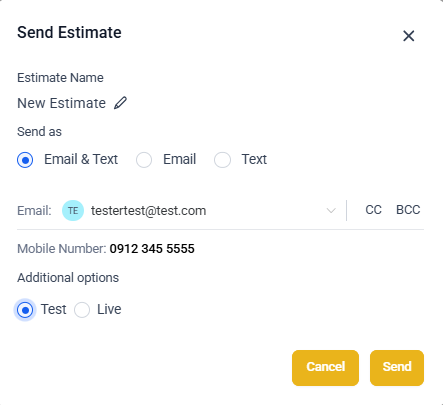
How to Send an Estimate to a Family
Once you've created your estimate, you can send it directly to the parent via email or text message. Choose the method that works best for your family.
- Review the estimate one final time
- Choose your delivery method: Email or SMS
- Click Send to Client
The parent will receive a link to view and respond to the estimate.
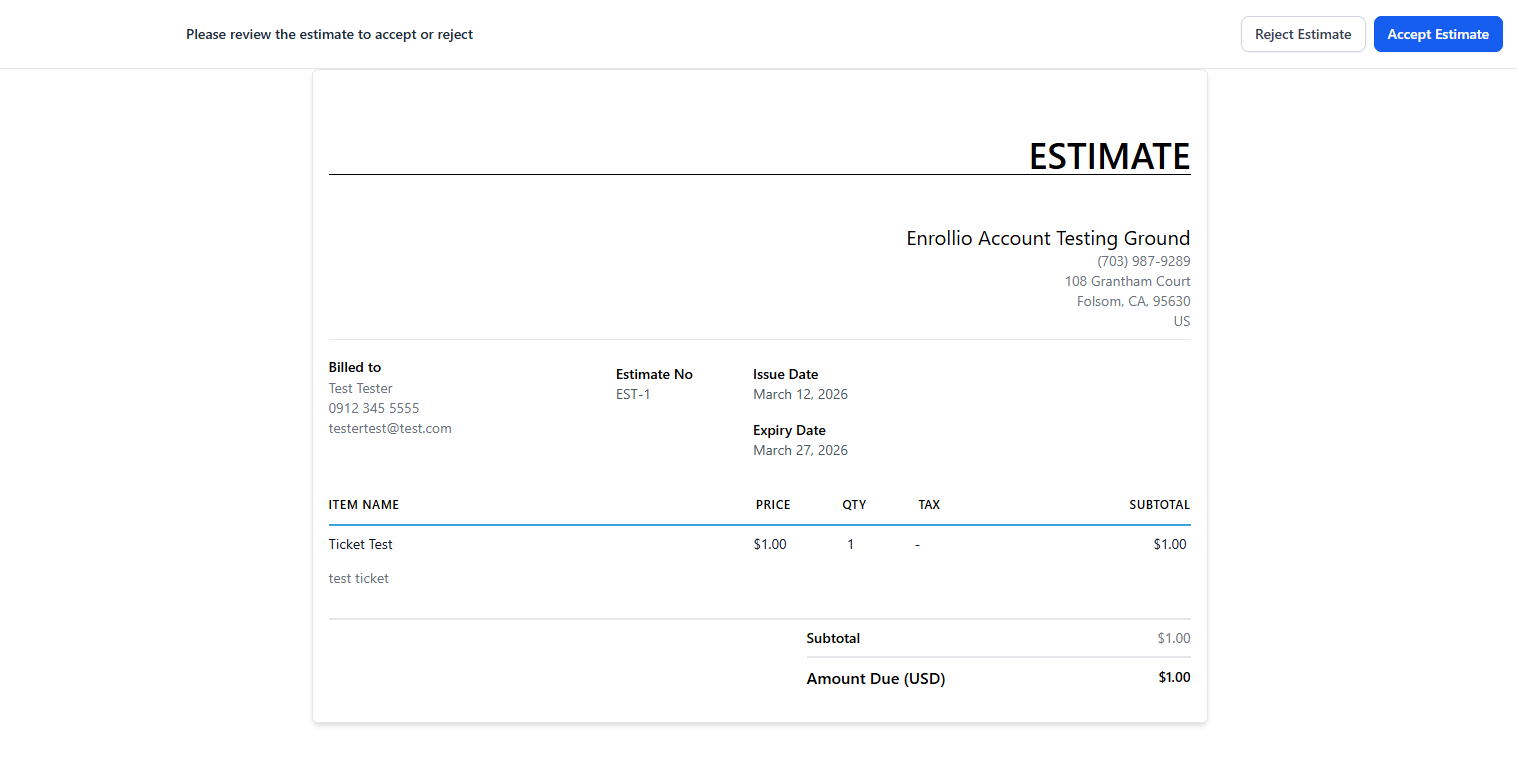
How Parents Accept or Decline Estimates
When a parent receives your estimate, they can take action directly from the link you sent:
- Accept: The parent clicks Accept, and the estimate is marked as accepted in your dashboard
- Decline: The parent clicks Decline, adds optional notes explaining why, and the estimate is marked as declined
You can also manually mark an estimate as accepted or declined if the parent confirmed over the phone or in person.
How to Convert an Estimate to an Invoice
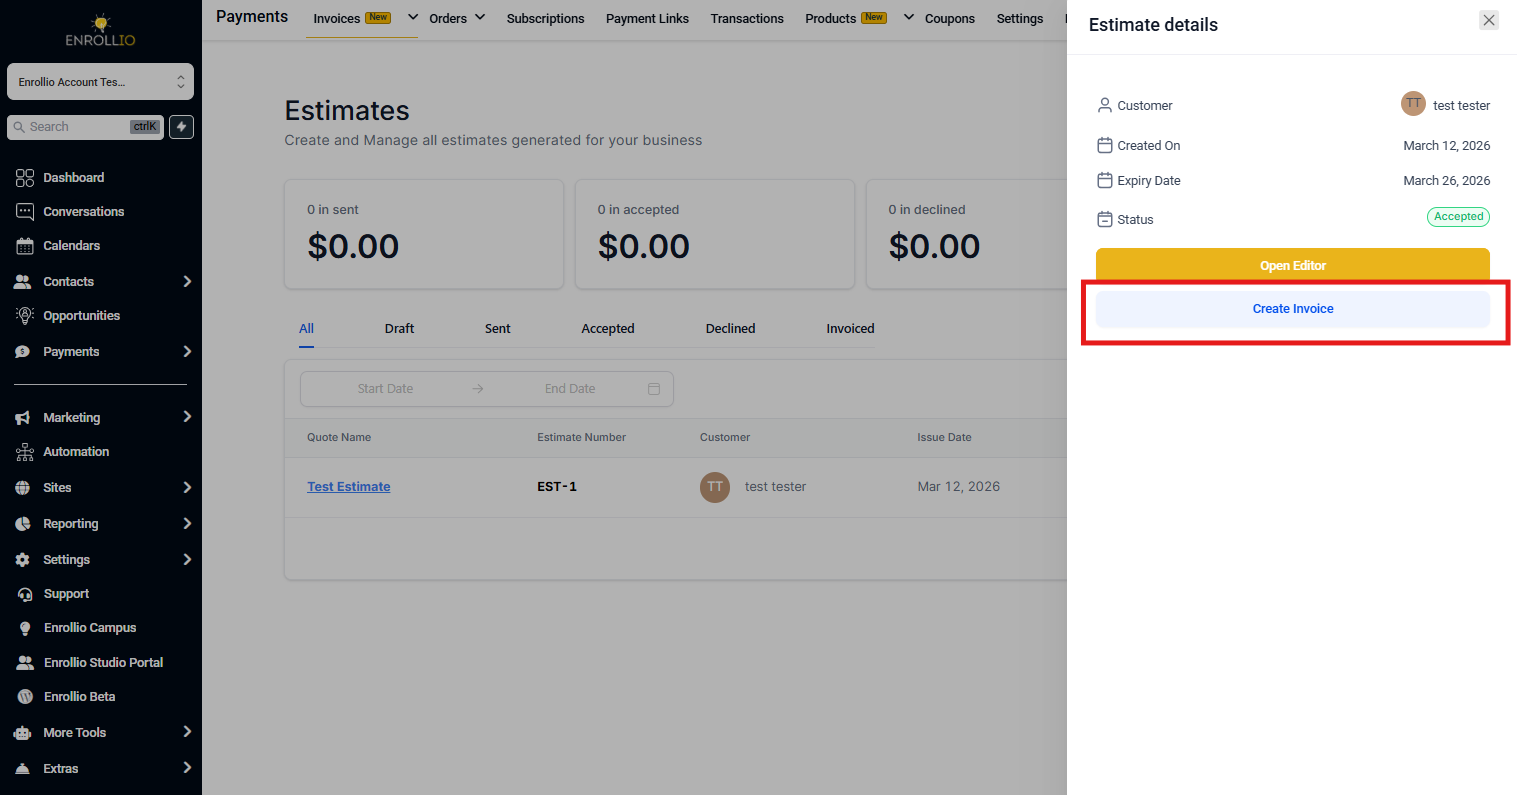
Once a parent accepts an estimate, you can turn it into an invoice in seconds.
Option 1: From the Estimates Dashboard
- Find the accepted estimate in your list
- Click on the estimate to open it
- Click Create Invoice
Option 2: From Within the Estimate
- Open the sent estimate
- Click Create Invoice at the top
The invoice will auto-populate with all the estimate details. You can edit if needed, then send it to the family for payment.
How to Track Your Estimates
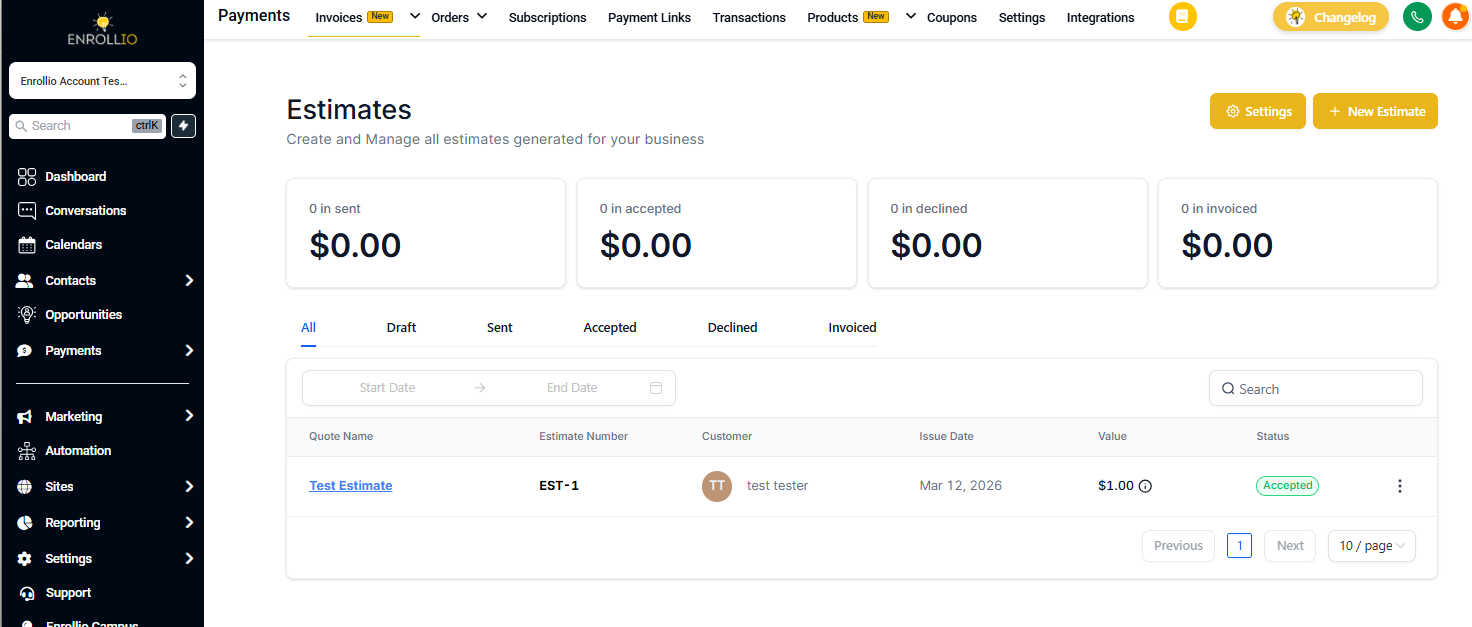
Your Estimates dashboard gives you a complete view of where every estimate stands.
Status Tracking:
- Draft: Estimates you've started but not sent yet
- Sent: Estimates delivered to families, awaiting response
- Accepted: Estimates approved by families
- Declined: Estimates rejected by families (you can view their notes)
- Invoiced: Estimates that have been converted to invoices
Value Cards: At the top of your dashboard, you'll see the total value of estimates in your pipeline. This helps you forecast potential revenue.
Notes: View any notes families added when accepting or declining estimates, both in the dashboard list and within each estimate.
How to Customize Your Estimates
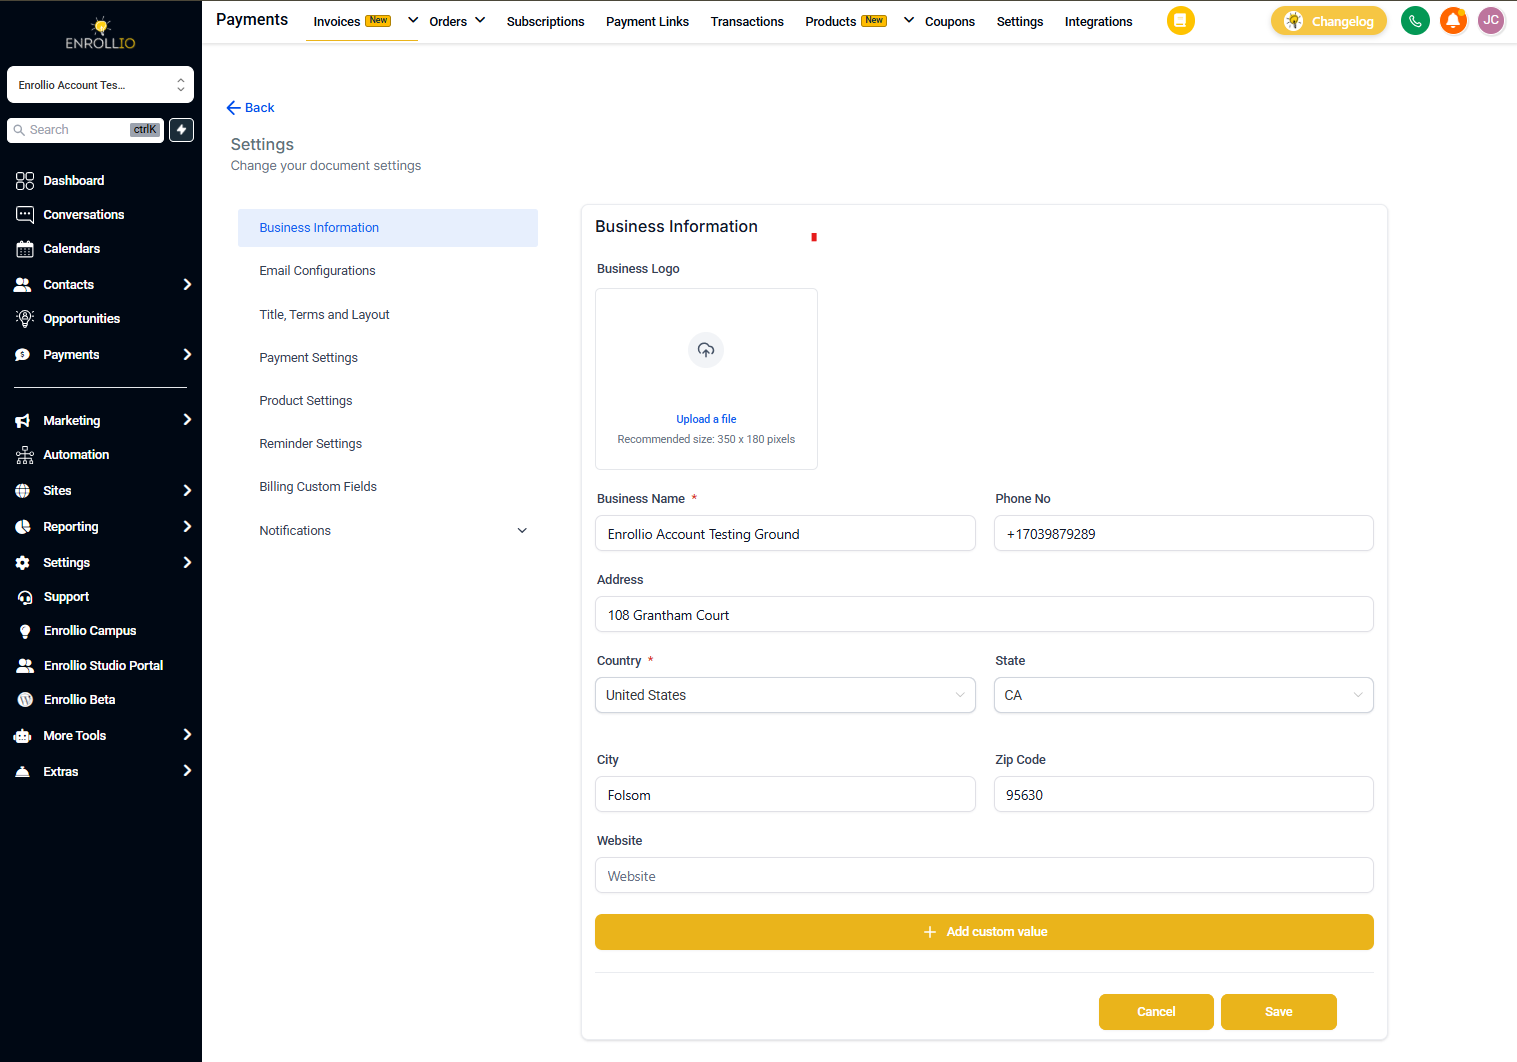
You can brand your estimates to match your childcare center's look and feel.
- Go to Settings in your Enrollio Dashboard
- Select Payments
- Click Invoices and Estimates
- Customize:
- Your center's logo
- Brand colors
- Terms and conditions
- Default estimate expiry period
- Email or text message templates
- Click Save
These settings will apply to all future estimates automatically.
Why Use Estimates?
Estimates complete your payment workflow in Enrollio. Instead of verbally quoting tuition and fees, you can send a professional, branded estimate that families can approve on the spot. Once accepted, converting to an invoice takes one click — no re-entering information.
This is especially helpful for:
- Prospective families touring your center
- Families enrolling mid-year with prorated tuition
- Custom service packages (extended care, summer camp, etc.)
- Families who want pricing in writing before committing