
How to Create a LinkedIn Lead Form in Ad Manager
LinkedIn Lead Forms let you capture parent and family details directly within LinkedIn ads, without requiring them to leave the platform. This is perfect for promoting childcare events, open houses, or enrollment campaigns.
Enrollio's Ad Manager makes it simple to create, preview, and map these forms directly to your enrollment pipeline. This guide walks you through each step of the Lead Form creation process.
Table of Contents
- Step 1: Open the Lead Form Builder
- Step 2: Add Basic Details
- Step 3: Greeting Section
- Step 4: Language
- Step 5: Questions
- Step 6: Form Fields Mapping
- Step 7: Data Privacy
- Step 8: Confirmation Page
- Step 9: Preview & Save
- Best Practices
Step 1: Open the Lead Form Builder
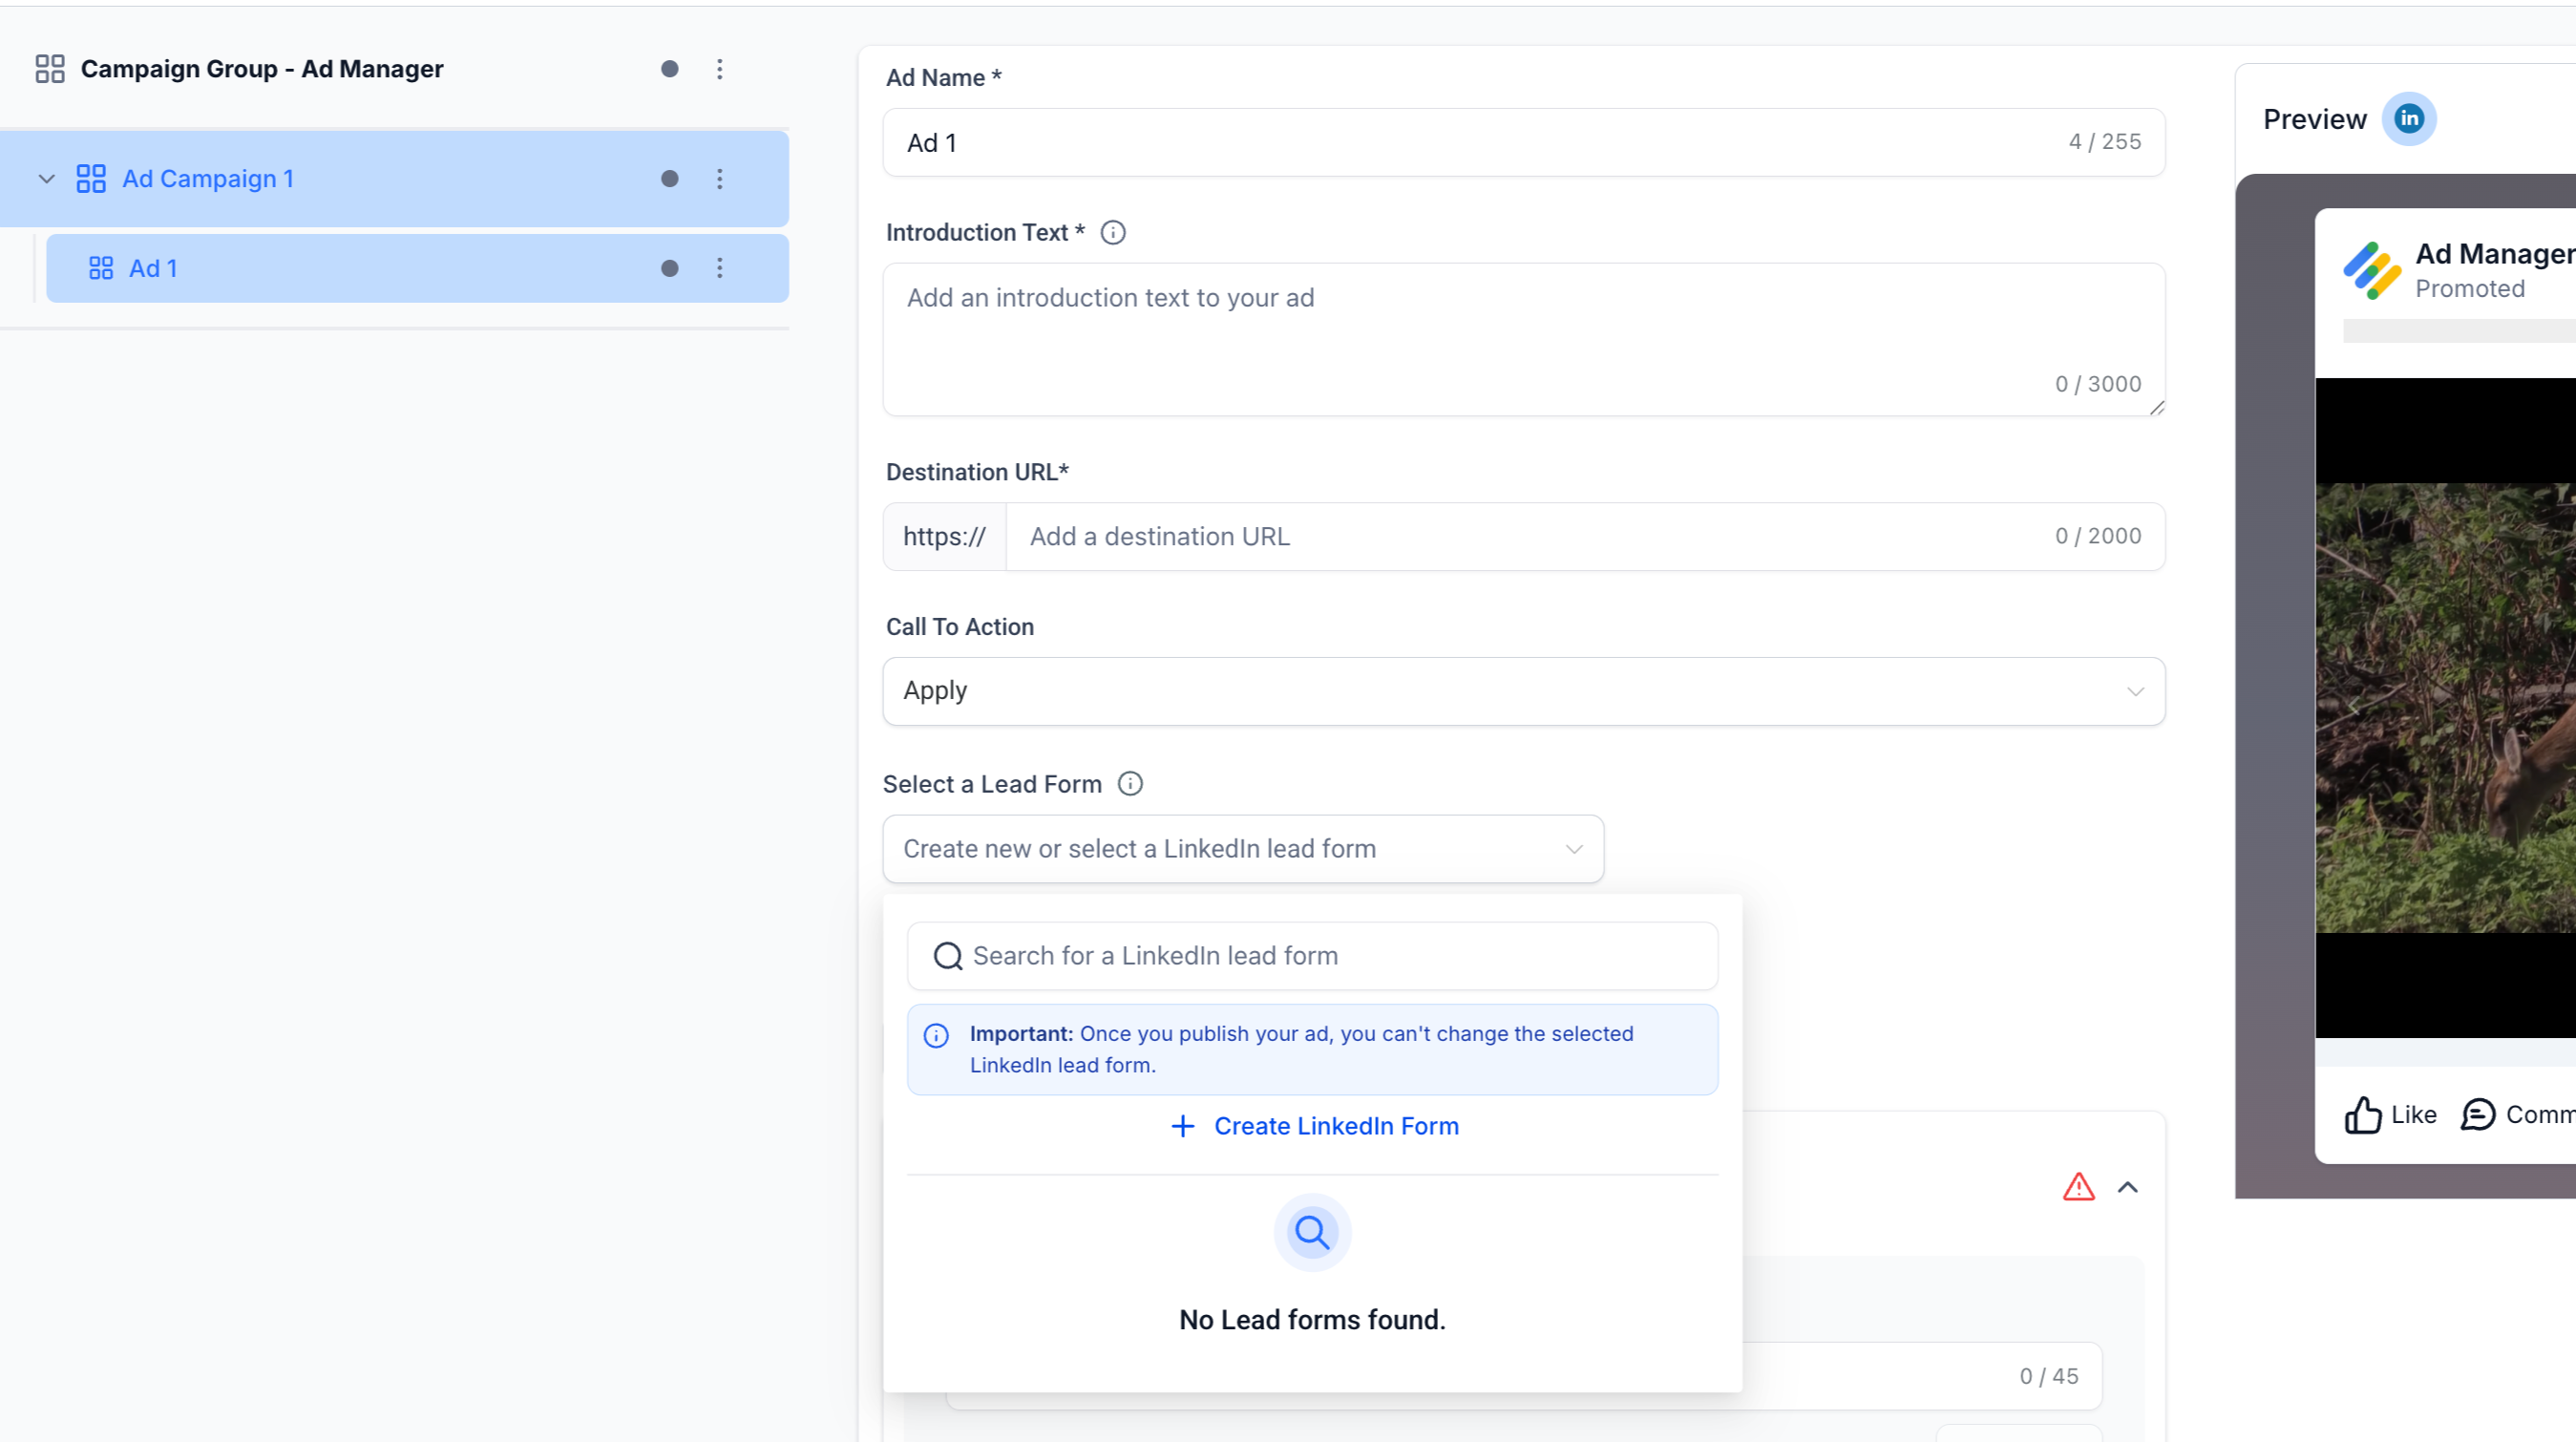
When creating a LinkedIn campaign in Ad Manager, select Lead Generation as your objective.
At the Ad Level, you'll see the option to Select a Lead Form. Click Create New to open the Lead Form Builder.
Step 2: Add Basic Details
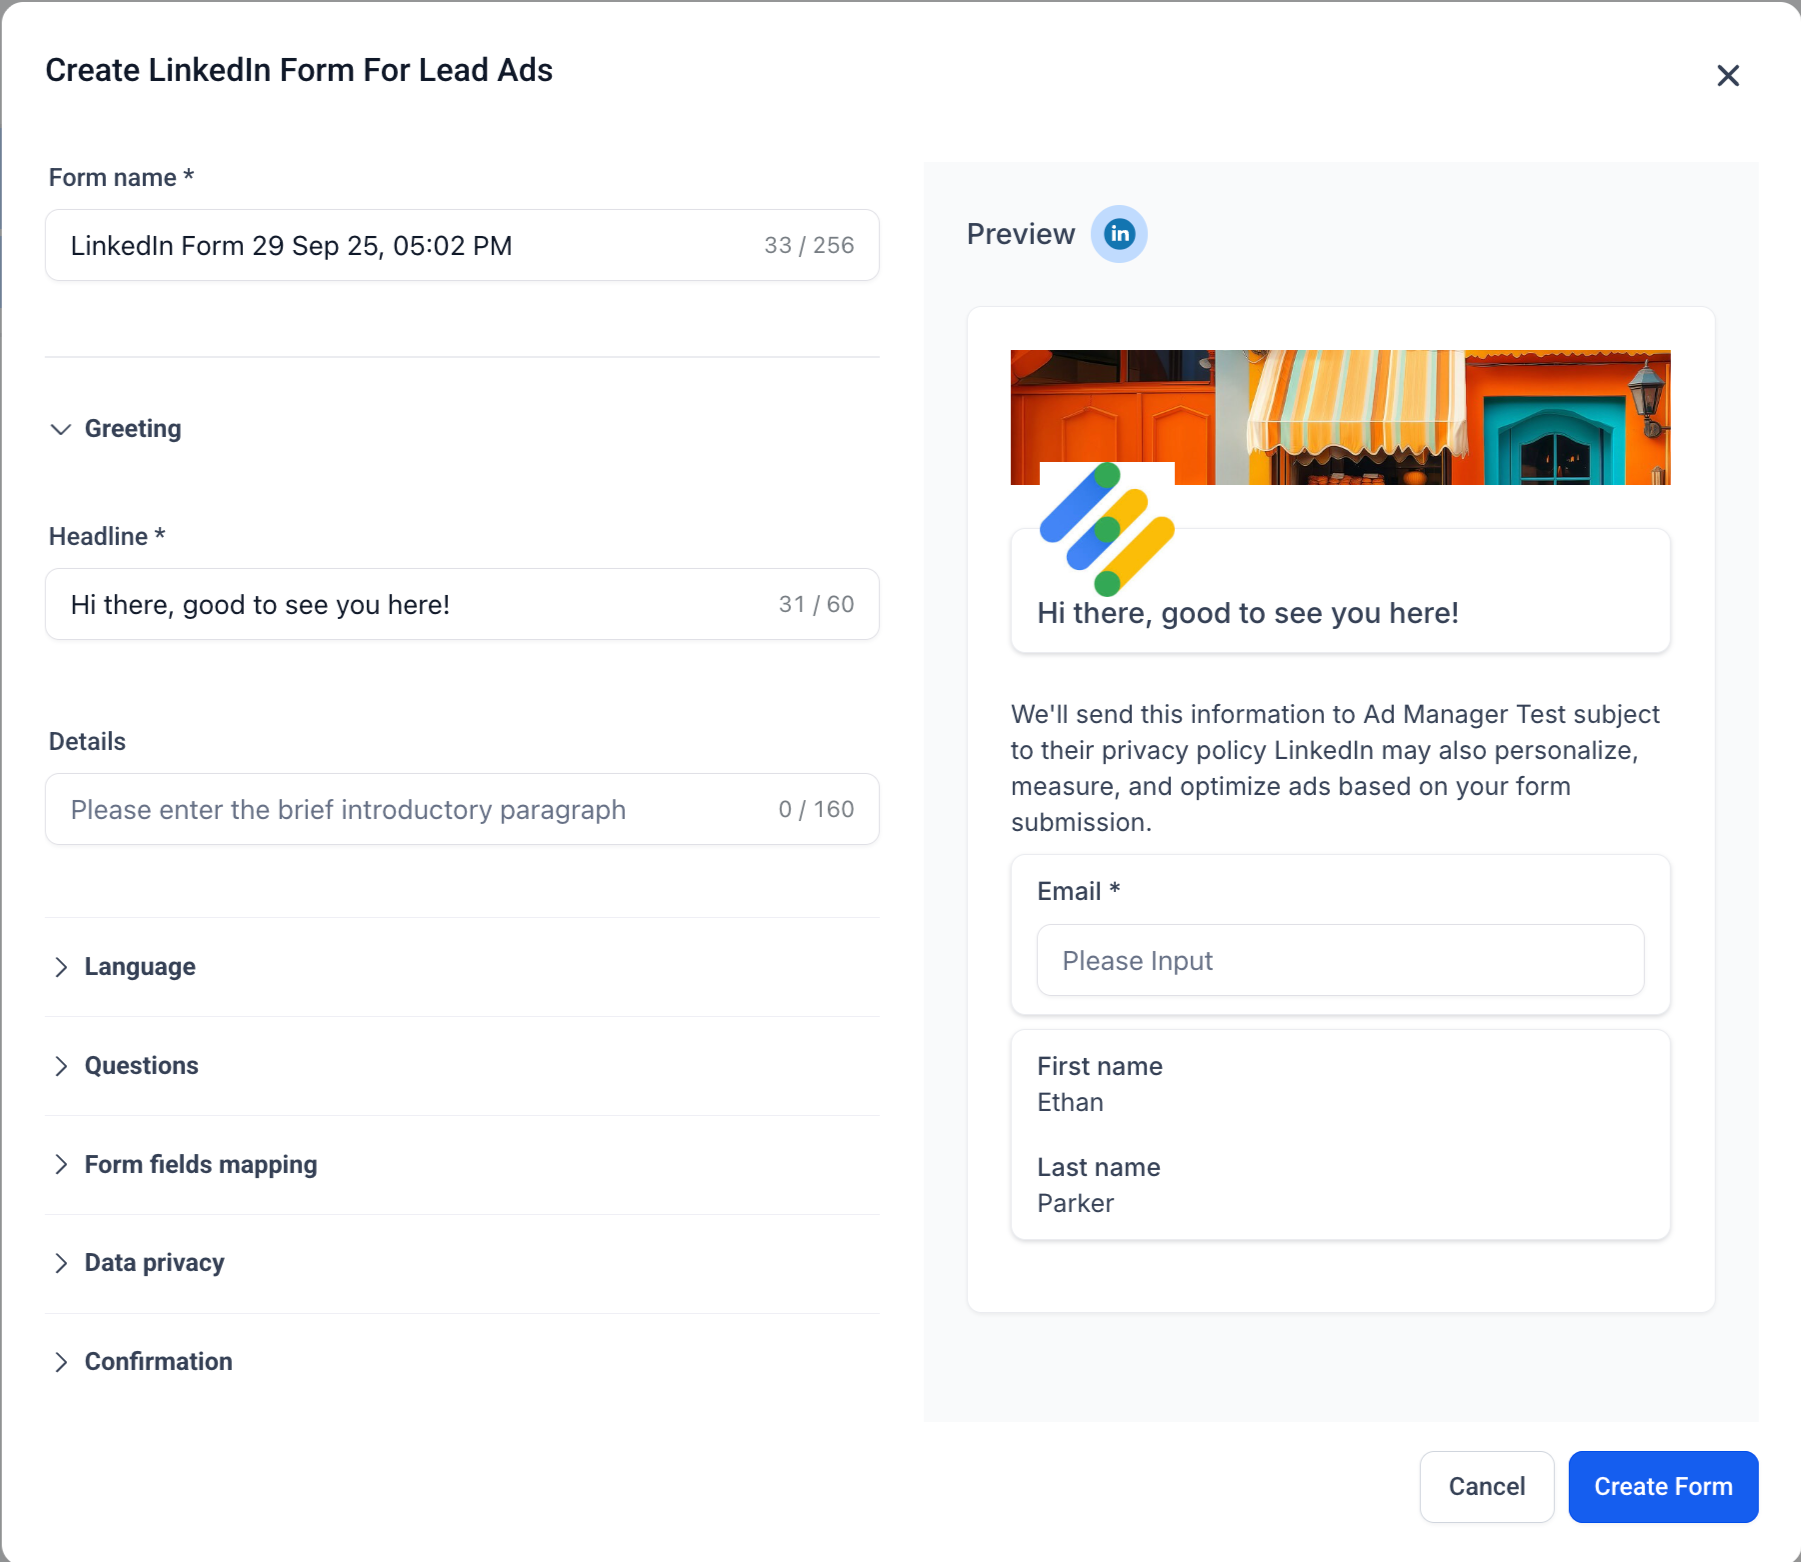
Form Name (required): Enrollio auto-generates a name with a timestamp (e.g., "LinkedIn Form 29 Sep 25, 05:02 PM"). You can edit this to something more descriptive like "Spring Enrollment Open House" or "Tour Request Form."
Maximum length: 256 characters.
Step 3: Greeting Section
This section controls the first impression families see when they open your form.
Headline (required): Up to 60 characters. This appears prominently at the top of the form.
Example: "Thanks for your interest in [Your Center Name]!"
Details (optional): Up to 160 characters. A short introduction to explain your offer.
Example: "Schedule a tour and learn how we support every child's growth and development."
Step 4: Language
Choose the form's display language. This ensures a localized experience for your audience and is especially important if you serve multilingual families.
Step 5: Questions
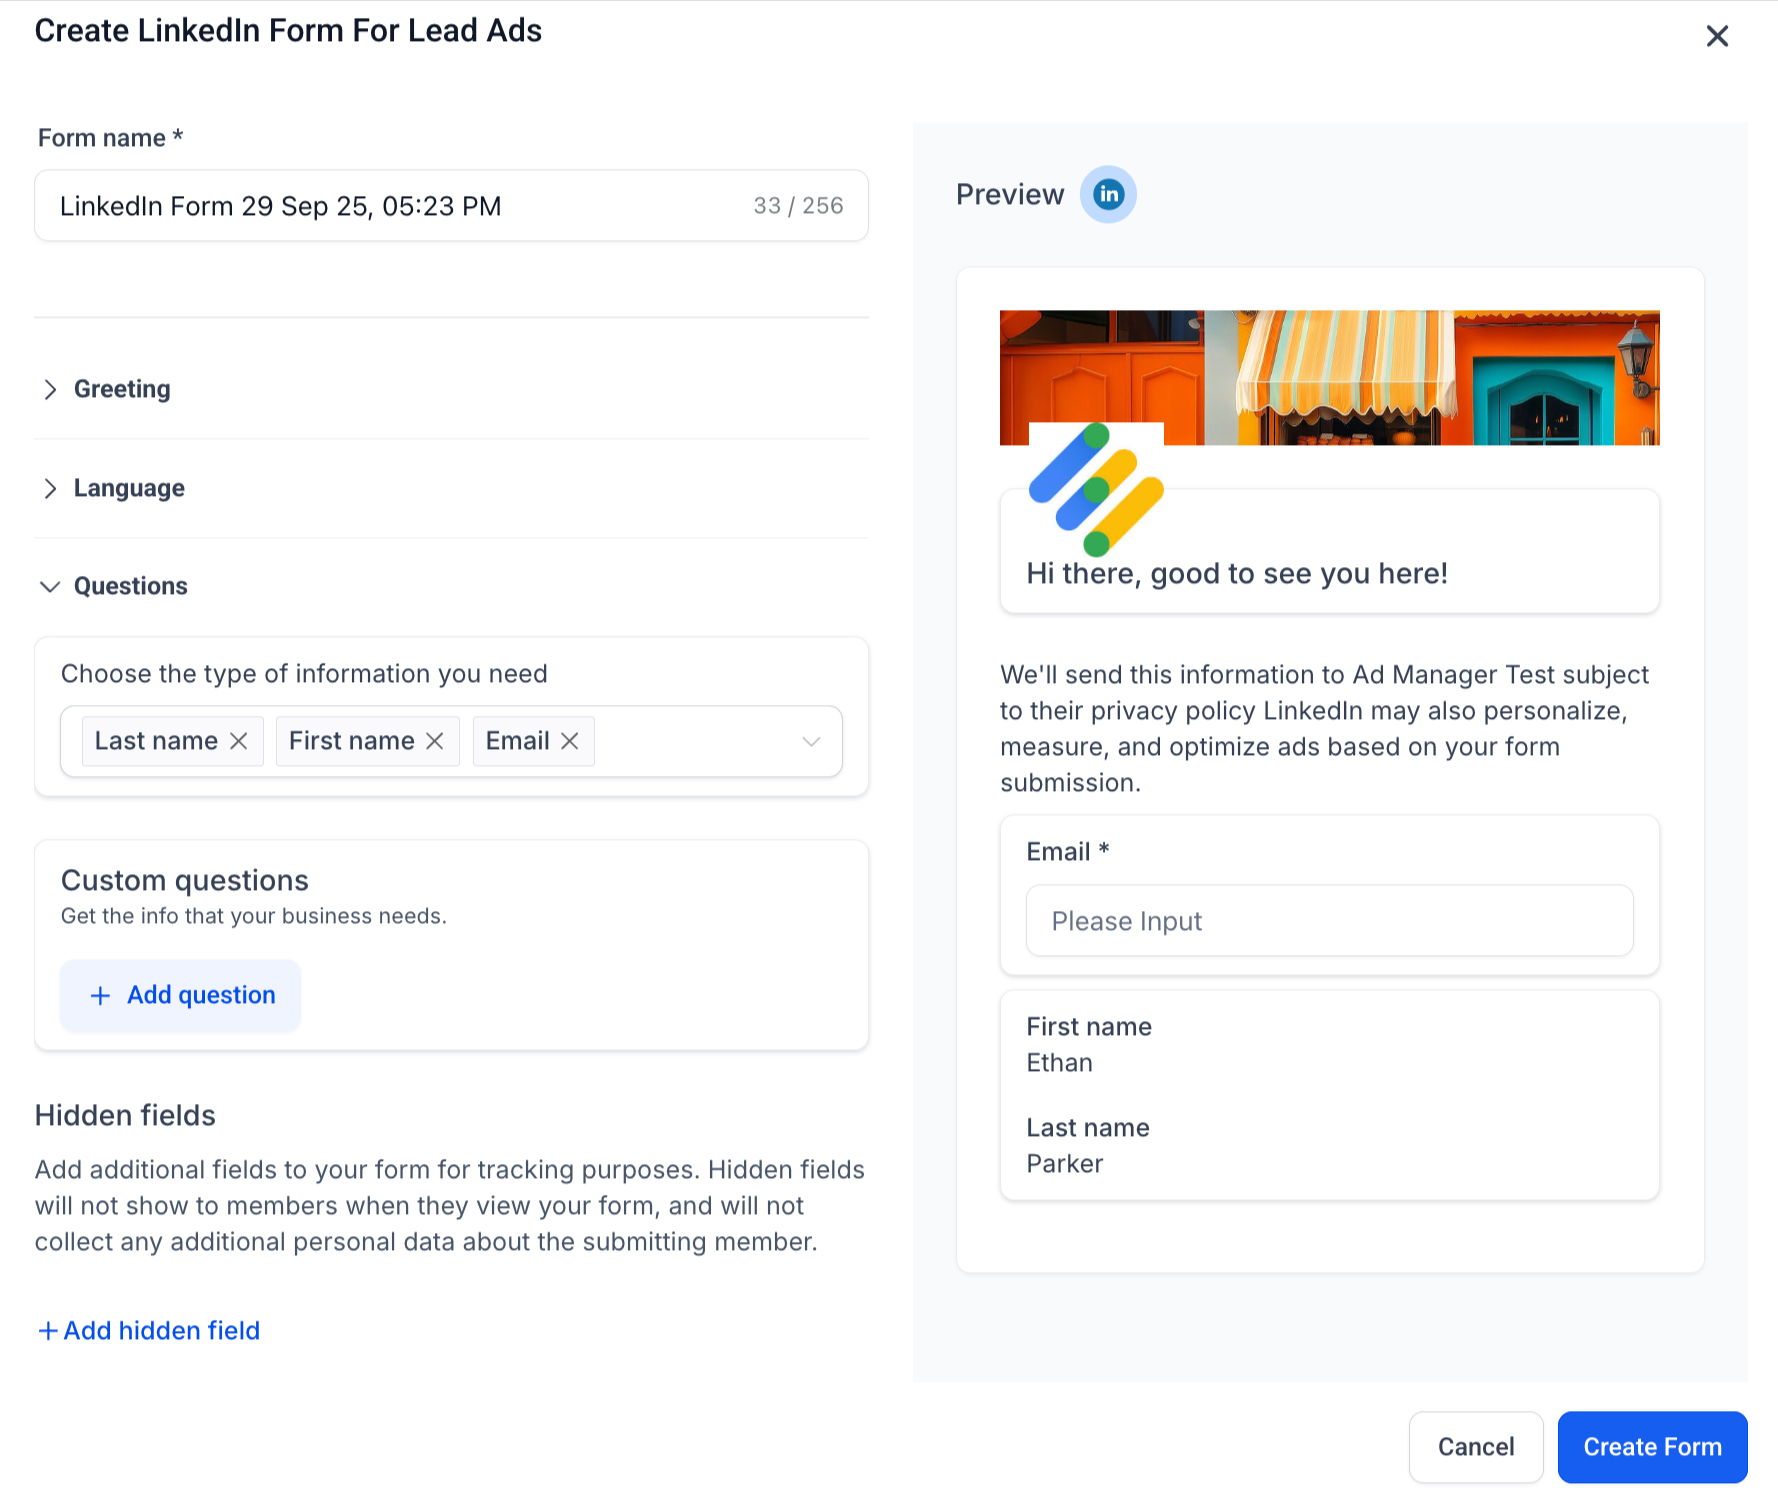
This section defines what information you'll collect from prospective families.
Prefilled Fields (up to 12)
Standard LinkedIn profile fields like First Name, Last Name, Email, Job Title, and Company Name are auto-filled by LinkedIn for faster completion. Parents appreciate this convenience.
Custom Questions (up to 3)
Choose Short Answer or Multiple Choice format.
Example: "What age group are you interested in?" with options like Infant, Toddler, Preschool, School-Age.
Hidden Fields (up to 20)
These aren't visible to users but are sent with each submission. Use them for tracking campaign performance (e.g., campaign ID, UTM tags, or lead source).
Step 6: Form Fields Mapping
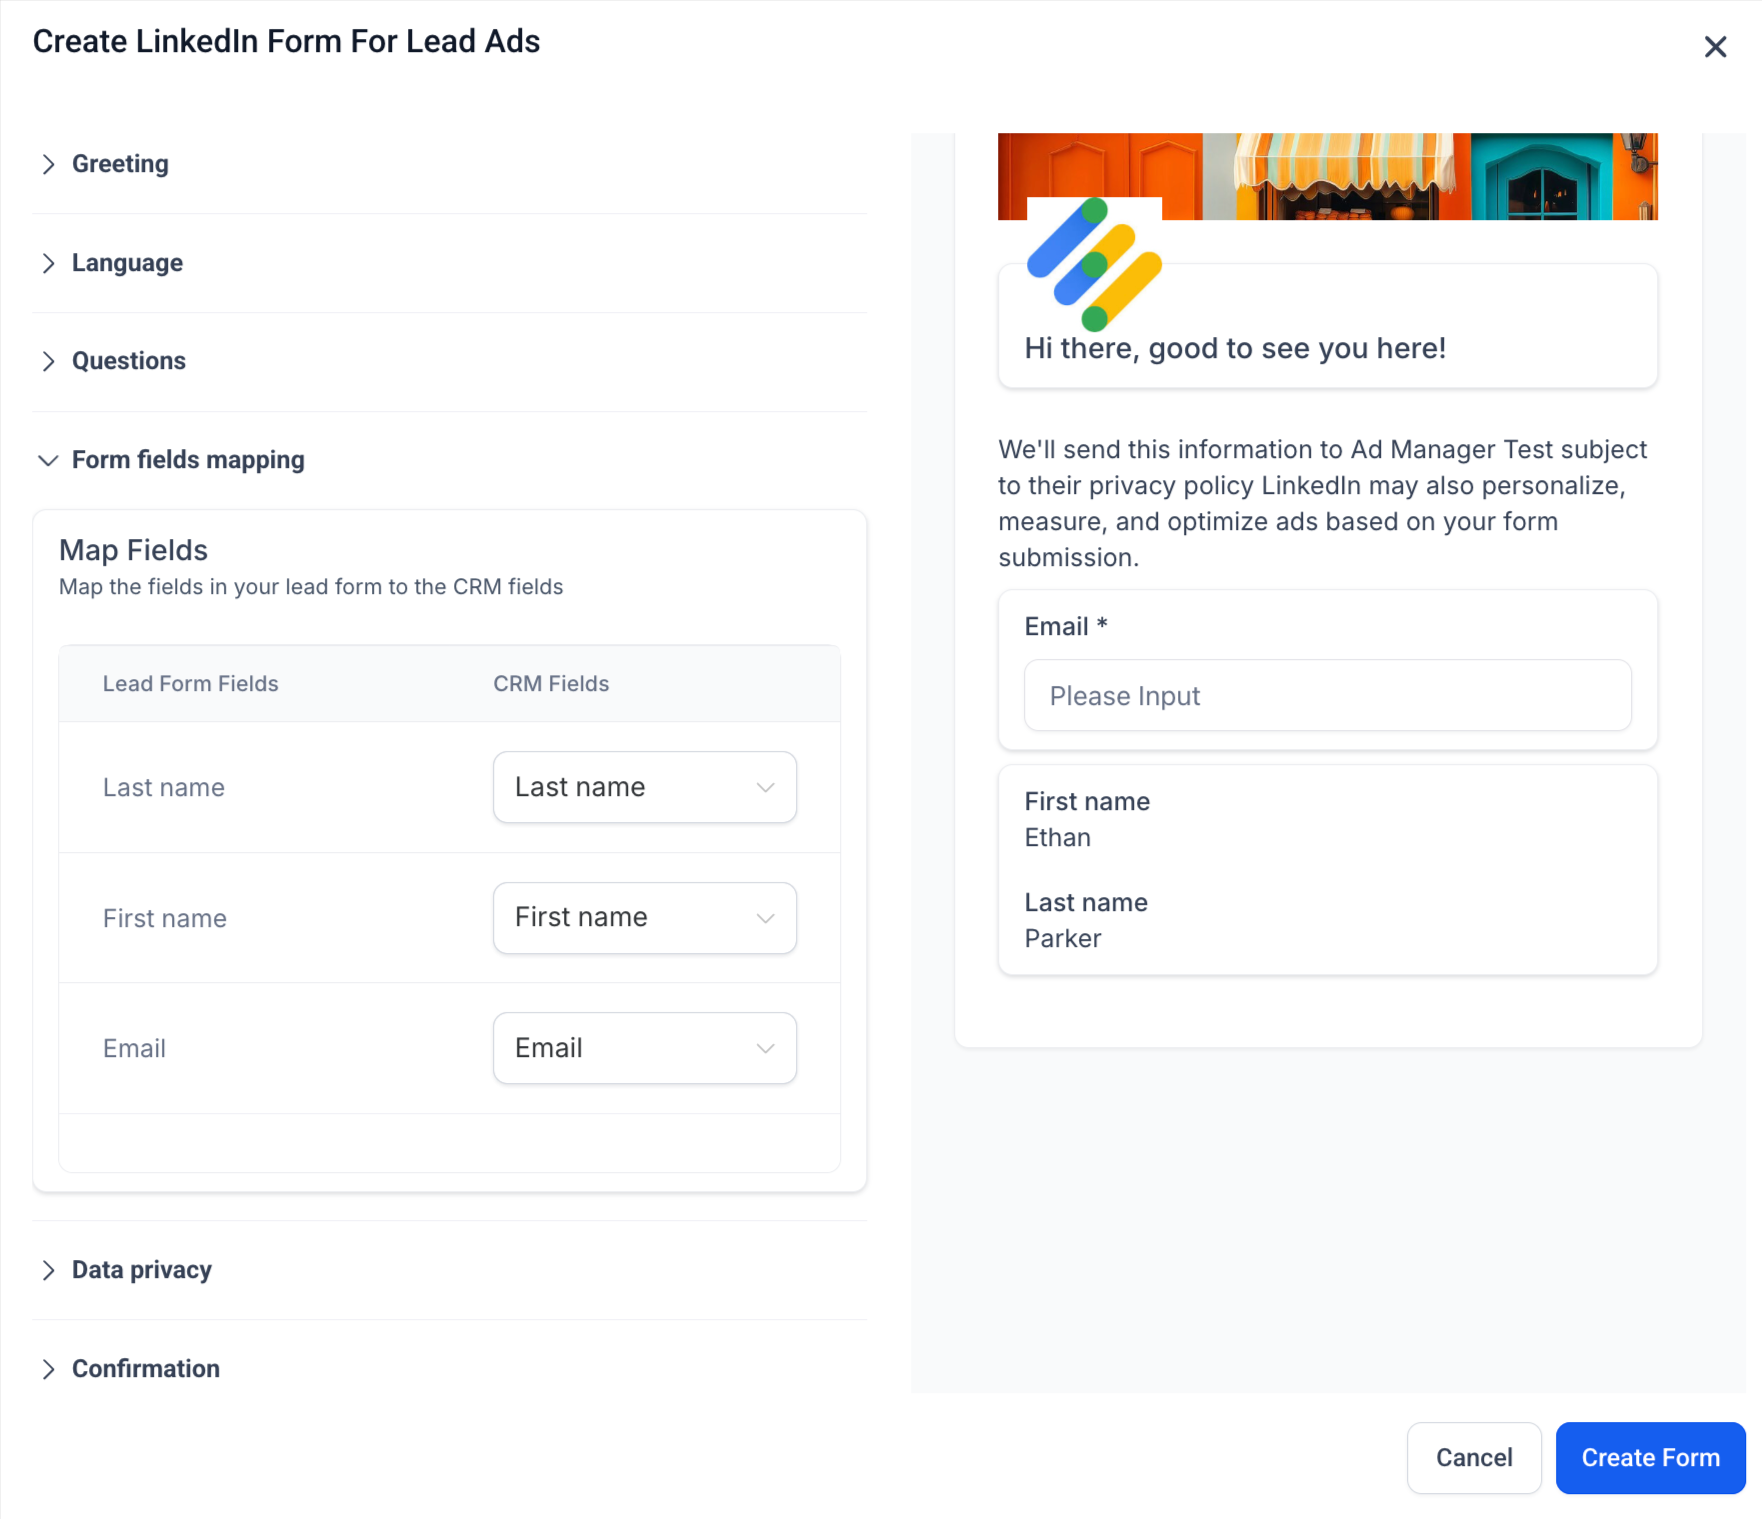
Map each LinkedIn field (pre-filled, custom, and hidden) to your Enrollio contact fields. This ensures captured leads sync seamlessly into your enrollment pipeline and automations.
For example, map "First Name" to your Parent First Name field, or create a custom field for "Child's Age" to capture that information.
Step 7: Data Privacy
Compliance is critical when collecting family information.
Privacy Policy URL (required): Link to your center's privacy page. This appears as a clickable label in the form.
Privacy Text (optional): Add additional disclaimer text if needed.
Consent Checkboxes (up to 5): For GDPR/CCPA compliance or marketing opt-ins.
Example: "I agree to receive information about enrollment opportunities and events."
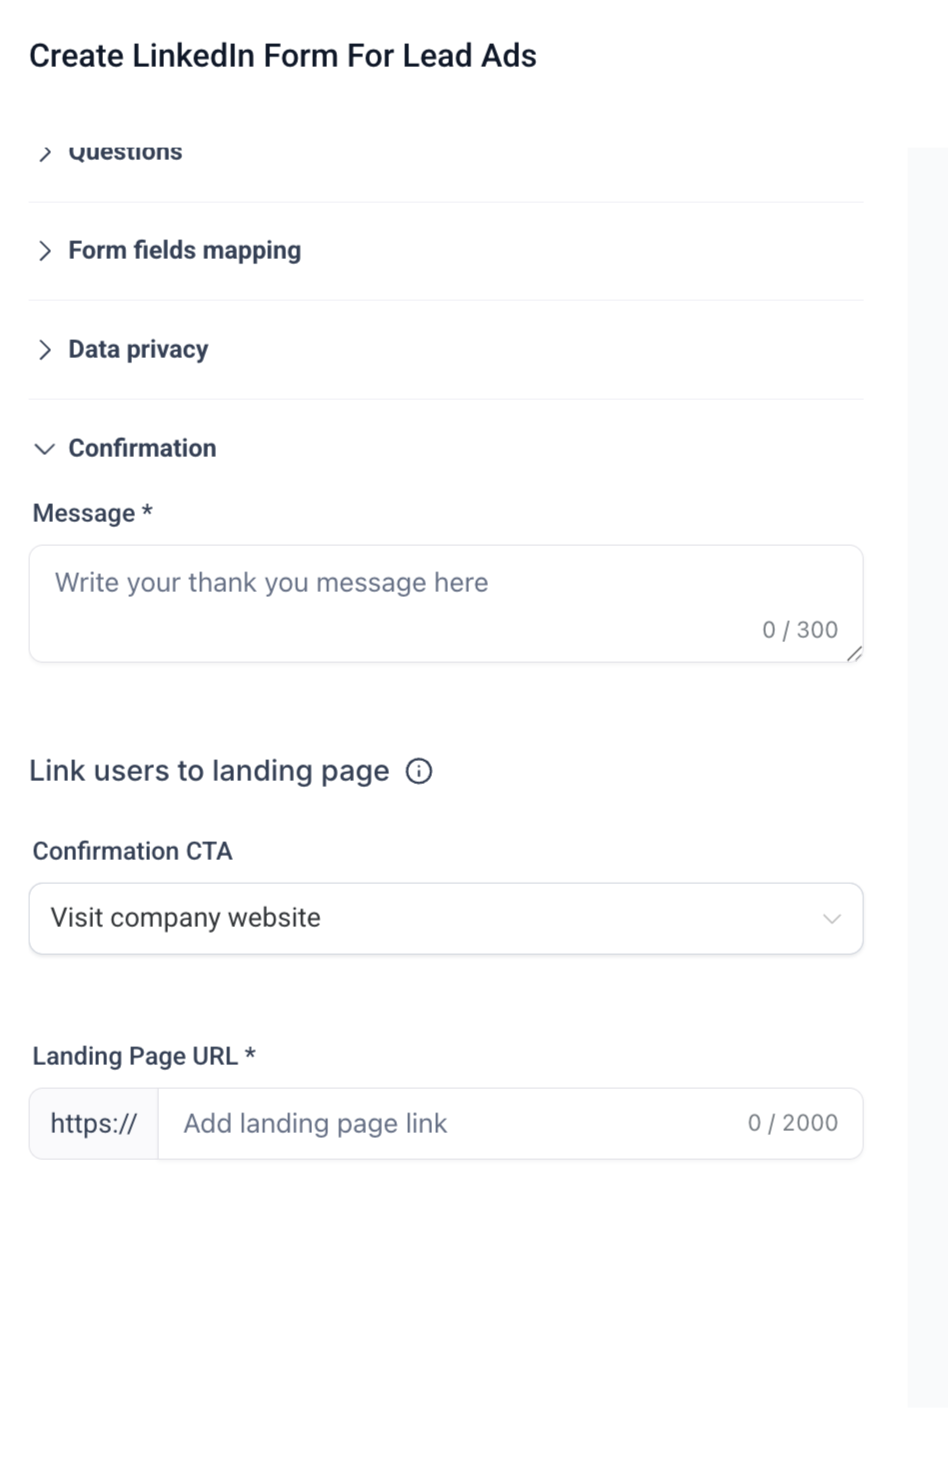
Step 8: Confirmation Page
After a parent submits the form, they see a thank-you screen. Make it count.
Headline: Short message (max 60 characters).
Example: "Thanks! We'll be in touch soon."
Description: Longer confirmation note (max 300 characters).
Example: "We've received your tour request. A member of our enrollment team will contact you within 24 hours to schedule your visit."
CTA Options
Guide families to the next step with one of these options:
- Visit Website — Direct them to your enrollment site
- Download File — Share a program guide or tuition sheet immediately
- Call Business — Provide a click-to-call option for immediate questions
Each CTA requires a link and button text.
Step 9: Preview & Save
A live preview panel on the right shows how your form will look on LinkedIn for both desktop and mobile.
Check that:
- Headline and intro text are clear and compelling
- Questions are easy to understand
- Fields are mapped correctly to Enrollio
- Privacy details are included
Click Create Form to save your work.
Best Practices
- Keep forms short — Fewer fields improve completion rates. Ask only what you need to start the conversation.
- Lead with value — Your headline and description should immediately communicate what families get (a tour, information, peace of mind).
- Always include consent — At least one checkbox ensures compliance and builds trust.
- Use hidden fields — Track which campaigns drive the best enrollment opportunities.
- Test before launch — Preview your form on both desktop and mobile to ensure it looks professional.
- Match your brand — Use language that reflects your center's warm, welcoming tone.