
Overview
You can now embed live blog posts directly on your enrollment pages and websites. This lets you showcase articles about your childcare programs, parenting tips, or center updates right where prospective families are learning about you.
Before You Start
Make sure you've already created a blog and published at least one blog post. If you haven't done this yet, check out our guide on How to Create a Blog.
How to Add Blog Posts to a Page
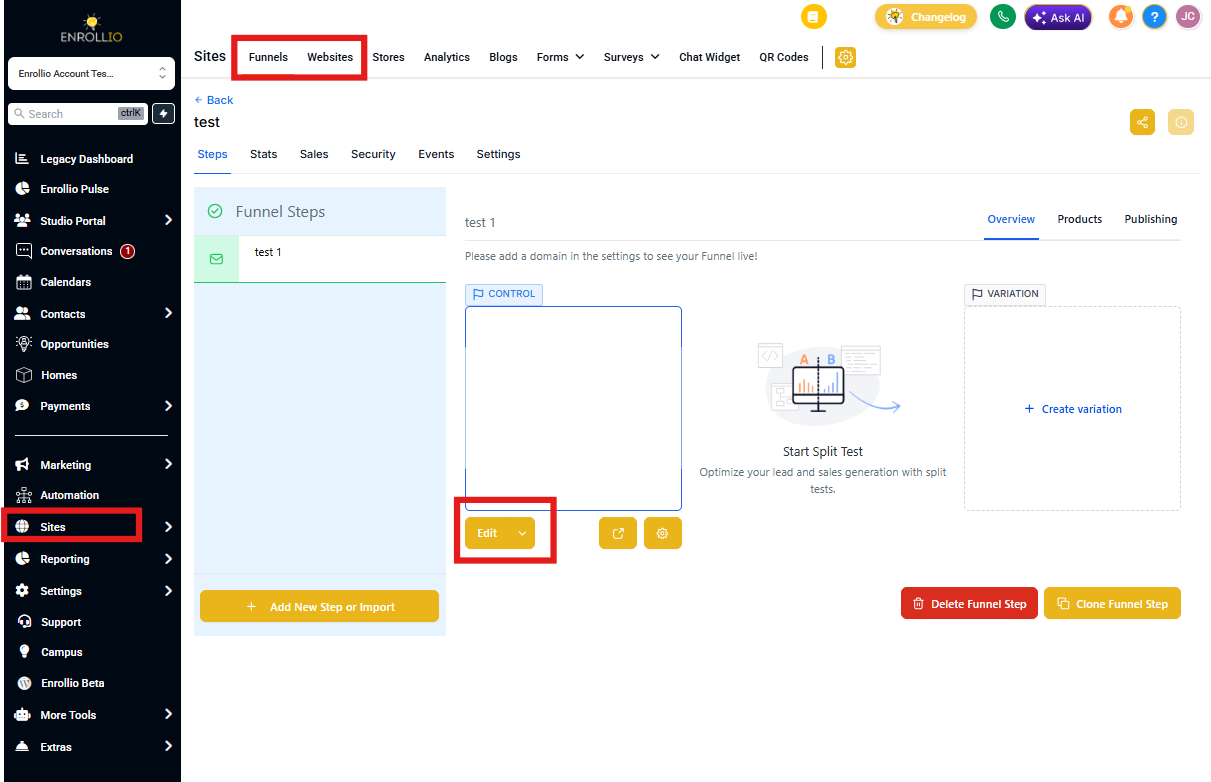
Step 1: Open Your Page Editor
Navigate to Sites and select the enrollment page or website page where you want to display blog posts.
Click Edit to open the page builder.
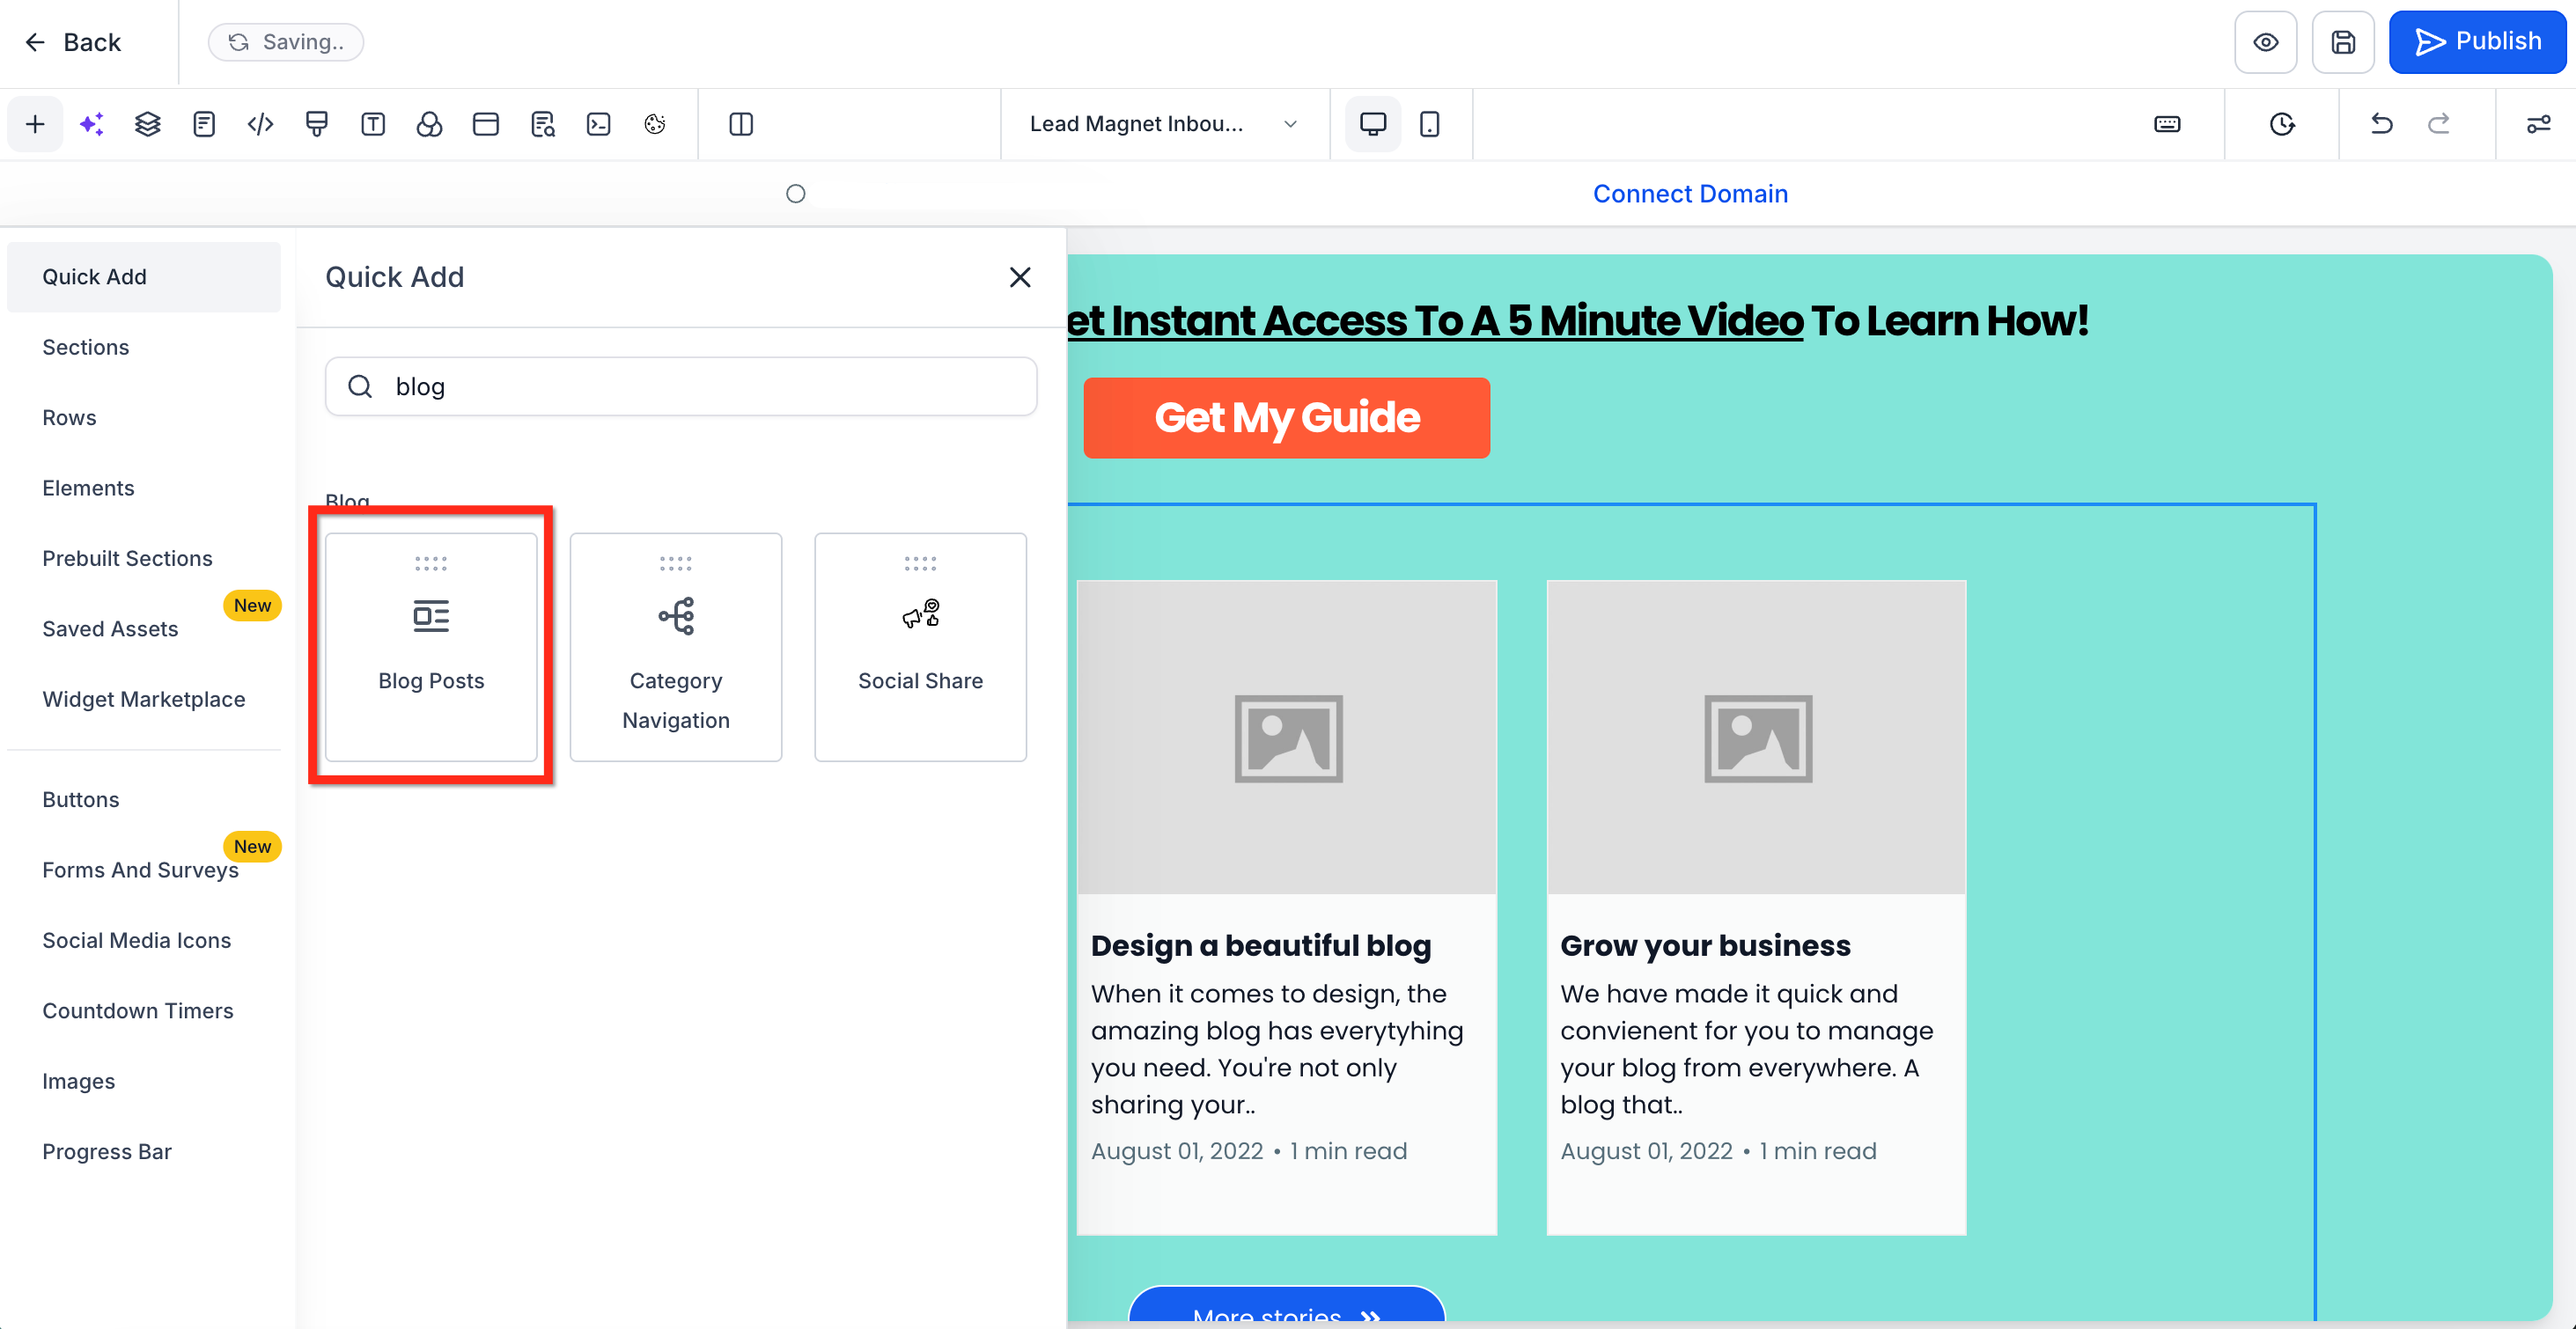
Step 2: Add the Blog Post Element
In the page builder, find the Blog Post element in your element menu.
Drag and drop it onto your page where you want your blog posts to appear.
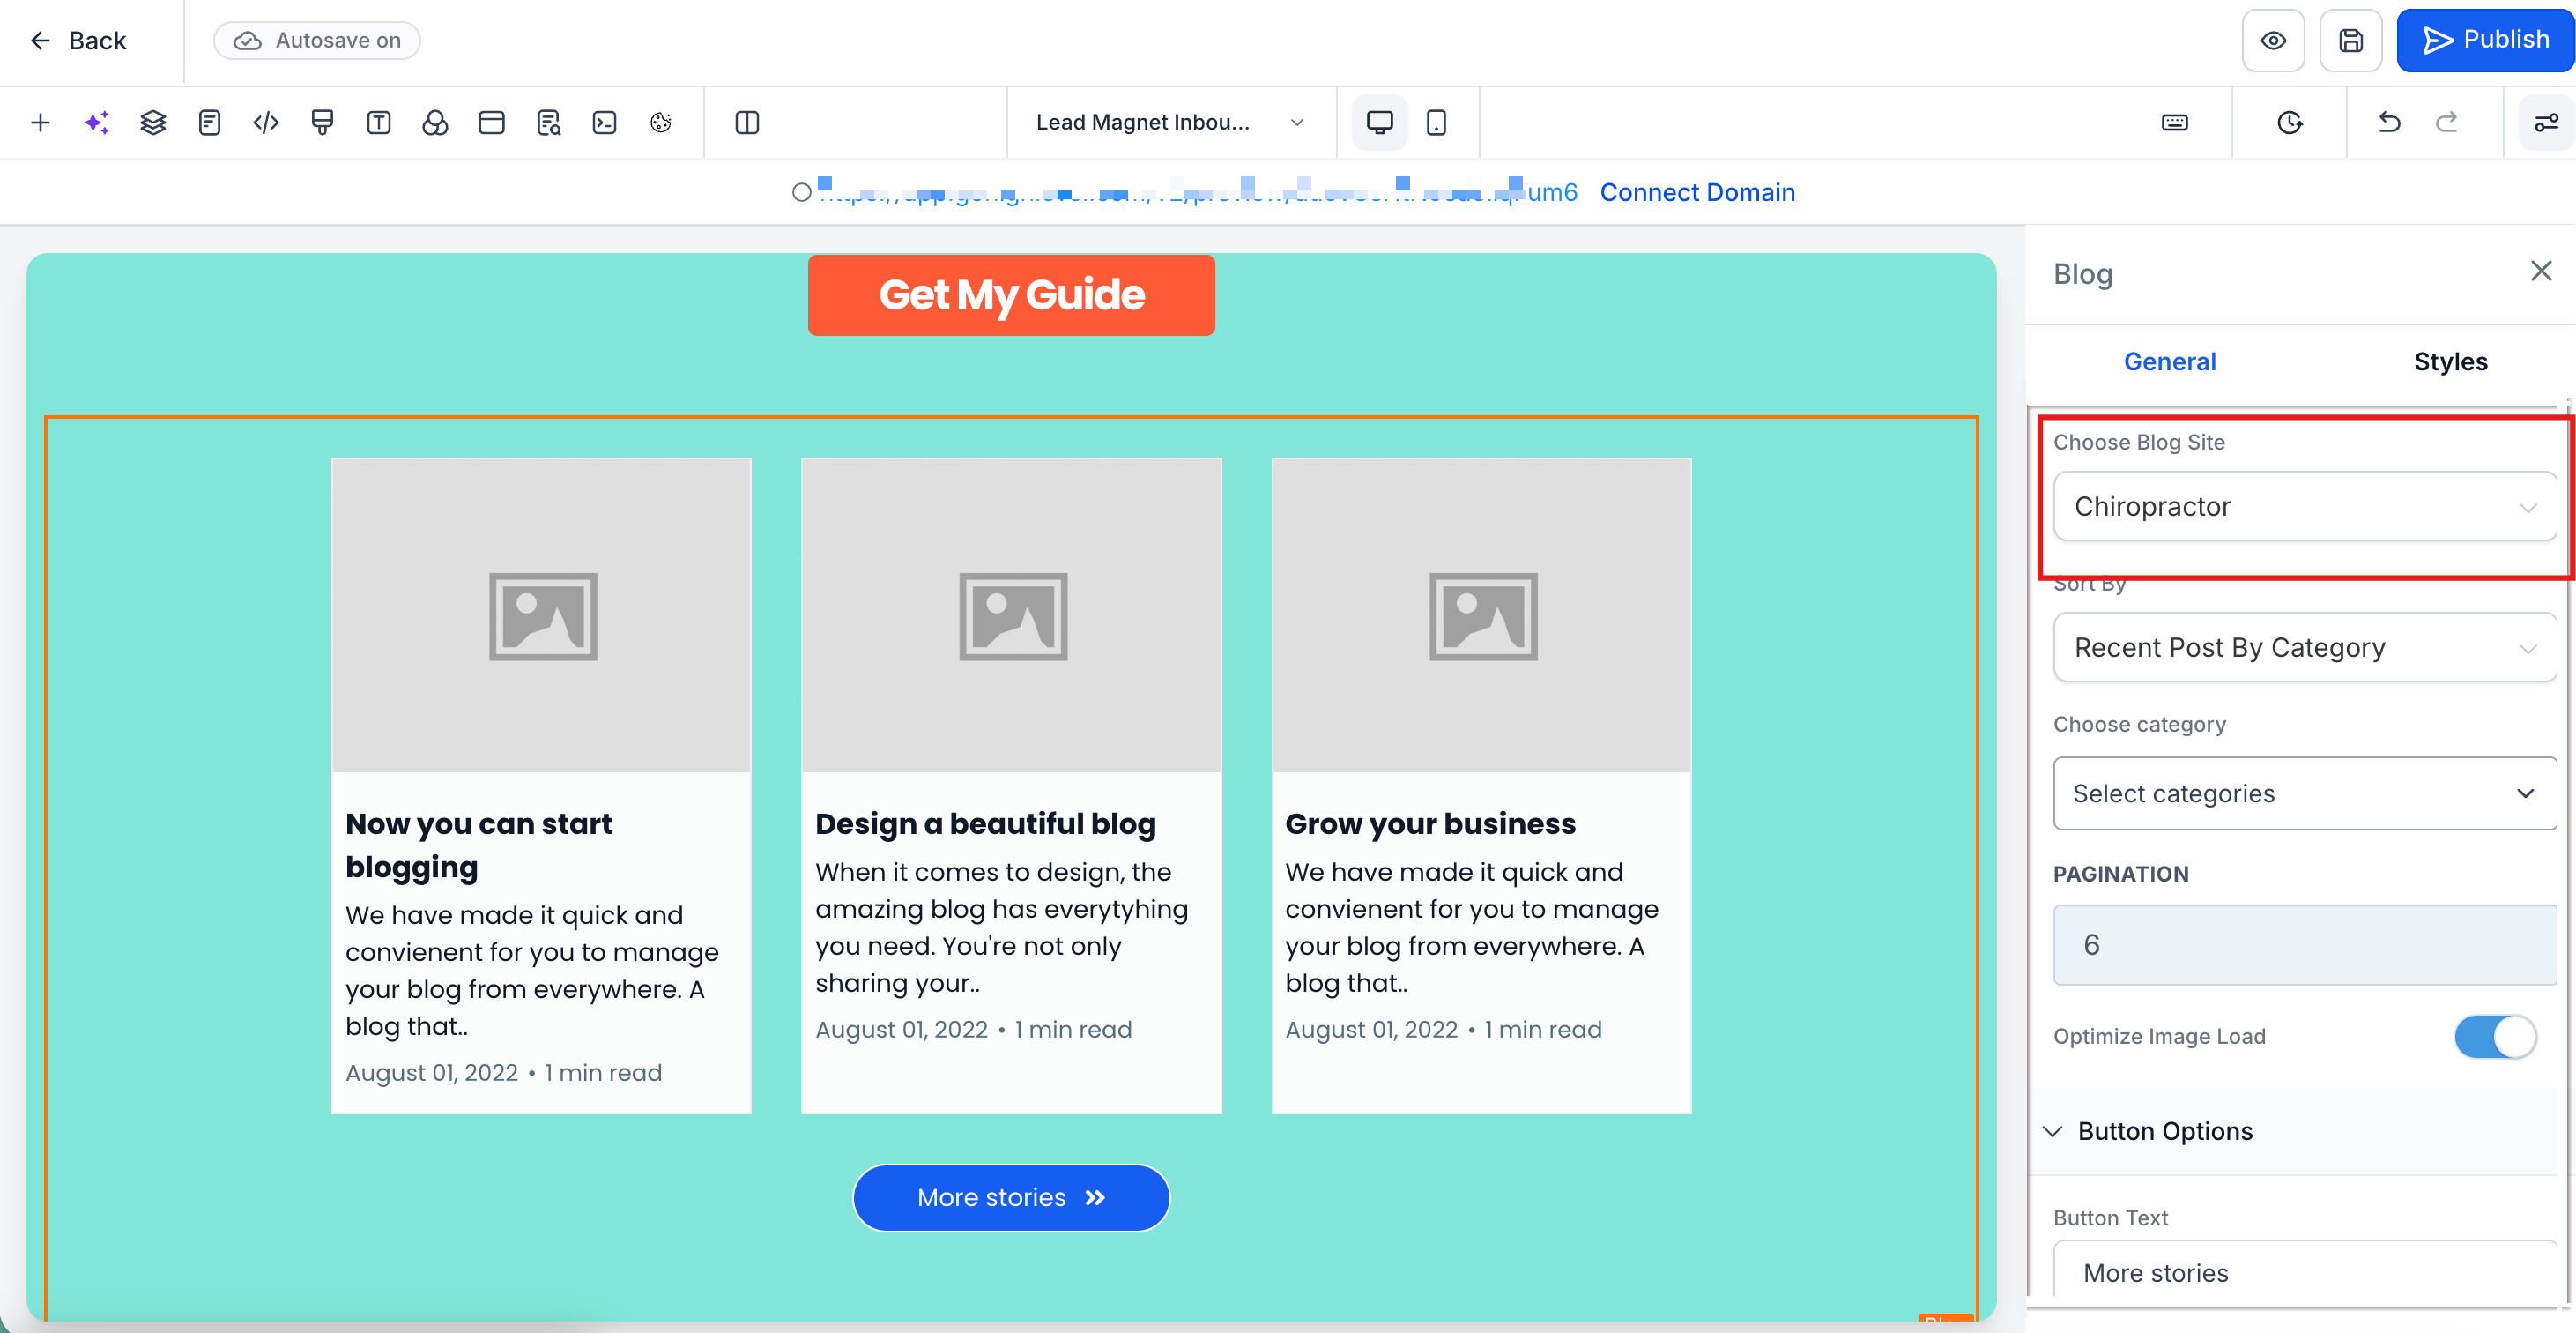
Step 3: Select Your Blog
Click on the Blog Post element you just added.
In the settings panel, select which blog you want to pull posts from using the blog name dropdown.
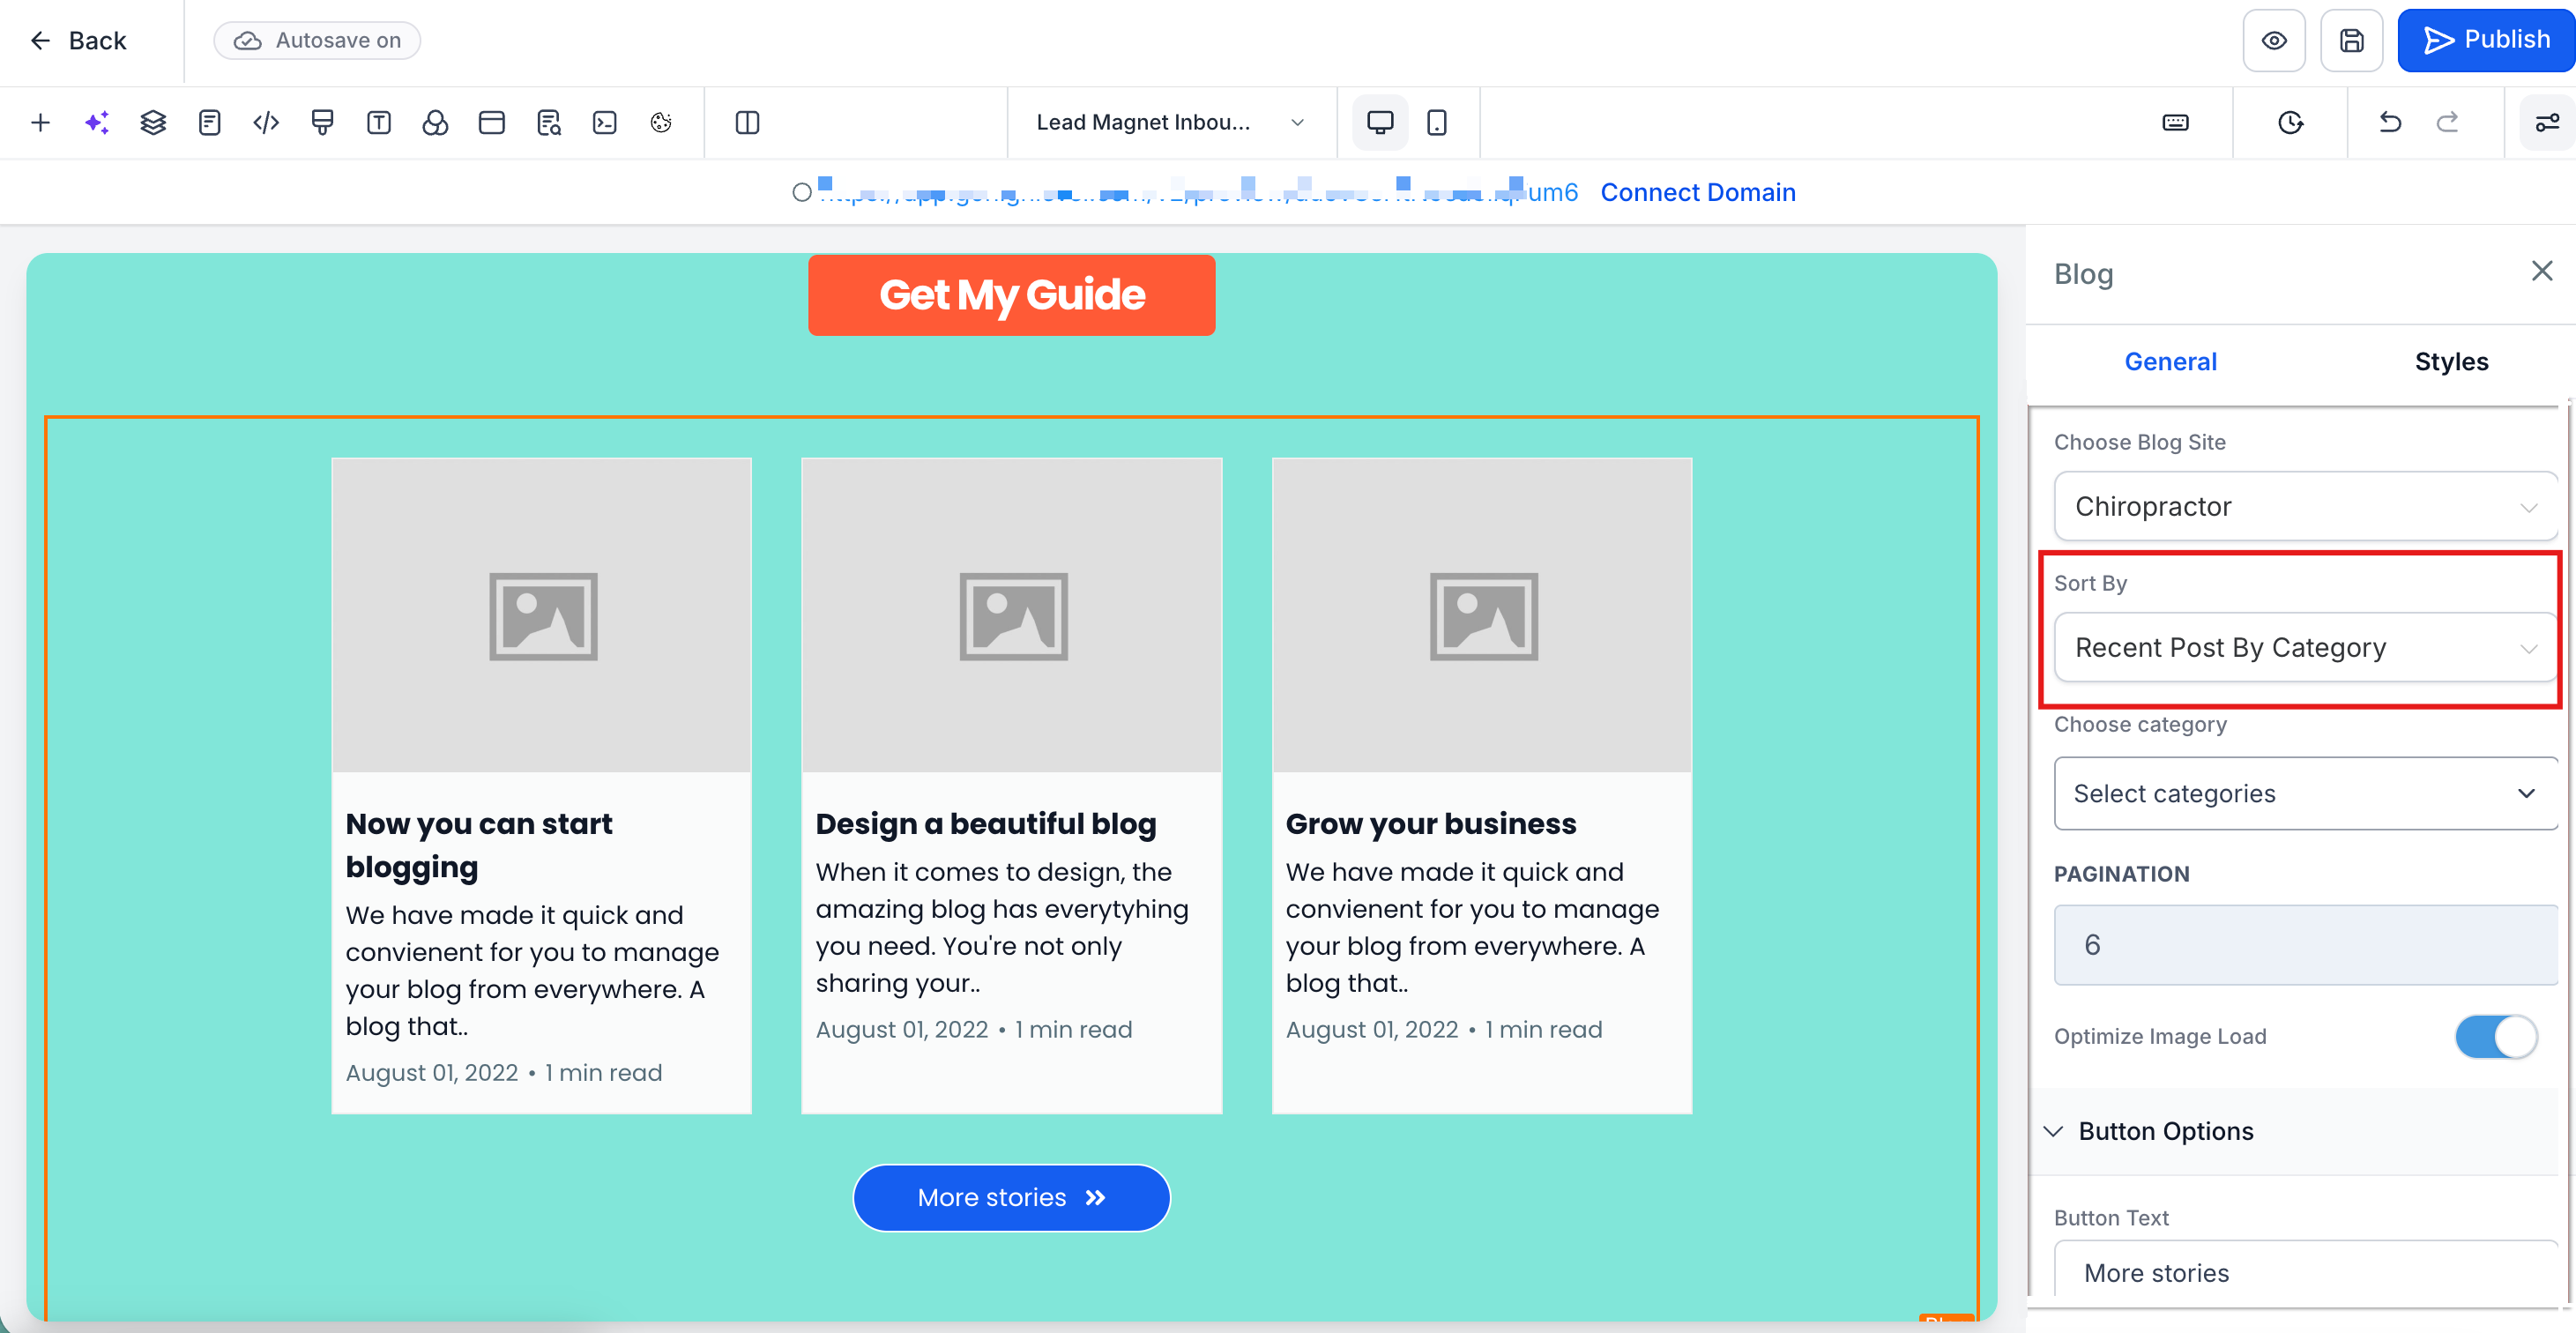
Step 4: Choose How to Filter Posts
You can control which blog posts display using these filtering options:
- Recent Posts — Shows your most recently published posts
- Recent Posts by Category — Filter by a specific category (like "Preschool Programs" or "Parenting Tips")
- Recent Posts by Author — Show posts from a specific staff member or contributor
Posts are sorted by their published date, with the newest content appearing first.
When to Use Blog Posts on Pages
Adding blog content to your enrollment pages helps build trust and keeps families engaged. Try these ideas:
- Add "Recent Posts" to your homepage to showcase fresh content
- Create a dedicated blog category for each age group and display those posts on program-specific pages
- Feature director or teacher posts on your "About Us" page to add personality
Related Articles
- How to Create a Blog
- Create Blog Posts
- How to Customize Blog Design and Layout