
What are Universal Elements?
Universal Elements let you design an element once—like a "Schedule a Tour" button or your center's logo—and reuse it across enrollment pages, landing pages, blogs, and your main site. When you update a Universal Element and publish your changes, every page using that element updates automatically.
This keeps your branding consistent and saves you from updating the same button or logo dozens of times across different pages.
Why Use Universal Elements?
Brand consistency: Keep your colors, fonts, and styles aligned across every parent touchpoint without manual updates.
Faster page building: Drag pre-built elements from your library instead of recreating common items like enrollment buttons or contact badges.
Centralized updates: Change your phone number or brand color once, publish the affected pages, and every instance updates.
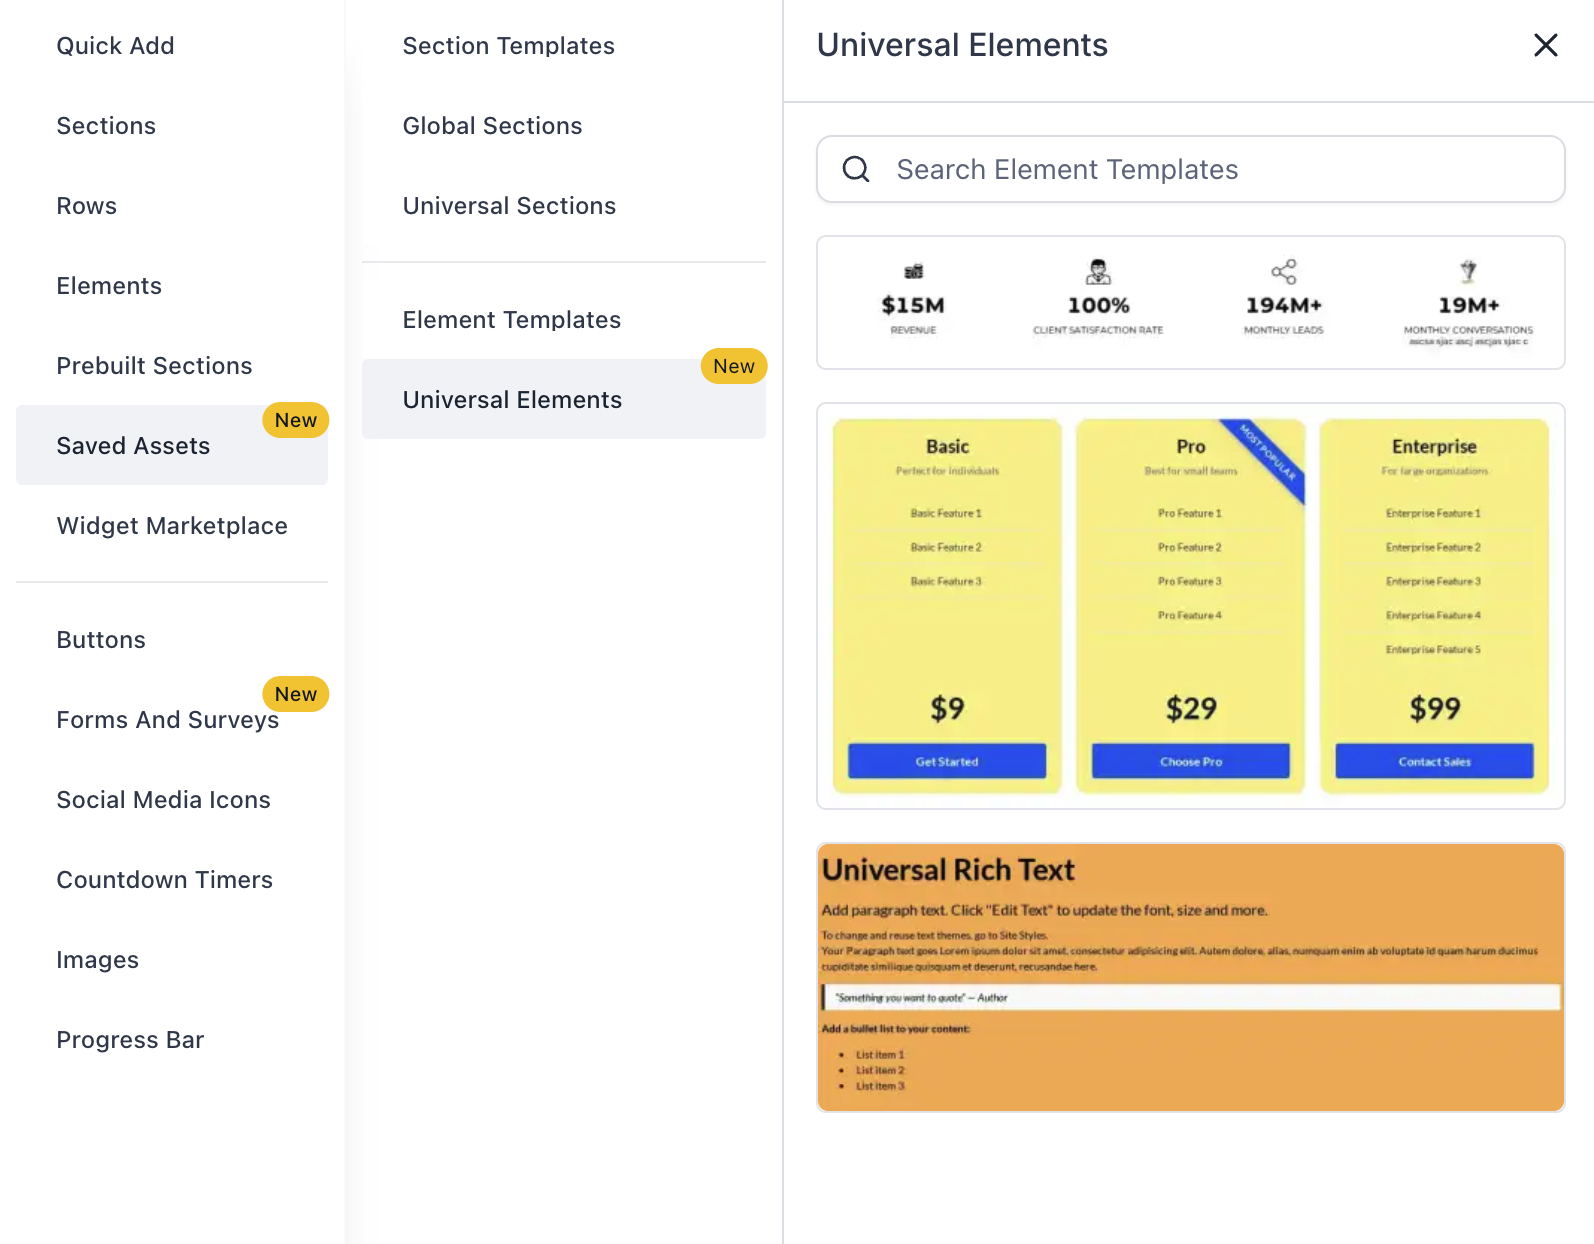
Organized library: Search and browse thumbnails to quickly find the elements you use most.
Team-friendly: Everyone on your team uses the same approved buttons, icons, and menus—no more design drift.
Universal Elements vs. Element Templates vs. Universal Sections
Enrollio offers three ways to save and reuse content. Here's when to use each:
| Type | How it works | Best for | Where to find it |
|---|---|---|---|
| Universal Elements | Single element, linked everywhere. Updates sync to all pages after publishing. | Buttons, logos, icons, navigation menus | Saved Assets → Universal Elements |
| Element Templates | Single element, inserted as a copy. Changes don't sync to existing placements. | One-off variations, quick starting patterns | Saved Assets → Element Templates |
| Universal Sections | Full section (group of elements), linked. Updates sync after publishing. | Headers, footers, announcement bars | Saved Assets → Sections (Universal) |
How to Create a Universal Element
Save an element correctly the first time to ensure it stays linked across all your pages.
- Open any page in the Page Builder (enrollment page, landing page, blog post, or main site).
- Select the element you want to reuse—a button, image, icon, headline, or menu.
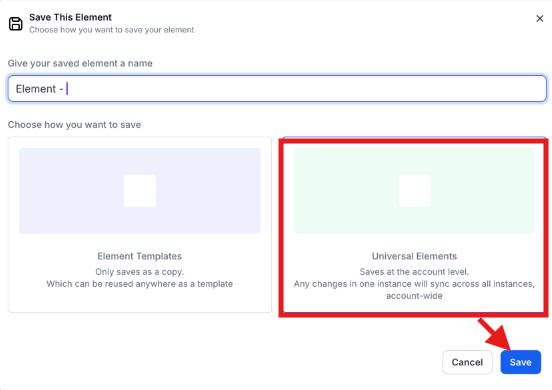
- Save it as a Universal Element using either method:
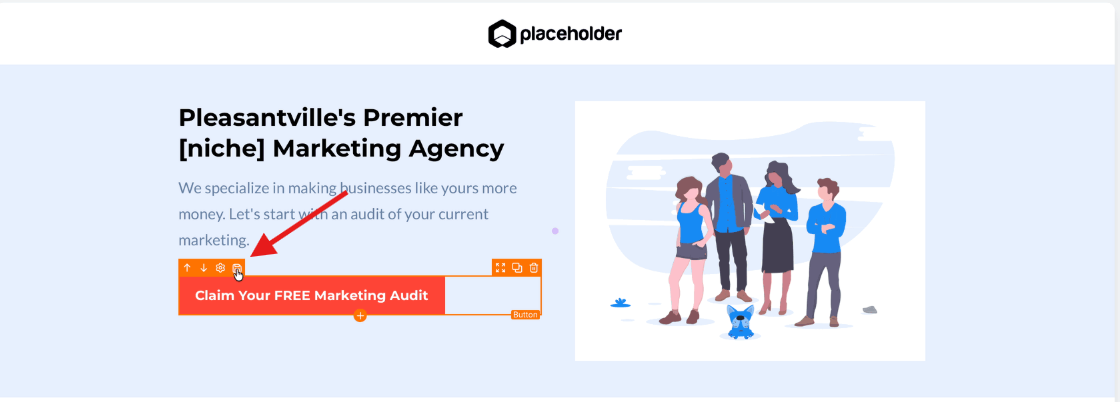
- Click the Save icon in the element's orange toolbar, or
- Open the Layers panel → click the ⋯ menu → choose Save as Universal Element
- Give it a clear, searchable name like Button — Schedule Tour CTA or Logo — Center Header.
- Click Confirm.
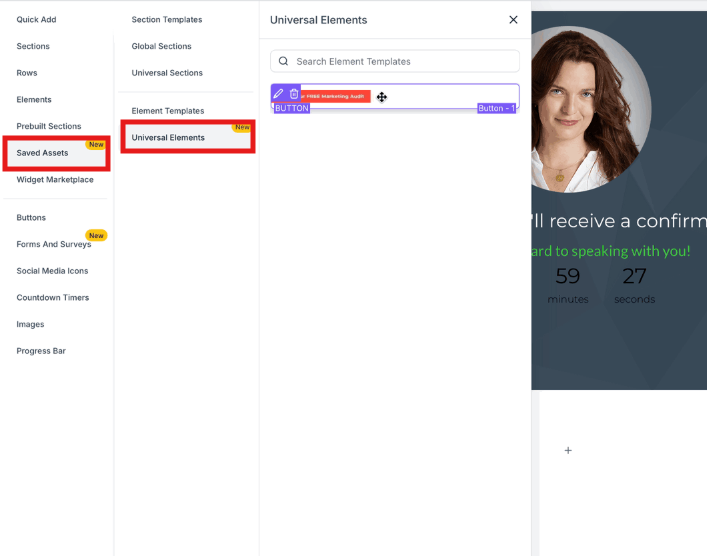
Your element now appears in Saved Assets → Universal Elements with a thumbnail you can drag onto any page.
How to Use Universal Elements on Your Pages
Place a Universal Element
- In the Page Builder, open Add Elements → Saved Assets → Universal Elements.
- Search by name or browse thumbnails.
- Drag the element onto your page.
Edit a Universal Element
- Click any placed Universal Element on your page.
- Make your design or text changes.
- Click Save to keep your changes in the builder.
- Click Publish to make the updates visible to parents visiting your site.
After publishing, every page using that Universal Element will reflect your changes.
Managing Your Universal Elements Library
A tidy library makes page building faster and prevents mistakes.
Browse and search: Open Add Elements → Saved Assets → Universal Elements to see thumbnails and use keyword search.
Use clear naming: Add consistent prefixes like Button —, Icon —, or Nav — so elements are easy to find.
Remove cautiously: Deleting a saved Universal Element removes it from your library for future use. Before deleting, check which pages currently use it to avoid breaking your design.
Frequently Asked Questions
Do I have to publish for changes to be visible to parents?
Yes. Saving keeps your edits in the builder. Publishing makes them live on your site.
Where do I find my saved Universal Elements?
In the Page Builder, click Add Elements → Saved Assets → Universal Elements to browse or search.
Can I rename or delete a Universal Element?
You can rename elements anytime for clarity. Deleting removes the item from your library—check which pages use it before removing.
What if I need a one-time variation on just one page?
Place an Element Template instead, or create a local copy of the Universal Element so your changes don't affect other pages.
How do I undo a change if something looks wrong?
Use Version History on the affected page to restore a previous version, then republish.
Related Articles
- How to Save & Use Element Templates in Page Builder
- Saved Sections – Enrollment Pages and Sites
- Save, Draft and Publish Enrollment Pages and Sites
- Auto-Save and Version History
- Template Library Overview & Setup