
Create headings, quotes, code blocks, colorful highlights, and perfectly nested lists — no HTML blocks or third-party hacks required. This article shows you how to drop the Rich Text Element into any landing page or enrollment site and start writing with word-processor-style controls right inside the Page Builder.
Table of Contents
- What Is the Rich Text Element?
- Key Benefits of Using the Rich Text Element
- Advanced Formatting Features
- Switch Between Paragraph and Headings
- Create Block Quotes
- Inline Code Blocks
- Full Code Blocks
- Advanced and Nested Lists
- Highlighting Text with Background Color
- Keyboard / Markdown Shortcuts
- Sidebar Styling Options
- How to Add a Rich Text Element
- Frequently Asked Questions
What Is the Rich Text Element?
The Rich Text Element gives you advanced formatting capabilities directly within the editor. This all-in-one text box brings advanced formatting including headings, block quotes, inline code, multi-level lists, and highlight colors.
Because everything lives in a single element while using the same sidebar as the Paragraph element, you can style content faster. Unlike basic paragraph elements, you can seamlessly switch text styles, add block quotes, highlight text, and insert code blocks without needing custom HTML or CSS.
Key Benefits of Using the Rich Text Element
Enhance your content creation experience with these major advantages:
- Easy Formatting: Effortlessly switch between paragraphs, headings, and styles
- Advanced Lists: Create organized content with various bullet styles (disc, circle, square) and numbering formats (numeric, alphabetic, Roman numerals)
- Highlighting and Quotes: Emphasize important content with customizable highlight colors and block quotes
- Markdown-Style Shortcuts: Type >, `code`, or ``` to auto-create quotes and code blocks
- No Coding Required: Eliminate the need for third-party tools or HTML blocks, improving workflow efficiency
- Zero Learning Curve: The sidebar matches the existing Paragraph element, so styling feels familiar
Advanced Formatting Features
Explore powerful formatting features within the Rich Text element to elevate your enrollment site content:
Switch Between Paragraph and Headings
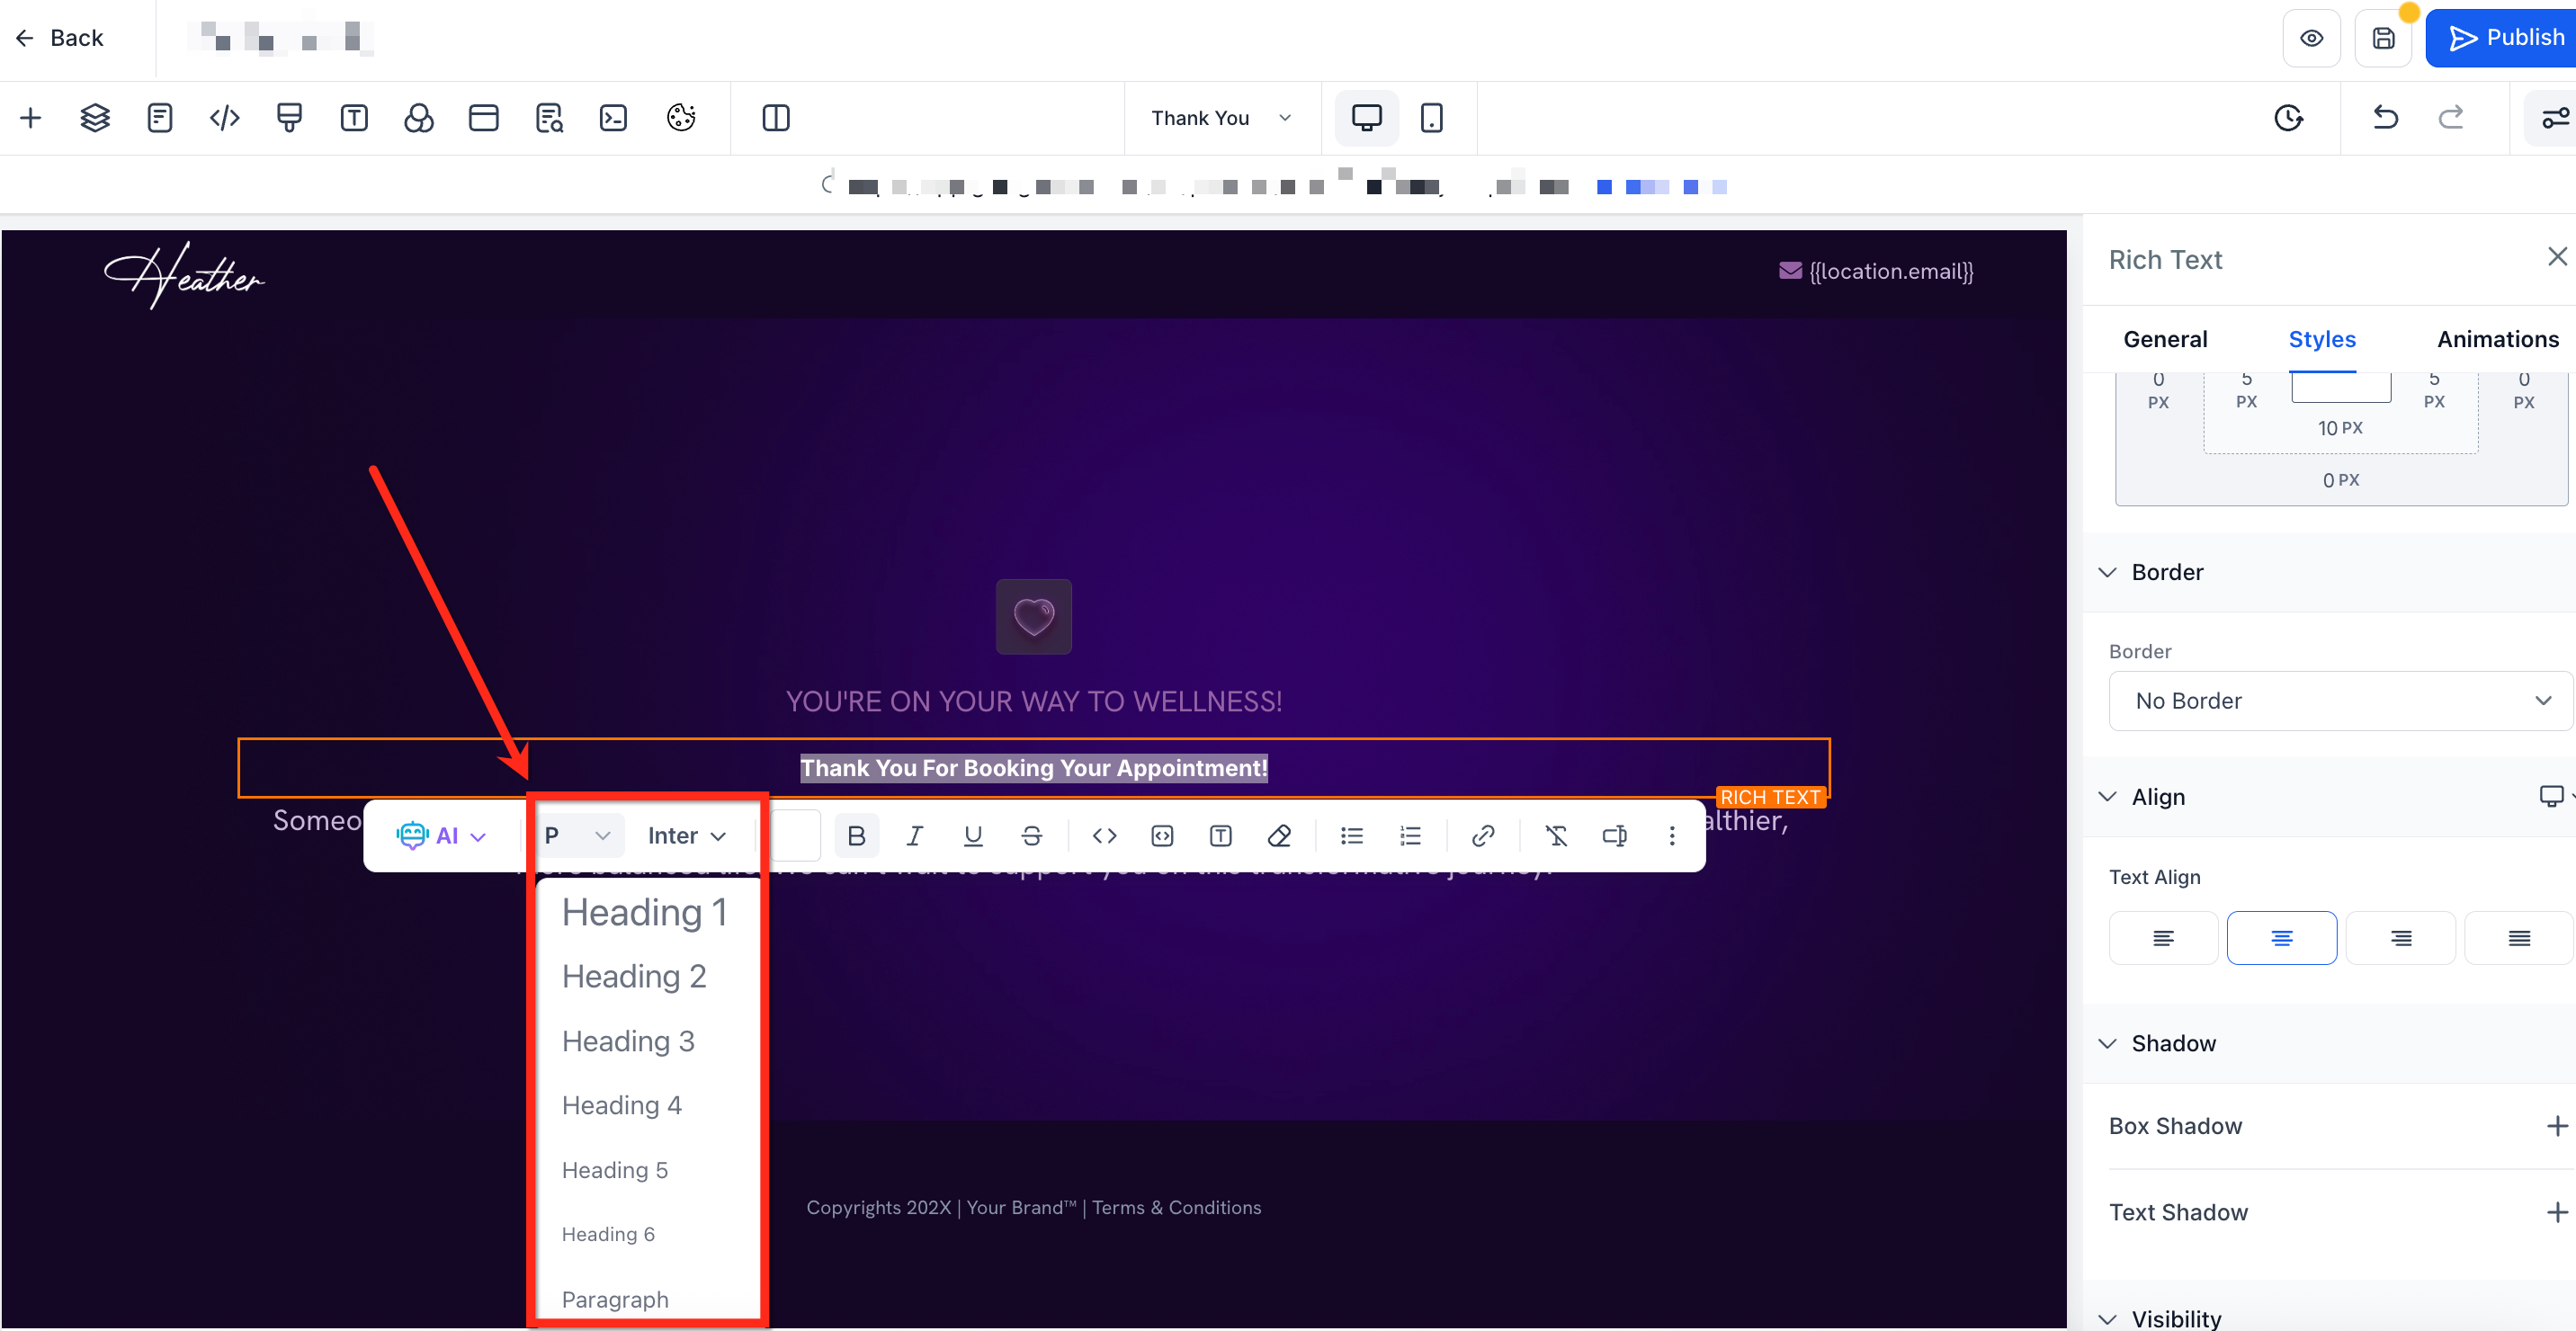
Instantly change text from paragraph to headings (H1-H6) directly within the floating toolbar:
- Highlight the text in the Rich Text element
- Click the Paragraph dropdown
- Select your preferred heading style from the dropdown list
Create Block Quotes
Highlight important quotes or parent testimonials clearly:
- Type the greater-than symbol (>) within a Rich Text element
- Hit enter to create the Block Quote
- Add your text to the Block Quote


Inline Code Blocks
Clearly display inline code snippets within your content:
Surround the desired text with single backticks (`) within a Rich Text element
Full Code Blocks
Effectively present larger code segments:
- Type triple backticks (```) within a Rich Text element
- Hit enter to create the Full Code Block
- Add your text to the Full Code Block
Advanced and Nested Lists
Improve content structure and readability with advanced list types:
There are two ways to create a list within a Rich Text element:
- Type asterisk (*) then hit space
- Highlight the text and within the floating toolbar, click Unordered List or Ordered List
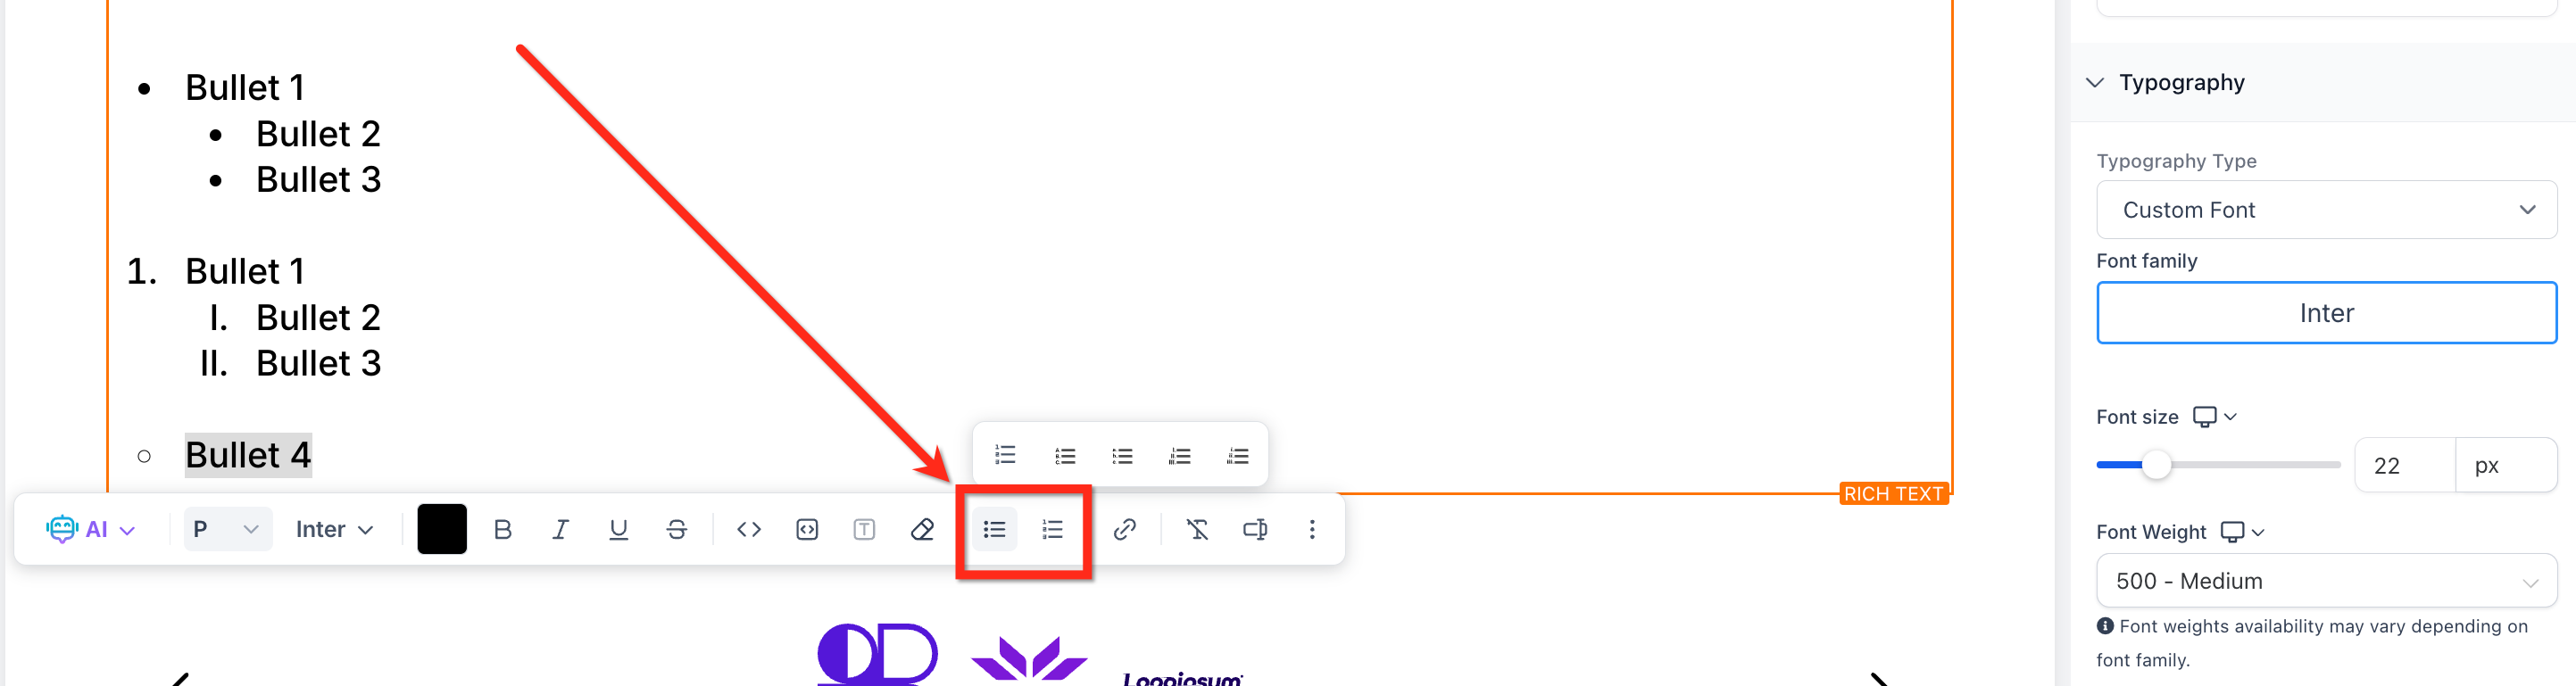
Click the dropdown next to the bullet to select the list type:
The options for unordered lists are:
- • (Bullets)
- ○ (Circles)
- ■ (Squares)
The options for ordered lists are:
- 1 2 3 (Numeric)
- a b c (Lower Alpha)
- A B C (Upper Alpha)
- i ii iii (Lower Roman)
- I II III (Upper Roman)
Press Tab to indent (create nested levels) or Shift + Tab to out-dent
Highlighting Text with Background Color
Draw attention to key phrases or points:
- Select the desired text within a Rich Text Element
- Click the Color Picker icon from the floating toolbar and choose your highlight color

Keyboard / Markdown Shortcuts
| Action | Keyboard / Markdown Shortcut |
|---|---|
| Toggle Paragraph ↔ Heading | Ctrl + Alt + 1-6 (Windows) or ⌘ + Option + 1-6 (Mac) |
| Add Block Quote | Type > + Space at line start |
| Inline Code | Wrap text with back-ticks `code` |
| Code Block | Type triple back-ticks ``` then Enter |
| Highlight Color | Select text → choose color swatch |
Sidebar Styling Options
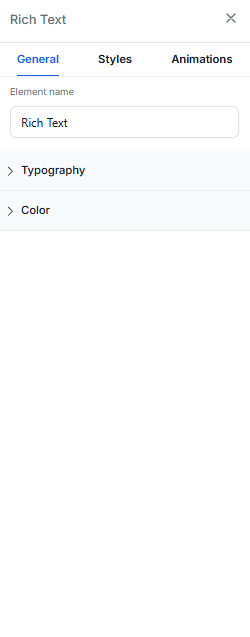
Everything you can tweak in a Paragraph block — fonts, size, line-height, shadows, animation — works here too, so your Rich Text stays perfectly on brand.
- Typography: Choose font family, weight, size, and line spacing
- Spacing: Adjust margin and padding for desktop, tablet, and mobile
- Effects: Add drop shadows or entrance animations
- Visibility: Show or hide the element on specific devices
- Advanced: Apply a custom CSS class for theme-wide overrides
List Item Spacing (Rich Text & Bullet Lists)
List Item Spacing controls the vertical space between individual list items, independent of text line height. Adjusting this value improves scannability for longer lists and ensures comfortable spacing on different devices.
Key benefits:
- Readability: Reduces visual clutter in dense lists
- Mobile comfort: Adds breathing room for small screens
- Precision: Fine-tunes spacing without altering paragraph line height
How it works:
- Select a Rich Text or Bullet List element on the page
- Open the Style panel → locate List Item Spacing next to Line Height
- Drag the slider or enter a value to increase/decrease space between list items
Pro Tip: Use Line Height for paragraph spacing inside a list item, and List Item Spacing for the gap between items.
How to Add a Rich Text Element
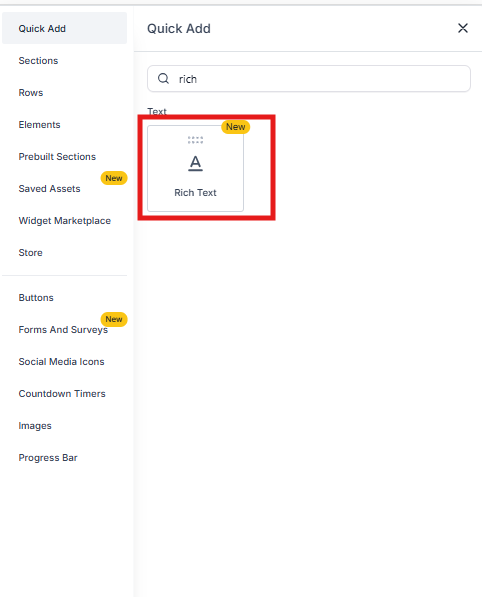
Follow these three quick steps to get the element onto your canvas and start typing:
- Open the Page Builder for your landing page or enrollment site
- In the left panel, click Quick Add → Rich Text
- Drag the element into any row or column and click once to begin editing
Frequently Asked Questions
Q: Can I convert an existing Paragraph element into Rich Text?
No. The text must be a Rich Text element to switch between a heading and paragraph.
Q: How do I create nested lists?
After creating your main list item, press "Tab" or use the indent option to create nested sub-items.
Q: Can I use the Rich Text element and Paragraph element interchangeably when writing paragraphs?
Yes, but Rich Text provides advanced formatting tools not available in the standard Paragraph element.
Q: Will global fonts and colors apply automatically?
Absolutely. The element inherits your global theme settings.