
What Is the Multiple Popup Feature?
The Multiple Popups per Page feature lets you create, customize, and manage several distinct popups on one enrollment page or site. Each popup can have unique content, positioning, and trigger conditions, making it easy to deliver specific messages tailored to your visitors' actions or behaviors.
Launch unlimited popups, each with its own trigger, style, and content. You can fire a welcome offer after three seconds, display an exit-intent survey when someone tries to leave, and reveal a bonus form on button click—all without cloning pages or writing custom scripts.
Key Benefits of Using Multiple Popups per Page
Multiple popups provide powerful flexibility for engaging prospective families:
- Improved Targeting: Display precise messages based on visitor behavior or journey stage
- Enhanced User Experience: Keep pages clean by avoiding cluttered content in the main layout while delivering offers in context
- Increased Conversions: Deliver targeted offers and lead-capture forms at optimal moments such as on exit
- Easy Management: Customize and manage each popup without technical complications
- Reduced Complexity: No complex workarounds, multiple pages, or custom scripts needed
How to Create a New Popup
Follow these steps to create your first (or fifth) popup in seconds:
- Open any page in the Site or Page Builder
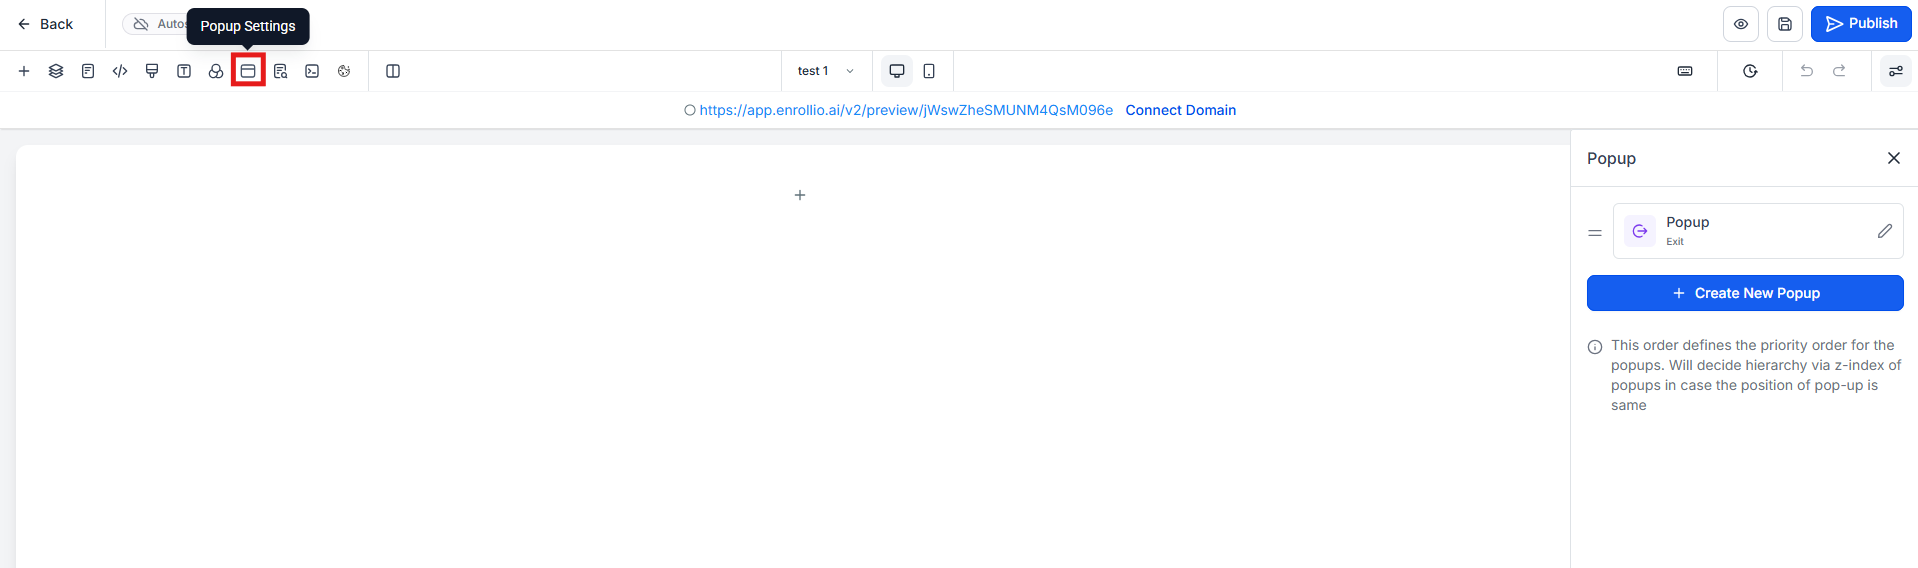
- Click the Popup Settings button in the top navigation bar
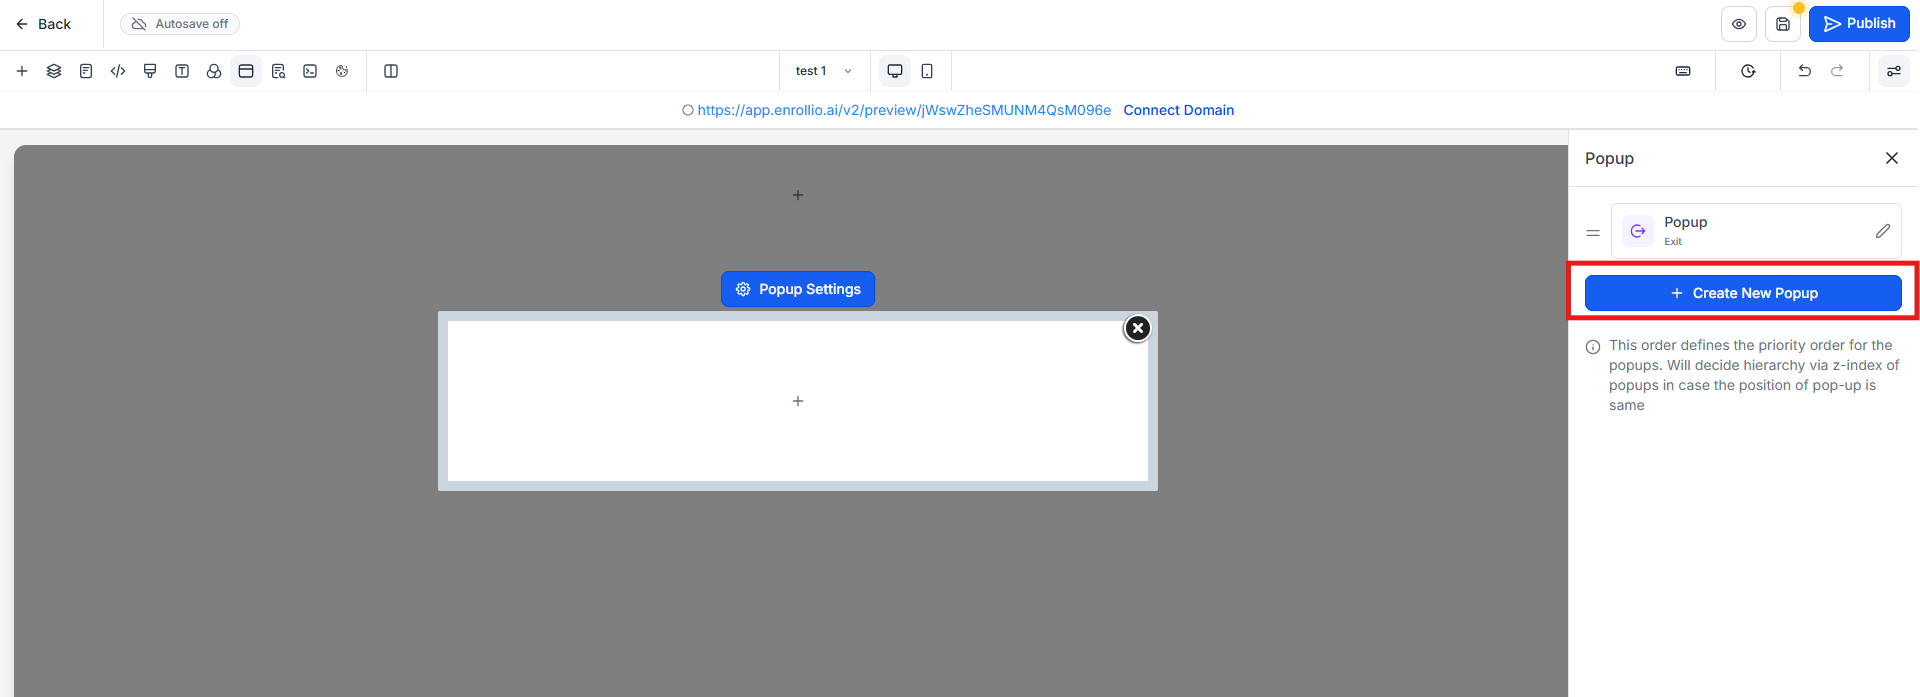
- In the sidebar, press + Create New Popup and give it a descriptive name
- Click the Edit (Pencil) icon located next to the popup you created
- Edit the popup just like a section—add text, forms, buttons, images, videos, or countdowns
How to Manage Multiple Popups
Easily set up and manage your popups from the Popup Settings panel in the page builder:
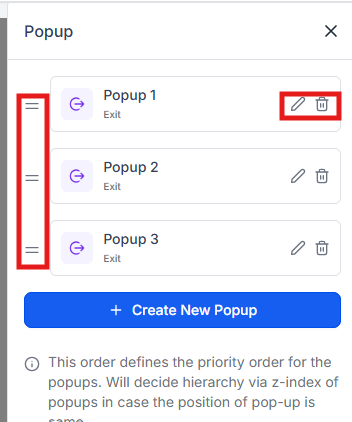
- Create New: Click Create New Popup to add additional popups
- Edit or Delete: Click the Trash icon to delete unwanted popups, or click the Edit (Pencil) icon to edit an existing popup
- Reorder: Drag the two-line icon to adjust popup priority (Z-index)
Customizing Popup Appearance & Positioning
Customize how each popup looks and where it shows up on your page to align precisely with your design and engagement goals. Every popup has the same design tools you use on sections.
Use the options within Popup Settings to customize each popup individually:
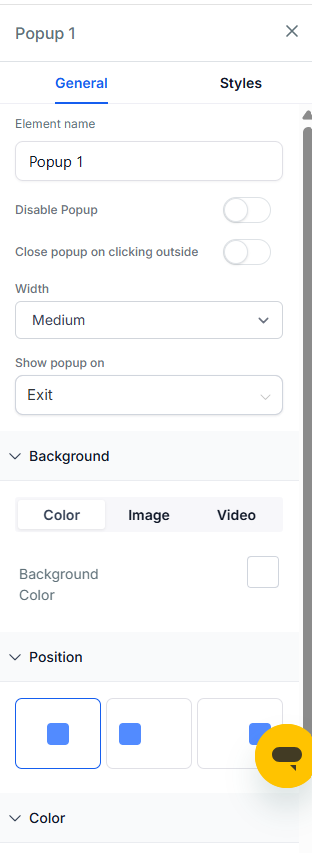
- Popup Positioning: Set the popup location to left, center, or right within popup settings
- Visual Customization: Modify background color, overlays, spacing, and content elements, just like regular page sections
- Spacing & Sizing: Adjust padding, margins, and max width for desktop, tablet, and mobile
- Popup Triggers: Choose specific triggers for each popup, including delay, exit-intent, or interaction-based triggers such as clicks on buttons, images, or text links
Recent Popup Enhancements
Recent improvements have enhanced popup layout stability and mobile responsiveness for a smoother user experience.
Improved Column Resizing
Column resizing inside popups now behaves more consistently. Layout adjustments maintain their structure more reliably, preventing unexpected shifting or distortion when modifying column widths.
Enhanced Mobile Touch Support
Popups now respond more smoothly to touch interactions on mobile devices. Scrolling, tapping, and closing popups feel more natural and responsive, improving usability across smartphones and tablets.
These enhancements ensure popups behave more predictably across devices while maintaining visual consistency.
Setting Popup Triggers
Control precisely when and how each popup is displayed by setting triggers. Triggers determine exactly when (or why) each popup appears.
Below are the available trigger options:
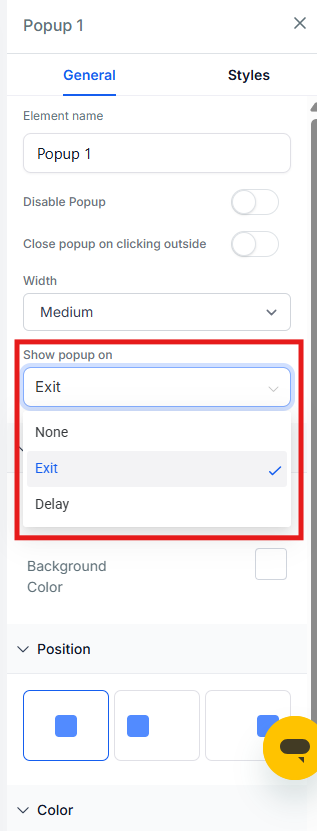
- Delay: Choose a time in seconds after the page loads
- Exit Intent: Trigger a popup when the visitor attempts to leave your page
- None: Manually triggered popups (usually linked to buttons, images, or text)
To Set a Trigger:
- Select the popup in the sidebar
- Open the Settings tab
- Under the Show Popup On dropdown, pick Delay, Exit Intent, or None (for click-only popups)
- If you chose Delay, enter the number of seconds
Linking Popups to Buttons, Images & Text
Easily link popups to buttons, images, or text, providing highly interactive user experiences. Use click triggers to show contextual offers without interrupting the visitor's flow.
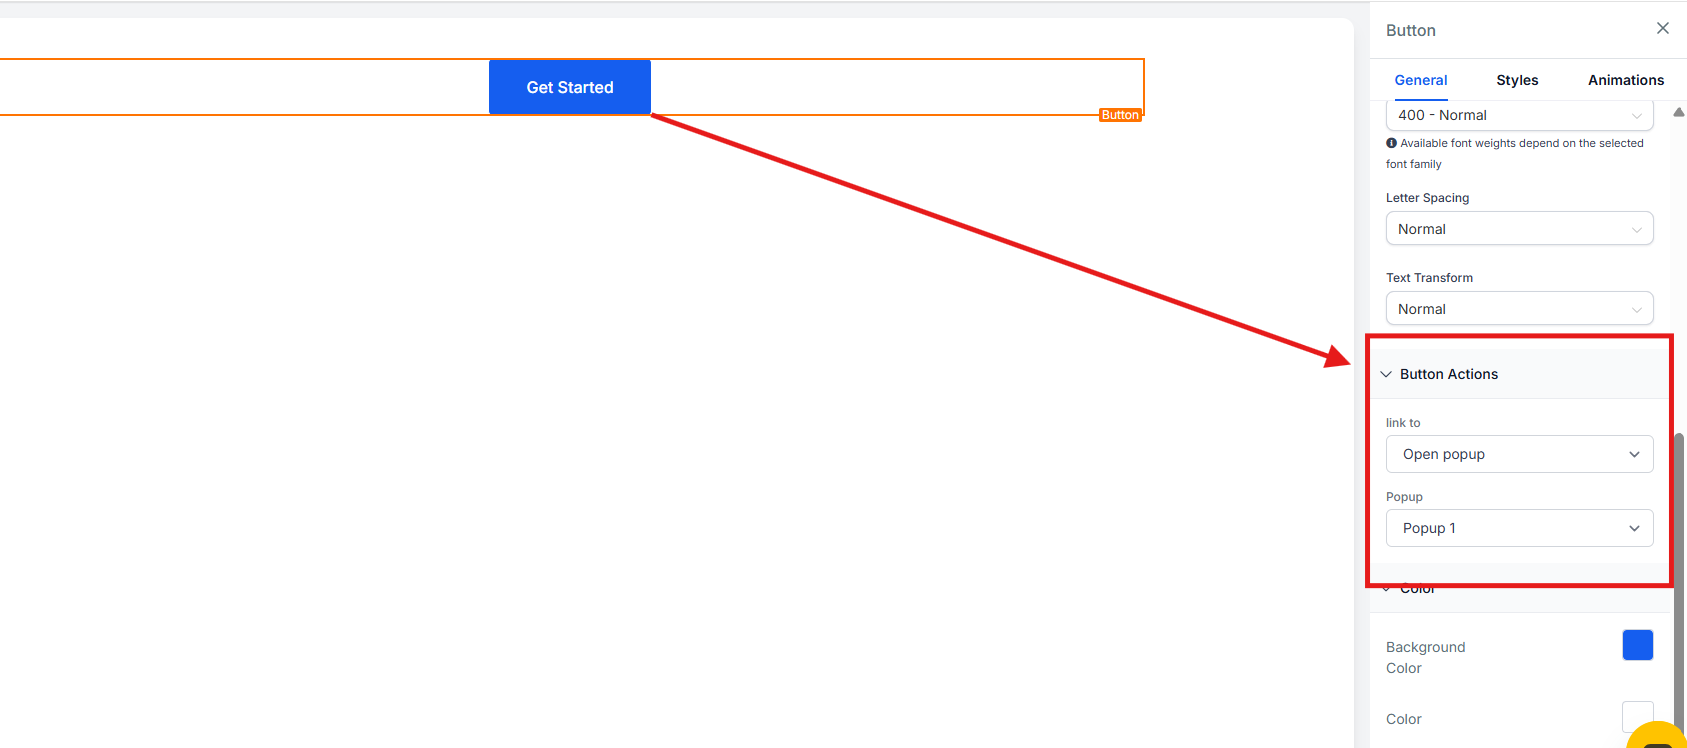
- Select a button, image, or text element
- In the Link To dropdown, choose Open Popup
- Select the desired popup from the dropdown menu
Frequently Asked Questions
How do I prioritize one popup over another?
Adjust popup order in the sidebar—higher-ranked popups will display on top.
Can I set different triggers for each popup?
Yes, each popup can have its own unique trigger (delay, exit intent, or button/image click).
What happens if multiple popups have the same trigger condition?
If multiple popups have identical triggers, the popup with the highest priority (top of the list in the sidebar) will appear first.
Can visitors close popups manually?
Yes, visitors can easily close popups by clicking the close (X) button or by clicking outside of the popup, depending on your selected settings.
How do I track popup conversions?
Use the page's Statistics tab or connect form submissions to your enrollment pipeline to track which popups are driving the most enrollments.