
What is a Prebuilt Mega Menu Header?
A Prebuilt Mega Menu Header is a ready-made navigation section you can quickly add to your enrollment pages or website. These headers feature structured dropdown layouts—perfect for childcare centers with multiple programs, age groups, or service areas.
They're fully customizable and help prospective families find what they need without digging through your site.
Key Benefits of Prebuilt Mega Menu Headers
Mega menus improve your site's usability and save you time by eliminating the need to build complex navigation from scratch.
- Ready-to-Use Designs – Choose from professional layouts built for childcare enrollment sites.
- Streamlined Parent Experience – Help families navigate your programs, pricing, and enrollment information efficiently.
- Fully Customizable Layouts – Edit text, colors, spacing, icons, and link destinations to match your center's brand.
- Quick Deployment – Drag, drop, and publish—no technical expertise needed.
- Consistent Look & Feel – Maintain uniform navigation across all pages for a cohesive site experience.
How To Add a Prebuilt Mega Menu Header
Here's how to find and add a mega menu header to your enrollment page or website.
Step-by-Step Instructions
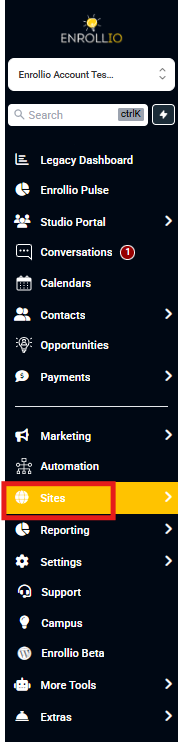
1. Go to Sites
From the left-hand menu in your Enrollio dashboard, click Sites.
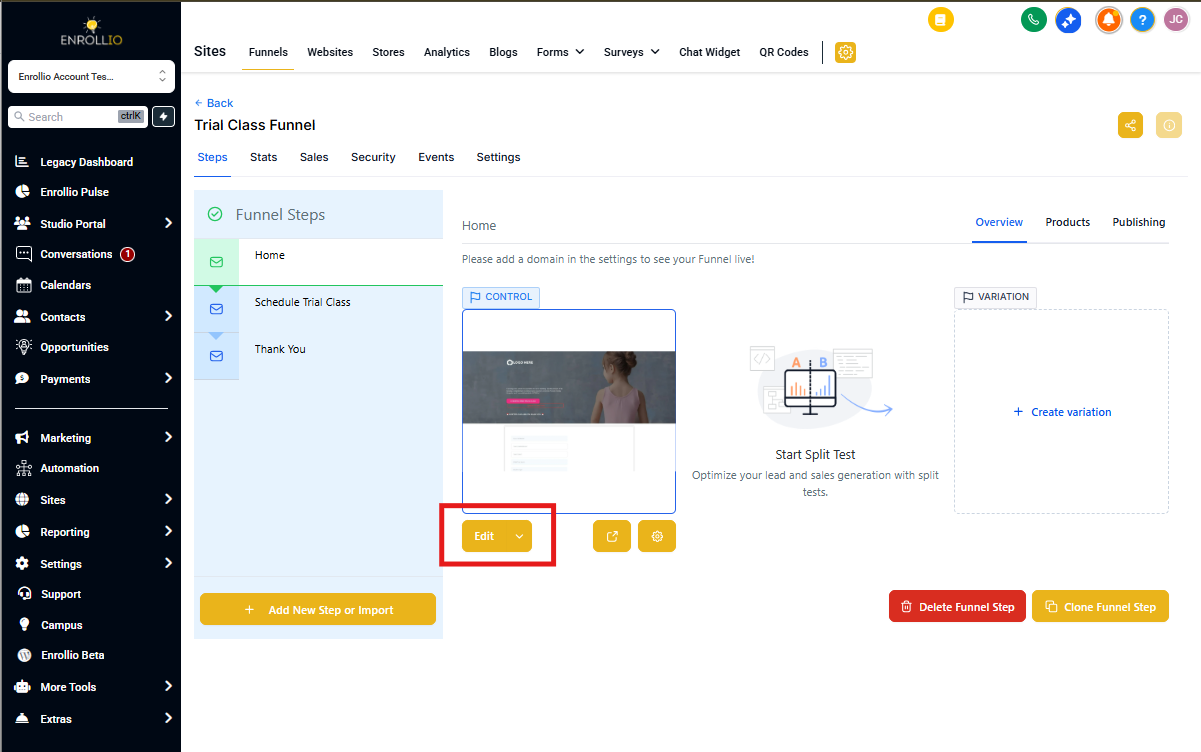
2. Open Your Enrollment Page or Website
Select the specific enrollment page or website where you want to add the mega menu, then open it in the visual builder.
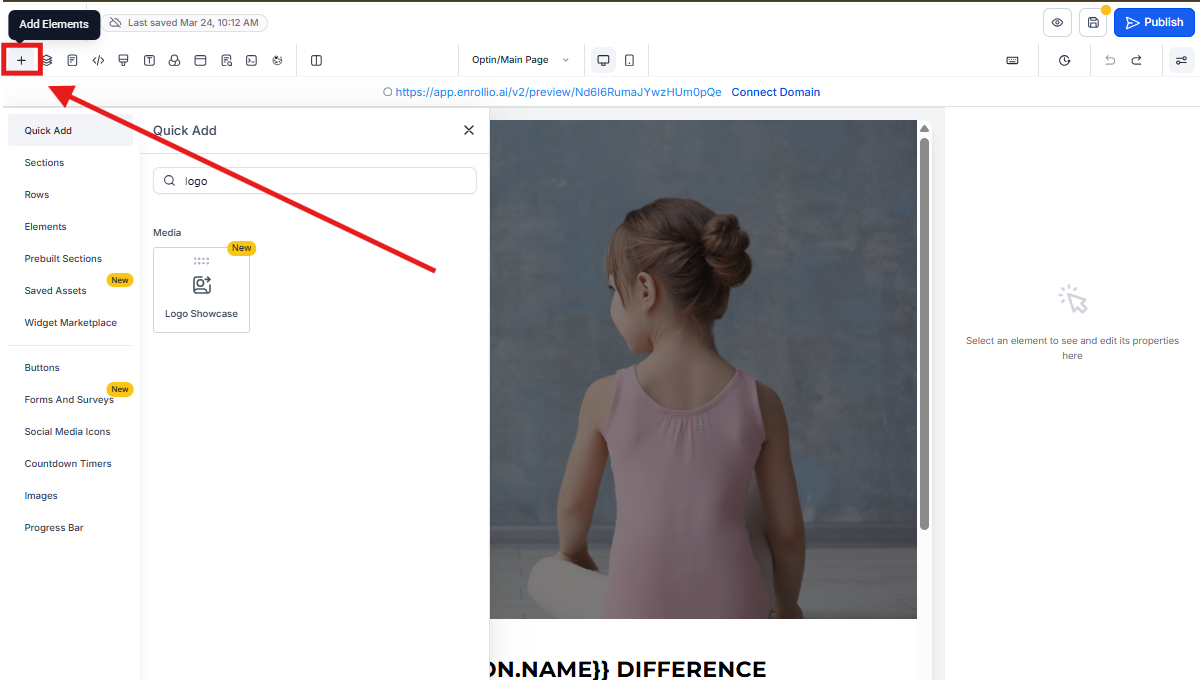
3. Click "Add Elements"
In the top-right corner of the visual editor, click the Add Elements button.
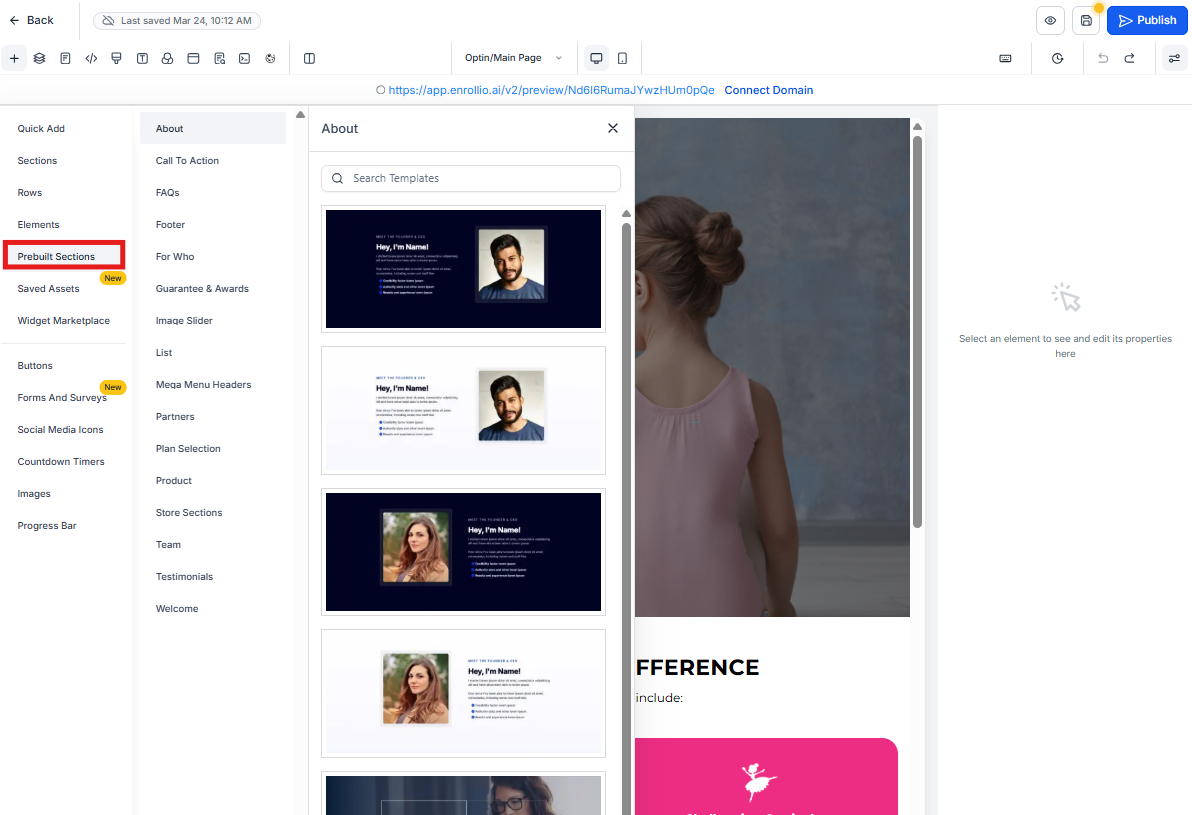
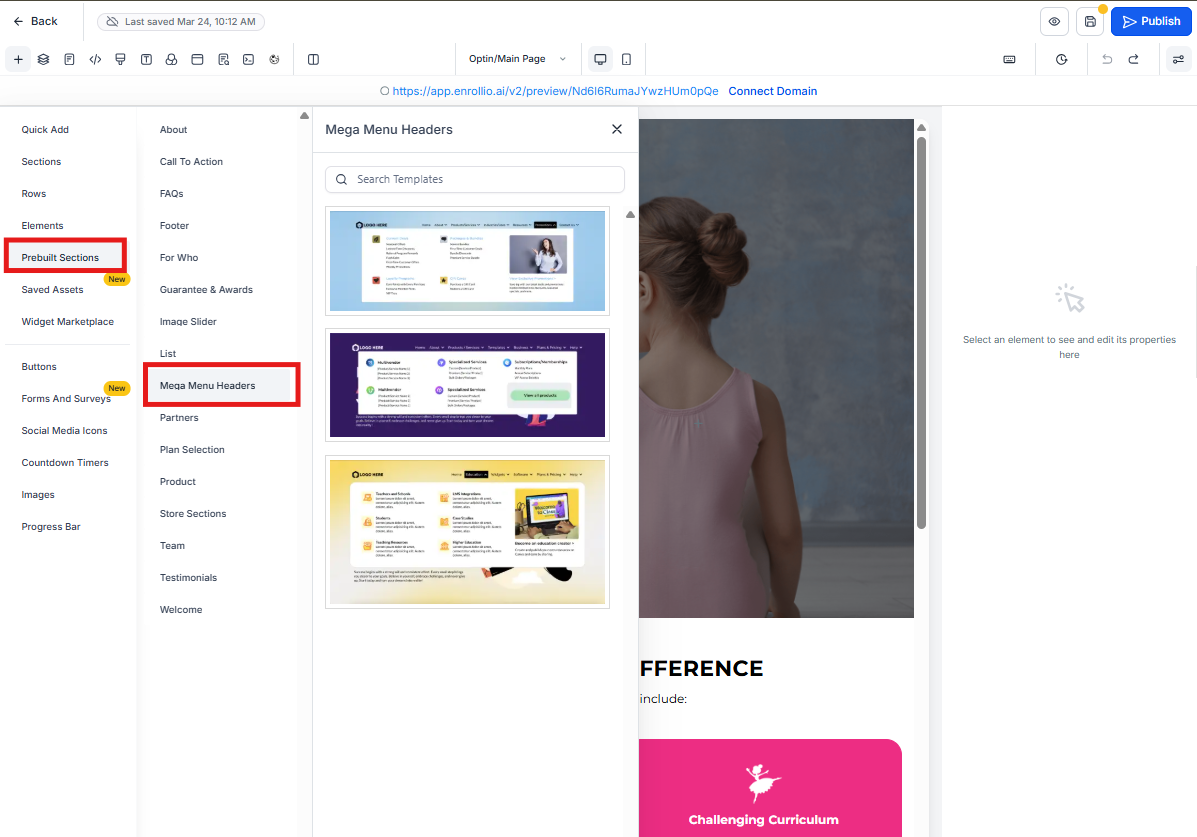
4. Select "Prebuilt Sections"
Scroll through the options and choose Prebuilt Sections from the sidebar menu.
5. Choose a Mega Menu Design
Browse the available mega menu layouts. Click to preview, then select the one that best fits your center's structure.
6. Customize the Menu
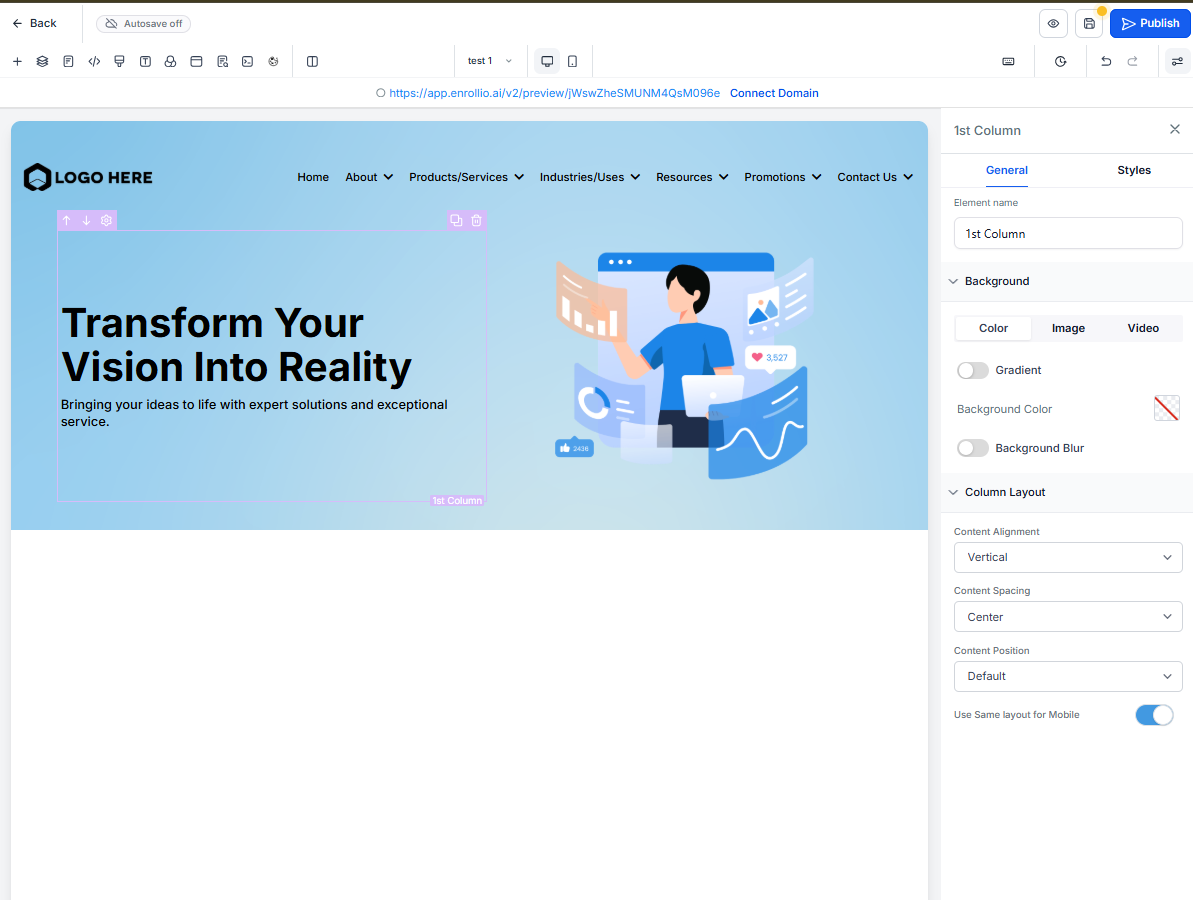
Use the visual builder to:
- Edit link text and destinations (programs, tours, enrollment, contact)
- Adjust colors, fonts, and spacing to match your brand
- Add or remove icons and subcategories (infant care, toddler program, preschool, etc.)
- Rearrange columns or content blocks as needed
7. Publish Your Page
Once you're satisfied with the layout and styling, click Save and Publish.
Pro Tip: Organize your mega menu by age groups (infants, toddlers, preschool) or by information type (programs, enrollment, tours, pricing) to help families find what they need fast.
Frequently Asked Questions
Q: Can I use the same mega menu across multiple pages?
Yes. You can save your customized section and reuse it across enrollment pages or your website to maintain consistent navigation.
Q: Are the mega menu templates mobile responsive?
Yes. The prebuilt mega menu headers are designed to be mobile-friendly and will automatically adjust to smaller screens—important since many parents browse on their phones.
Q: Can I add my own custom links or buttons?
Absolutely. You can link to internal pages (like your tour booking page), external URLs, or trigger pop-ups and actions from the mega menu elements.
Q: Can I change the number of columns in the mega menu?
Yes. You can modify the layout using the visual editor to add or remove columns, change widths, or rearrange content blocks to fit your center's needs.
Q: Does the mega menu support dropdown animations?
Yes. Many of the prebuilt designs include built-in dropdown interactions that you can enable or modify during customization.
Next Steps
- Add a mega menu to your enrollment site homepage to improve navigation
- Customize the design to align with your center's brand
- Save your customized header as a reusable section for easy replication across pages
- Test on mobile devices to ensure a seamless parent experience