
Make your enrollment pages more interactive by showing and hiding elements when parents click a button. This feature works on both desktop and mobile, giving you complete control over what families see and when they see it.
What You Can Do
Add interactive layers to your enrollment pages by revealing or hiding content when someone clicks a button. This is perfect for:
- Showing additional program details on demand
- Creating expandable FAQs
- Revealing enrollment forms step-by-step
- Building interactive tour request pages
How to Hide Elements on Button Click
Follow these steps to make elements disappear when a parent clicks a button.
Step 1: Select Your Button
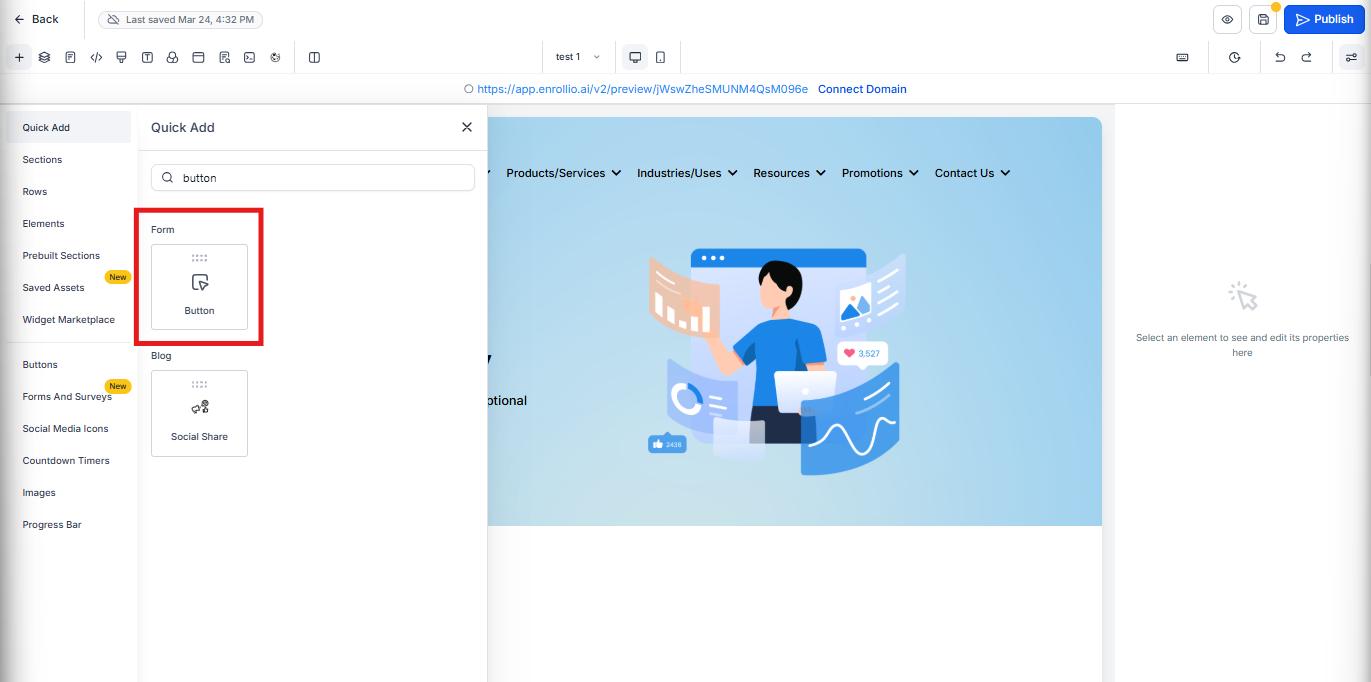
In your enrollment page builder, click the button element you want to use.
Step 2: Open Button Actions
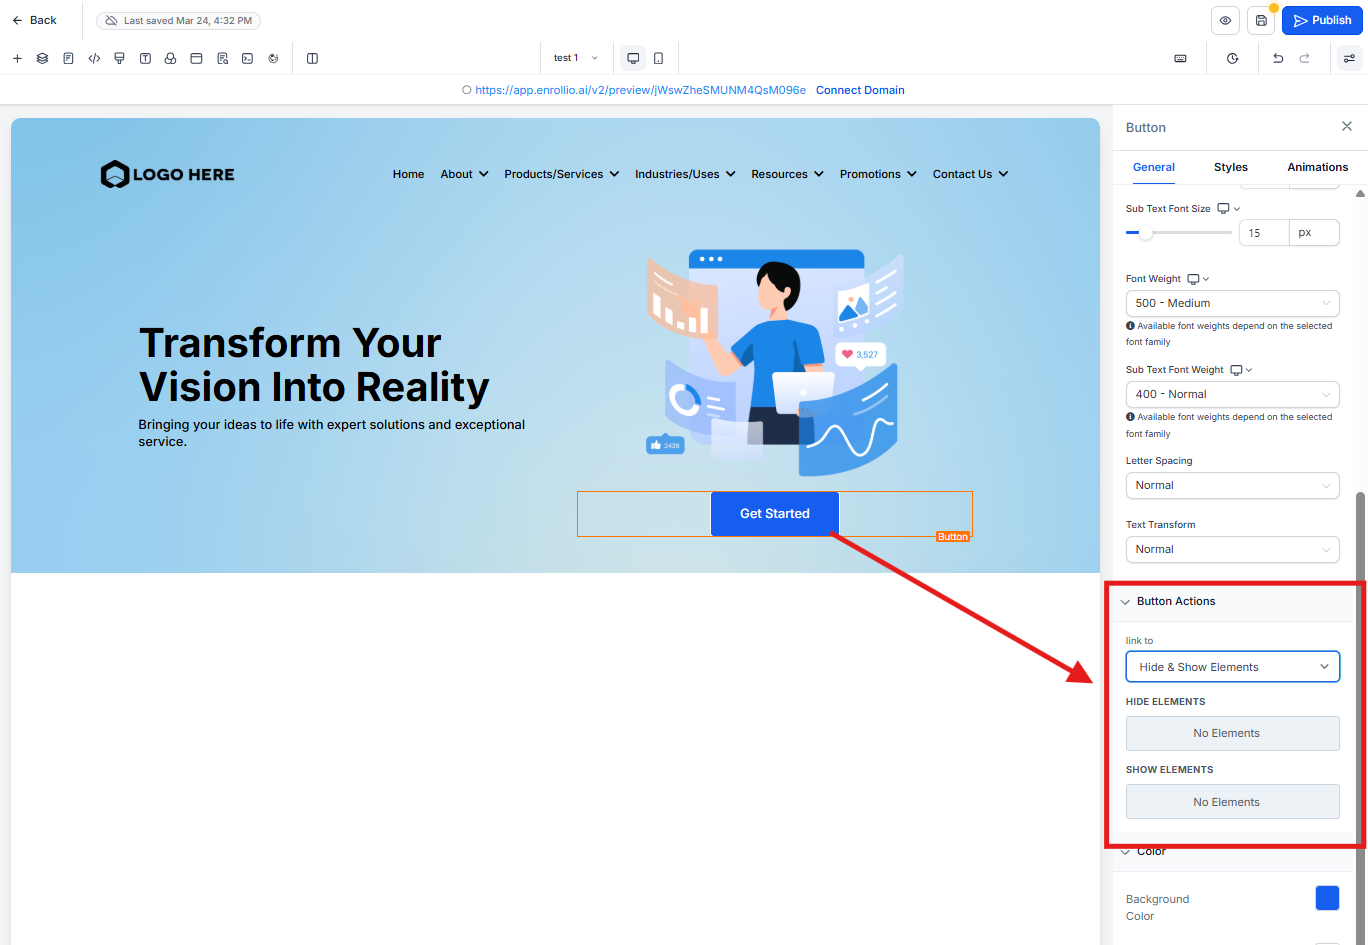
On the right side of your screen, look for the element settings panel. Under General, scroll down to Button Actions.
In the Link To dropdown, select Hide & Show Elements.
Step 3: Choose Elements to Hide
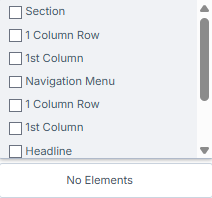
Click Hide Elements to see a list of all elements on your page. Select the elements you want to hide when the button is clicked.
You can hide individual elements, entire sections, columns, or column rows.
Step 4: Save Your Changes
Click the Save button to save your changes, or click Preview to test how it works before publishing.
Pro Tip: To later show an element, you must first hide it. If you don't see any options in the Show Elements dropdown, you need to hide at least one element first.
How to Show Elements on Button Click
Use this to reveal hidden content when a parent clicks a button — perfect for progressive disclosure.
Step 1: Select the Element to Start Hidden
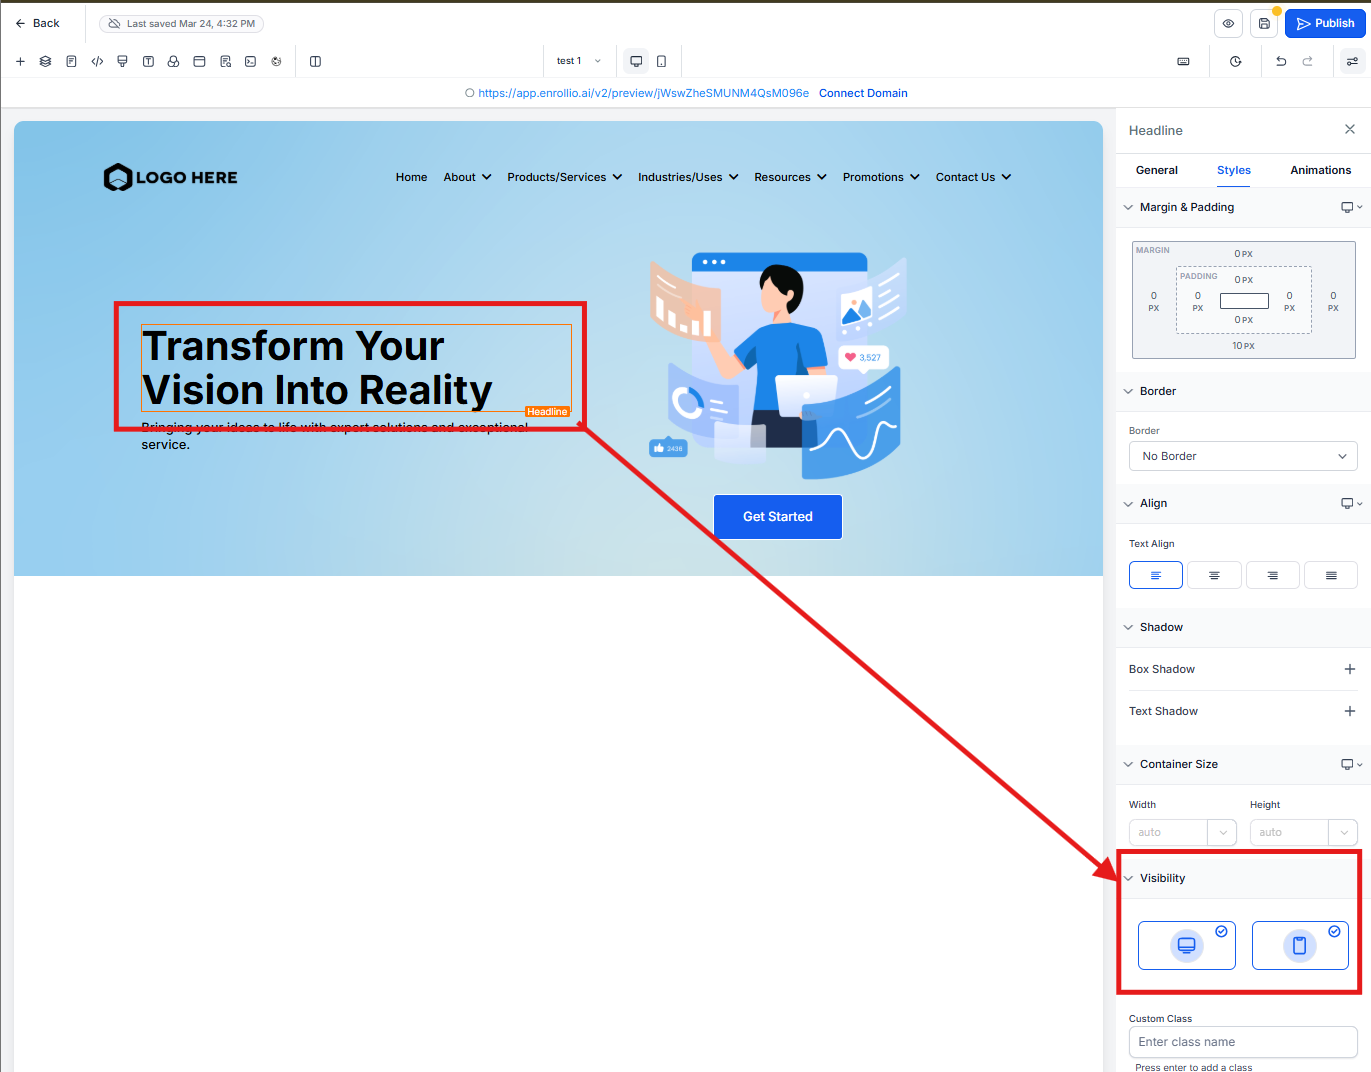
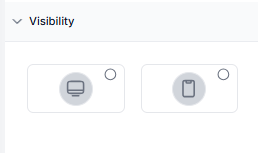
Click the element you want to reveal later. In the left-side settings panel, navigate to the Styles tab and scroll down to Visibility.
Step 2: Hide the Element
Click both the desktop and mobile visibility buttons to hide the element on both views. When hidden, the icons will turn gray.
Step 3: Select Your Button
Click the button element you want to use to reveal the hidden content.
Step 4: Open Button Actions
On the right side of your screen, find the element settings. Under General, scroll down to Button Actions.
In the Link To dropdown, select Hide & Show Elements.
Step 5: Choose Elements to Show
Click Show Elements to see a list of all hidden elements on your page. Select the elements you want to reveal when the button is clicked.
You can show individual elements, sections, columns, or column rows.
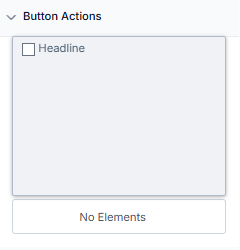
Note: If you don't see any options in the Show Elements dropdown, you need to hide at least one element first using the Visibility settings.
Step 6: Save Your Changes
Click the Save button to save your changes, or click Preview to test your enrollment page before publishing.
Editing Hidden Elements
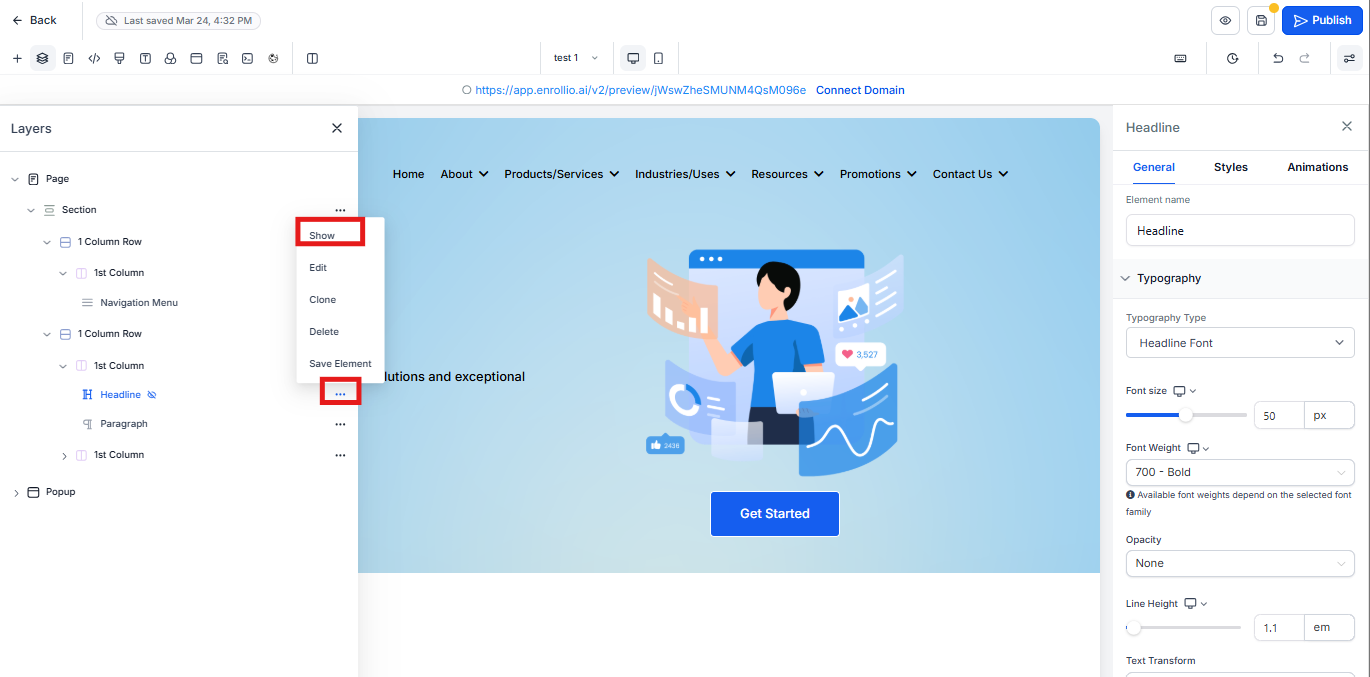
If you've hidden an element from both desktop and mobile views, you won't see it on your canvas — but you can still access and edit it.
Use the Layers Panel
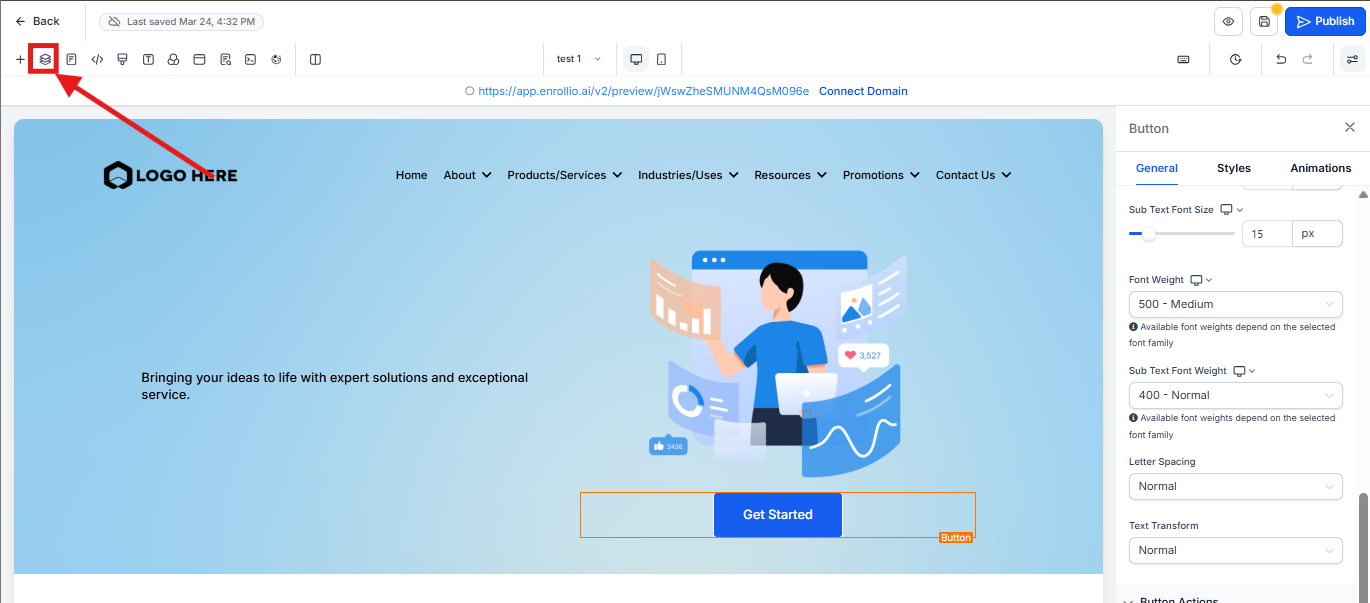
In the top left of the page builder, click the Layers icon (it looks like stacked layers). This opens a list of every element on your page, including hidden ones.
Find Your Hidden Element
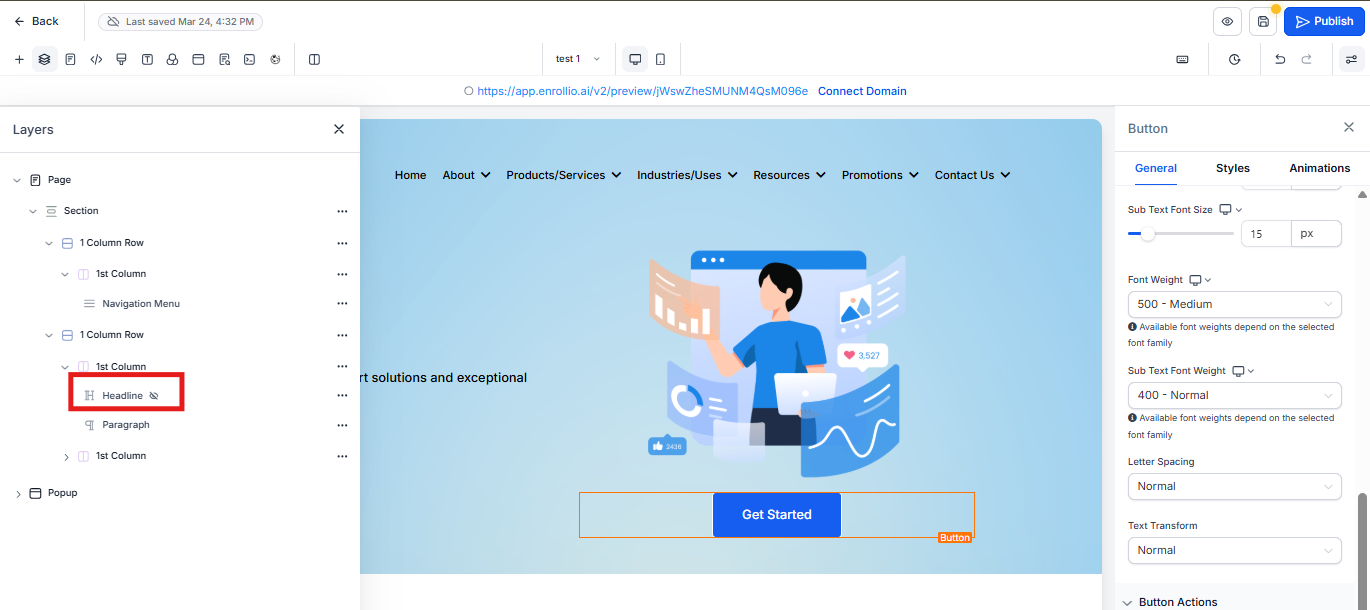
Scroll through the list to locate the element you hid. Hidden elements may appear dimmed or show an "eye" icon indicating they're not visible.
Select and Edit
Click the element's name in the list. The element will be selected, and its settings panel will appear on the right side of your screen.
Restore Visibility
With the element selected, click the visibility toggle (eye icon) in the settings panel to make it visible again on desktop and/or mobile.
Pro Tip: Use the Layers panel anytime you need to select elements that are stacked or hard to click on the canvas. It's a faster way to navigate complex page layouts.