
How to Set Up Facebook Conversion API for Your Enrollment Pages
Facebook Conversions API (CAPI) helps you deliver personalized ads to prospective families while maintaining their privacy. It sends enrollment page events directly to Facebook from your server, giving you more accurate tracking for your ad campaigns.
If you're running Facebook ads to attract new families, you'll want to add the Facebook Pixel to your enrollment pages to track which ads are bringing in tour requests and applications.
What You'll Learn
- Creating a Meta Pixel in Facebook Business Manager
- Adding the Pixel code to your enrollment pages
- Setting up Conversions API automation in Enrollio
- Using custom conversion values
Step 1: Create Your Meta Pixel
Start by opening your Facebook Business Manager (also called Meta Business Suite).
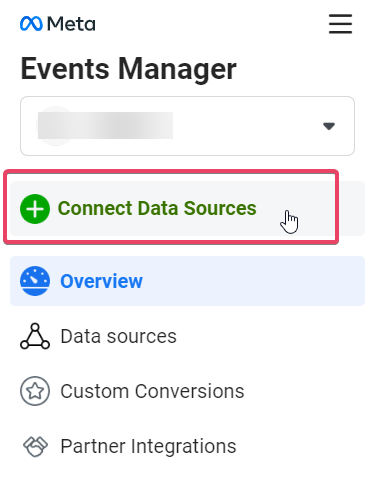
- Click Events Manager in the left sidebar
- Make sure you're connected to the correct Ad Account with access to your Facebook Page
- Click Connect Data Sources in the left sidebar
- Choose Web from the options, then click Next
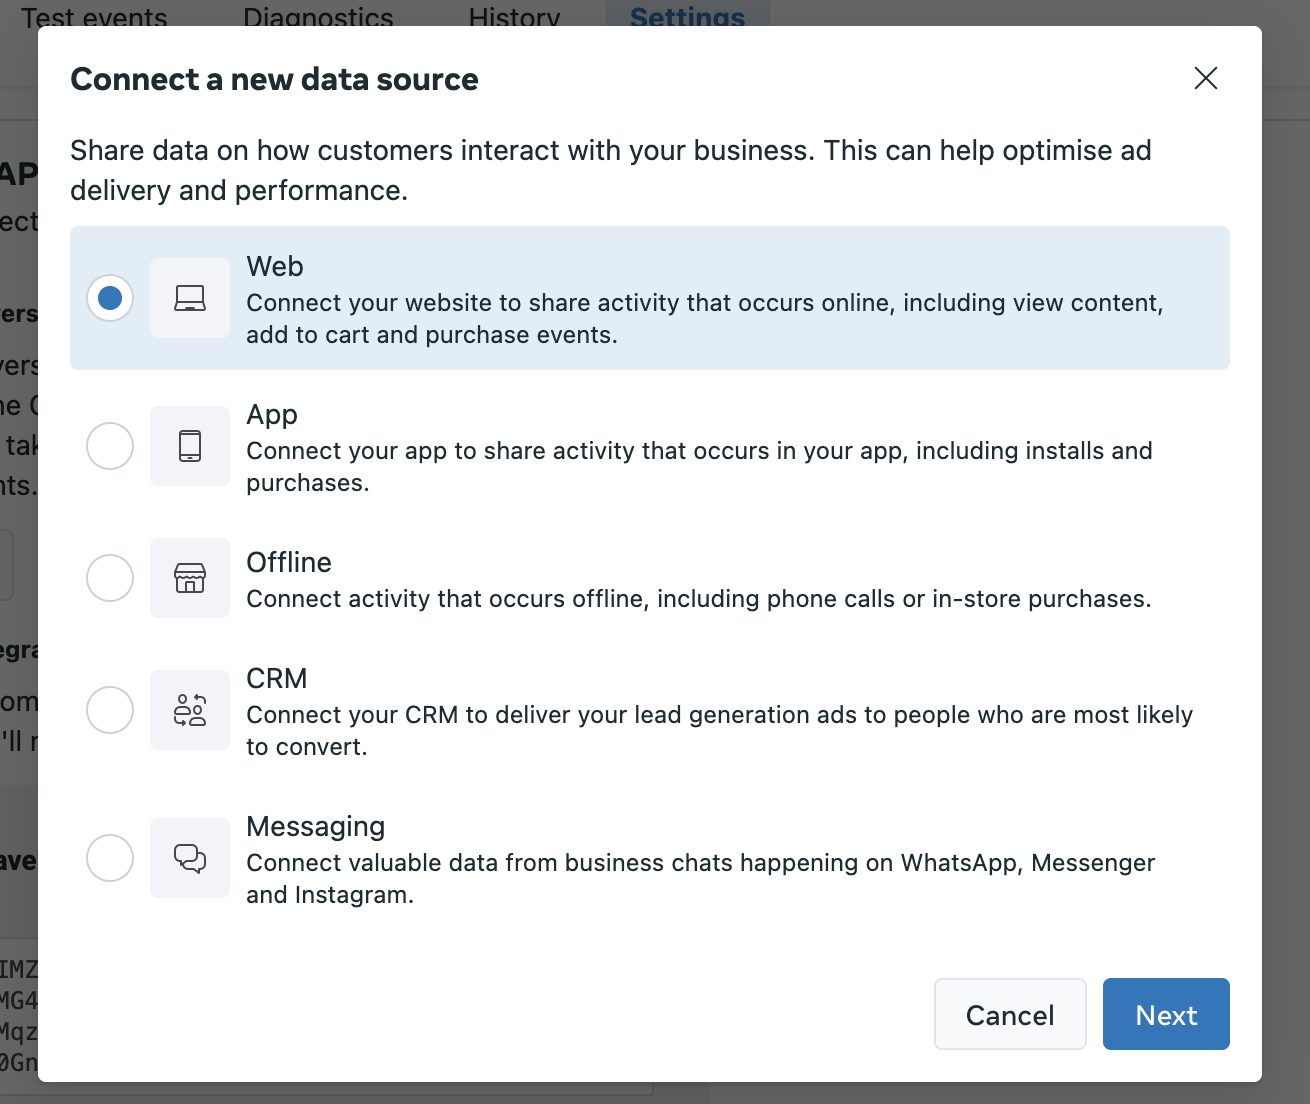
If you already have pixels, Facebook will ask you to choose between them or create a new one.
- Click Create new Pixel (or select an existing pixel from the list)
- Click Continue once the pixel details are added
- Enter your enrollment page domain (for example,
yourcentername.enrollio.com) - Click Check to verify your domain is eligible
When you see a green checkmark next to your domain, you're ready to continue.
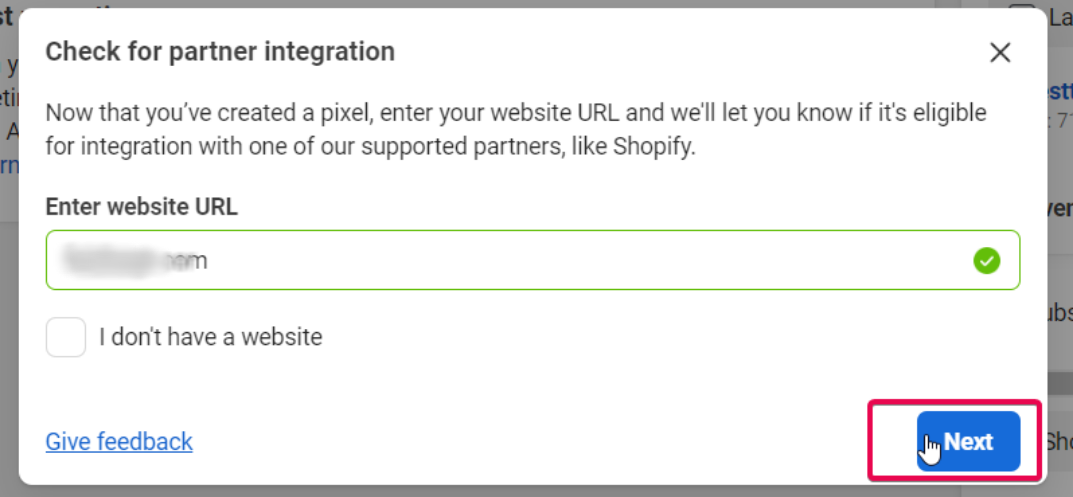
- Click Next
- When asked how to connect your website, choose Meta Pixel and Conversions API
- Click See Instructions under Conversions API
Configure Your Pixel Events
Facebook will take you through the manual setup process.
- Read through the Overview instructions and click Continue
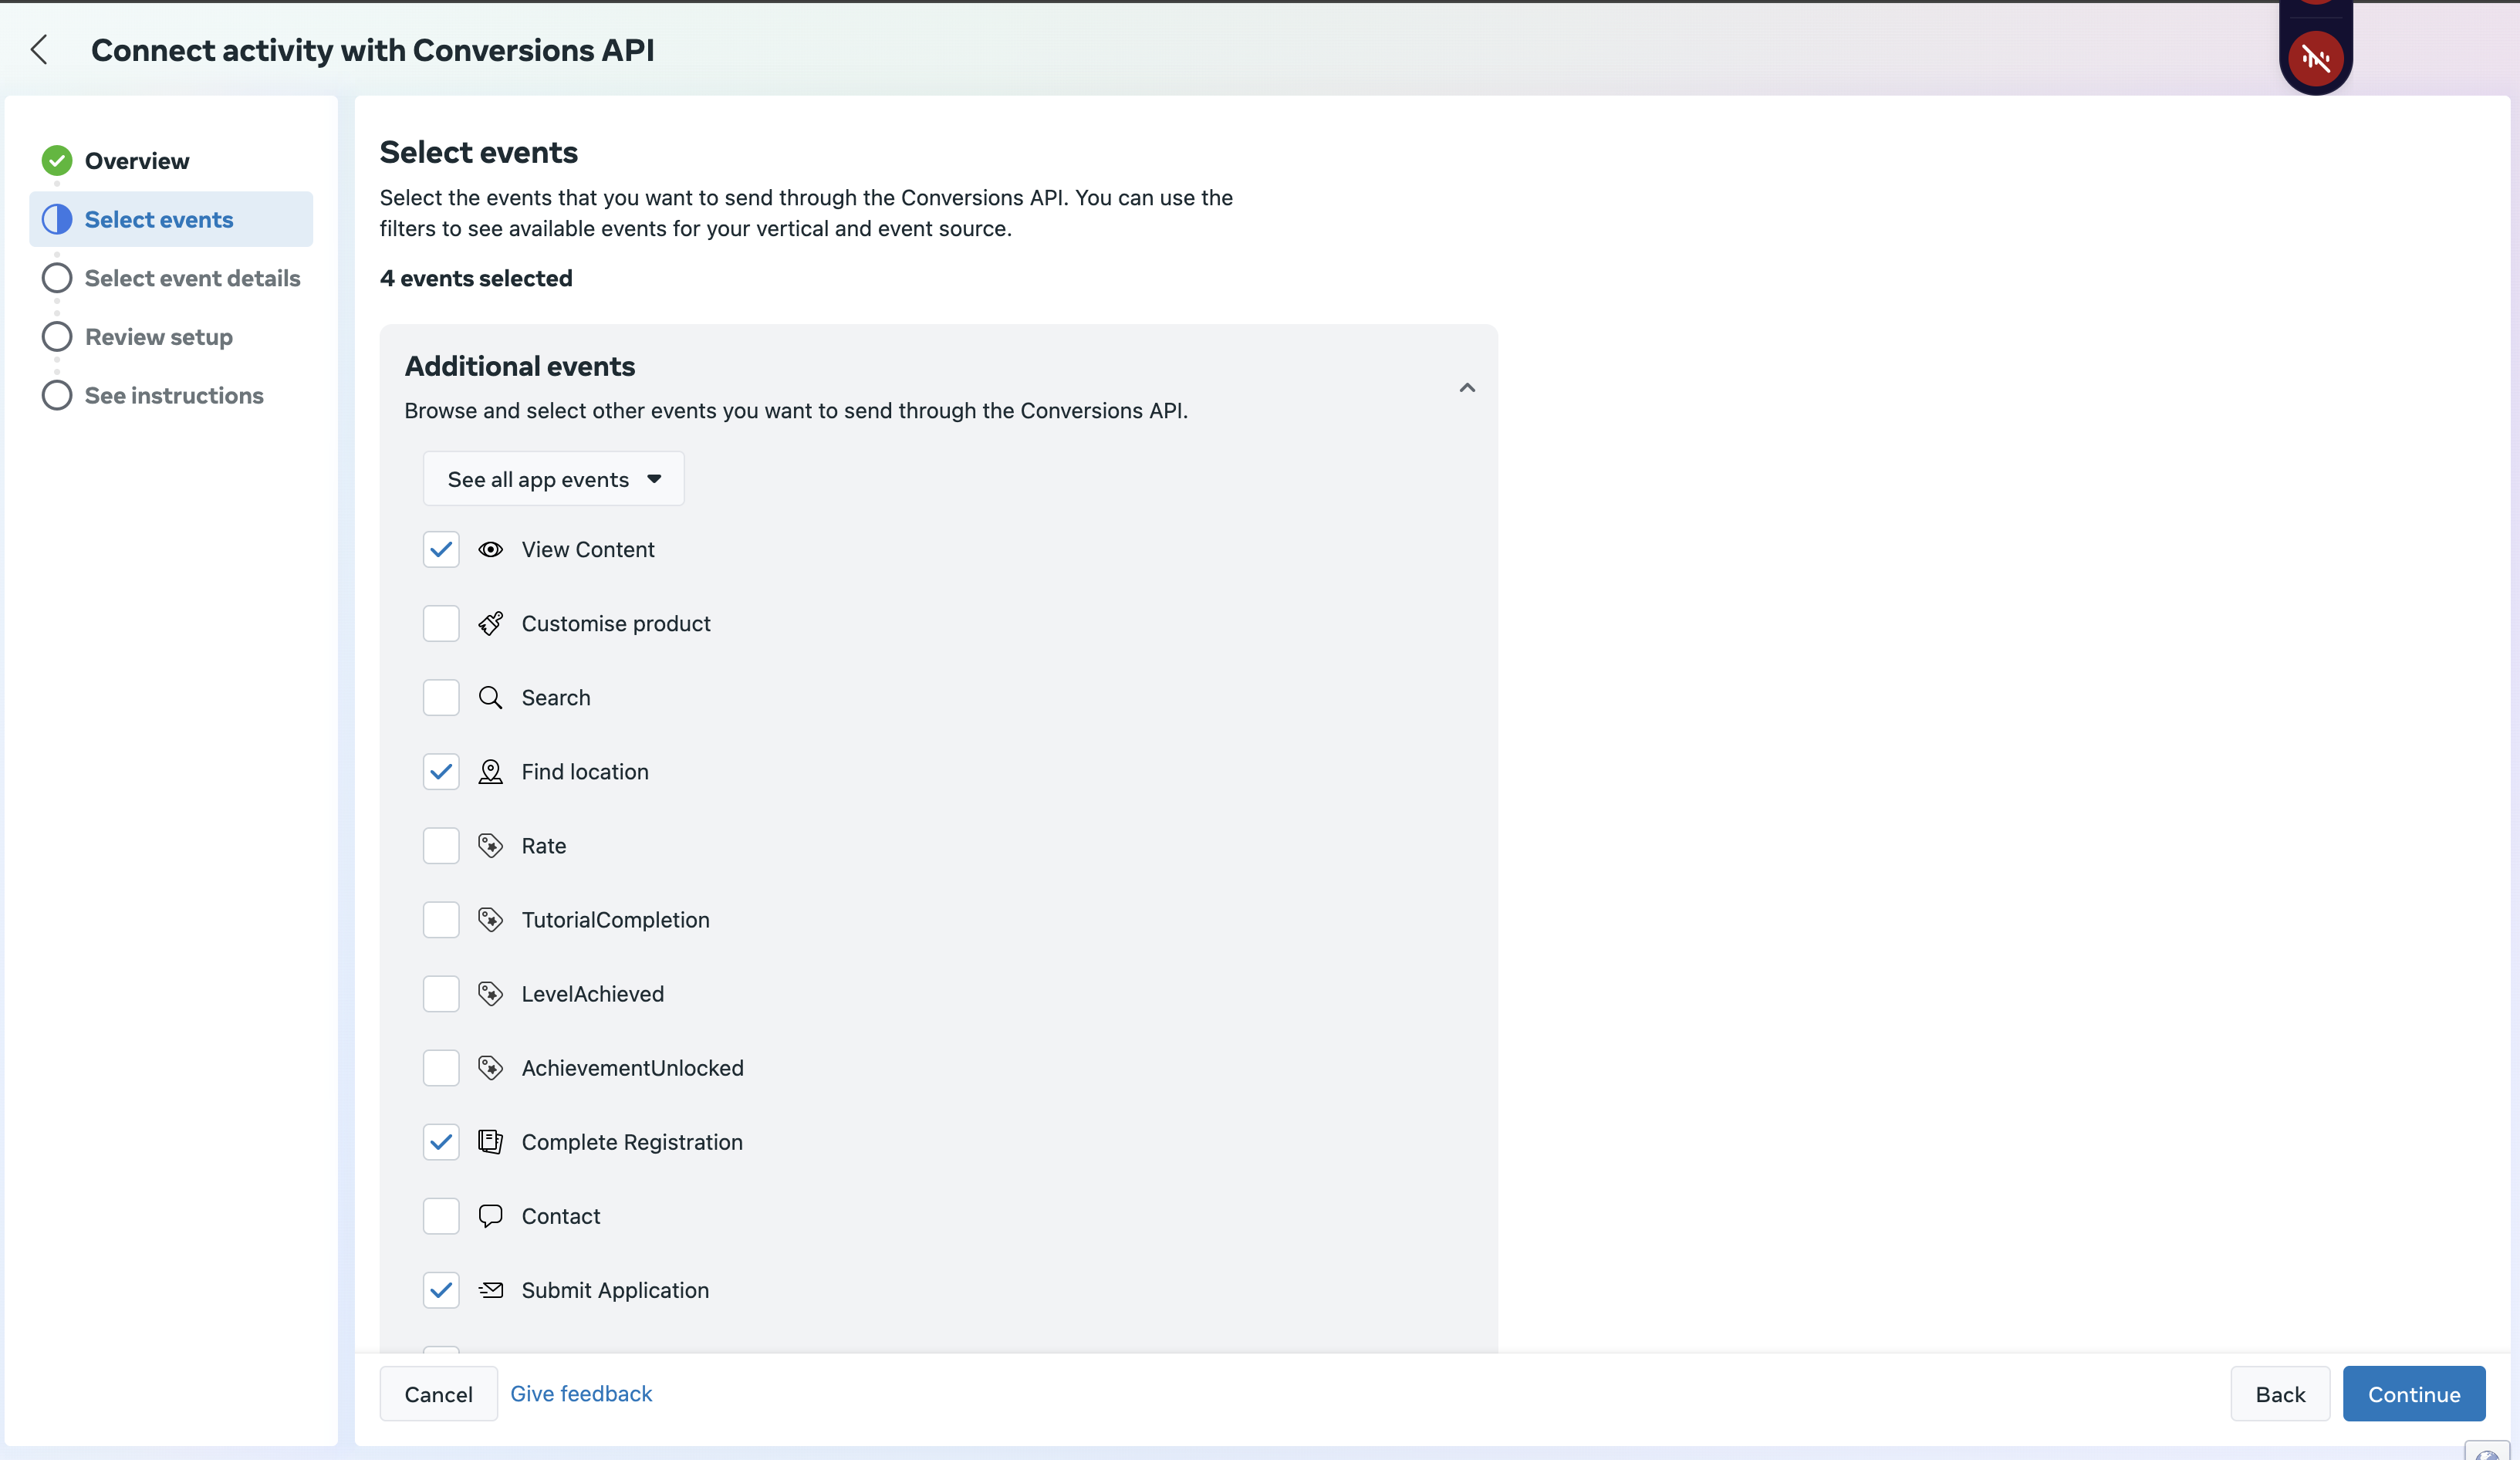
- In the Select Events tab, choose your industry from the dropdown (select the option closest to childcare/education)
- Select all the events you want to track (like form submissions, tour bookings, etc.)
- Click Continue
Now you'll set up which information to send with each event.
- In the Select Parameters tab, make sure Event ID is checked (Facebook recommends this)
- Under Customer Information Parameters, check:
- Client's IP Address
- First Name
- Client ID
- Business ID
- Last Name
- Review your setup to confirm all parameters are correct for each event
- Click Continue, then Finish
Get Your Pixel Code
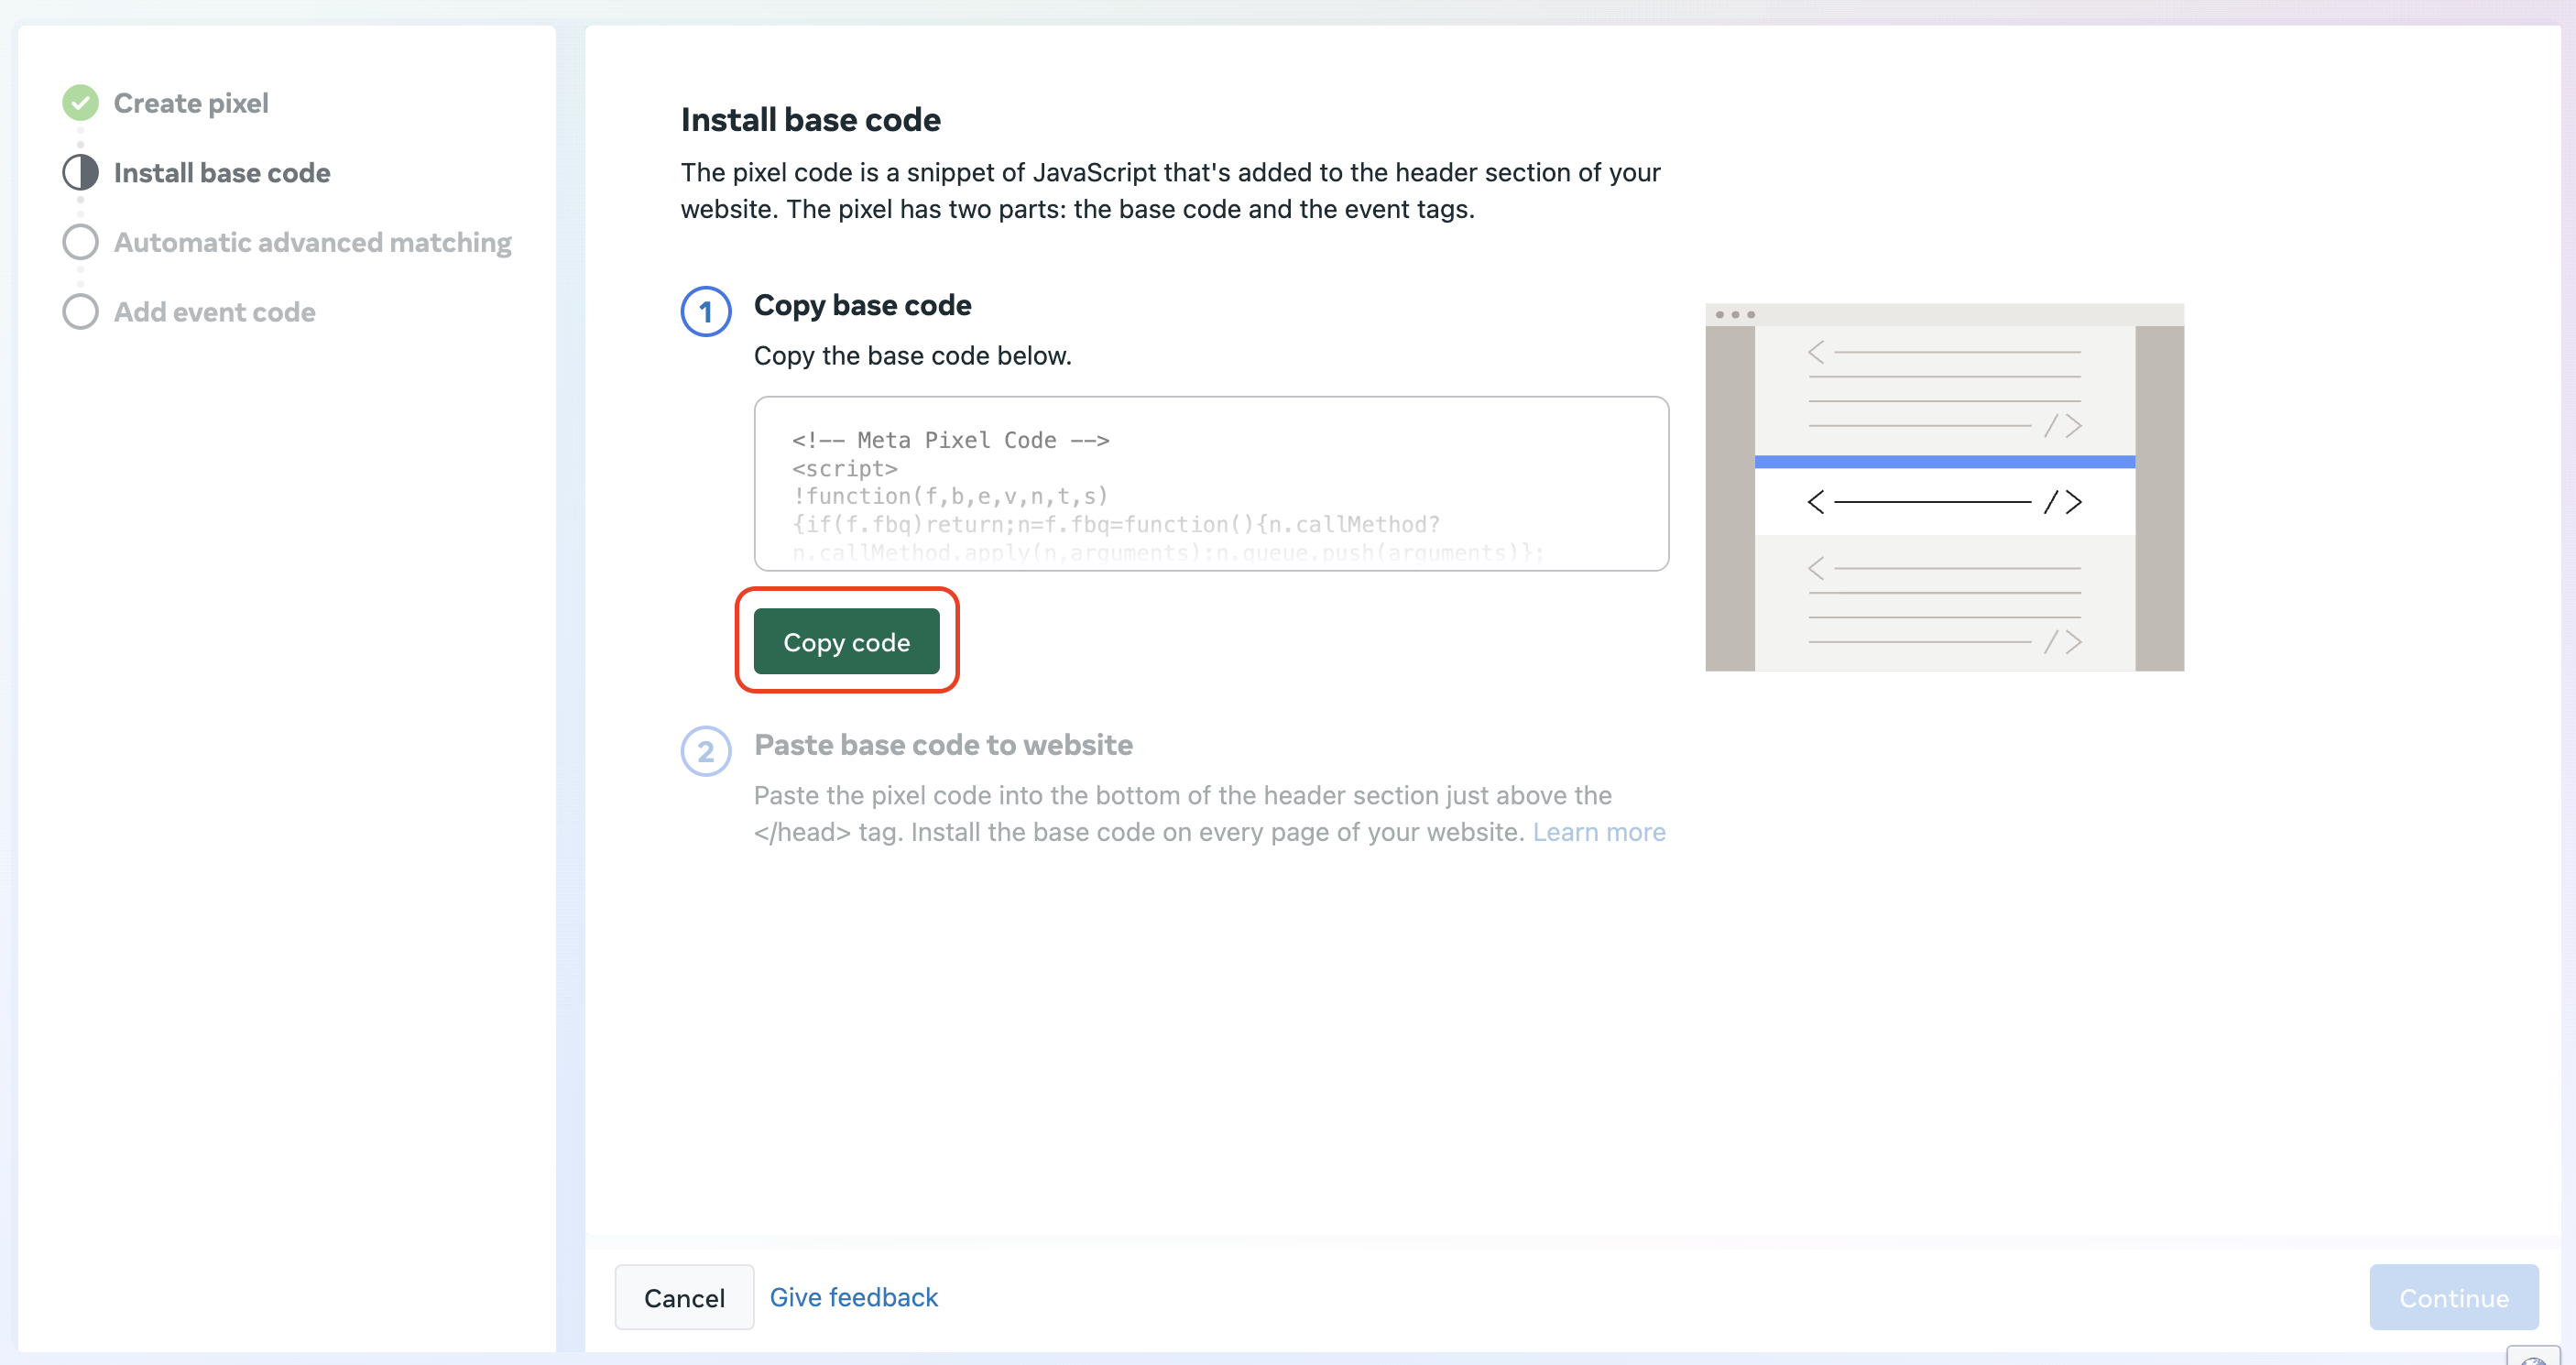
- Click Set up Meta Pixel
- Choose Install Code Manually
- Click Copy Code to copy your pixel code
Keep this browser tab open — you'll need to switch back to it in a moment.
Step 2: Add the Pixel Code to Your Enrollment Pages
Now you'll add the Facebook Pixel code to your enrollment pages in Enrollio.
To Track a Specific Page
- In Enrollio, go to Sites in the left sidebar
- Click Enrollment Pages
- Find the page you want to track and click Edit (or Edit in new tab)
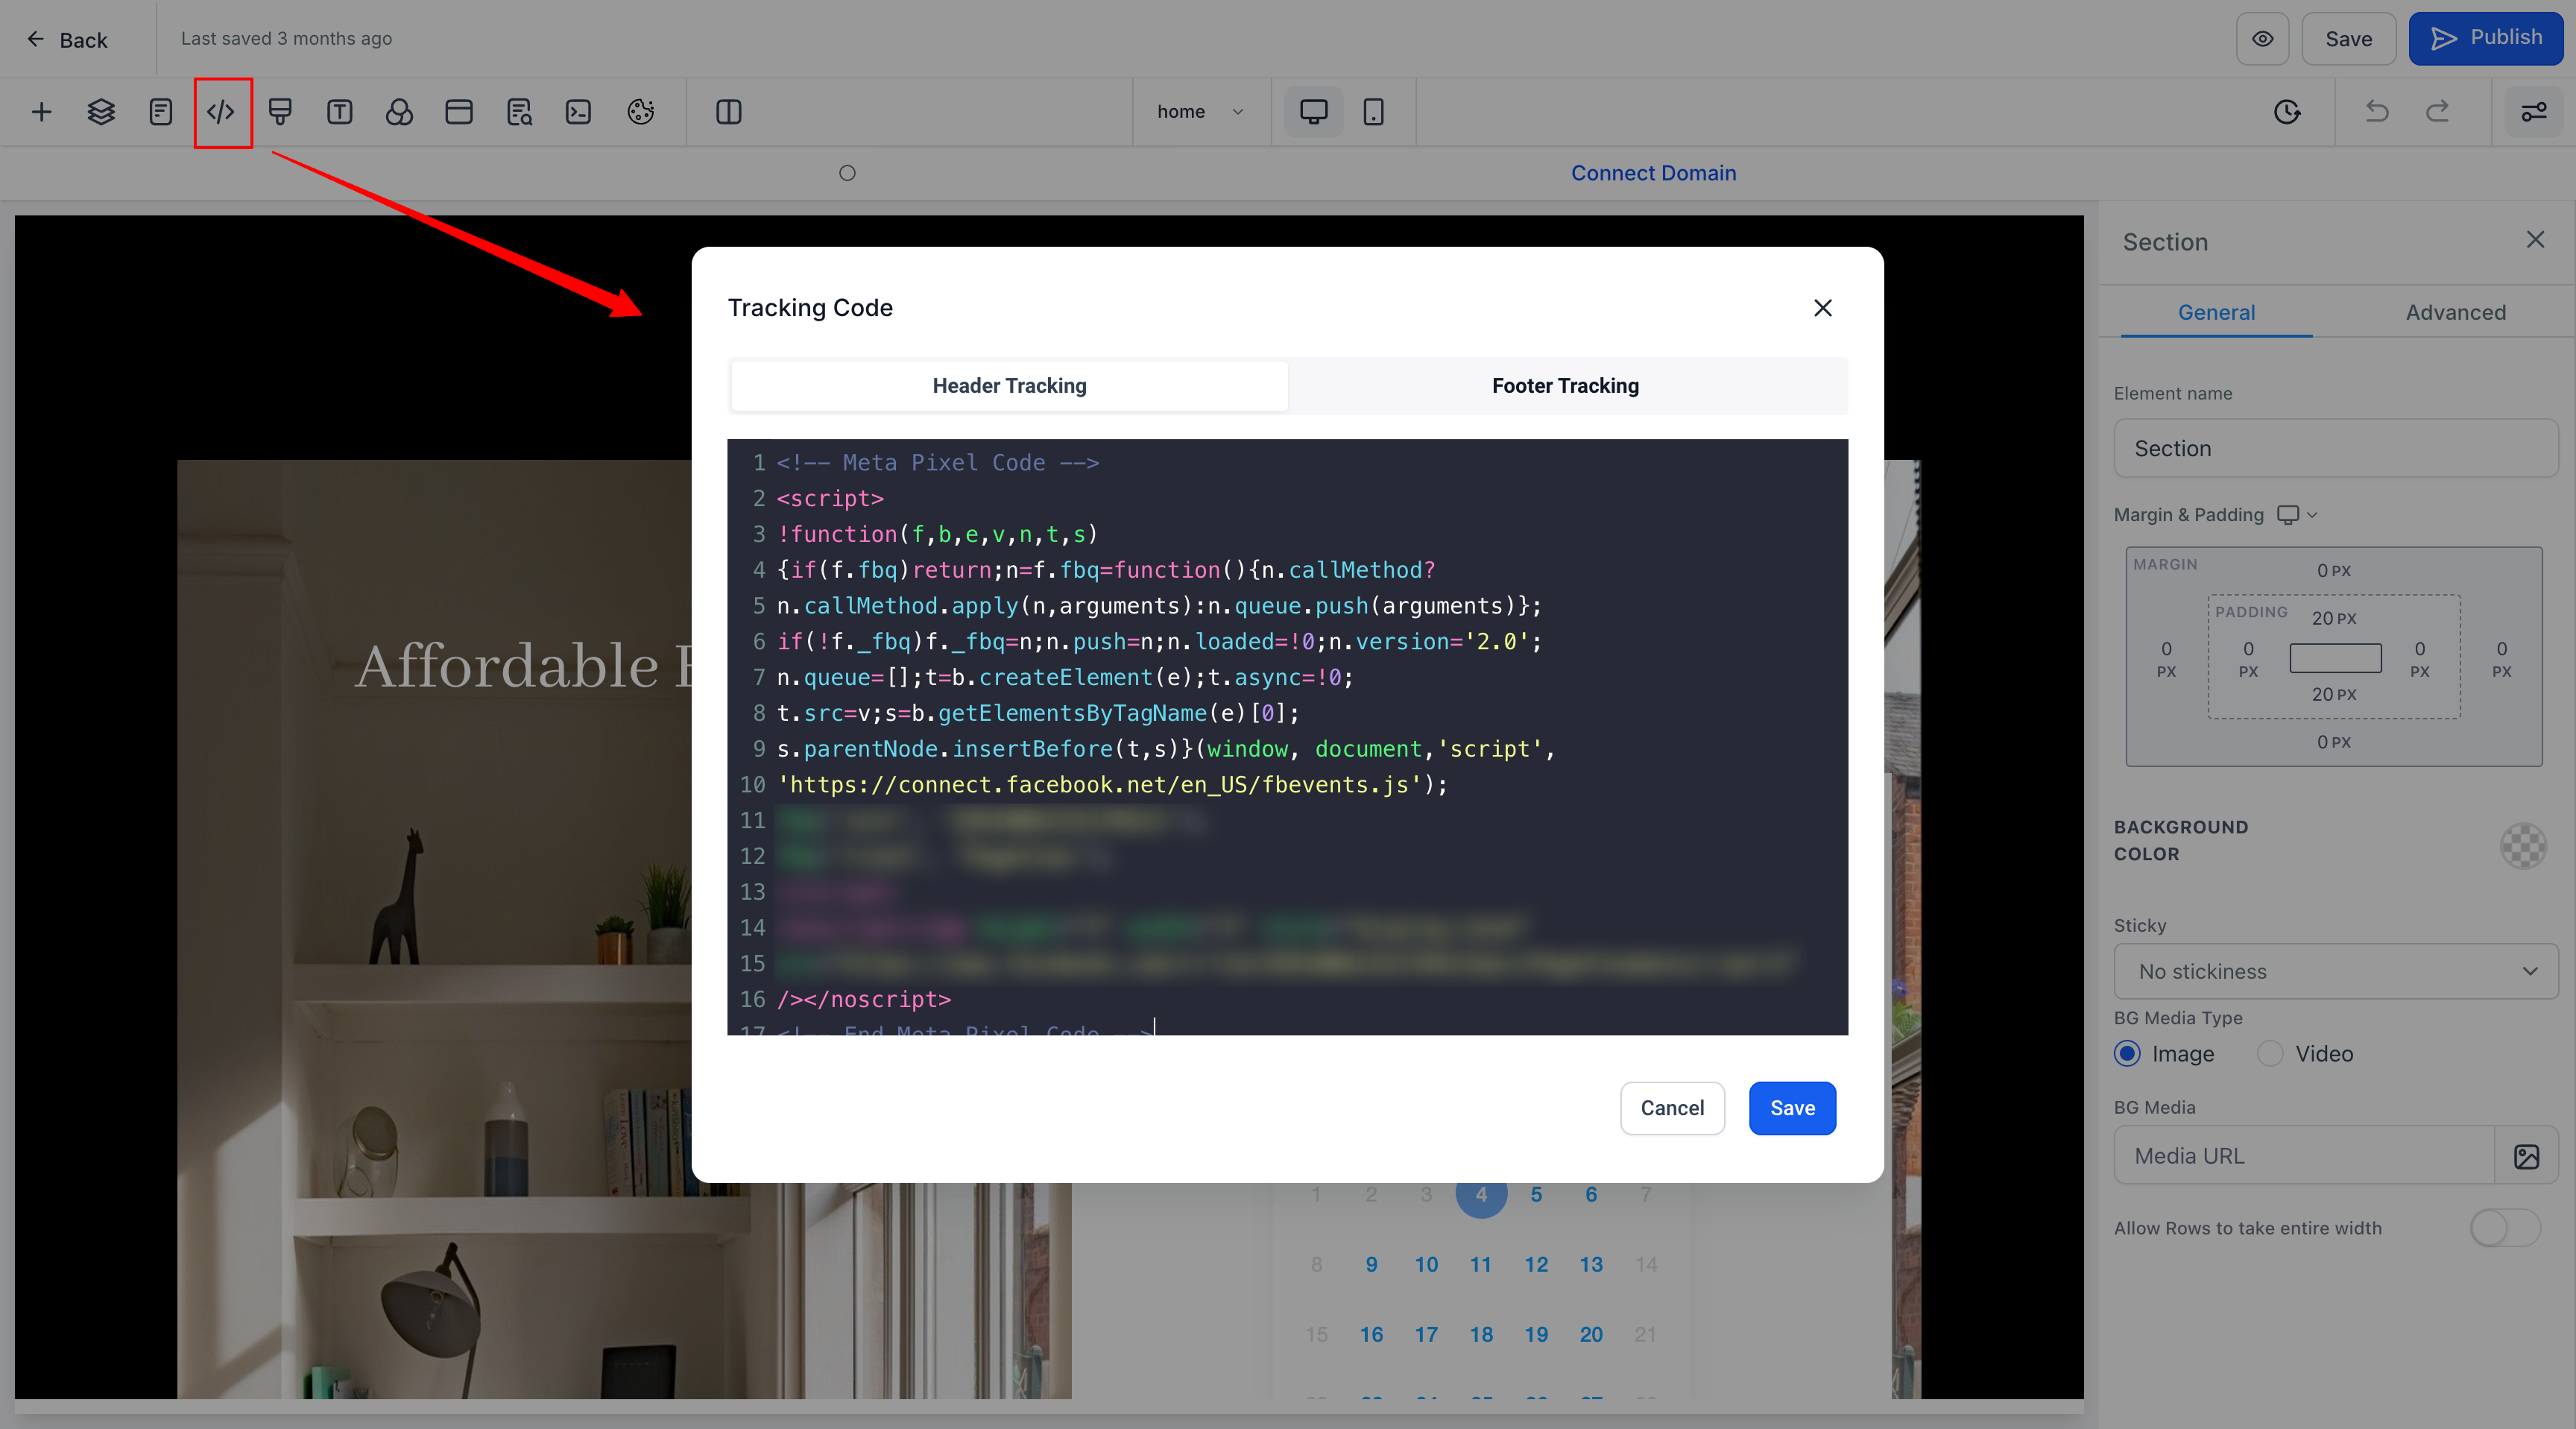
- In the page builder, click the code icon </>
- Paste the pixel code in the Header Tracking section
- Click Save
To Track All Pages on Your Enrollment Site
- Click the Settings icon for your enrollment page or site
- Paste the code in the Head Tracking Code section
- Click Save
This will add the pixel to every page on that enrollment site.
Step 3: Create Your Conversions API Automation
The final step connects your form submissions and tour bookings to Facebook's tracking system.
- Go to Automation in the left sidebar
- Click Create Automation
- Click Add New Automation Trigger
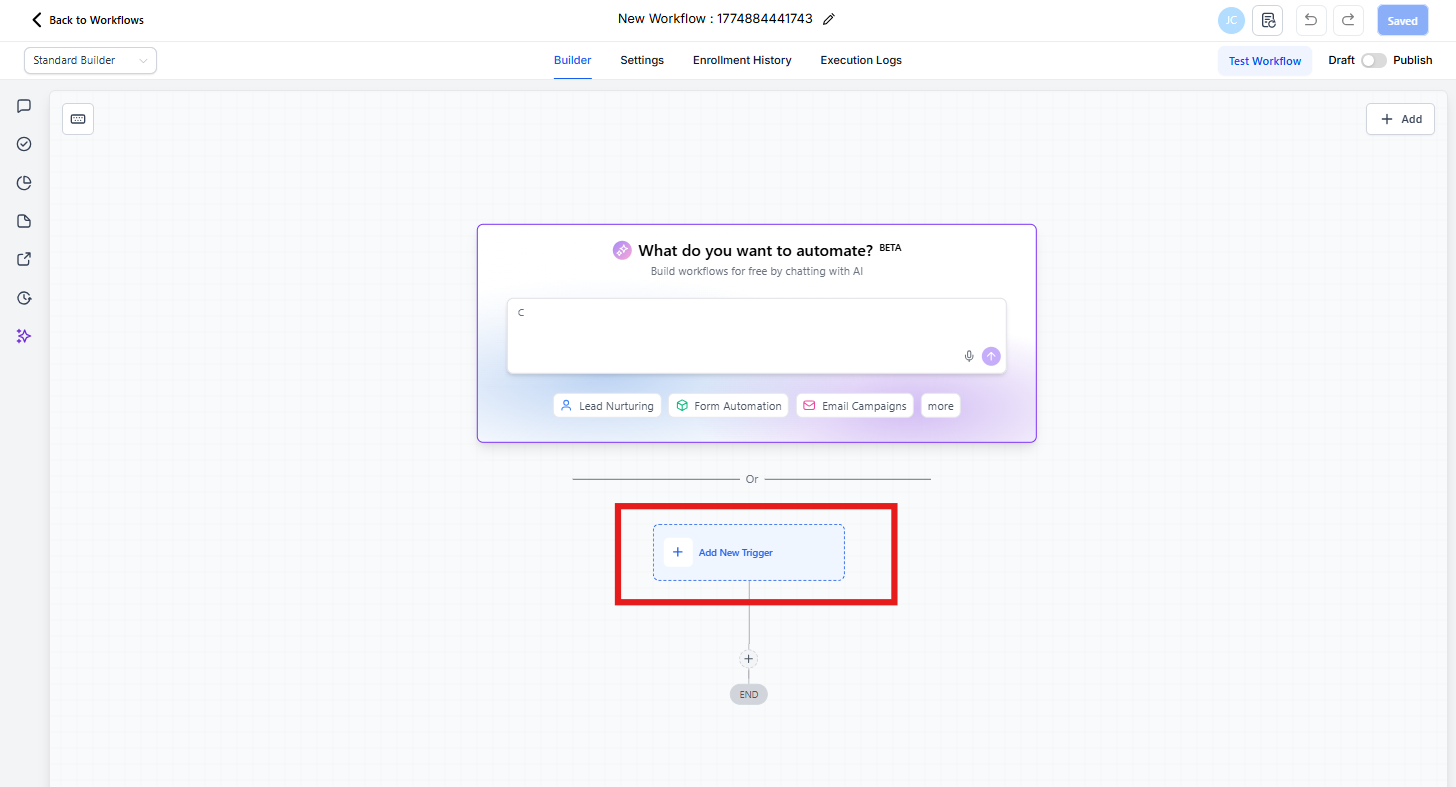
Choose one or more of these triggers:
- Form Submitted — when a family fills out your enrollment form
- Customer Booked Appointment — when a family schedules a tour
- Survey Submitted — when a family completes a survey
- Order Form Submission — when a family submits payment information
- Use the filter to choose the specific form, calendar, order form, or survey you want to track
- Click Add your first Action
- Search for and select Facebook Conversion API
Configure the Conversion API Action
- Give your action a name (optional, but helpful for organization)
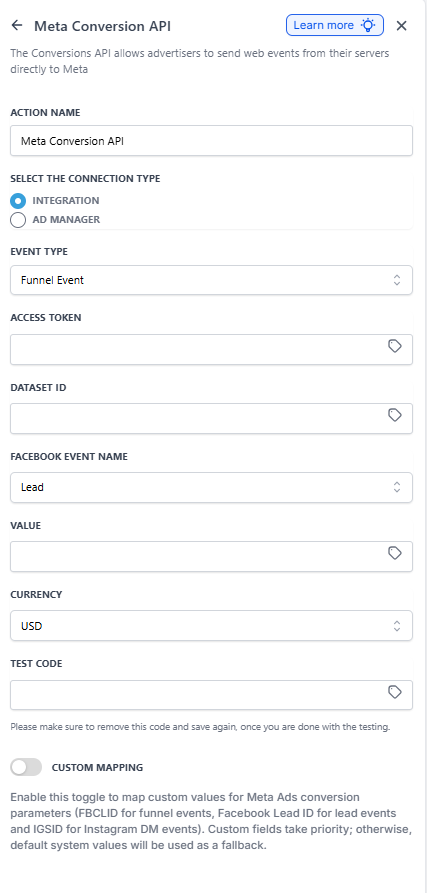
- In the Event Type dropdown, choose Funnel Event
Now you'll need two pieces of information from Facebook.
Get Your Access Token
- Go back to your Facebook Events Manager tab
- Click Data Sources
- Click Settings
- Scroll down and click Generate Access Token
- Copy the access token
- Paste it in the Access Token field in Enrollio
Get Your Pixel ID
- In the same Facebook Settings screen, scroll down to find your Dataset ID (this is your Pixel ID)
- Copy the Dataset ID
- Paste it in the Pixel ID field in Enrollio
- Click Save on the action
- Click Save and Publish on your automation
Custom Value Mapping
Enrollio allows you to customize how conversion tracking parameters are sent to Facebook, similar to Google Ads tracking.
How It Works
By default, custom mapping is disabled. When you enable it, you can map:
- FBCLID for enrollment page events
- Facebook Lead ID for lead events
If you provide custom mapping fields, Enrollio will use those instead of the system defaults. If you leave them empty, the system continues using its default values.
You're All Set!
Your Facebook Pixel is now tracking activity on your enrollment pages, and Facebook Conversions API is sending conversion data when families submit forms or book tours. This gives you accurate data to optimize your ad campaigns and attract more families to your center.