
Pricing columns help prospective families compare tuition plans side-by-side on your enrollment pages. This guide shows you how to add and customize pricing tables that showcase your childcare programs clearly.
When to Use Pricing Columns
Pricing columns work best when you offer multiple program options — like infant care, toddler programs, and preschool — or different payment plans. They make it easy for parents to see what's included at each level and choose the right fit for their family.
Adding a Pricing Table to Your Page
- Open your enrollment page in the Page Builder
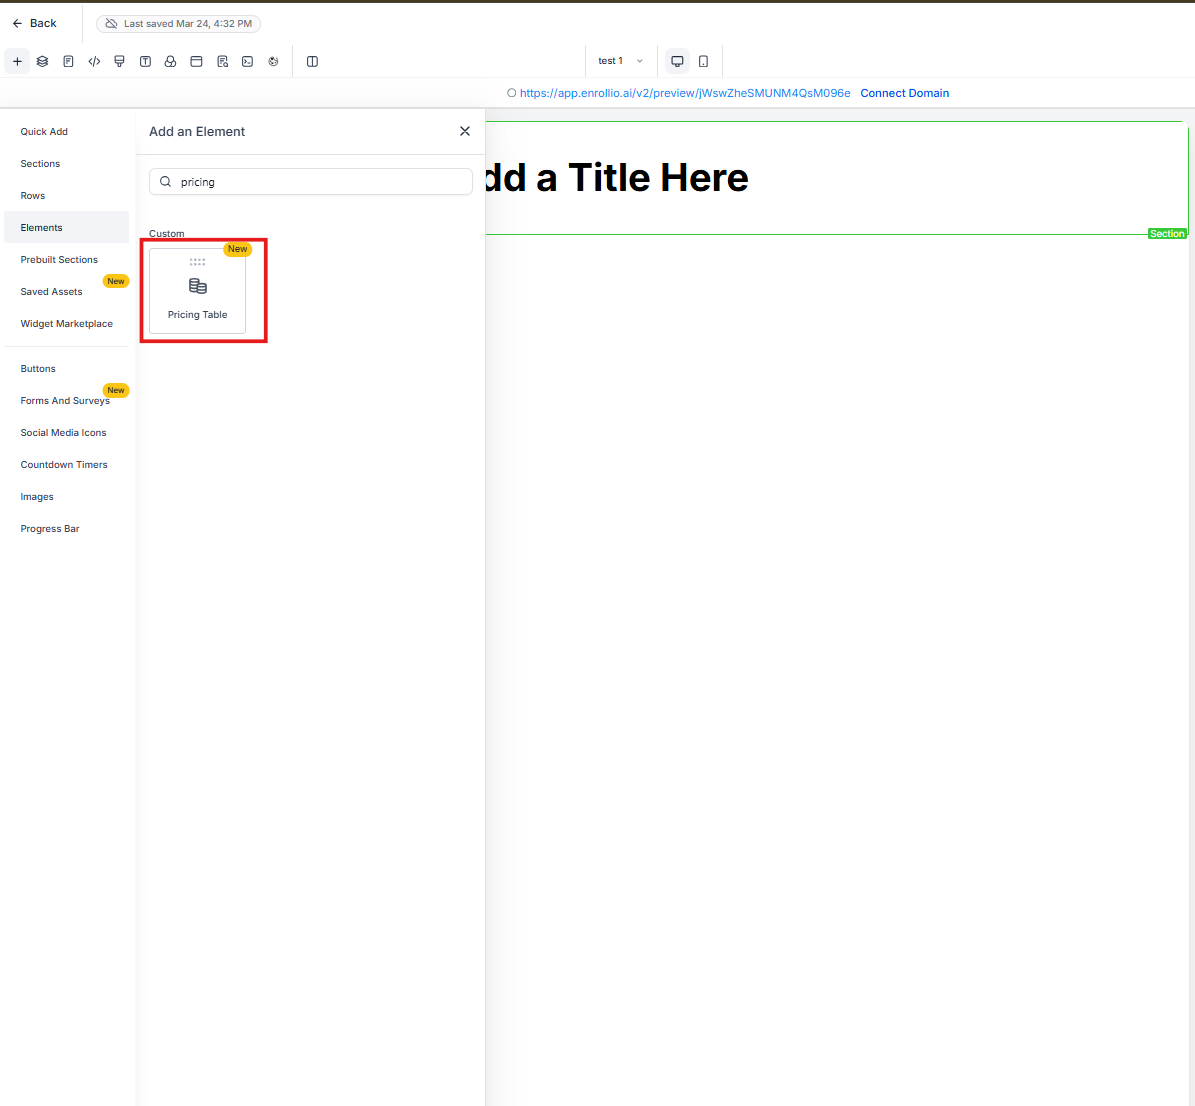
- Click the + button where you want your pricing table
- Select Pricing Table from the element library
- Drag it into position on your page
Customizing Your Pricing Columns
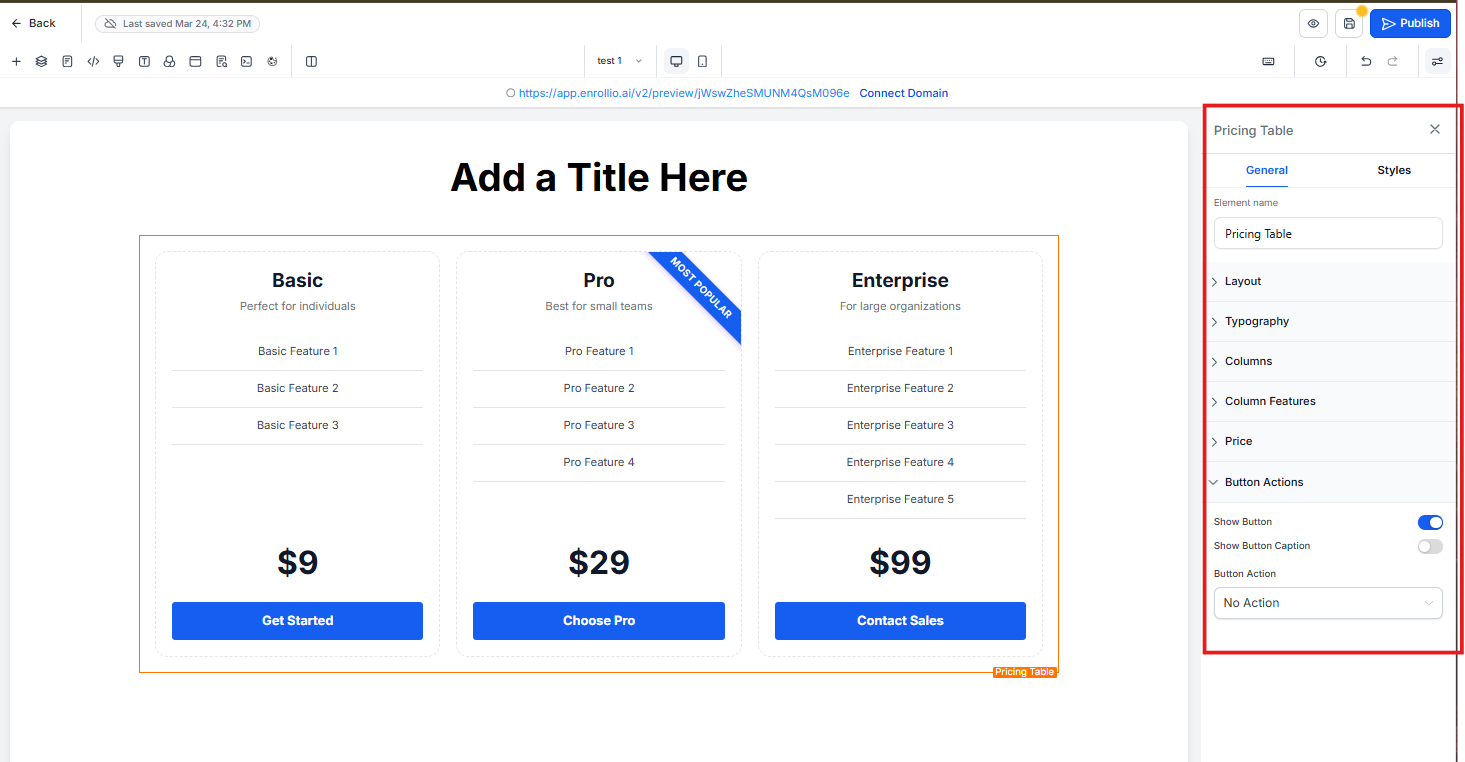
Click on your pricing table to open the settings panel. Here's what you can adjust:
Number of Columns
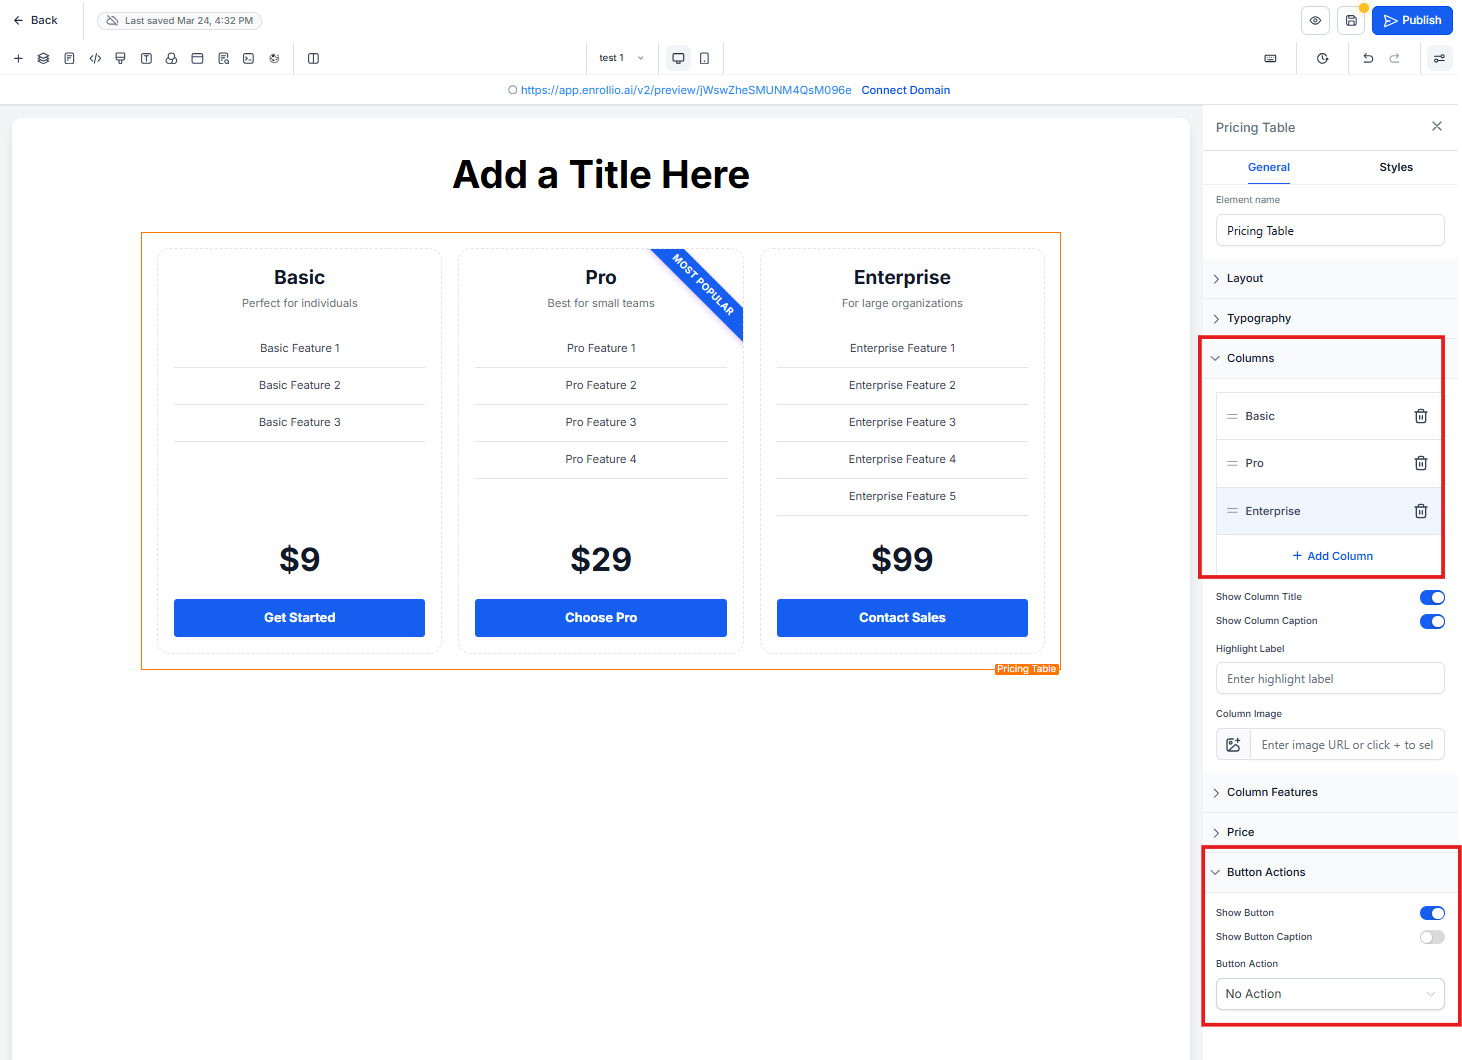
Add or remove pricing columns based on how many programs you're showcasing. Most centers show 2-4 options.
Column Content
For each program column, you can edit:
- Program name — "Infant Care," "Toddler Program," etc.
- Price — Display monthly tuition, weekly rates, or both
- Features list — What's included (hours, meals, curriculum, activities)
- Call-to-action button — Link to enrollment forms or tour booking
Highlight a Popular Option
Use the "Featured" toggle to make one column stand out. This draws attention to your most popular program or best value option.
Style Settings
Match your pricing table to your brand:
- Choose colors for backgrounds, text, and buttons
- Adjust spacing and padding
- Set column width and alignment
- Pick fonts that match your enrollment site
Pro Tip: Keep feature lists concise and parallel. Use checkmarks for included items and make sure each column has roughly the same number of features for clean visual alignment.
Connecting Pricing Columns to Enrollment
Each pricing column button can link to a different action:
- Enrollment form — Link directly to your enrollment application
- Tour scheduler — Let parents book a tour before committing
- Waitlist signup — Capture interest when spots are full
- Contact form — For families who want more information first
Mobile Optimization
Your pricing columns automatically stack on mobile devices so parents can easily scroll through options on their phones. Preview your page on mobile before publishing to ensure everything looks good.
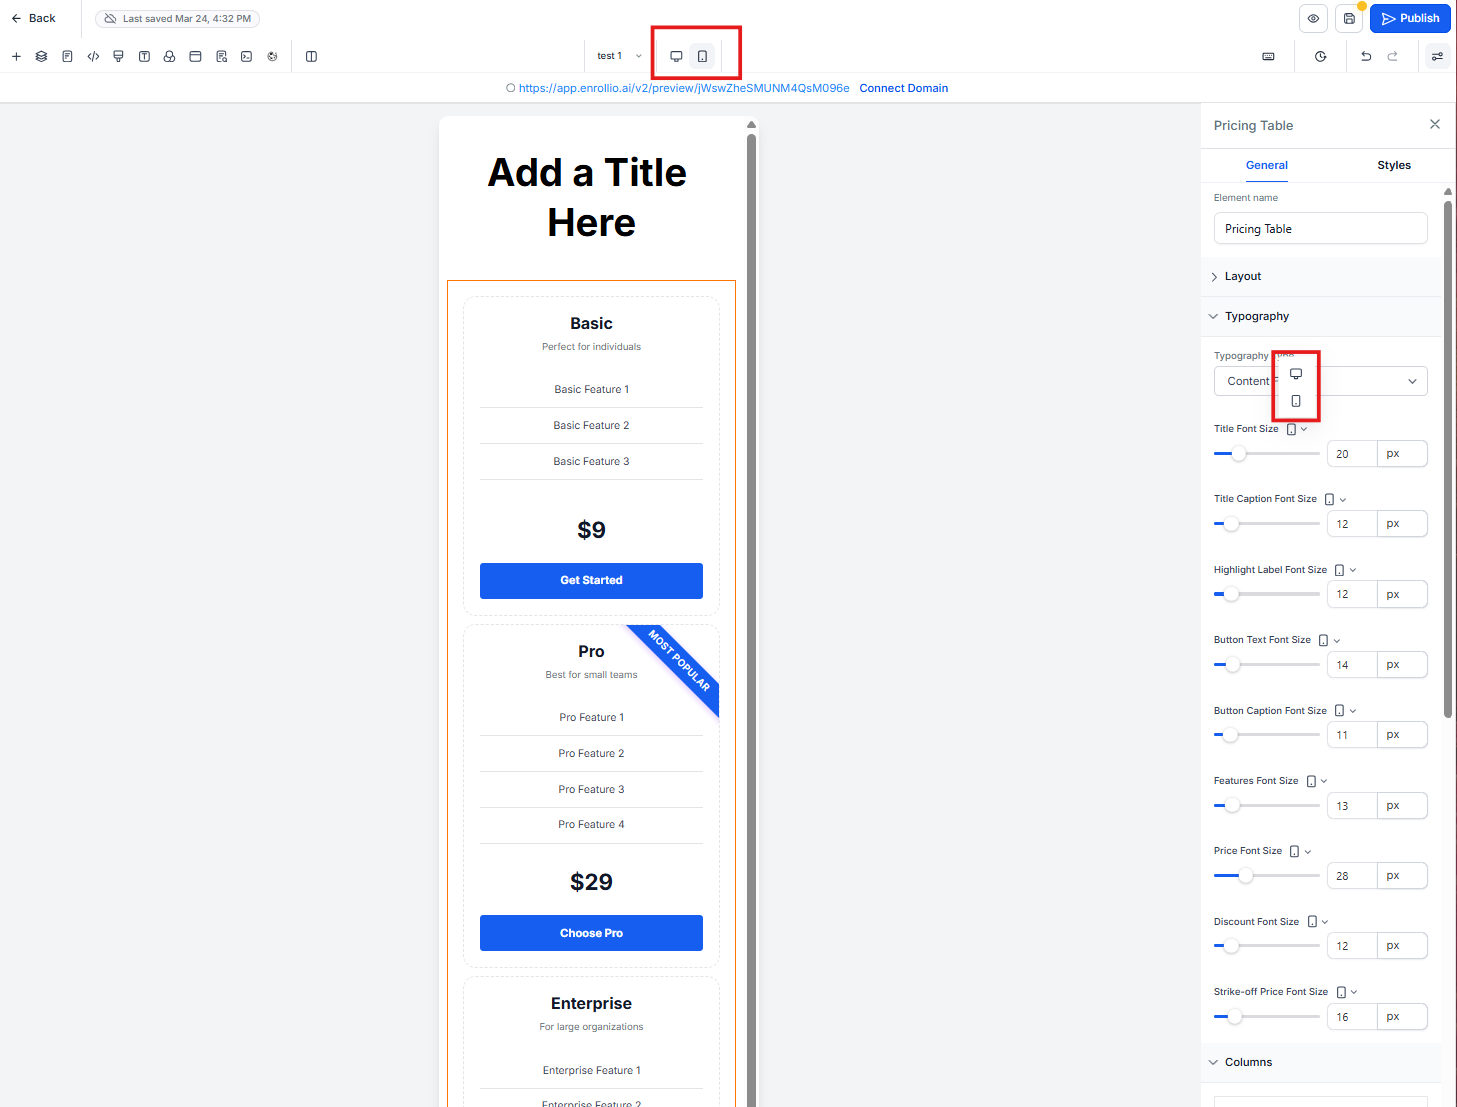
Pro Tip: Most parents browse on mobile first. Keep your feature lists short and your pricing clear — they should be able to compare options without zooming or squinting.
Testing Your Pricing Table
Before you publish:
- Click each button to verify links work correctly
- Check that prices display accurately
- View on mobile and desktop
- Ask a team member to review for clarity
Once everything looks good, click Publish to make your pricing table live.