
How to Build Home Pages in the Enrollio Website Builder
Your home page is often the first impression prospective families have of your childcare center. With Enrollio's website builder, you can create a professional, mobile-friendly home page that converts visitors into enrolled families — no coding required.
Before You Start
Make sure you have:
- Access to your Enrollio Dashboard
- Your childcare center's branding (logo, colors, photos)
- Key messaging about your program and philosophy
Step 1: Access the Website Builder
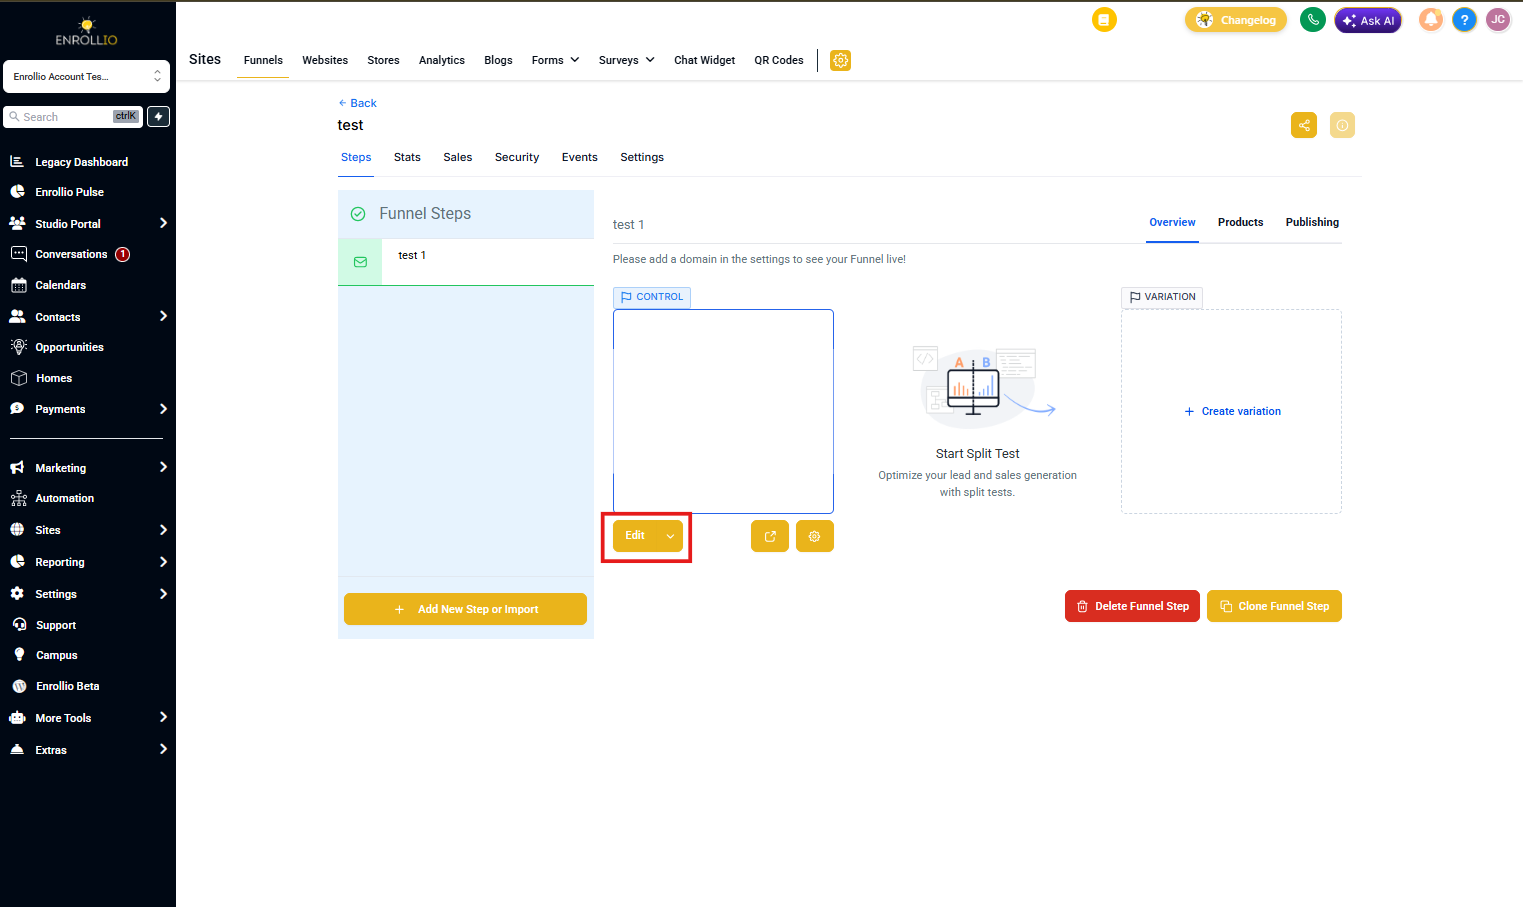
- Log into your Enrollio Dashboard
- Click Sites in the left navigation menu
- Select the site you want to edit, or click Create New Site to start fresh
- Click Edit to open the website builder
Step 2: Choose Your Home Page Layout
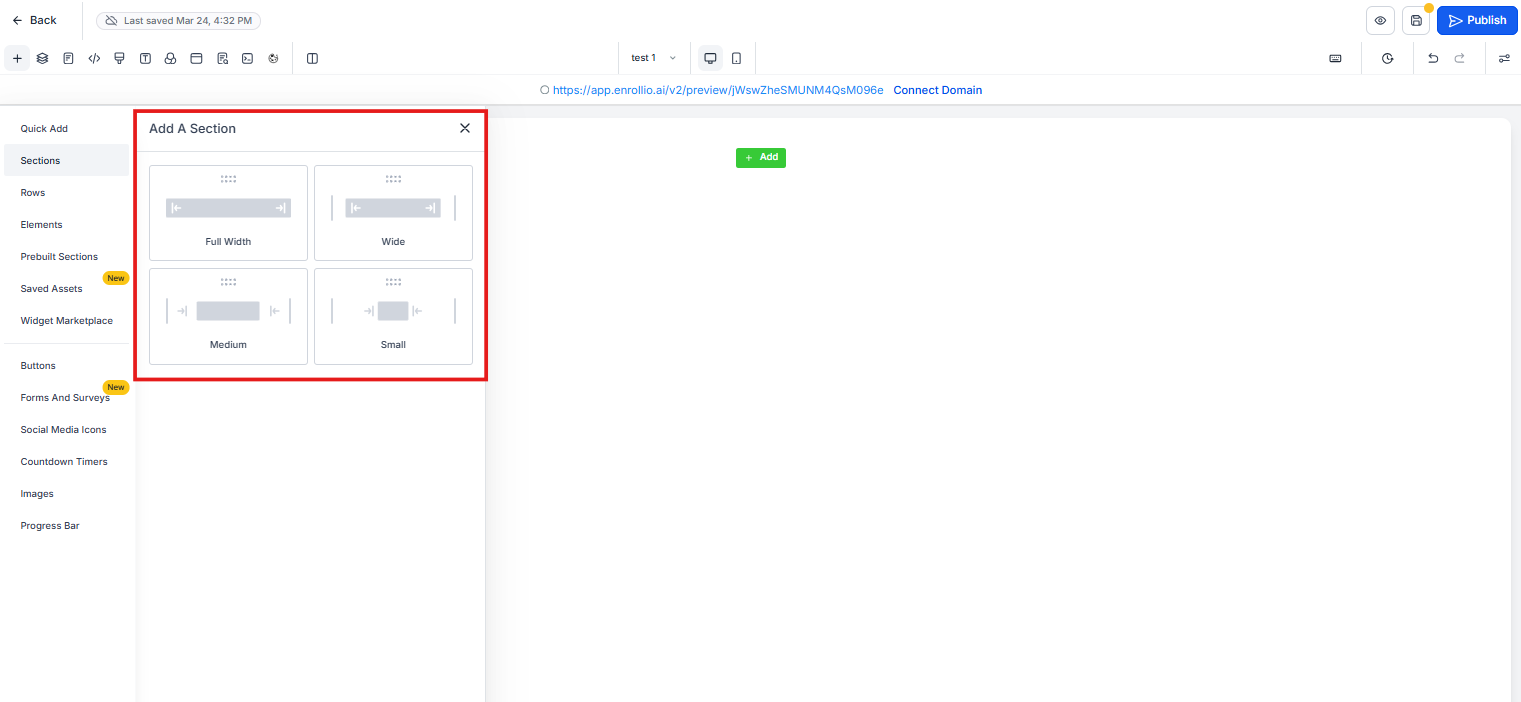
Enrollio offers pre-built sections designed specifically for childcare centers:
- In the website builder, click Add Section
- Browse templates like Hero Banner, Program Overview, Testimonials, and Tour Booking
- Click any section to add it to your page
- Drag sections to reorder them
Pro Tip: Start with a hero section that includes your center's name, a clear call-to-action (like "Schedule a Tour"), and a welcoming photo of your facility or staff with children.
Step 3: Customize Your Content
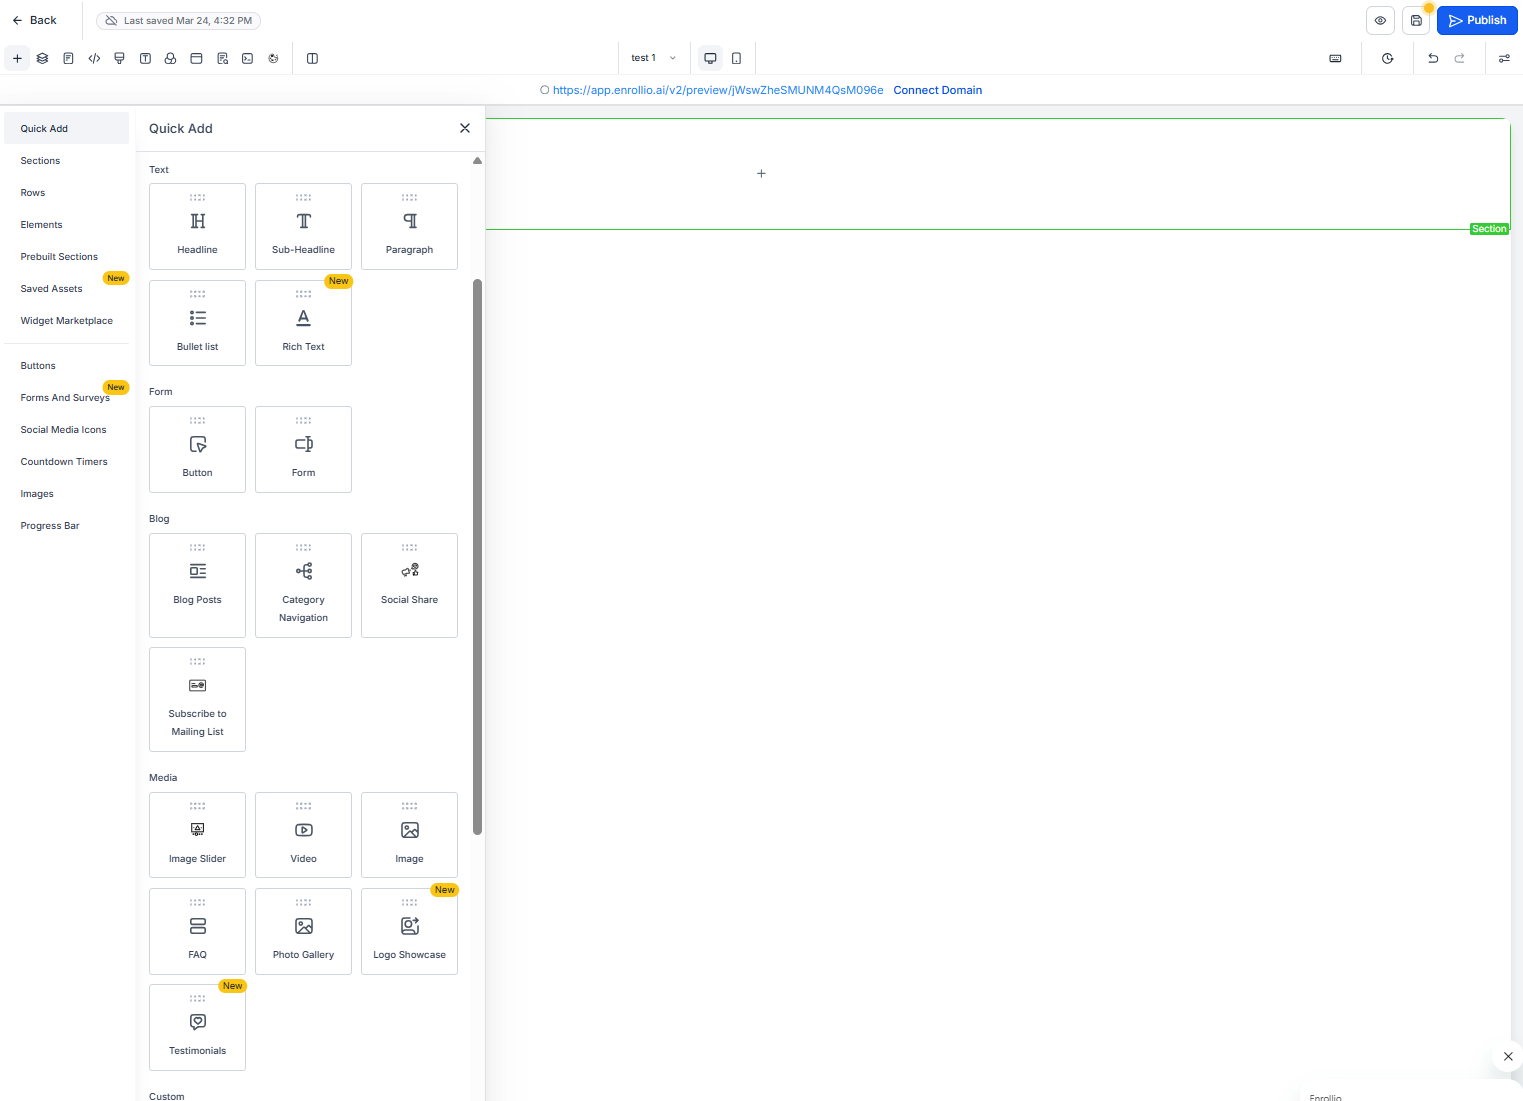
Click any element on the page to edit it:
- Text: Click to edit headlines, body copy, and button text
- Images: Click to upload photos of your center, classrooms, and activities
- Buttons: Link buttons to your tour booking page, enrollment form, or contact page
- Colors: Use the style panel to match your center's branding
Step 4: Add Essential Elements
Every effective childcare home page should include:
- Clear value proposition: What makes your center special?
- Tour booking button: Make it easy for parents to schedule a visit
- Age groups served: Help families quickly see if you're a fit
- Contact information: Phone number, address, and hours
- Social proof: Parent testimonials or reviews
Step 5: Make It Mobile-Friendly
Most parents will view your site on their phones:
- Click the Mobile icon at the top of the builder
- Preview how your page looks on different devices
- Adjust text sizes, button placement, and image scaling for mobile

Step 6: Connect Your Booking and Forms
Turn visitors into enrolled families:
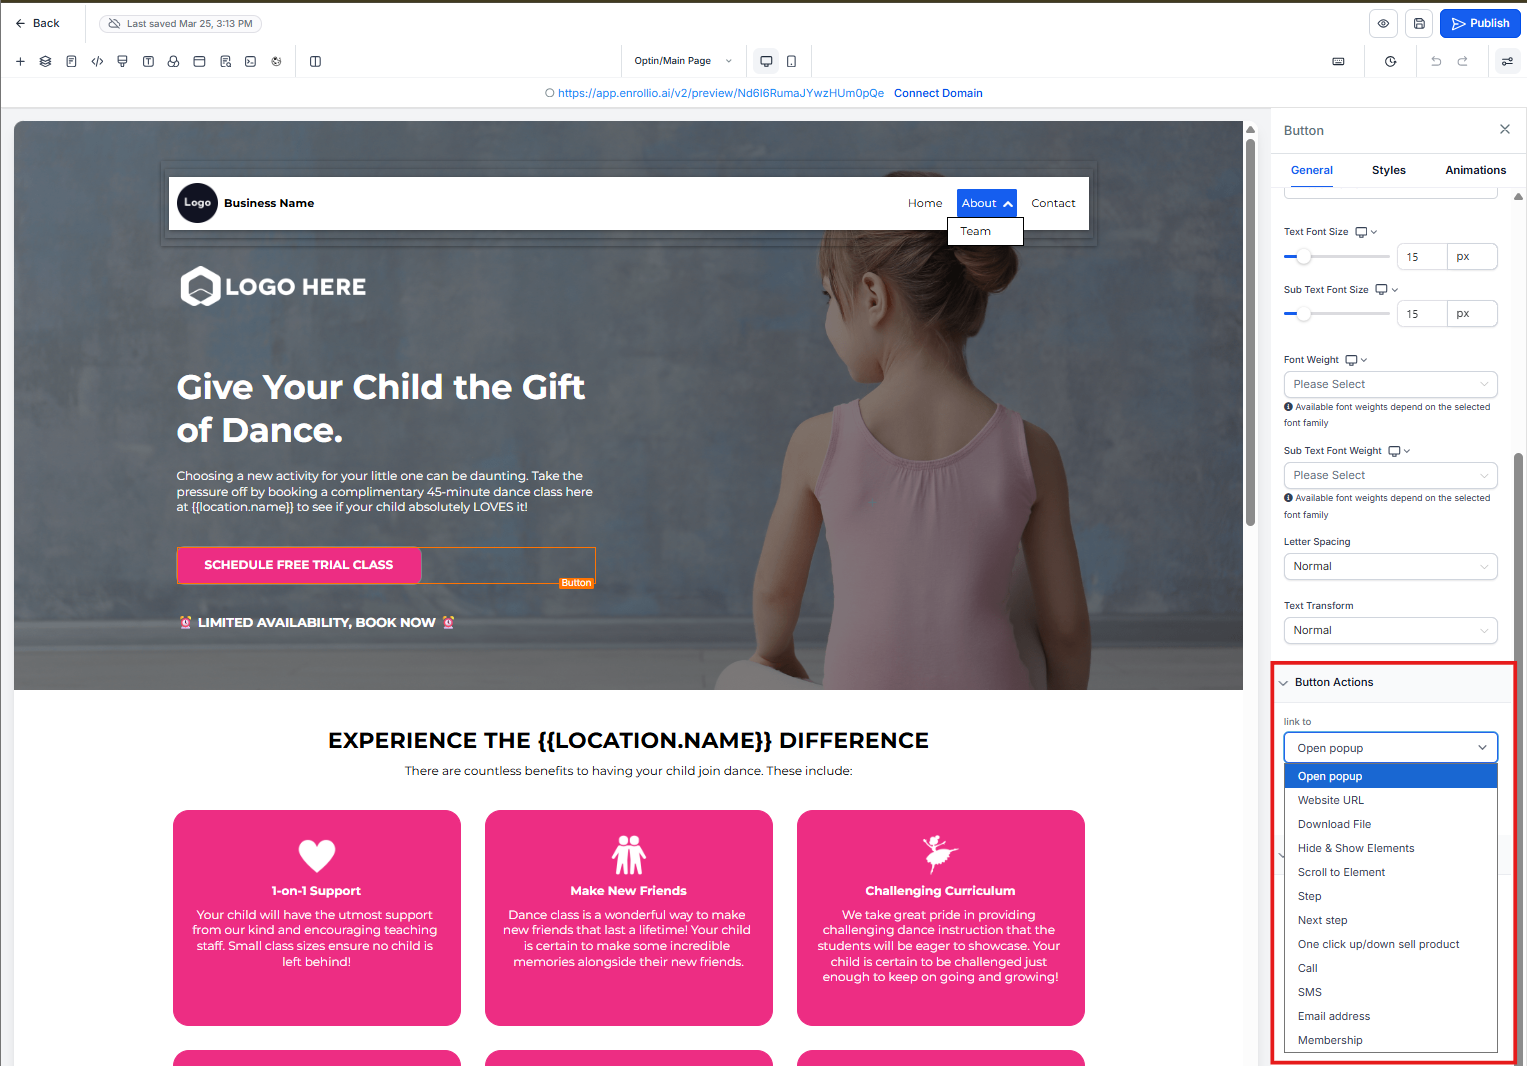
- Add a button or form to your home page
- In the button settings, select Book a Tour or Submit Form
- Choose your tour calendar or enrollment form from the dropdown
- Save your changes
Pro Tip: Place multiple calls-to-action throughout your home page. Parents at different stages of research need different next steps — some want to book a tour immediately, while others want to learn more first.
Step 7: Preview and Publish
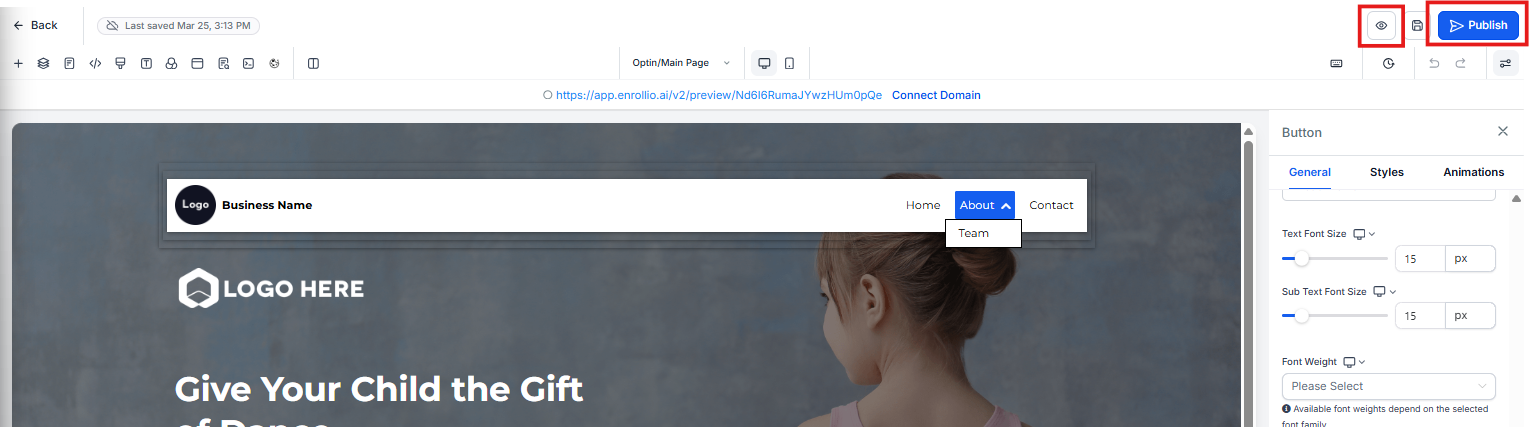
- Click Preview to see your page live
- Test all buttons and links
- Check that forms and booking calendars work correctly
- When ready, click Publish to make your page live
Next Steps
Now that your home page is live:
- Set up tracking to see how many visitors book tours
- Create additional pages (About, Programs, Contact)
- Connect your custom domain for a professional web address
- Add your site to Google Search Console for better visibility
Need Help?
If you get stuck or want feedback on your home page design, reach out to Enrollio support. We're here to help you create a site that fills your enrollment waitlist.