
How to Create and Send Invoices
Invoicing is essential for managing your childcare business finances. Whether you're billing for tuition, registration fees, or additional services, Enrollio makes it easy to create professional invoices and get paid quickly.
In this article, you'll learn how to create, customize, and send invoices to families — all from within Enrollio.
What You'll Learn
- How to create a new invoice
- How to customize invoice details and branding
- How to add taxes and discounts
- How to send invoices to families
- How to track invoice status and payments
Create a New Invoice
Follow these steps to create your first invoice:
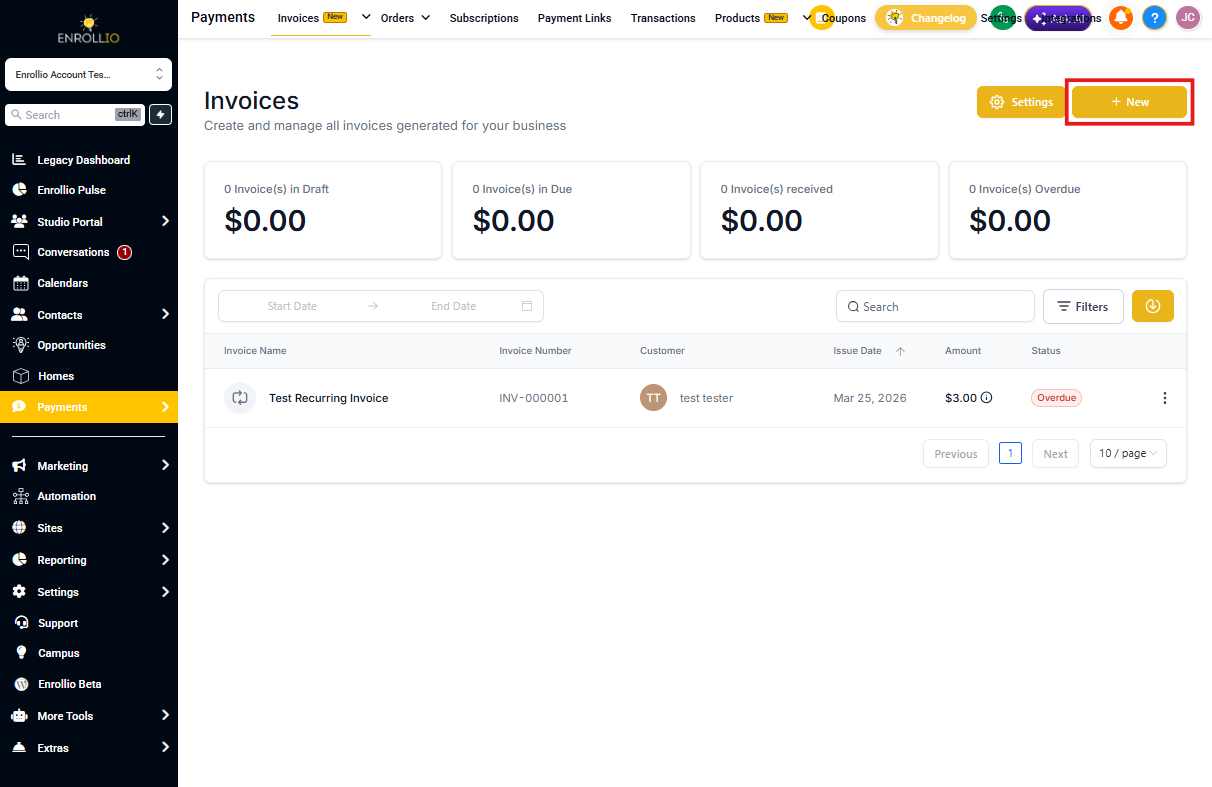
- Go to the Payments tab in your Enrollio dashboard
- Click on the Invoices tab
- Click the + New button to start creating your invoice
Customize Your Invoice Details
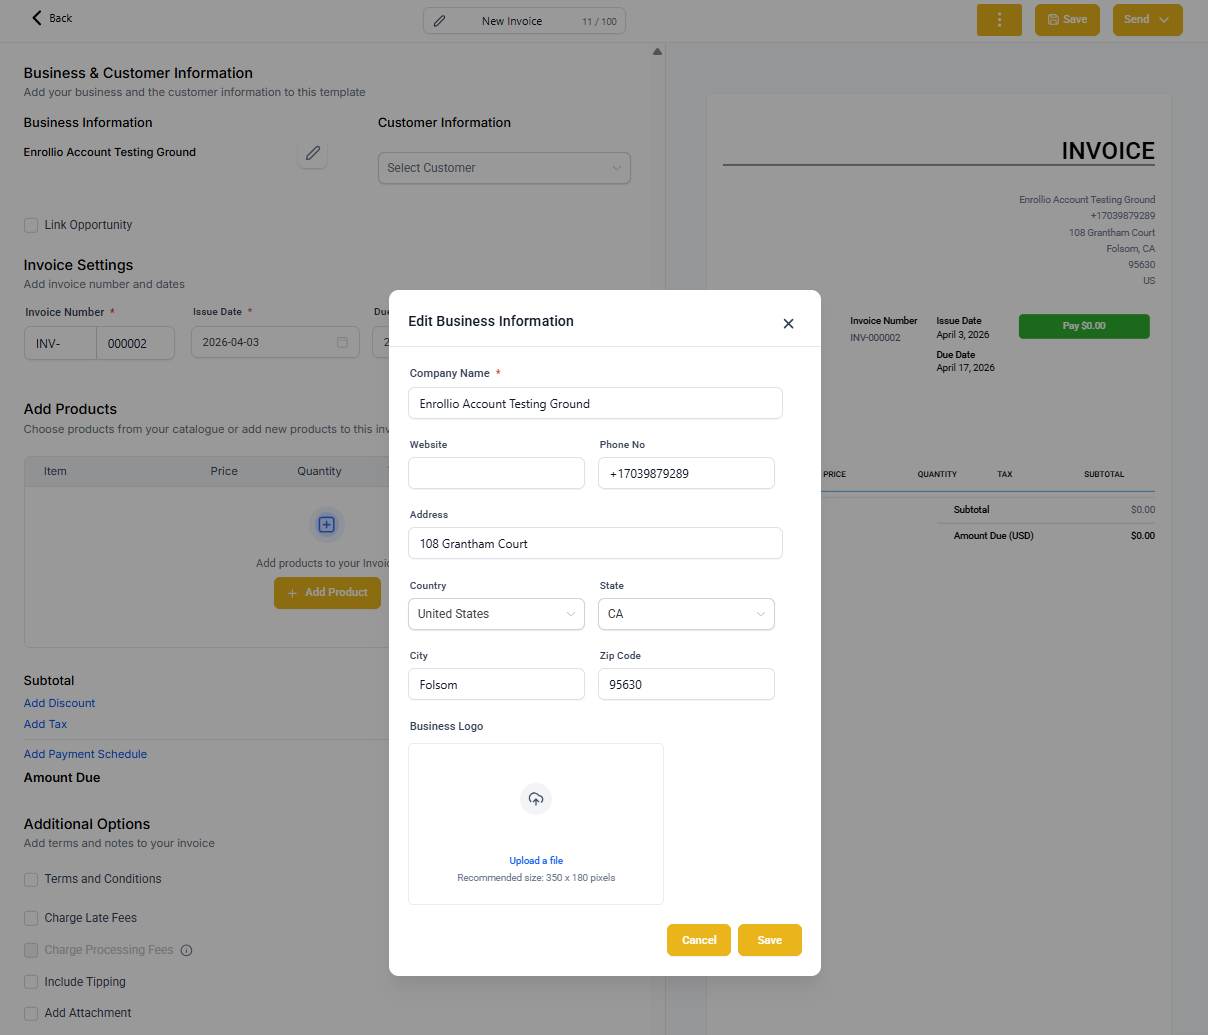
Update Your Business Information
Make your invoice look professional by adding your childcare center's details:
- Edit the "From" information: Click directly on the text to edit your business name, address, and contact information
- Add your logo: Click on the image placeholder to open the media library, where you can upload or select your center's logo
Add Family and Invoice Details
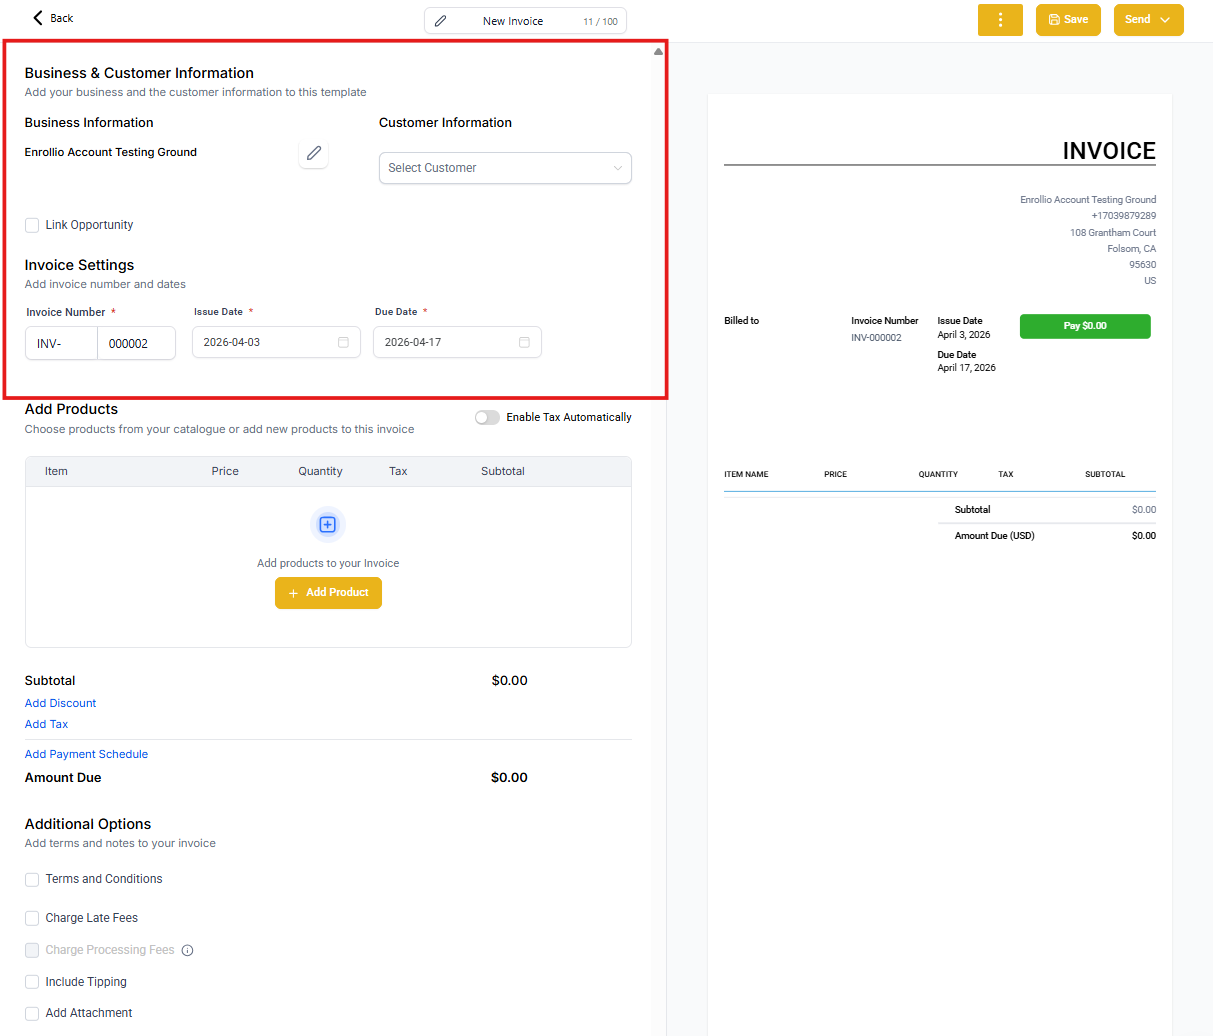
Now complete the invoice-specific information:
- Select the family from your contact list
- Edit the Invoice number if needed (Enrollio auto-generates these)
- Set the Issue date and Due date
Add Line Items
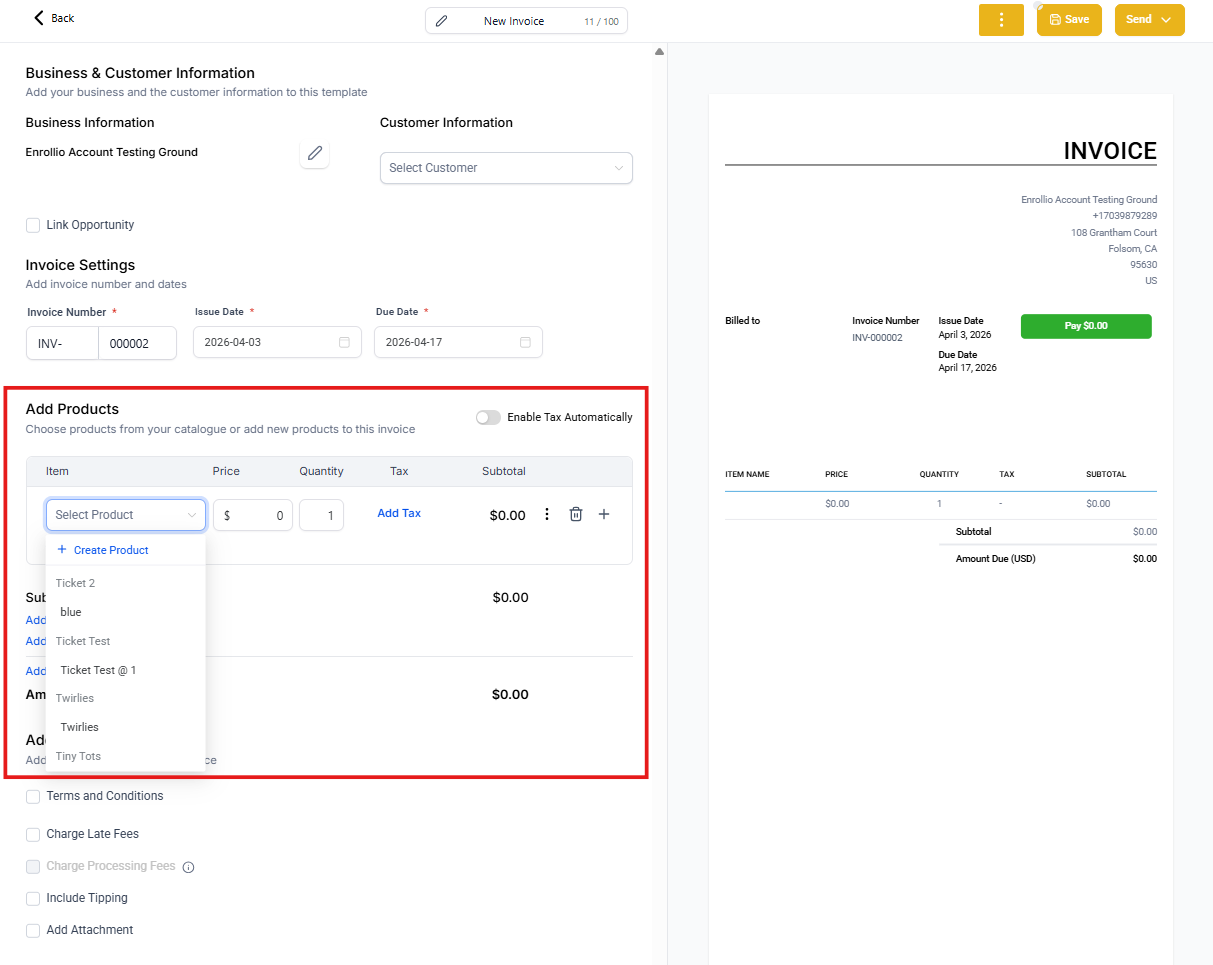
Add the services or products you're billing for:
- Click Add an item
- Select from products you've created (like tuition, registration fees, field trips, etc.)
- Adjust the price and quantity as needed for this specific invoice
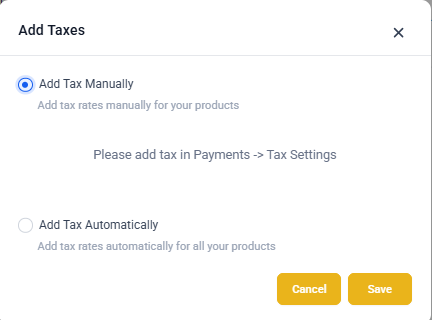
Add Taxes to Your Invoice
If you need to collect sales tax or other taxes on your services:
- Click Tax Settings
- Click Add Tax
- Enter the following:
- Tax name (e.g., "State Sales Tax")
- Tax rate in percentage
- Description or Tax ID number (optional)
- Click Save
The tax will automatically calculate based on your invoice total.
Add a Discount
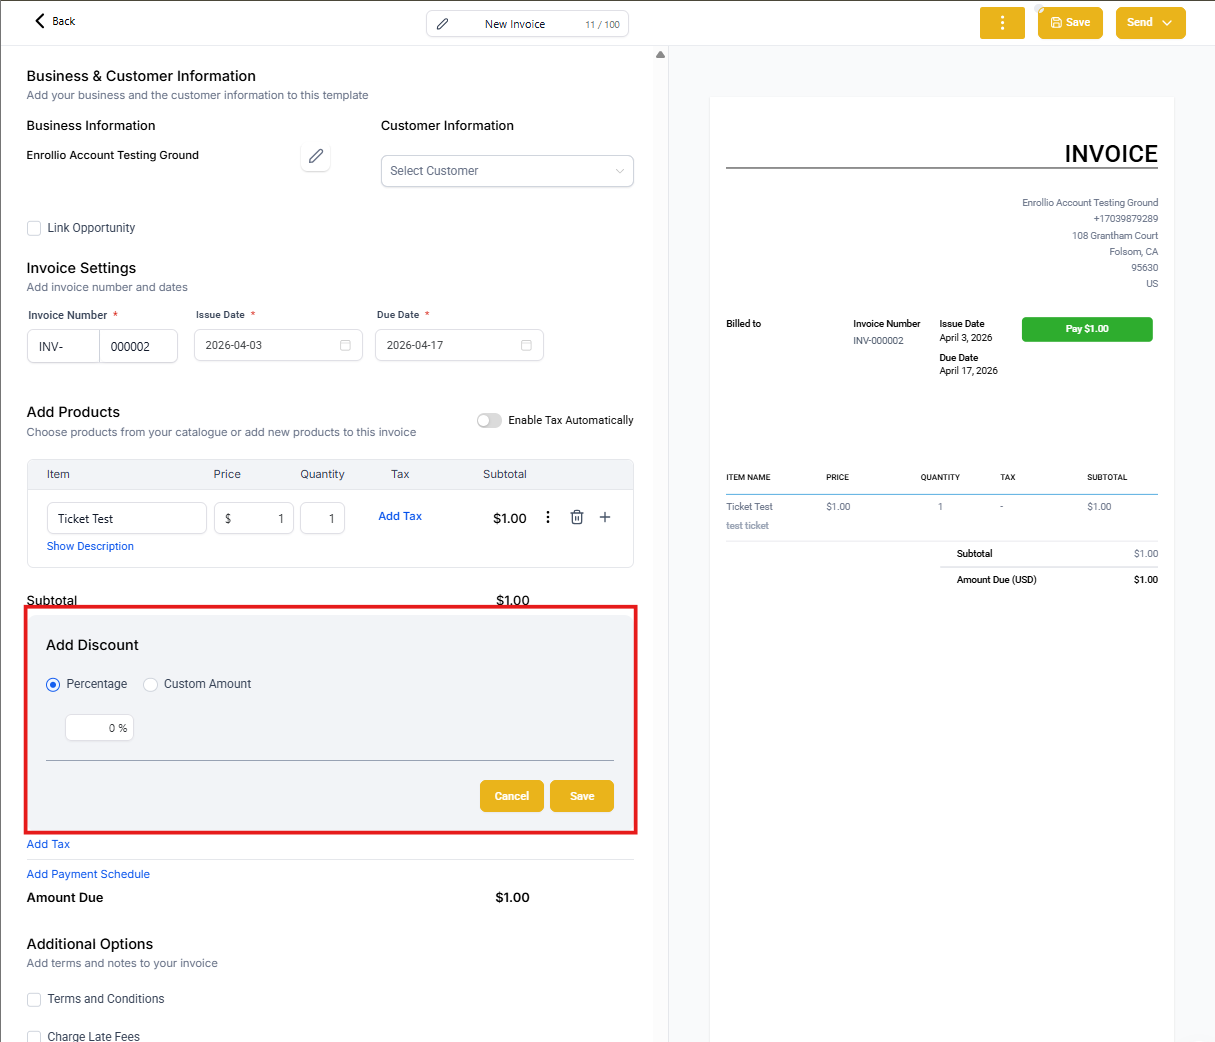
Offering a sibling discount or early payment incentive? Here's how to add it:
- Click the Add discount button on your invoice
- Enter the discount amount (either as a percentage or fixed dollar amount)
- Add a description (like "Sibling Discount" or "Early Payment")
The discount will automatically adjust your invoice total.
Send Your Invoice
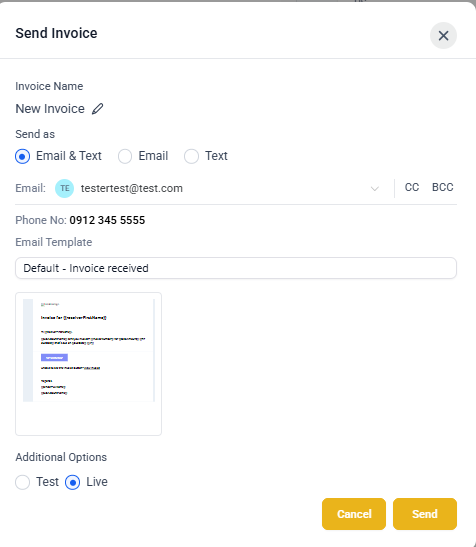
Once your invoice is ready, you can send it directly to the family:
- Click the green Send button in the top right corner
- Choose how to send the invoice:
- Email — sends to the family's email address
- Text message — sends a payment link via SMS
- Both email and text
- Use the Advanced options to switch between live and test mode (helpful for testing your setup)
- Click Send Invoice
Track Invoice Status
Keep tabs on which families have paid and which invoices are still outstanding:
View All Invoices
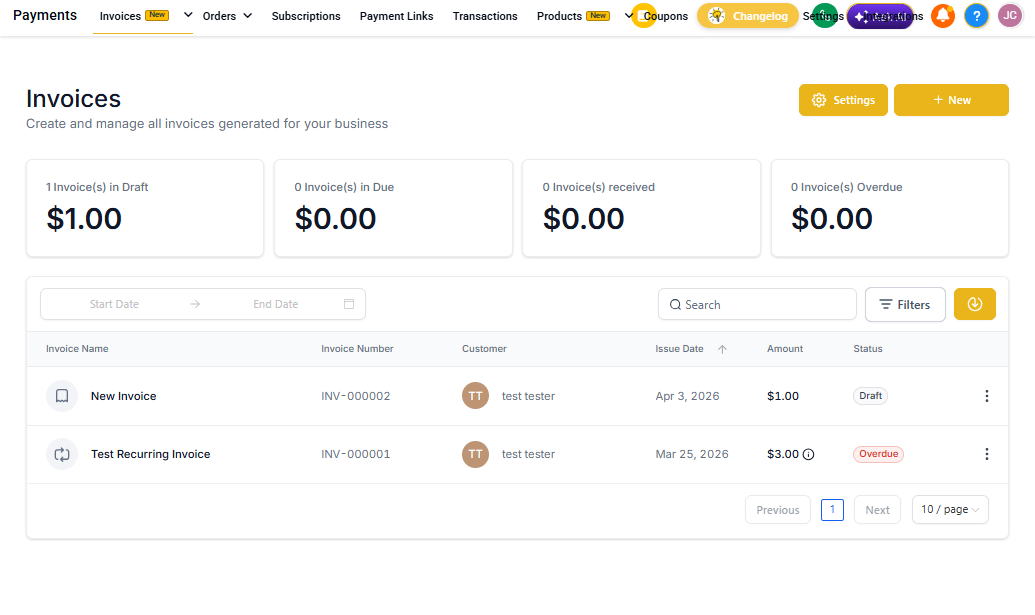
- Go to Payments > Invoices
- You'll see a list of all invoices with their current status:
- Draft — not yet sent
- Sent — delivered but not paid
- Paid — payment received
- Overdue — past the due date
- Use the filters to view invoices by status or date range
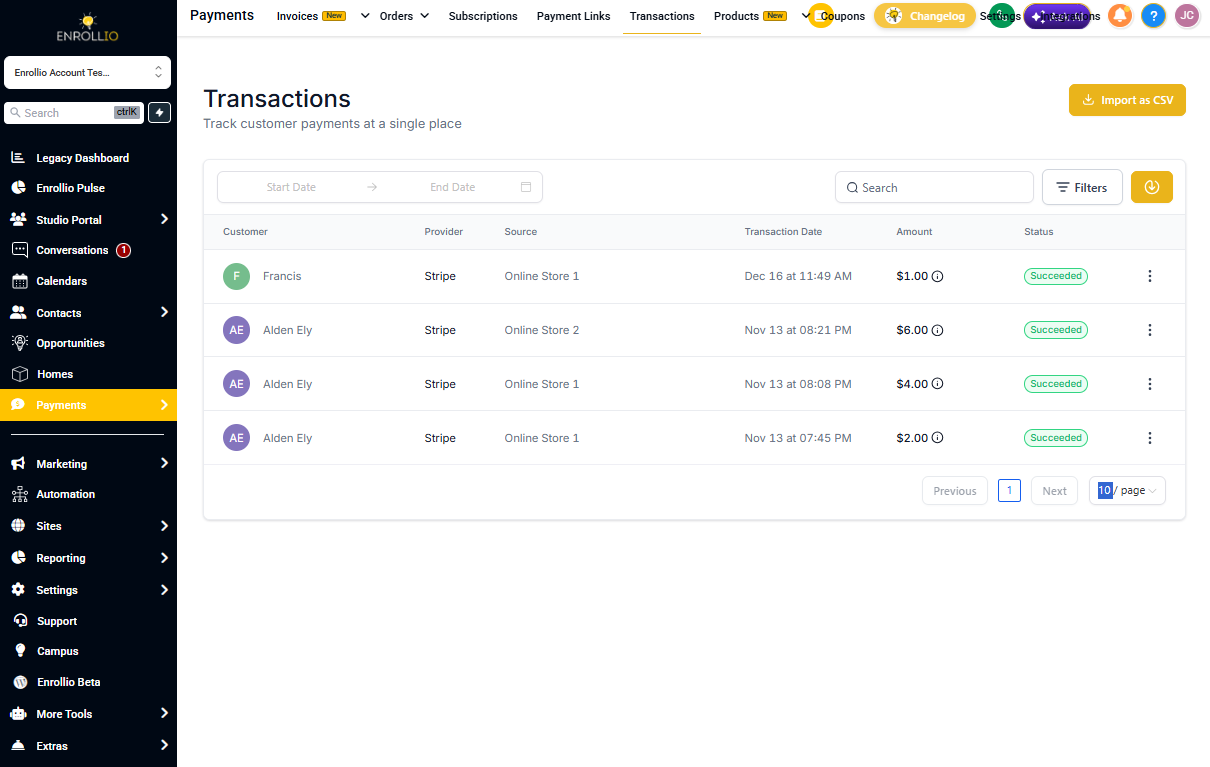
Check Invoice Transactions
You can also view invoice payments in your transaction history:
- Go to Payments > Transactions
- Filter by successful or failed transactions
- Click on any transaction to view the full invoice details
Next Steps
Now that you know how to create invoices, explore these related features:
- Recurring Invoices — automatically bill families monthly for tuition
- Payment Schedules — set up installment plans for registration fees
- QuickBooks Integration — sync your invoices with your accounting software