
How to Add Countdown Timers to Your Enrollment Emails
Countdown timers create urgency in your enrollment campaigns by showing parents exactly how much time they have left to claim a spot, register for an open house, or take advantage of a limited-time discount.
Why Use a Countdown Timer?
Creates Urgency: Parents are more likely to complete enrollment when they see time running out on a promotion or waitlist opportunity.
Enhances Your Emails: Adds a visually engaging element that draws attention to your call-to-action.
How Countdown Timers Work in Emails
Countdown timers display as animated GIFs in your emails. Here's what happens when a parent opens your email:
Dynamic Updates: The timer checks the current time and counts down for up to 60 seconds from when the email is opened.
Example: You're running a tour registration that closes at midnight on December 25th. A parent opens your email on December 24th at noon. They'll see "12 hours left" and watch it count down to "11 hours 59 minutes left." The countdown continues for 60 seconds, then pauses. If they close and reopen the email later, the timer refreshes and shows the updated time remaining.
Why This Approach? This keeps your email size manageable while still creating that critical sense of urgency.
Note About Apple Mail: Apple Mail caches GIFs, which means the timer may not refresh properly when parents reopen the same email multiple times. The countdown will work correctly on the first open, but subsequent opens might show the same cached animation. This is an Apple Mail limitation that affects all email countdown timers.
How to Add a Countdown Timer to Your Email
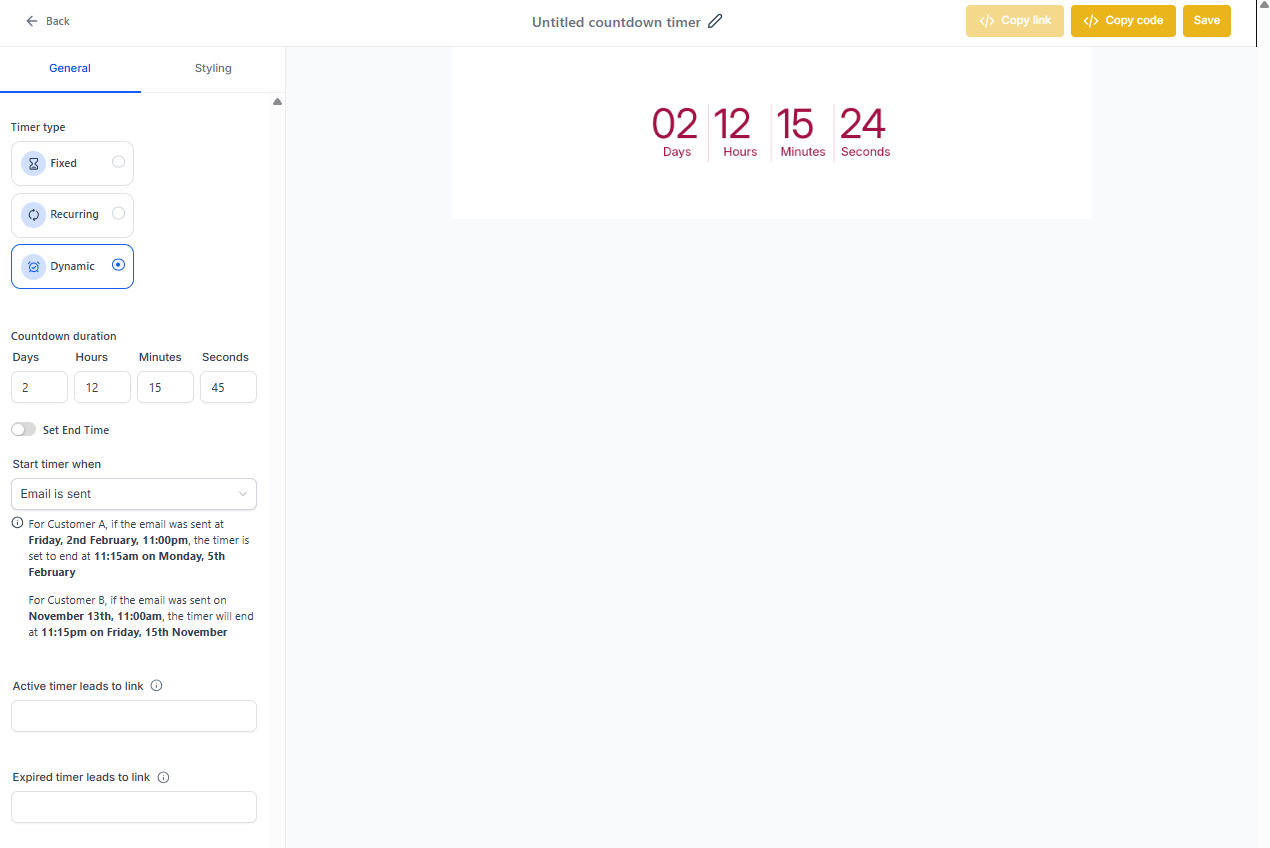
Step 1: Create Your Countdown Timer
- Go to Marketing > Countdown Timer
- Click Create New Timer
- Set your end date and time (e.g., enrollment deadline, open house date)
- Customize the timer design to match your branding
- Save your timer
Step 2: Add the Timer to Your Email Campaign
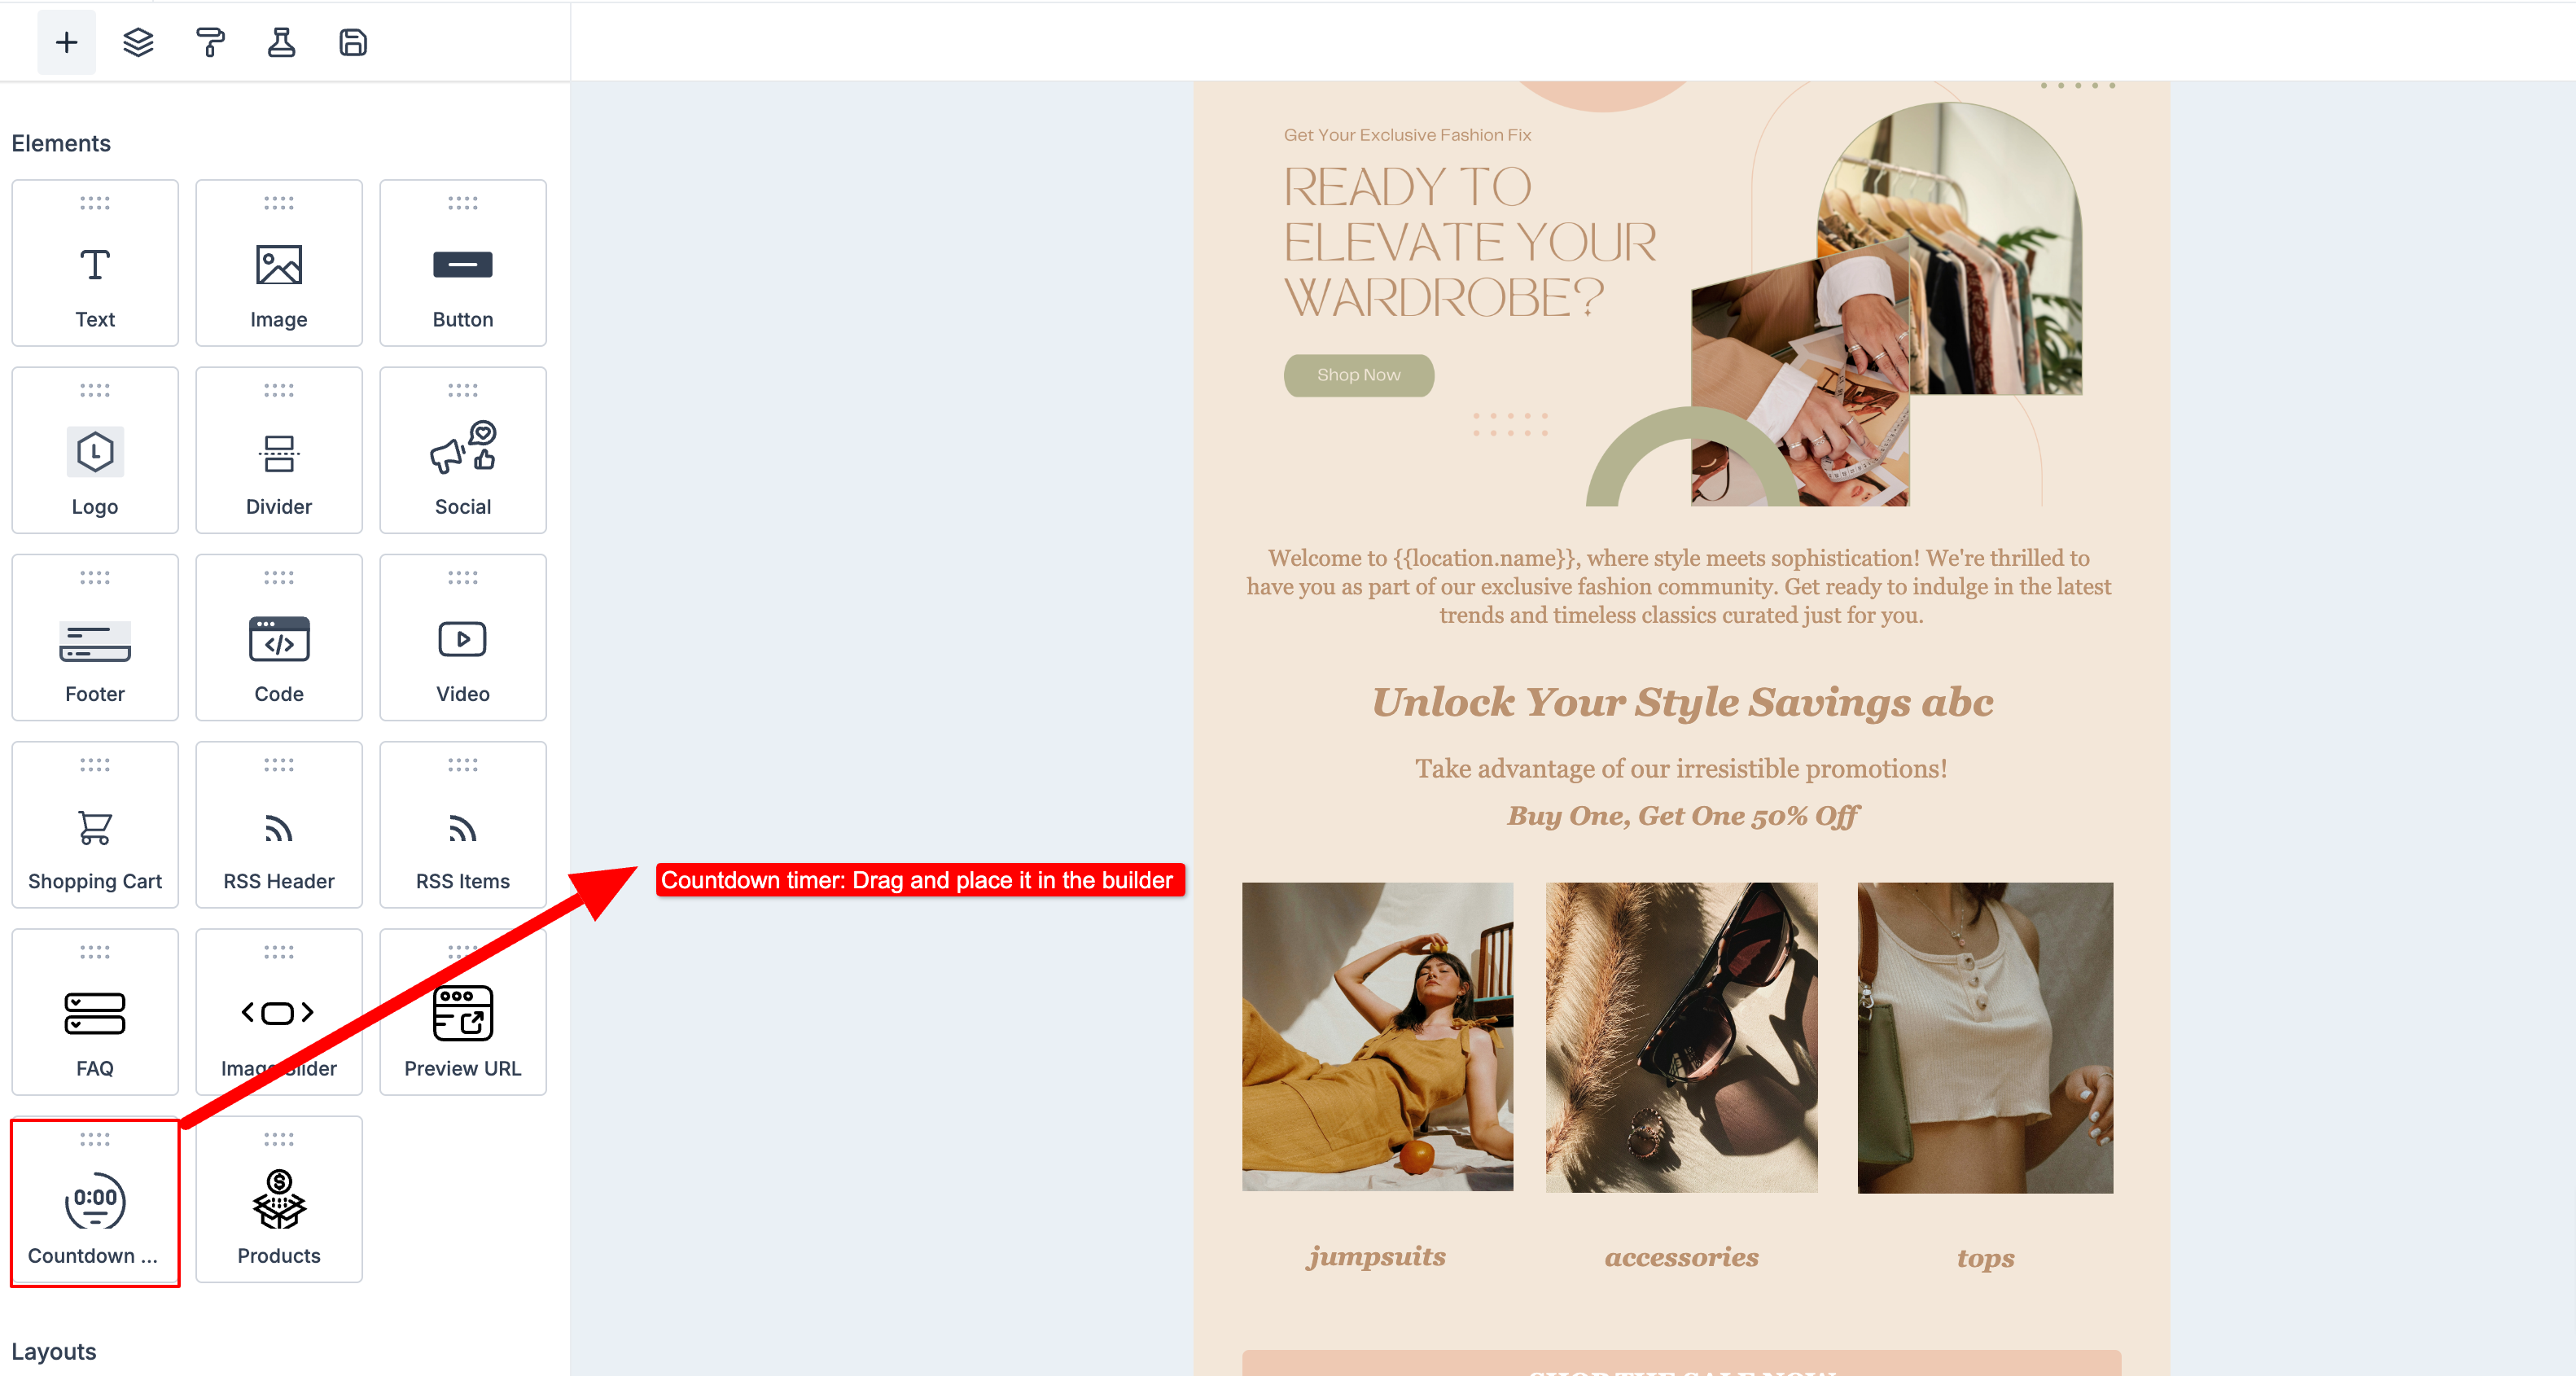
- Navigate to Marketing > Email
- Open an existing email template or create a new campaign
- In the email builder, drag the Countdown Timer element into your email
- Select the timer you just created from the dropdown menu
Step 3: Customize Timer Placement
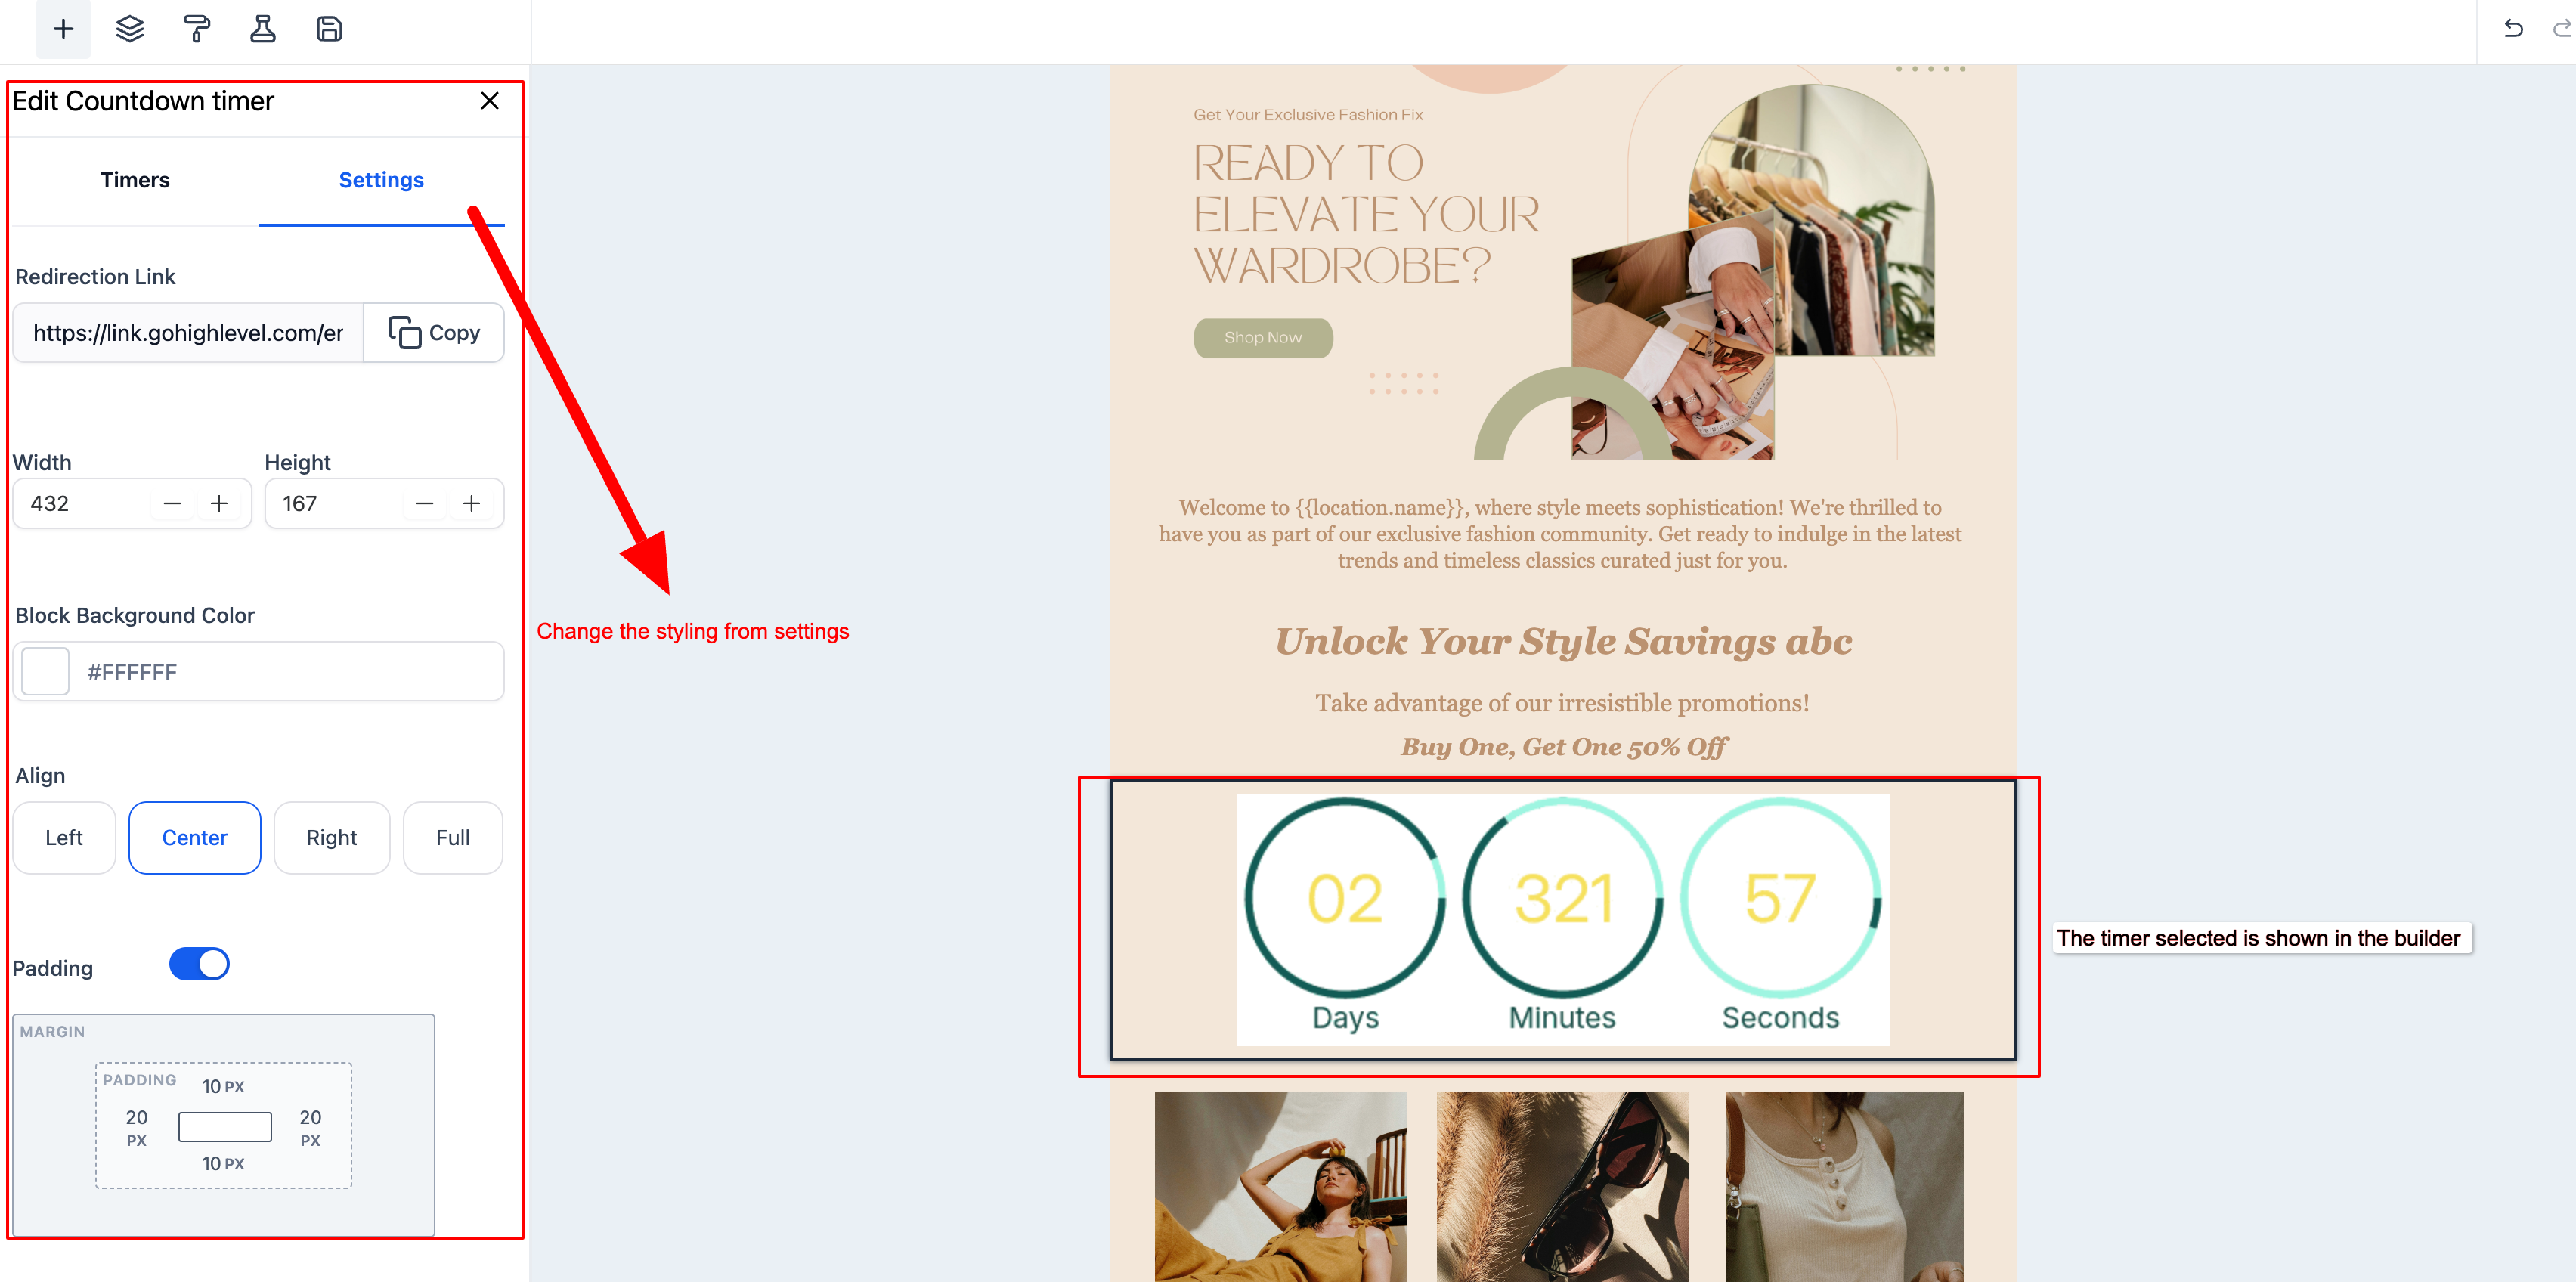
- Click the timer element to open settings
- Adjust alignment (left, center, or right)
- Set background color to match your email design
- Adjust padding for proper spacing
Step 4: Add Your Call-to-Action
- In the timer settings, find the Redirection Link field
- Copy this URL
- Paste it into any button or text link in your email (e.g., "Register Now" or "Claim Your Spot")
Pro Tip: Place your countdown timer near the top of enrollment deadline emails or limited-time offers. Pair it with a clear button like "Reserve Your Spot" or "Register for Open House" to maximize conversions.
Best Practices for Enrollment Emails
- Tour Registration Deadlines: "Only 3 hours left to book your spot for tomorrow's tour!"
- Waitlist Opportunities: "You have 24 hours to claim this opening before we move to the next family."
- Early Bird Discounts: "Midnight tonight: Save $200 on enrollment fees."
- Open House Events: "Registration closes in 6 hours — don't miss out!"
Related Articles
- Getting Started with Countdown Timers
- How to Create a Recurring Timer
- Using Countdown Timers on Landing Pages