
XML sitemaps help search engines like Google crawl and index your childcare center's website more effectively. When you add your sitemap to your robots.txt file, search engines are automatically notified about your site's structure, which can improve your search rankings and visibility to prospective families.
The good news? Enrollio's blog feature includes automatic sitemap generation. Every time you publish a new blog post, your sitemap updates automatically—no manual work required.
Setting Up Your Blog Sitemap
Step 1: Connect Your Domain
Before you can generate a sitemap, you need to connect a custom domain to your Enrollio account.
- Go to Sites in your Enrollio dashboard
- Click Domains
- Follow the domain setup process to connect your childcare center's domain
Step 2: Access Your XML Sitemap
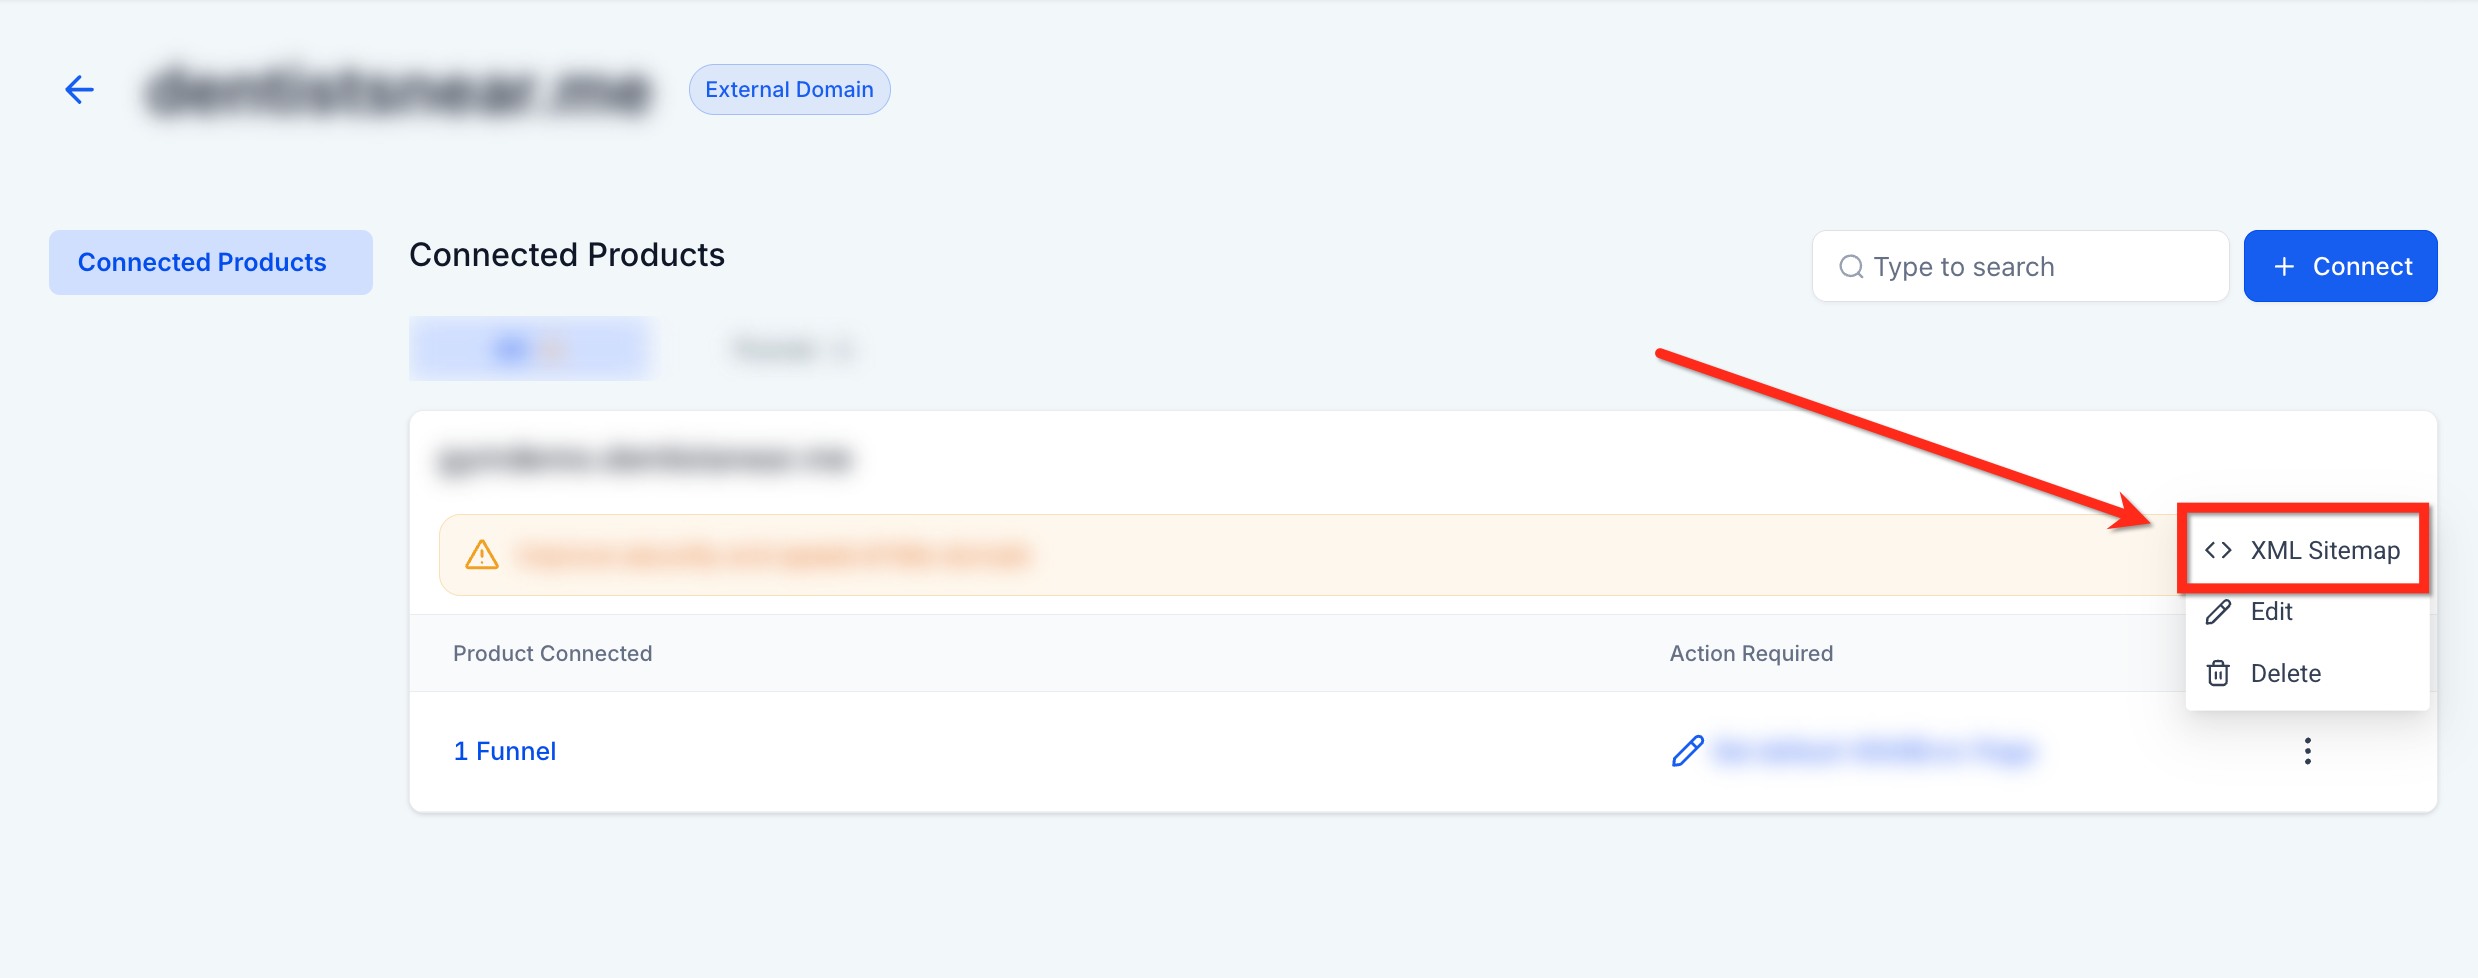
- After connecting your domain, click the three-dot menu next to your domain name
- Select Visit XML Sitemap
Step 3: Select Pages to Include
In the XML Sitemap settings, you'll see two steps:
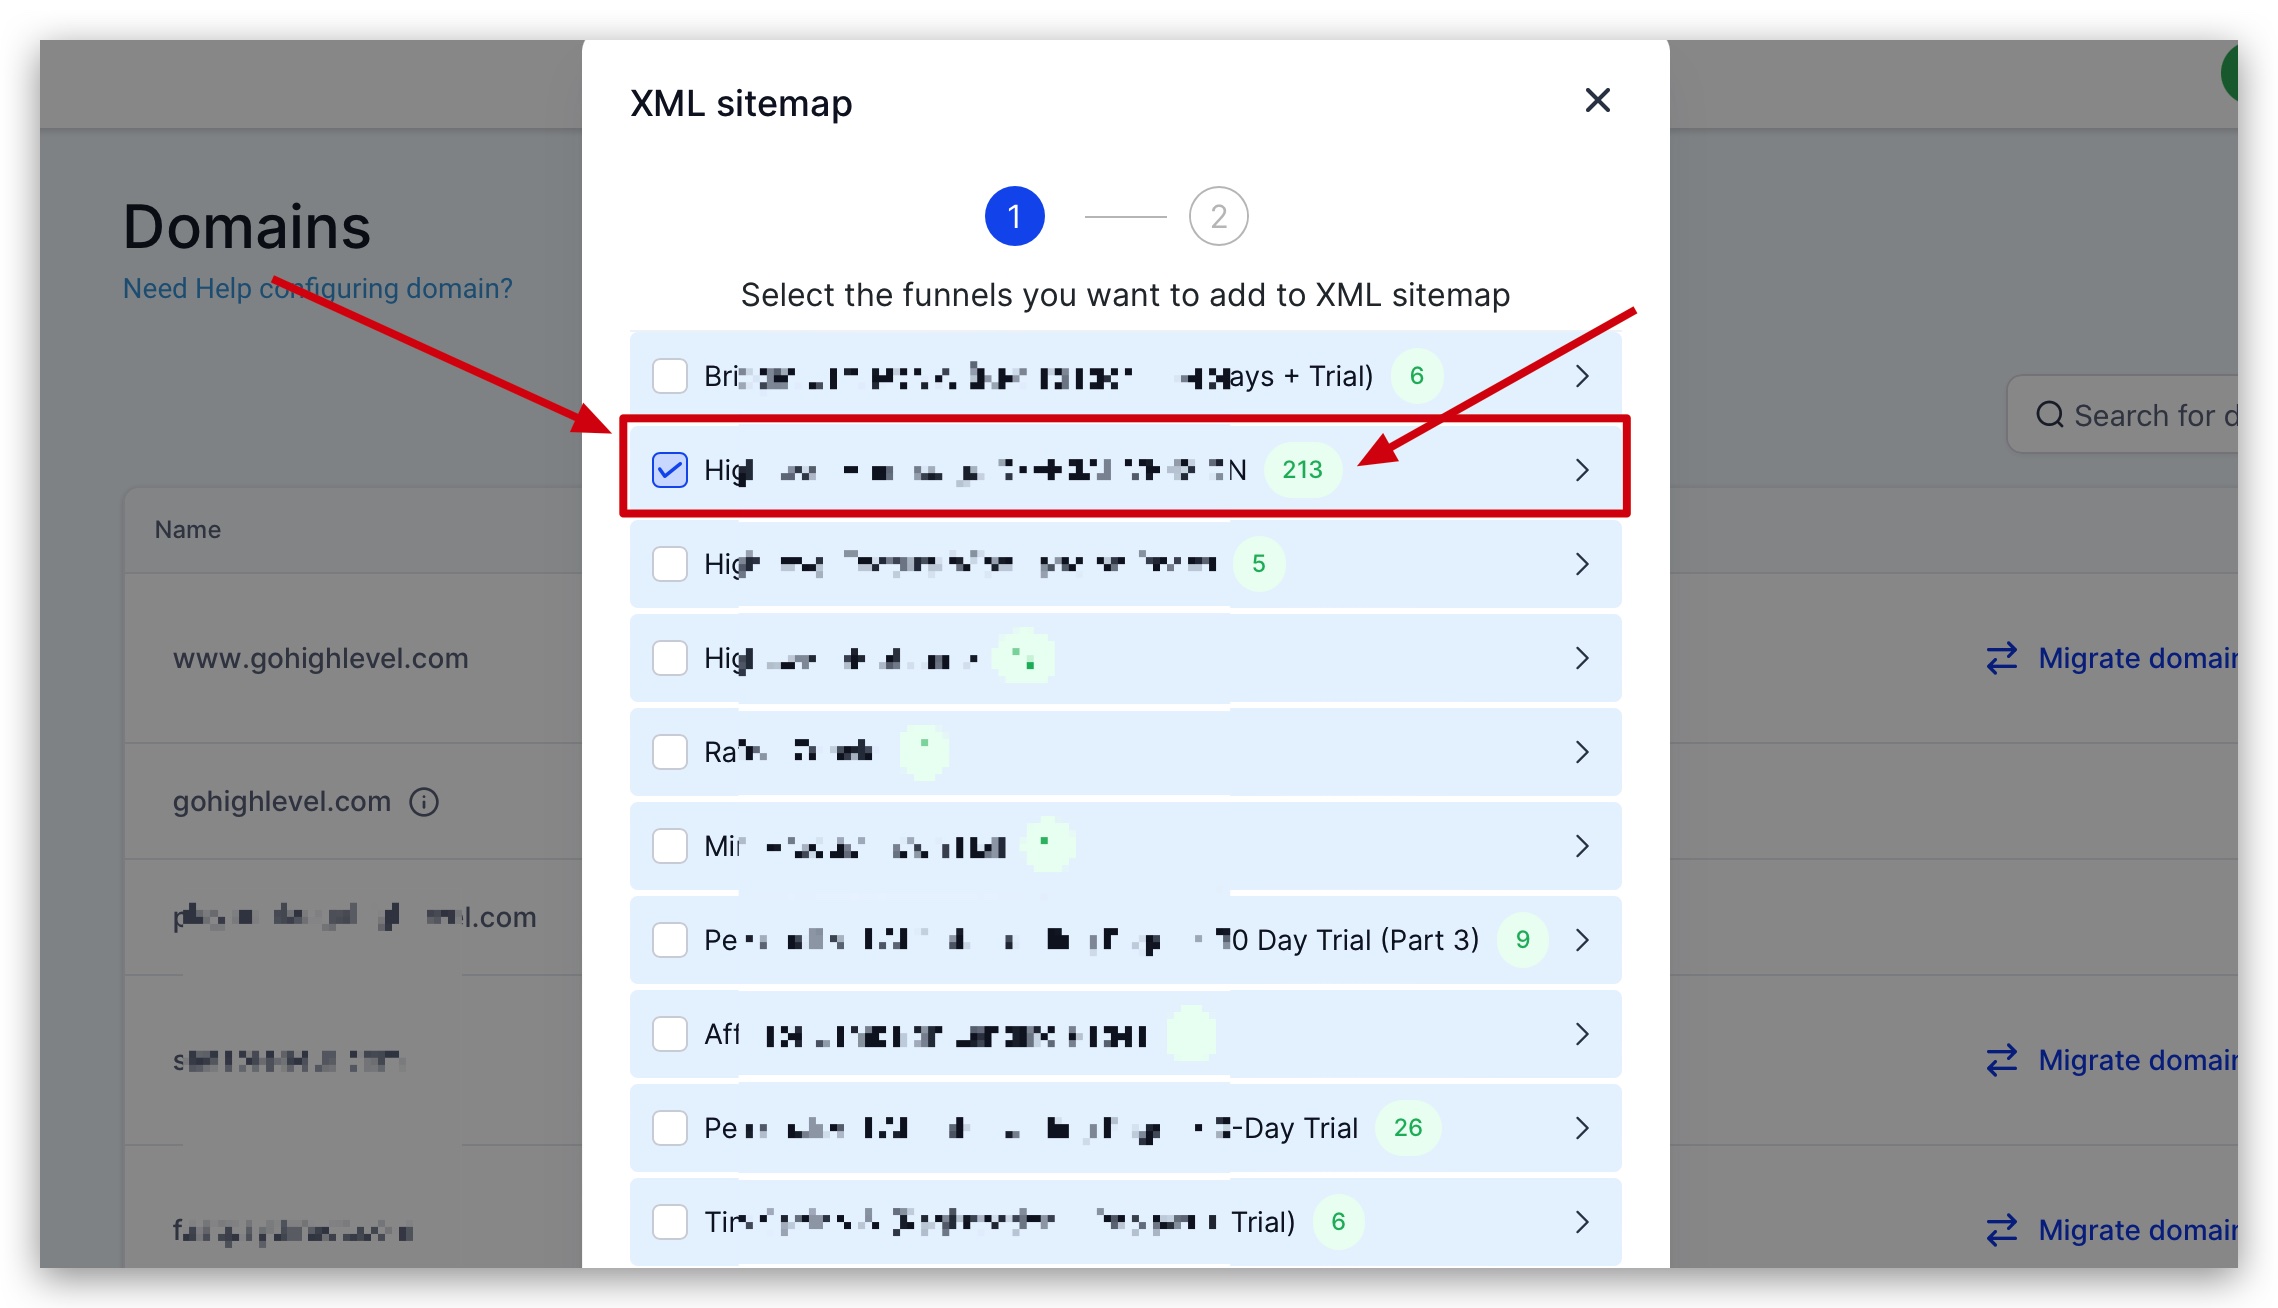
Step 1: Choose which pages to include
- Select your Blog Home page (your main blog listing)
- Select Blog Posts (your individual articles)
- You can also include other landing pages or your enrollment site pages
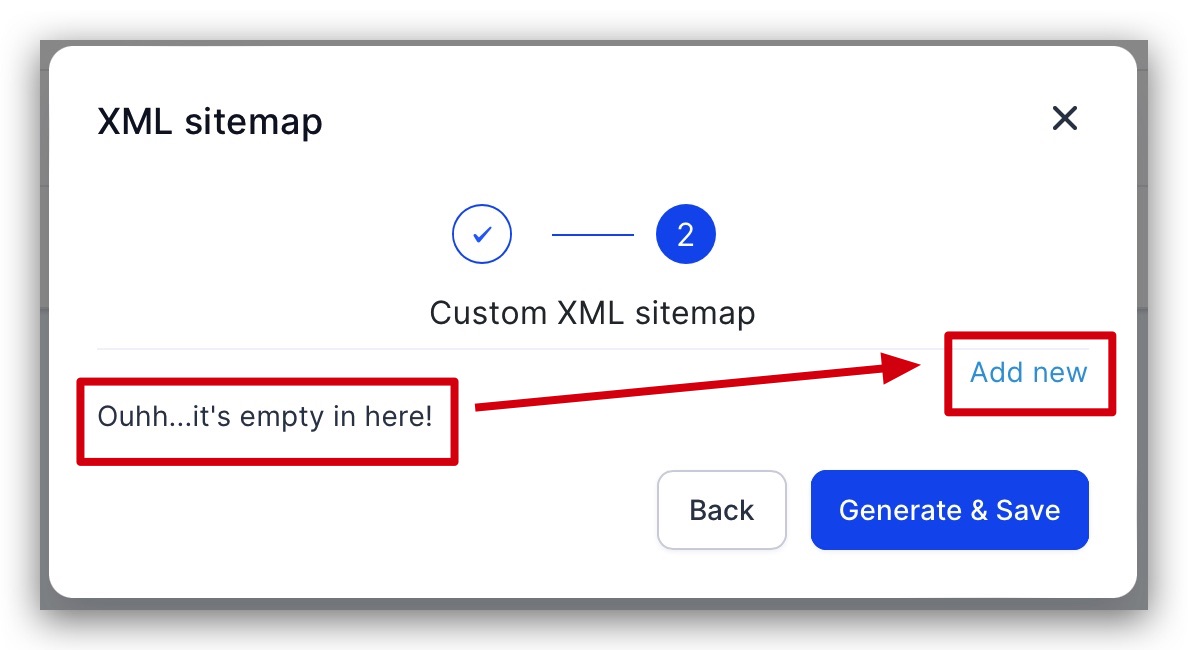
Step 2: Generate the sitemap
- Click Generate Sitemap
- Your sitemap will be created and hosted automatically at yourdomain.com/sitemap.xml
Why This Matters for Your Childcare Center
When you regularly publish blog content—like enrollment tips, curriculum updates, or parenting resources—search engines need a way to discover and index that new content quickly. An XML sitemap ensures Google and other search engines know exactly where to find your latest posts, helping prospective families discover your center when they're searching for childcare options.
Next Steps
Once your sitemap is set up, consider submitting it to Google Search Console to track how your blog posts are performing in search results. This gives you valuable insights into which topics resonate most with families searching for childcare in your area.