
Keep Your Countdown Timers Consistent
When you're running a time-sensitive promotion for your childcare center, you want parents to see the same countdown no matter where they encounter it. If a parent sees one deadline in your email and a different one on your landing page, it creates confusion and hurts trust.
This guide shows you how to sync countdown timers so they display identically in your emails and on your enrollment pages.
Why Sync Your Timers?
Here are common scenarios where synced timers make your promotions more effective:
Limited-Time Enrollment Discounts
You're offering 50% off registration fees until midnight on March 15th. Your email shows a countdown timer and links to your enrollment page. When parents click through, they see the exact same timer — building trust and creating urgency.
Early Bird Tour Booking
You're running an early bird special for tour bookings. Your promotional email includes a countdown timer and links to your booking page. Both timers match perfectly, so families know exactly how much time they have left to claim the offer.
Open House Registration
You're promoting an open house with limited spots. Your email has a countdown showing when registration closes. Parents click to your registration page and see the same timer counting down. When time expires, the page automatically shows that registration is closed.
Waitlist Priority Access
You're giving families on your waitlist 48 hours of priority enrollment access. Your email notification includes a countdown timer linking to the enrollment page. When the timer runs out, the page redirects to a standard waitlist form.
How to Set Up Synced Countdown Timers
Step 1: Configure Your Redirect Links
Before creating your timer, set up the pages parents will see during and after your promotion:
- Create an "active" landing page (where the offer is available)
- Create an "expired" page (what parents see when time runs out)
- Make note of both page URLs — you'll need them in the next step
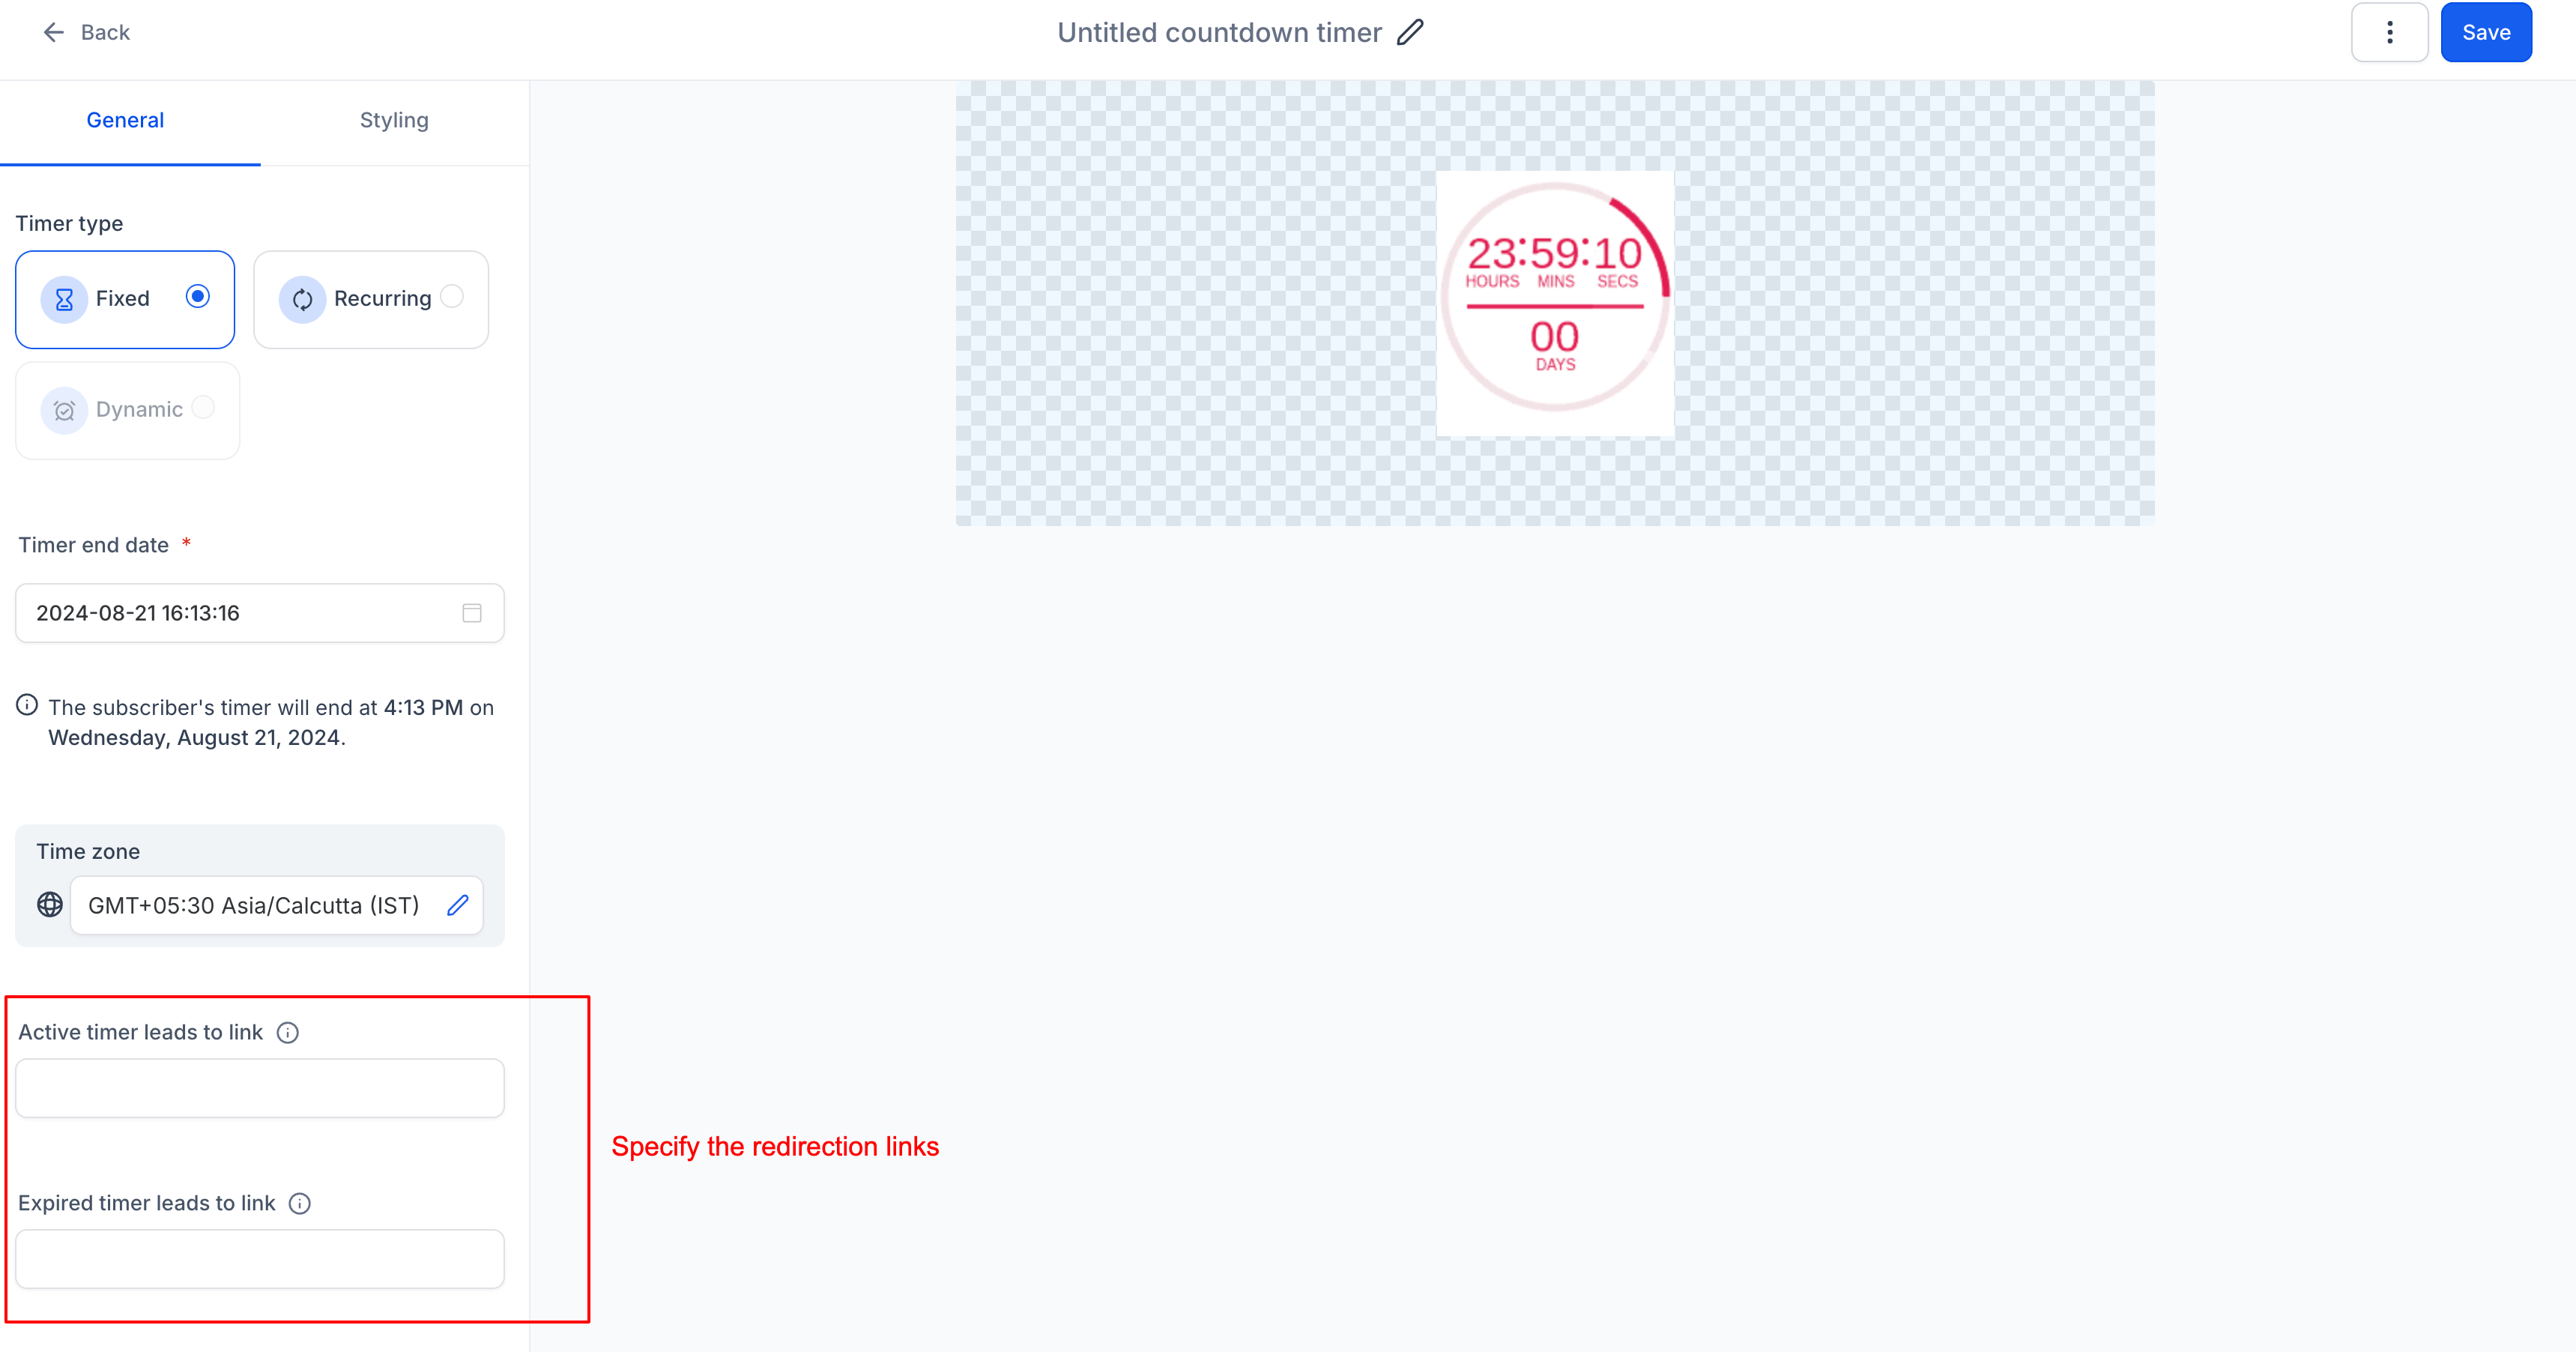
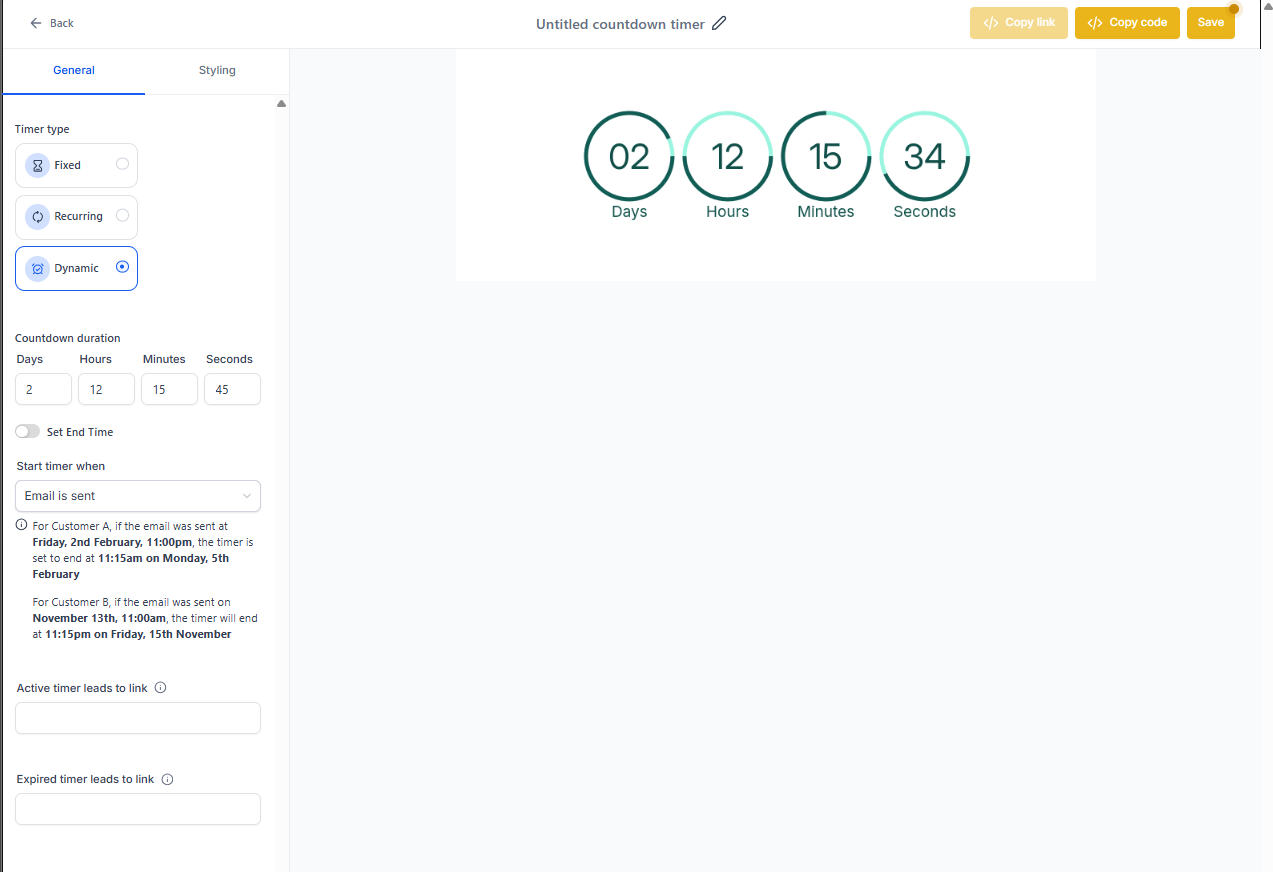
Step 2: Create Your Countdown Timer
- Click Marketing in your left sidebar
- Select Countdown Timer
- Click Create New Timer
- Name your timer (e.g., "Spring Enrollment Discount")
- Set your end date and time
- Add the active page URL (where your offer lives)
- Add the expired page URL (where parents go when time's up)
- Click Save
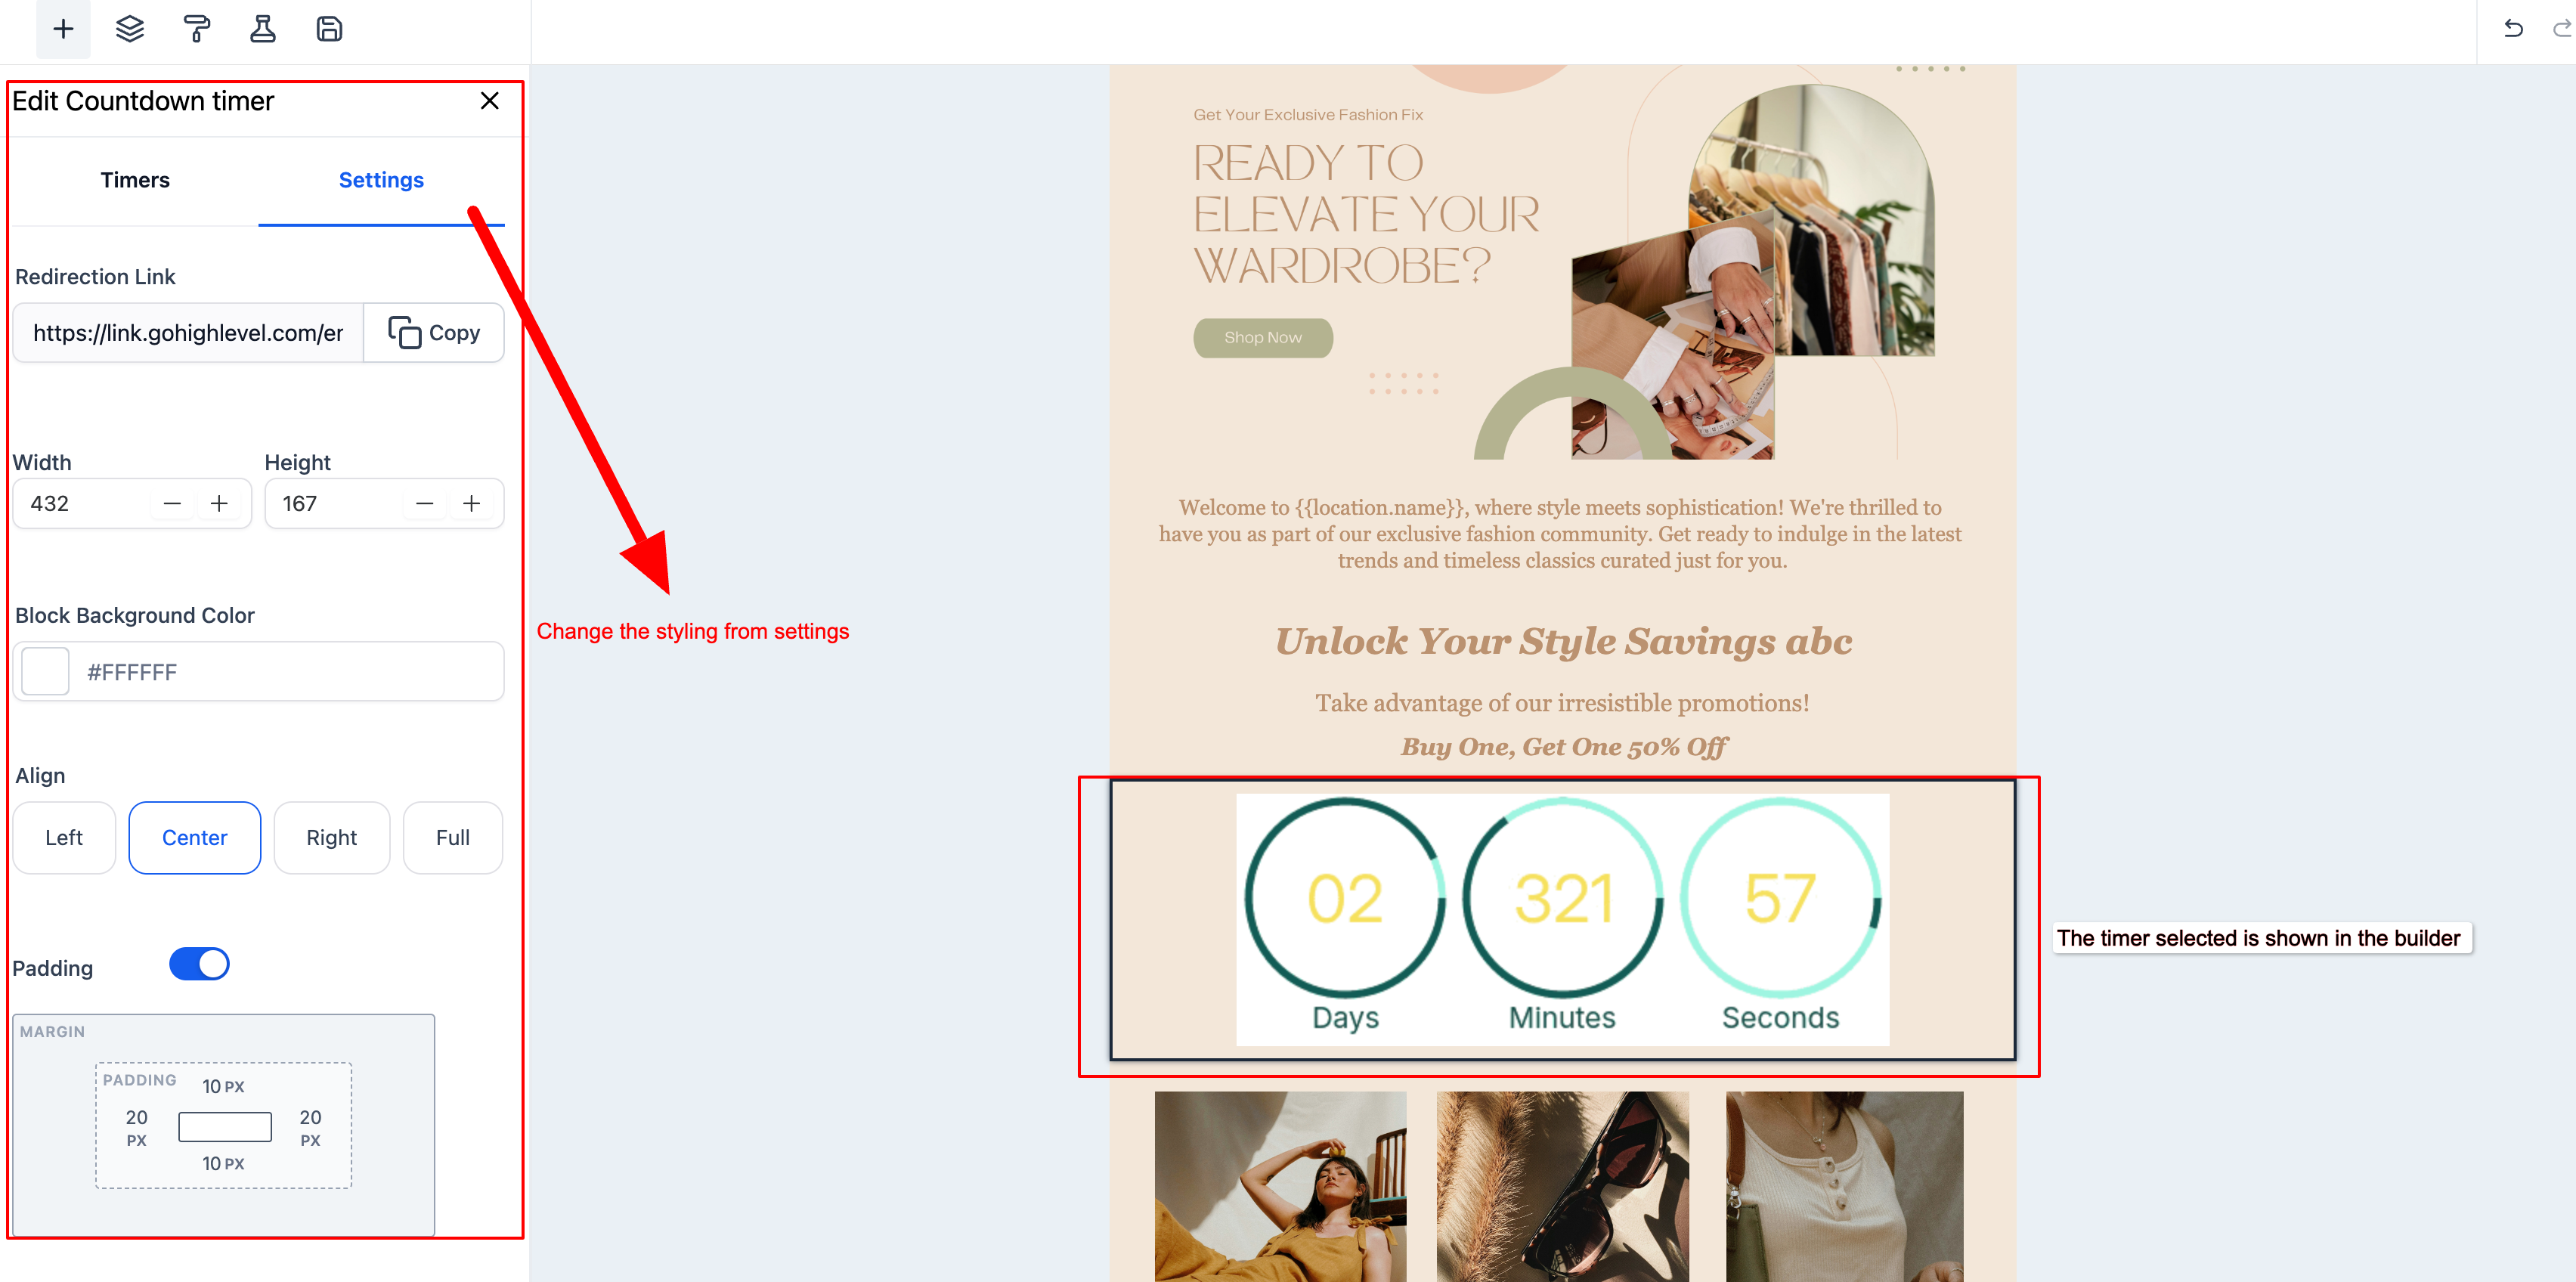
Step 3: Add the Timer to Your Email
- Create or open your email campaign
- Drag the Countdown Timer element into your email
- Select the timer you just created from the dropdown
- Style the timer to match your email design (colors, size, format)
Step 4: Link Your Call-to-Action Button
- Add a button to your email (e.g., "Claim Your Discount")
- Click the button to edit it
- In the link field, paste your timer's active page URL
- This ensures parents land on the page with the matching countdown
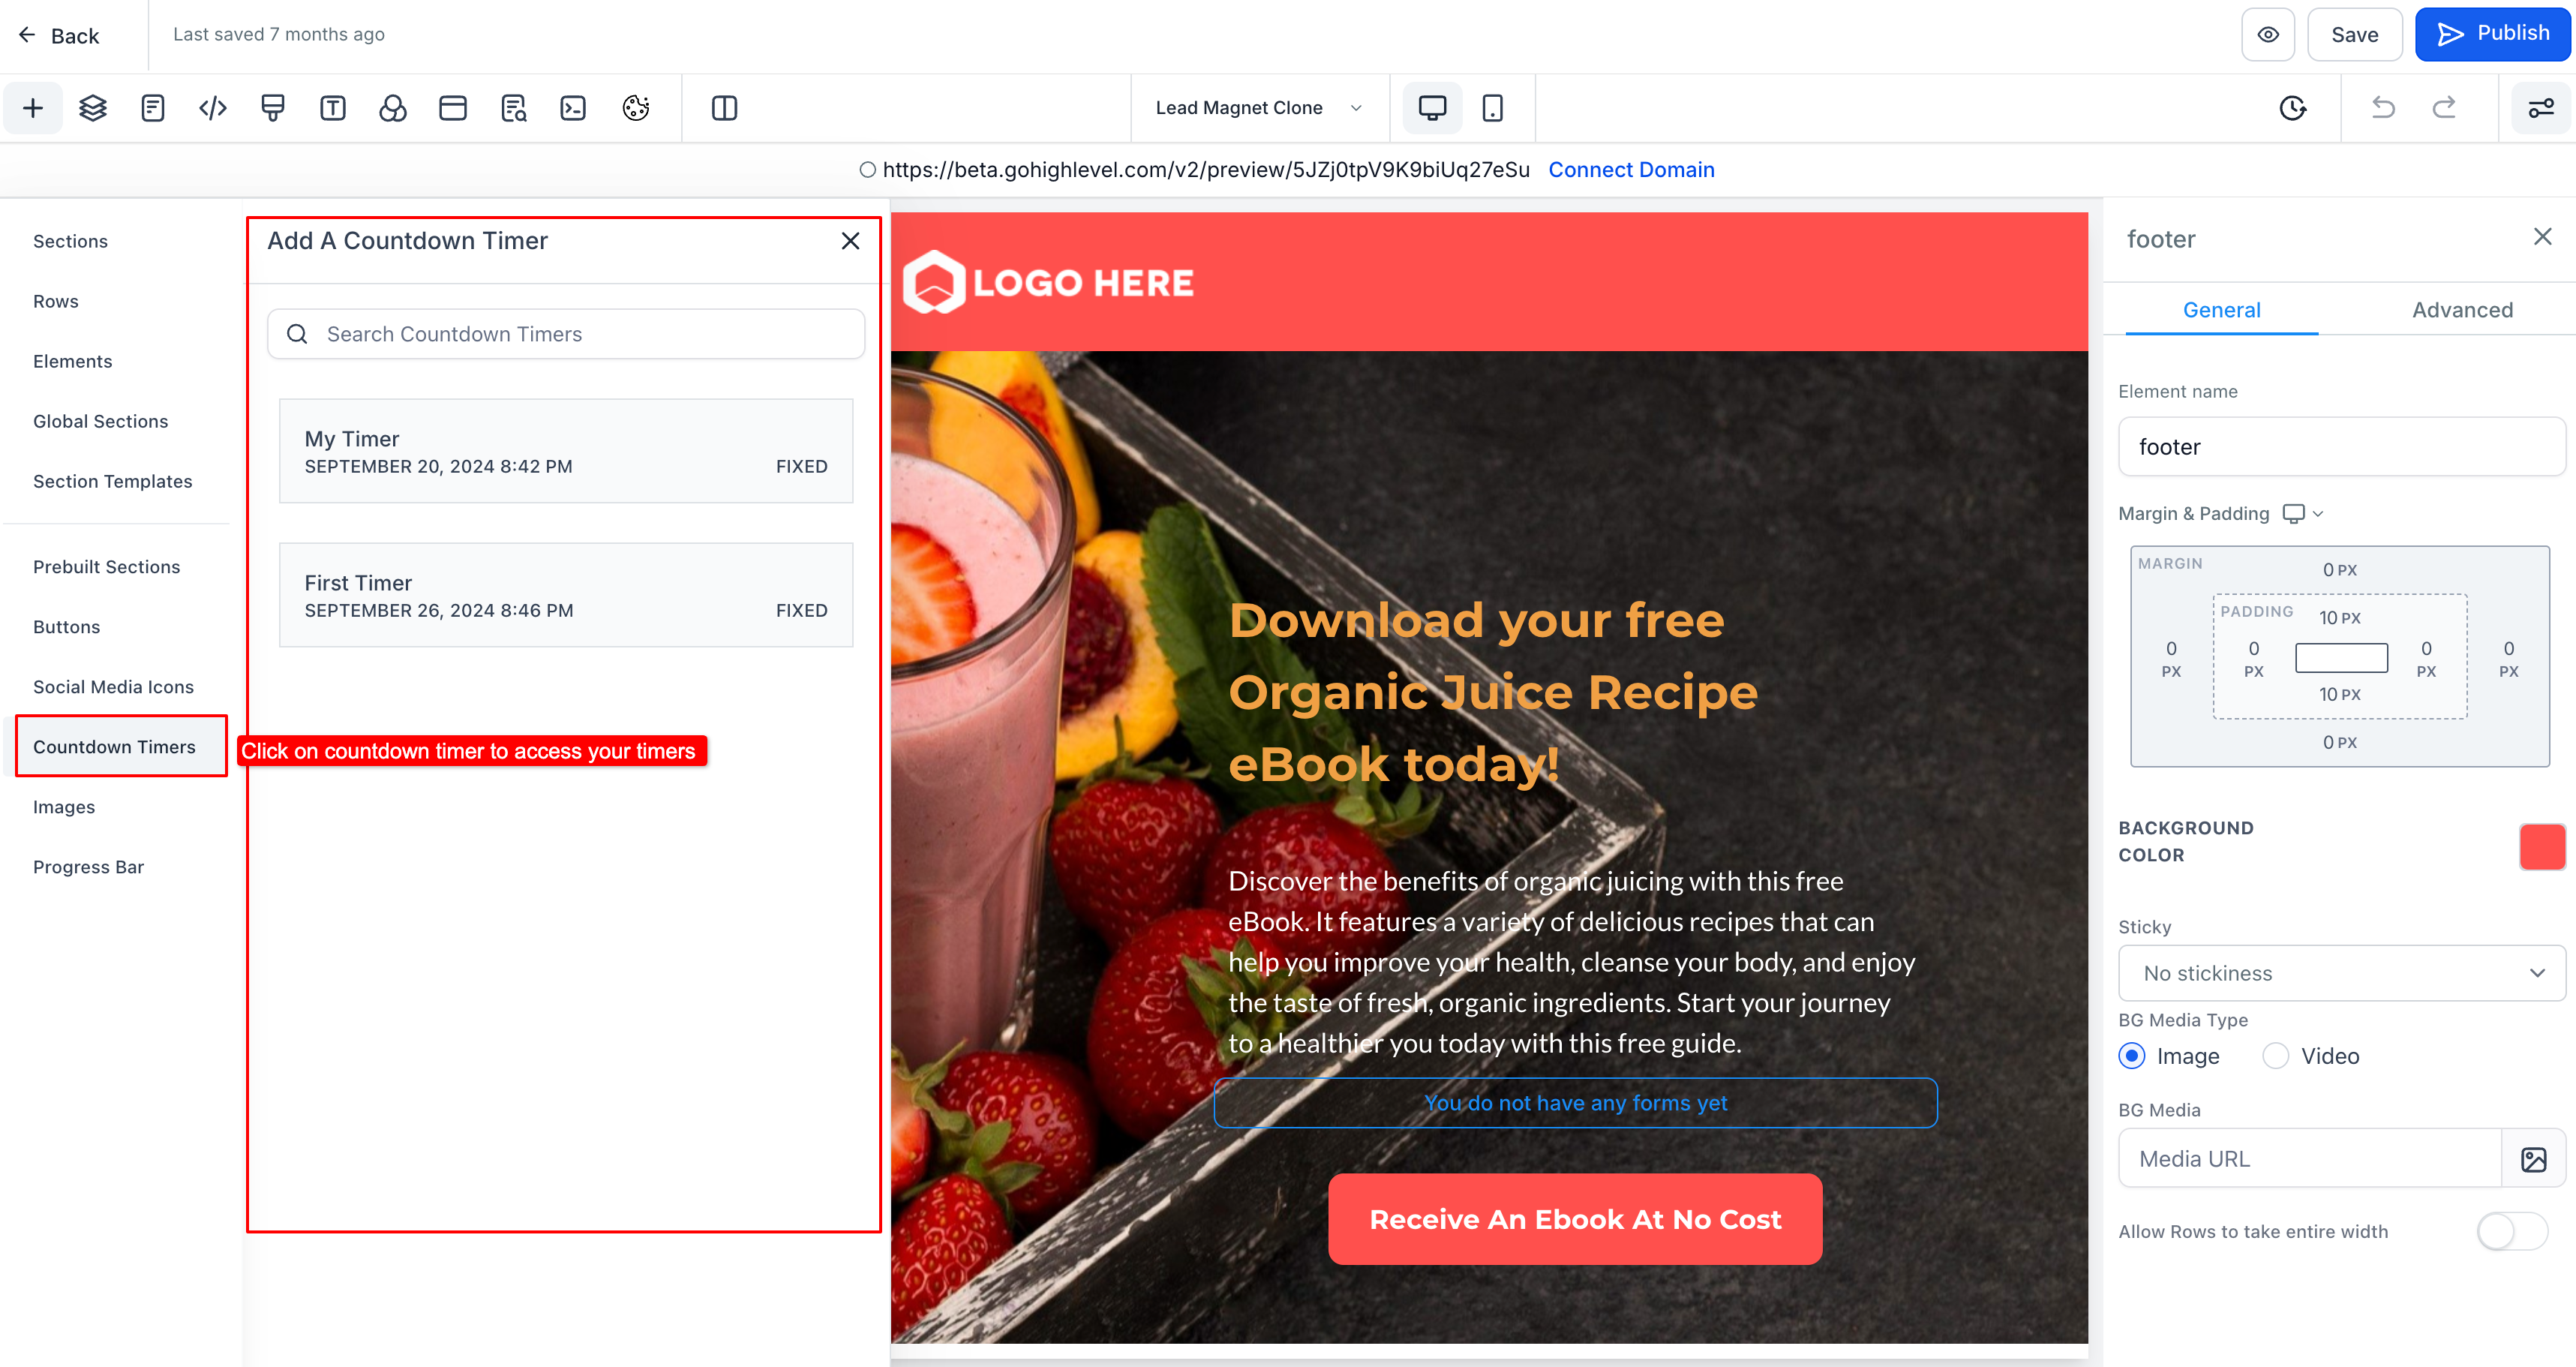
Step 5: Add the Same Timer to Your Landing Page
- Open the active offer page you created in Step 1
- Drag the Countdown Timer element onto the page
- Select the same timer from the dropdown
- Position and style it to match your email timer
- Click Save
Your Timers Are Now Synced
Parents will see exactly the same countdown in your email and on your landing page. When the timer expires, anyone who clicks your email link will automatically be redirected to your expired offer page.
Related Articles
- How to Create a Countdown Timer
- How to Add Timers in Emails
- How to Add Timers to Landing Pages
- Understanding Timer Redirect Links
- Creating Recurring Countdown Timers