
How to Edit a Countdown Timer
Need to update your countdown timer's look, timing, or linked actions? Here's everything you need to know about editing timers in Enrollio.
When You Can Edit a Timer
You can edit a countdown timer only before it's been used in an email campaign. Once you've sent an email that includes the timer, your only option is to archive it and create a new one.
Pro tip: Double-check all timer settings before including it in your enrollment campaigns or parent communications.
What You Can Edit
Before sending your email, you can change:
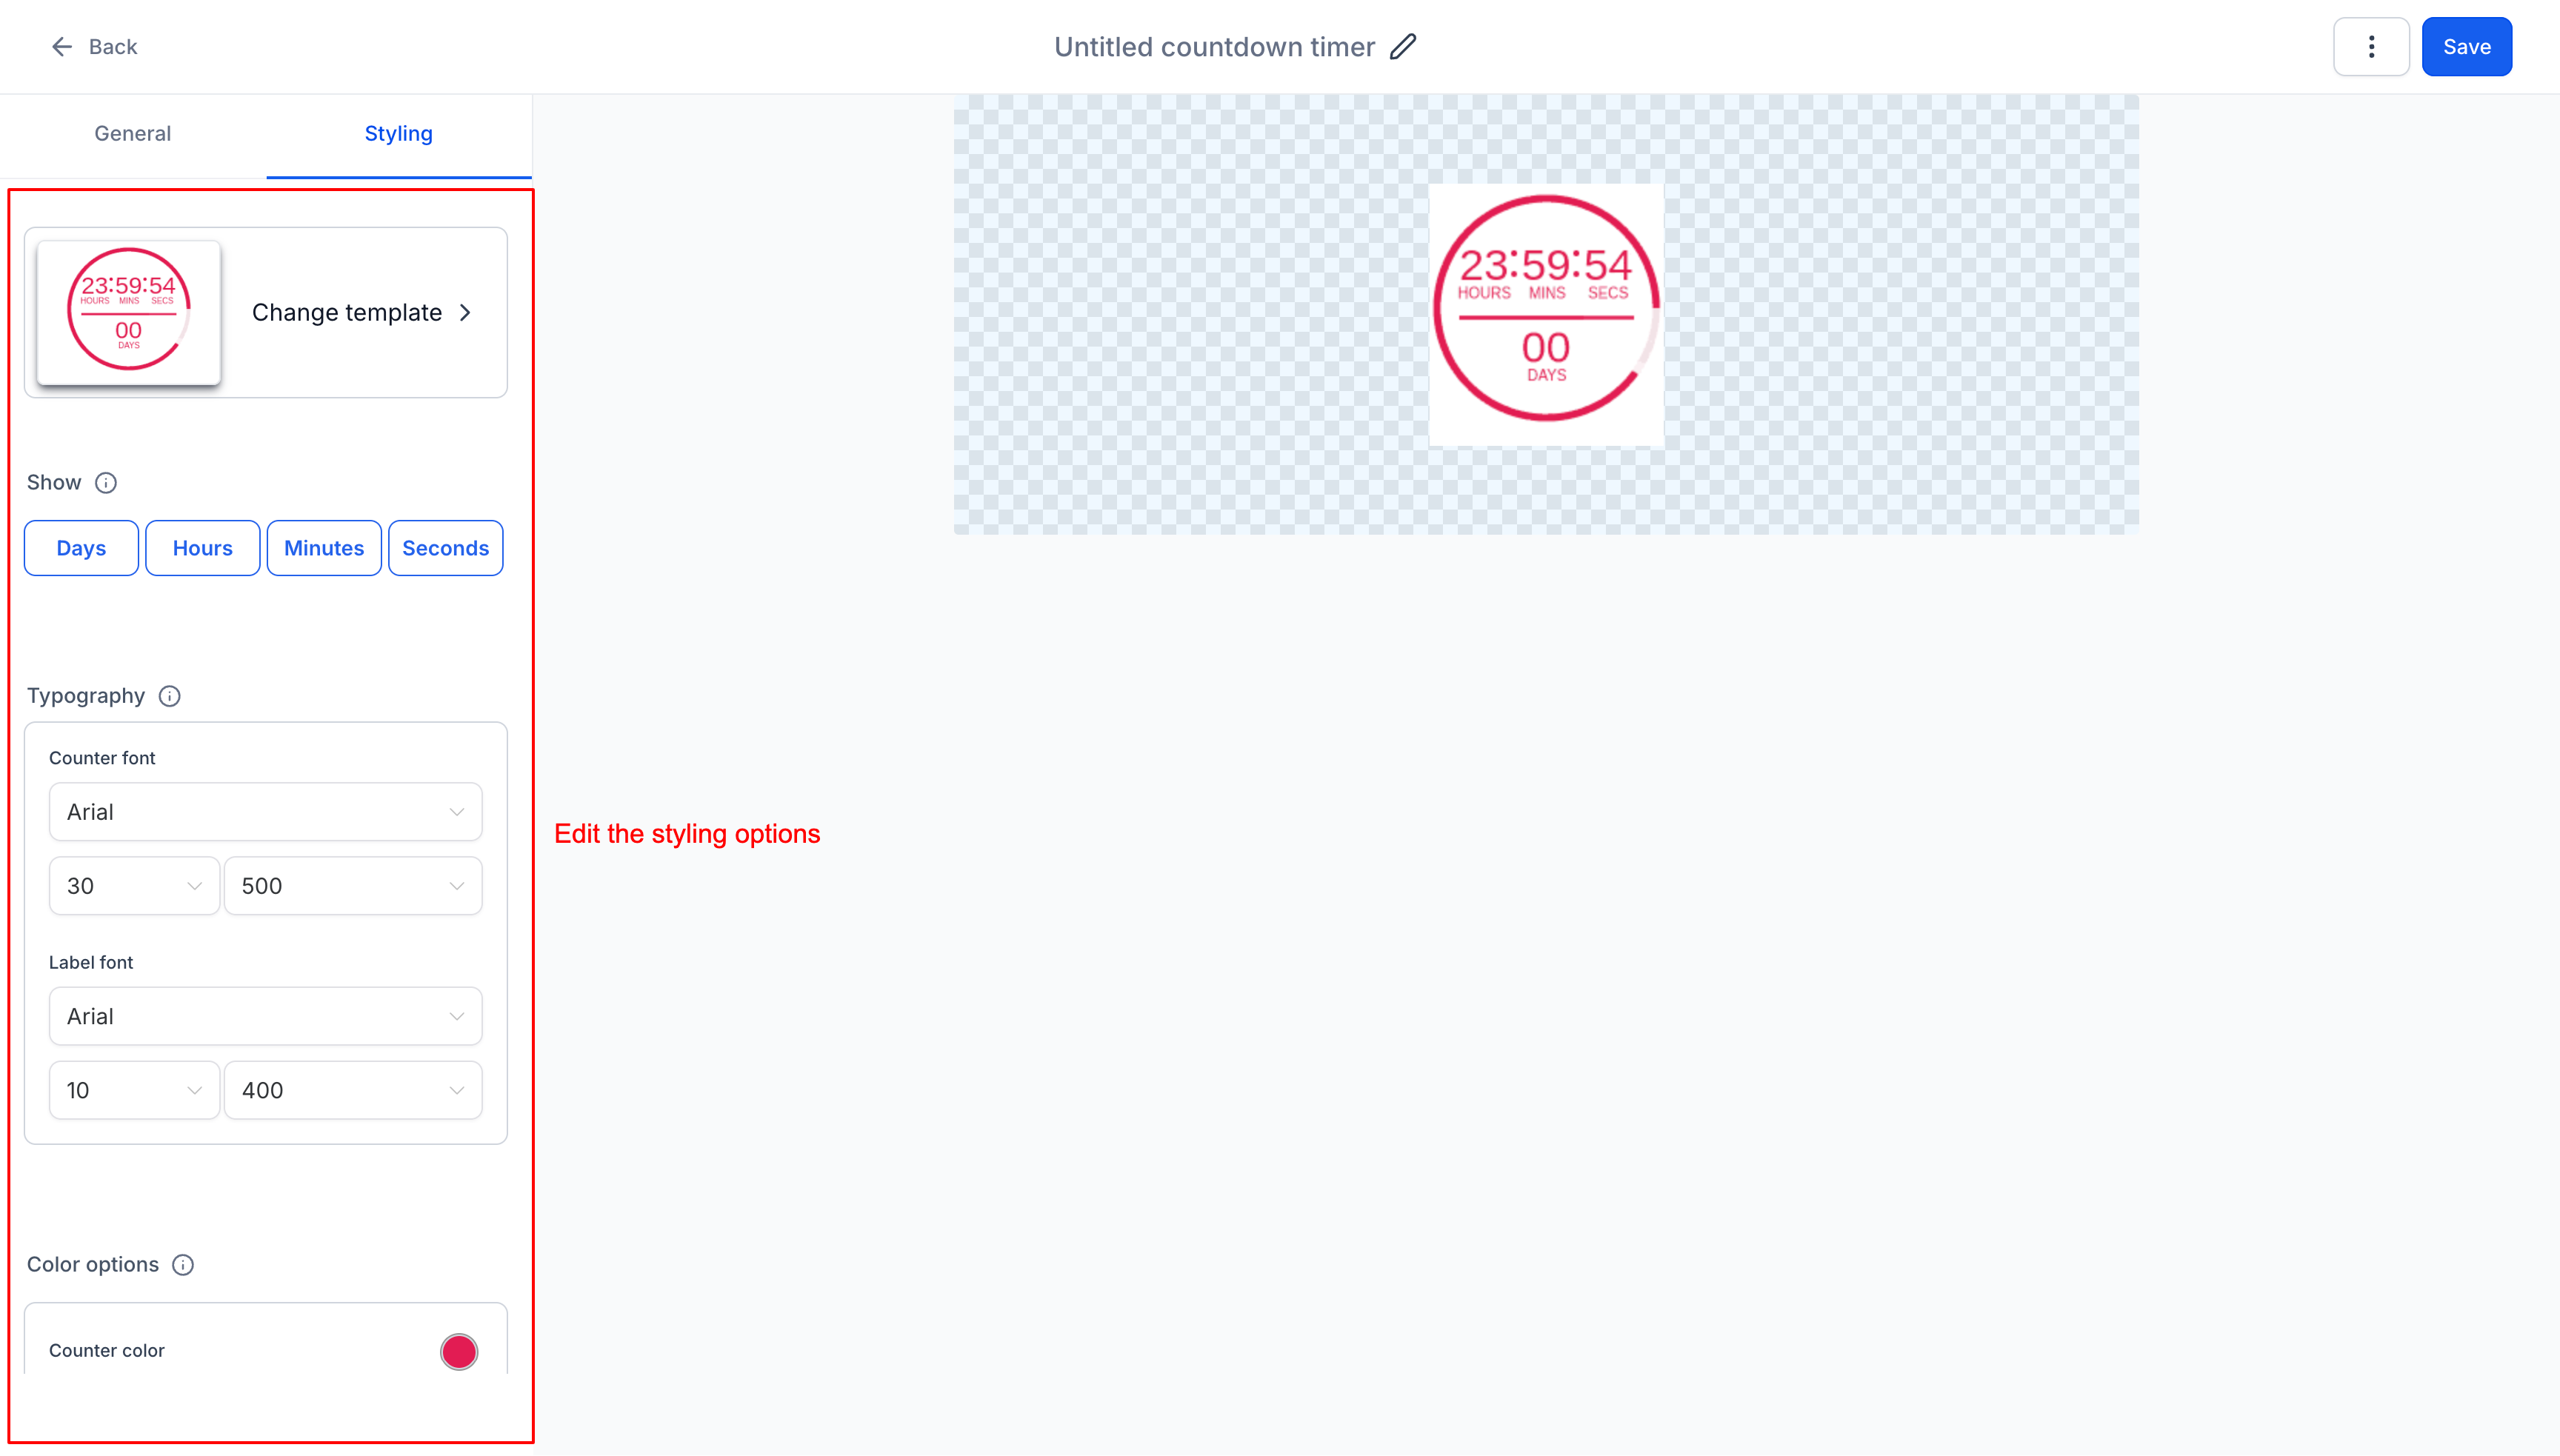
- Style: Adjust fonts, colors, and design to match your center's branding
- Timer Details: Modify the countdown duration, end date, or time-related settings
- Dynamic Link: Update where parents are directed when they click the timer (like your enrollment page or tour booking form)
- Name: Rename the timer to keep your campaigns organized
How to Edit Your Timer
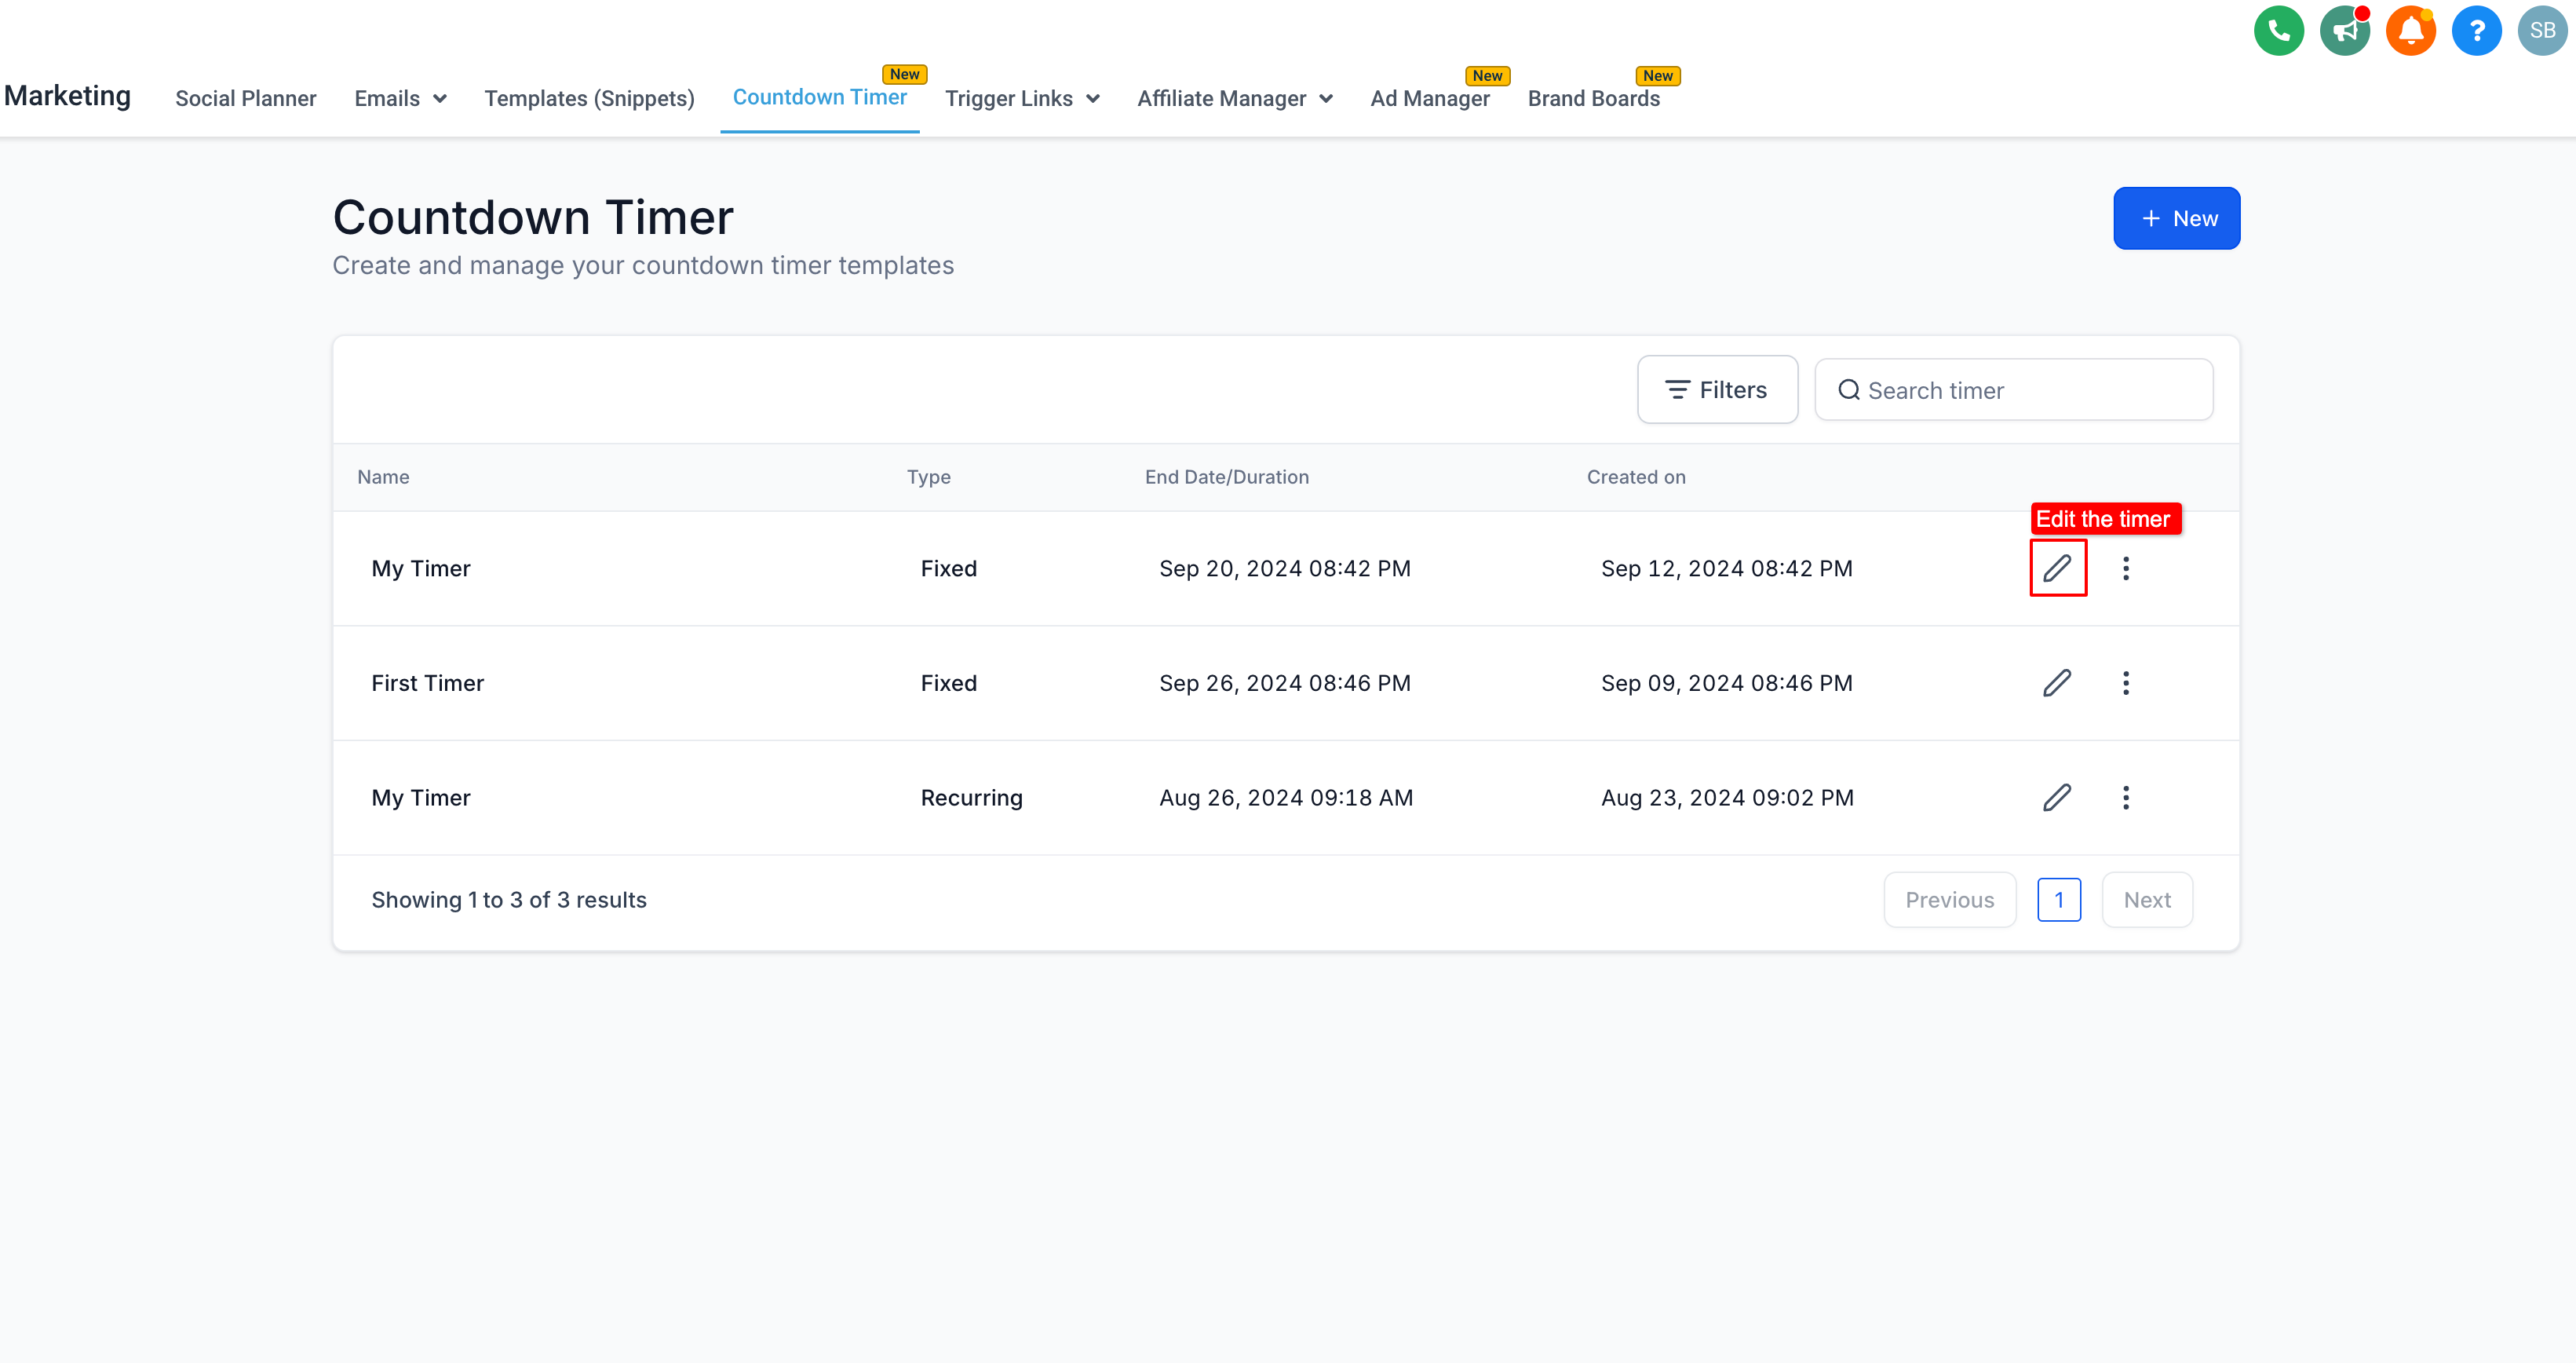
- Go to Marketing in your Enrollio dashboard
- Click Countdown Timer to see all your timers
- Find the timer you want to edit and click the Edit button
- Make your changes to:
- Style (fonts and colors)
- Timer details (start/end time)
- Dynamic links (active or expired states)
- Timer name
- Click Save Changes
Related Articles
- How to Use Countdown Timers in Emails
- How to Sync Your Countdown Timer on Enrollment Pages
- How to Create a Recurring Timer
- Timezone Settings for Countdown Timers