
How to Create a Recurring Countdown Timer
A recurring timer is perfect for promoting events, enrollment deadlines, or special offers that happen regularly at your center. Unlike a one-time countdown, a recurring timer automatically resets after each cycle — giving families a consistent sense of urgency without you lifting a finger.
What is a Recurring Timer?
A recurring countdown timer counts down for a fixed period (like seven days), reaches zero, then restarts automatically for a set number of cycles. Every parent sees the same deadline, creating consistent urgency across your enrollment pages, emails, and tour confirmations.
Recurring timers cycle through three states:
- Wait: The timer hasn't started yet
- Active: The countdown is live and ticking
- Expired: The countdown has ended and redirects families or hides content
Why Use a Recurring Timer?
Recurring timers keep urgency alive without constant maintenance, so every promotion feels fresh and credible.
- Automation: Resets itself on schedule — no need to rebuild timers manually
- Consistent Urgency: Families always see an active countdown encouraging them to act
- Multi-Channel: Use the same timer across enrollment pages, emails, and your website
- Flexible Loops: Choose exactly how many cycles your timer should run
- Branded Design: Customize colors, fonts, and styling to match your center's brand
Where to Use Recurring Timers
Weekly Enrollment Promotions
Promote weekly open house events or enrollment discounts that happen on a regular schedule. Display the timer on your enrollment page, in parent emails, and on social media.
Monthly Tuition Deadlines
Remind families of upcoming monthly tuition deadlines or re-enrollment dates. Include the timer in billing reminder emails or on your parent dashboard.
Regular Tours or Info Sessions
If you host tours or parent info sessions on a regular schedule (every Tuesday, for example), a recurring timer shows the time remaining until the next session. Embed it on your tour registration page or in confirmation emails.
Daily or Weekly Waitlist Offers
For limited-time spot releases from your waitlist that repeat daily or weekly, a recurring timer creates urgency and reminds families when the next opportunity opens.
Understanding Loop Events
Loop Events control how many times your recurring timer resets once it finishes counting down.
For example, if you set Loop Events to 3, your timer will count down, reset, and repeat three times total — the original countdown plus two more loops.
Example: Weekly Enrollment Deadline
- Set Timer Start Date to your next desired start (Monday at 8:00 AM)
- Set Countdown Duration to 7 days
- Set Loop Events to 4 for four weeks in a row
Each loop refreshes automatically once the previous countdown ends, based on your time zone settings.
How to Create a Recurring Timer
Follow these steps to set up your recurring timer:
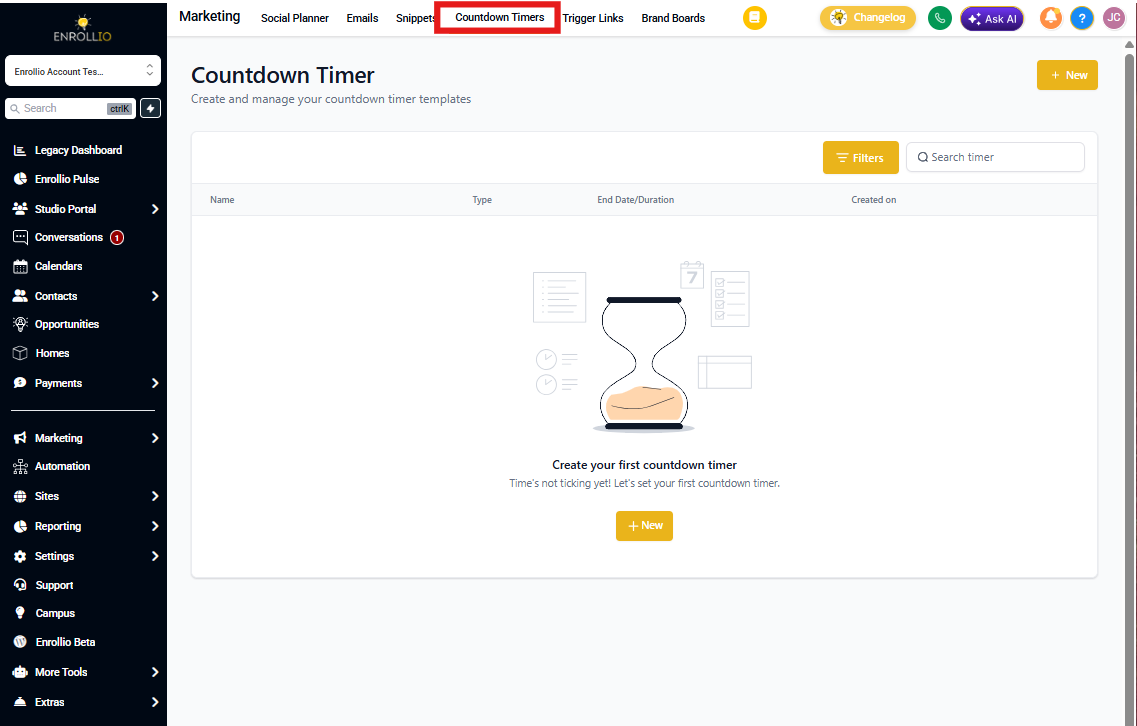
Step 1: Navigate to Marketing
- Click Marketing in the left navigation
- Select Countdown Timers from the top ribbon
Step 2: Select a Timer
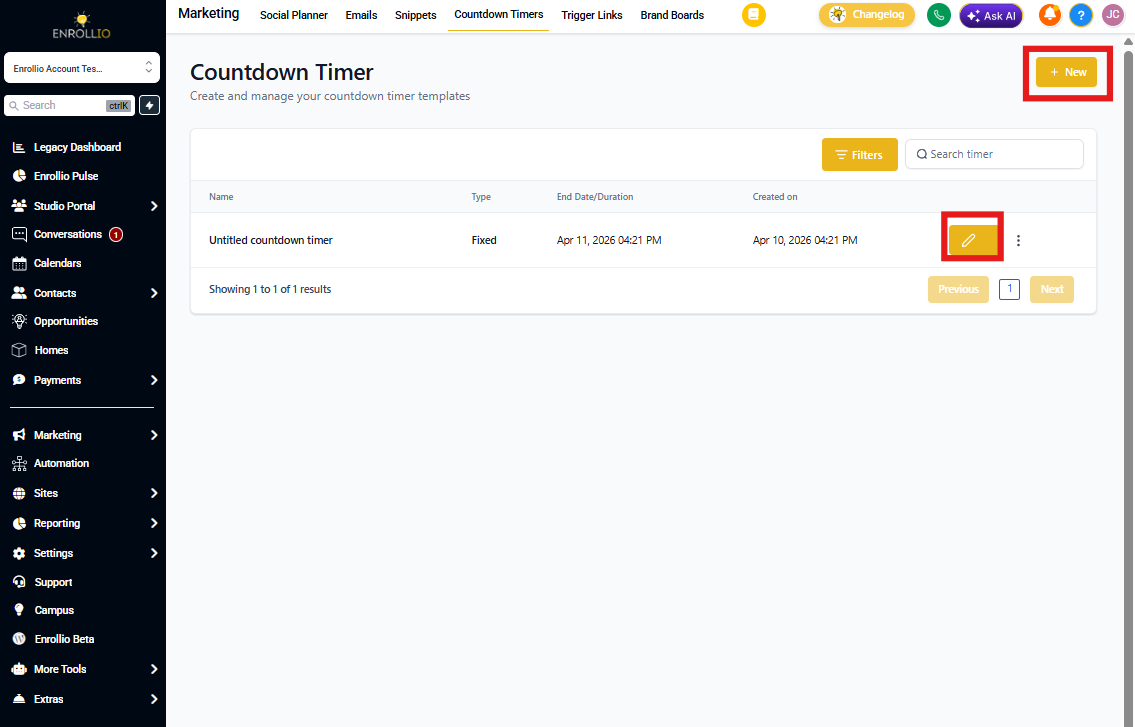
To create a new timer, click the blue New button. Choose a template to save time designing your timer.
To edit an existing timer, click the Edit (Pencil) icon next to the timer name.
Step 3: Choose Timer Type
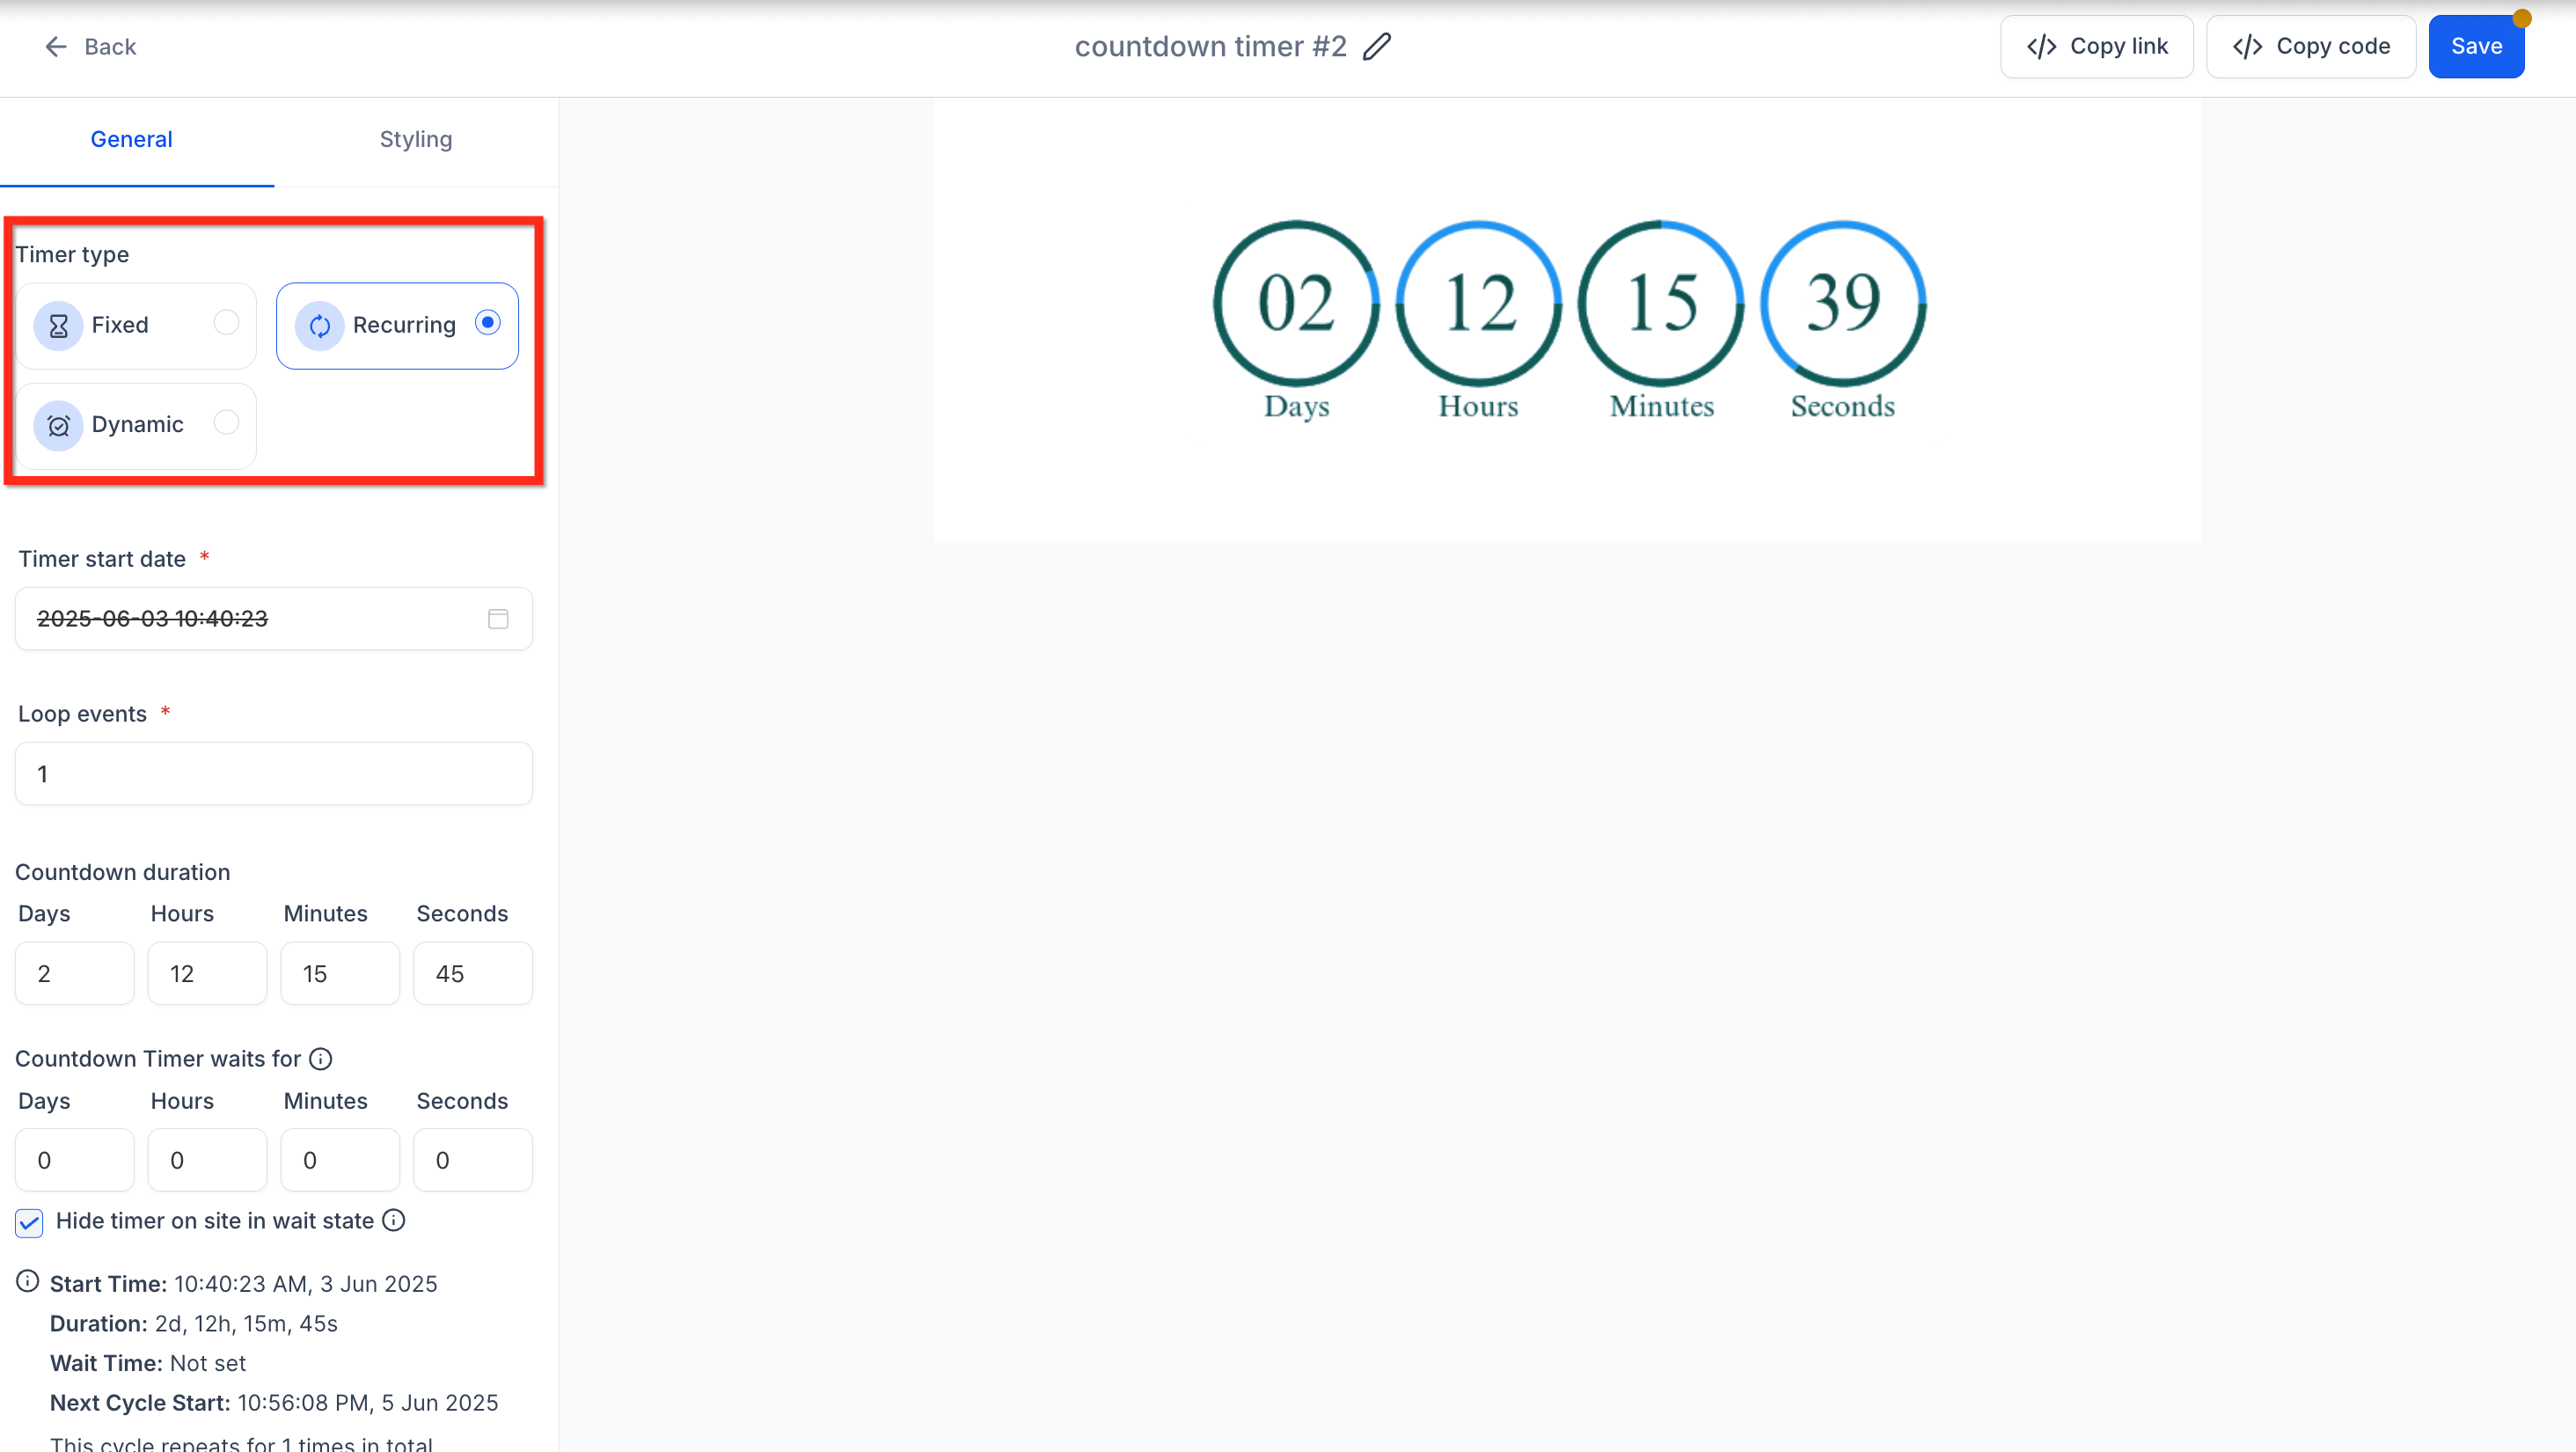
In the settings panel under the General tab, select Recurring as your Timer Type.
Step 4: Configure Timer Details
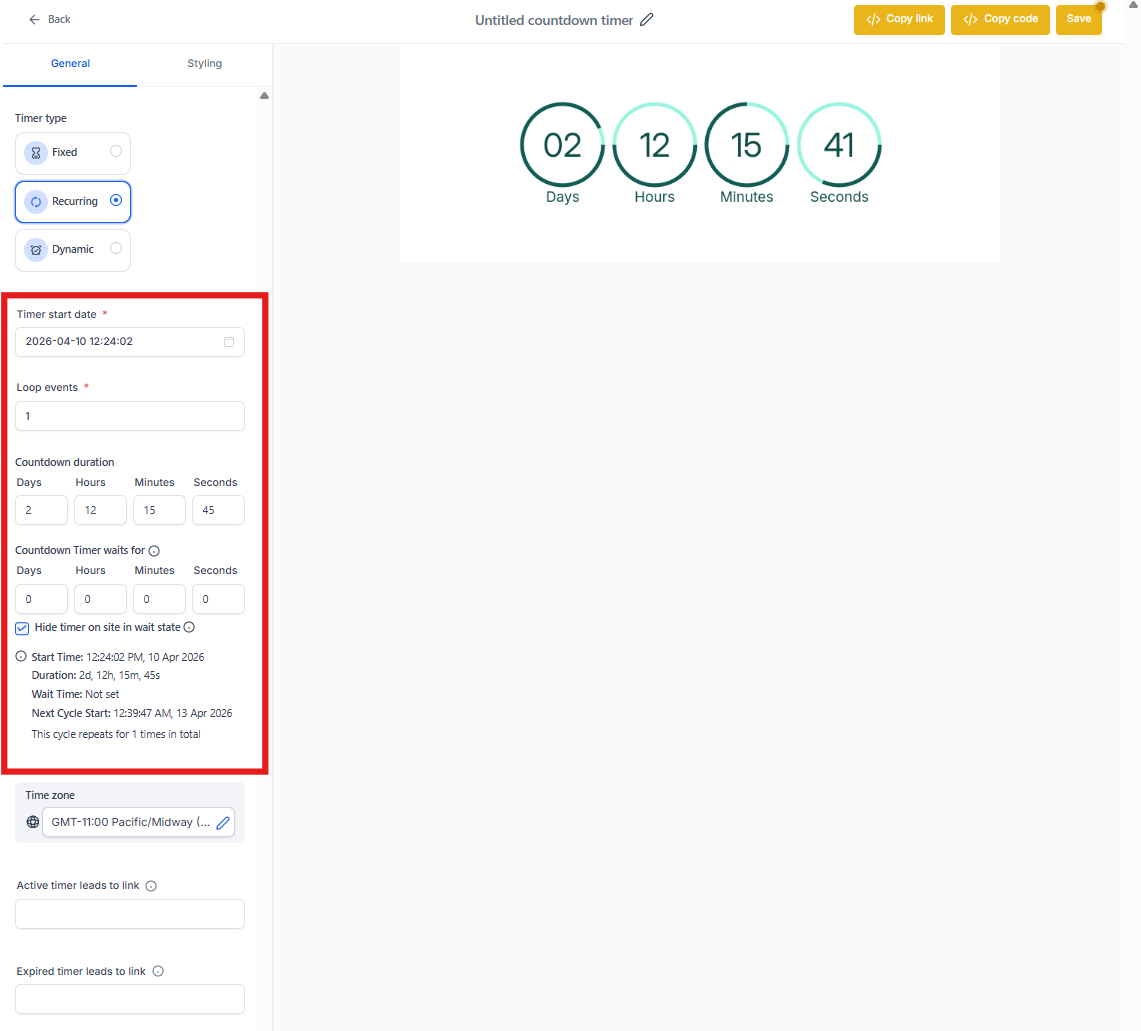
Define your timer settings:
- Start Date/Time: When the first cycle begins
- Loop Events: Number of resets/cycles (e.g., 4 for four weeks)
- Countdown Duration: Length of each cycle (e.g., 7 days)
- Countdown Timer Waits For: Optional pause between cycles (see Wait Time section below)
- Hide Timer on Site in Wait State: If disabled, the timer shows zero during wait time on enrollment pages
Step 5: Add Links
- Active Link: Where families go when they click during the countdown (e.g., your enrollment form)
- Expired Link: Where families land after the timer expires (e.g., a waitlist page)
Step 6: Customize and Save
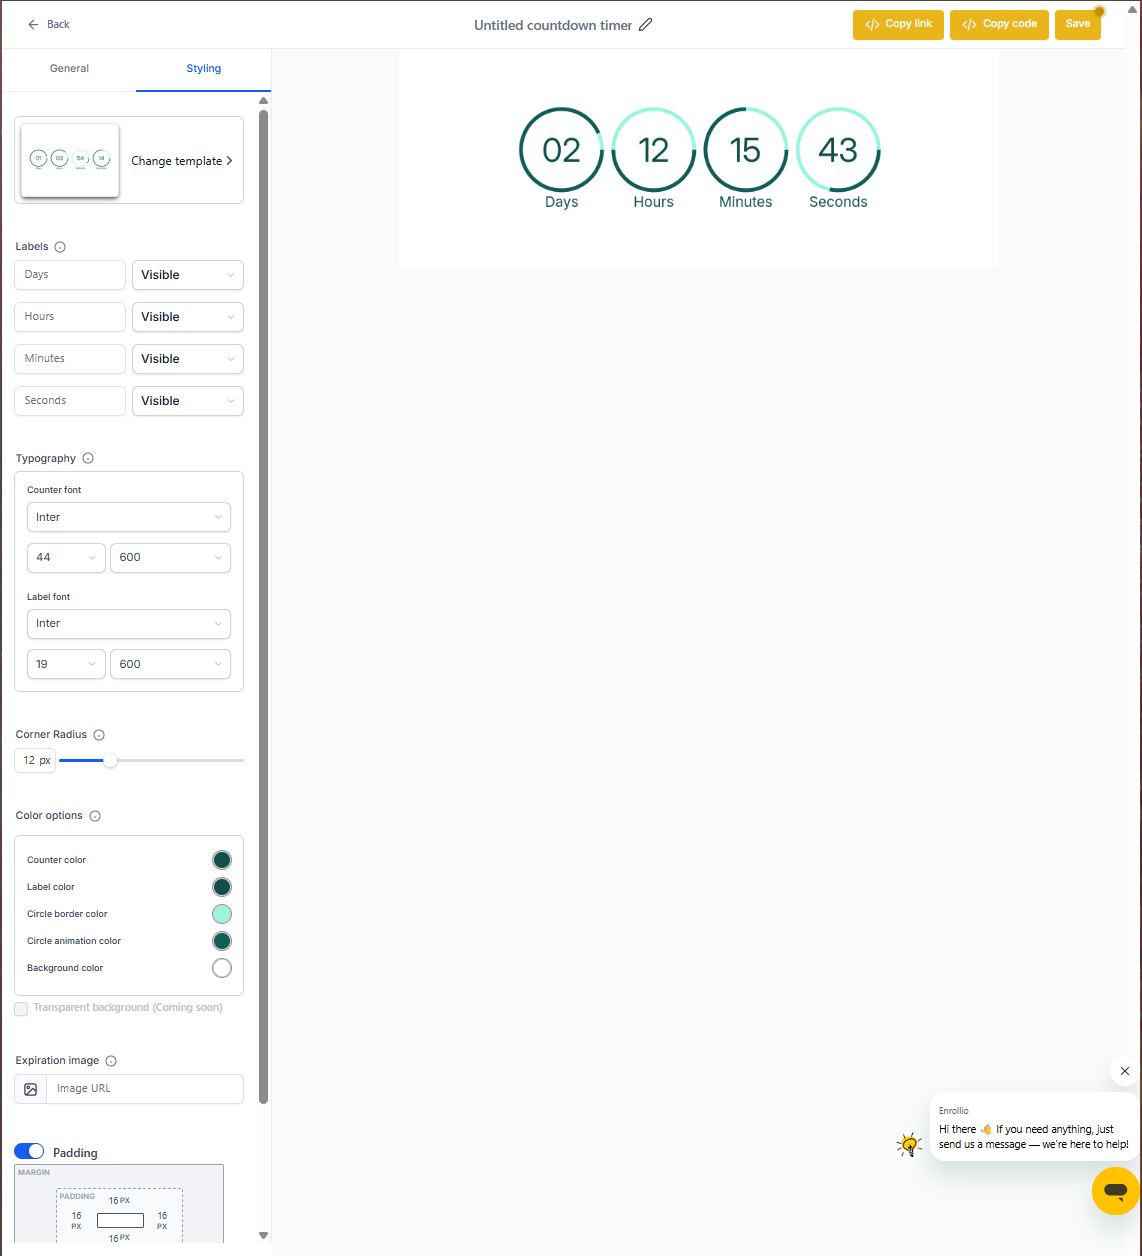
- Adjust the timer's appearance — colors, fonts, expiry message, and time display format
- Give your timer a descriptive name (e.g., "Weekly Enrollment Deadline")
- Click the blue Save button to activate your timer
Understanding Wait Time
The Countdown Timer Waits For setting lets you add a pause between cycles. This is useful when you need time between promotions to update pricing, refresh waitlist spots, or prepare for the next enrollment window.
For example, you might run a 5-day enrollment promotion, then wait 2 days before the next cycle starts.
How Wait Time Works
In Emails:
- Timer shows zero state during wait
- Clicking the email link redirects to your Expired Page
On Enrollment Pages:
- Timer can be hidden during wait (if you enable that setting)
- If the timer transitions from Active → Wait while a family is viewing the page, they stay on the page (no automatic redirect)
- If they refresh the page during wait time, they're redirected to your Expired Page
Frequently Asked Questions
What is Wait Time, and why would I use it?
Wait Time is an optional gap between cycles (for example, 24 hours between weekly enrollment deadlines). It prevents your timer from restarting immediately, giving you time to update availability or prepare the next promotion.
Can I edit Wait Time or Loop Events after the timer is live?
Yes. Edit the timer under Marketing → Countdown Timers. Your changes apply everywhere the timer is embedded — in emails, enrollment pages, and your website.
Does the timer adjust to each family's local time zone?
No. Recurring timers run in the time zone you choose during setup. All families see the same countdown regardless of where they're located.
Is there a limit to how many recurring timers I can create?
Enrollio doesn't cap the number of timers. However, each timer generates assets on demand, so keep your list organized and delete unused timers for best performance.