
How to Create WhatsApp Templates for Parent Communication
WhatsApp templates let you send pre-approved messages to parents and families. Think enrollment confirmations, tour reminders, waitlist updates, and more. Before you can start a conversation via WhatsApp, you'll need an approved template.
Before You Start
Make sure your center has:
- An active WhatsApp subscription in Enrollio
- Completed Meta onboarding (if you need help with this, check out our WhatsApp setup guide)

Understanding Template Categories
When you create a template, you'll choose from three categories:
- Marketing – Promotional messages like open house announcements, enrollment specials, or program updates
- Utility – Service messages like tour confirmations, tuition reminders, or waitlist notifications
- Authentication – Security codes or login verification (rarely used for childcare)
Choose the category that matches your message content. Meta reviews this carefully, and mismatched categories can get rejected.
How to Create a WhatsApp Template
Step 1: Open Template Settings
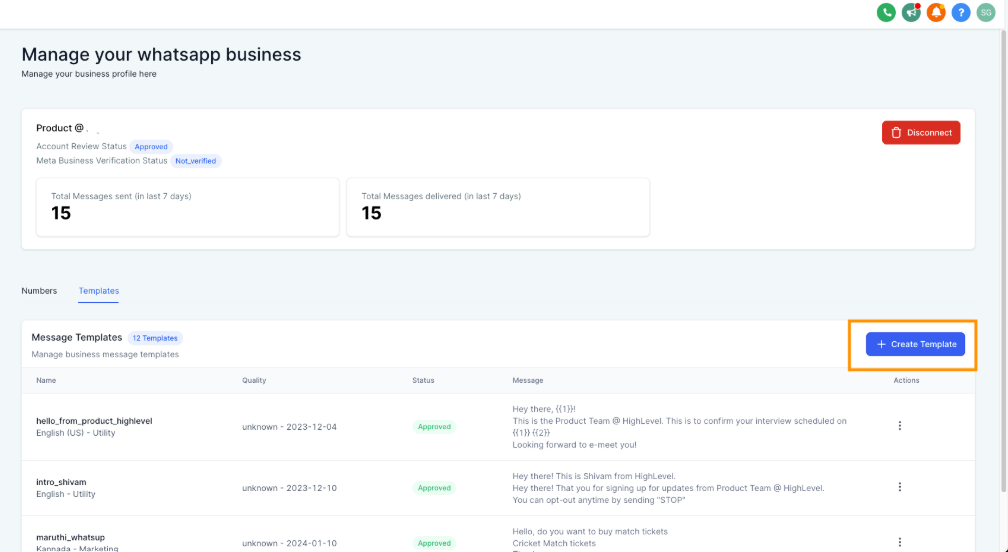
From your center dashboard, click Settings in the lower corner. Then select WhatsApp → Templates tab. Click + Create Template.
Step 2: Fill in Template Details
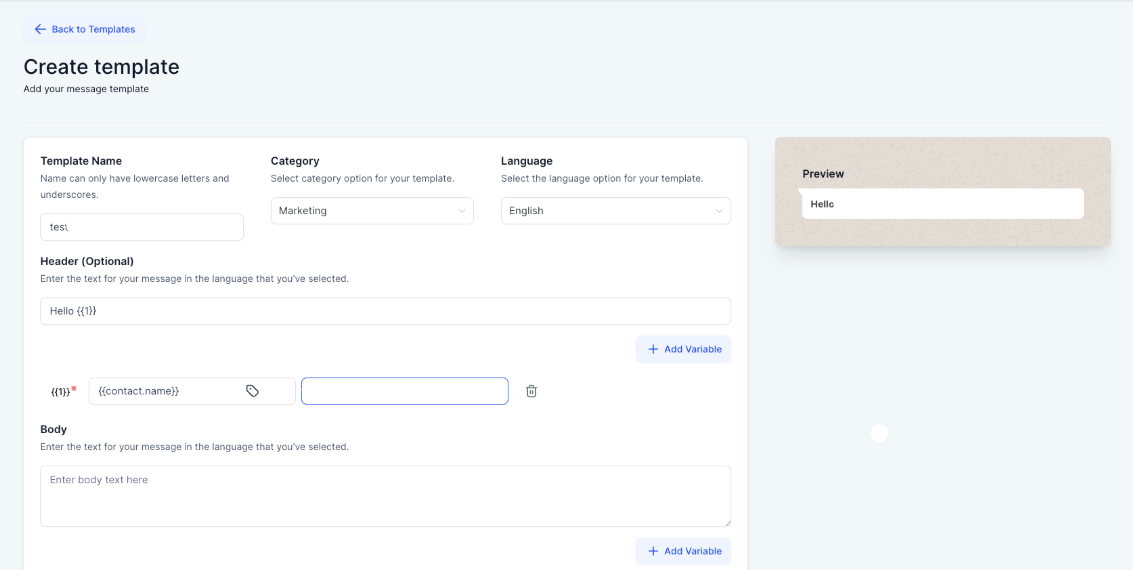
You'll need to provide:
-
Template Name – Use lowercase letters and underscores only (no spaces). Example:
tour_confirmationorenrollment_welcome - Category – Select Marketing or Utility based on your message purpose
- Language – Choose the language your message will be sent in
-
Header (optional) – Can be plain text or include one custom variable like
{{1}}
Step 3: Write Your Message
Body: This is your main message. Click Add Variable to insert placeholders like {{1}}, {{2}}, etc. These let you personalize messages with parent names, child names, tour dates, and more.
Footer: (optional) Add a static footer like your center name or contact info.
You must provide sample values for every variable. For example, if {{1}} is the parent's name, enter "Sarah Johnson" as the sample. Meta needs these examples to review your template.
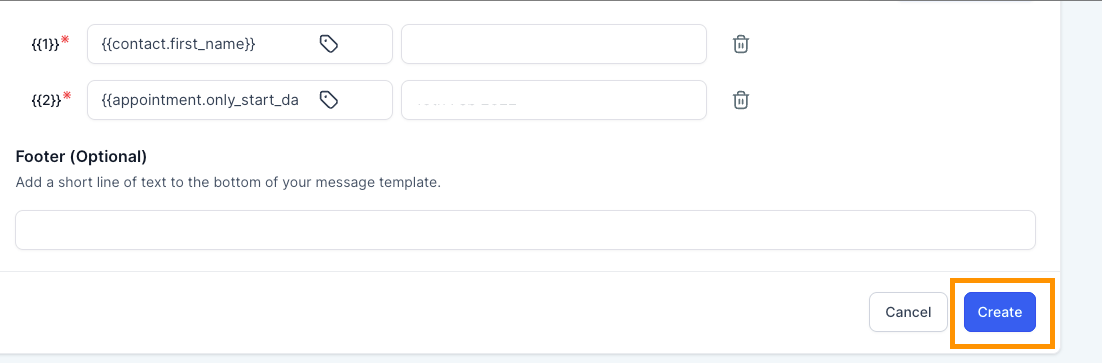
Header: Tour Confirmation for {{1}}
Body: Hi {{1}}! Your tour at Little Stars Academy is confirmed for {{2}} at {{3}}. We can't wait to show you around! Reply CONFIRM to let us know you're coming.
Footer: Little Stars Academy | (555) 123-4567
Step 4: Add Buttons (Optional)
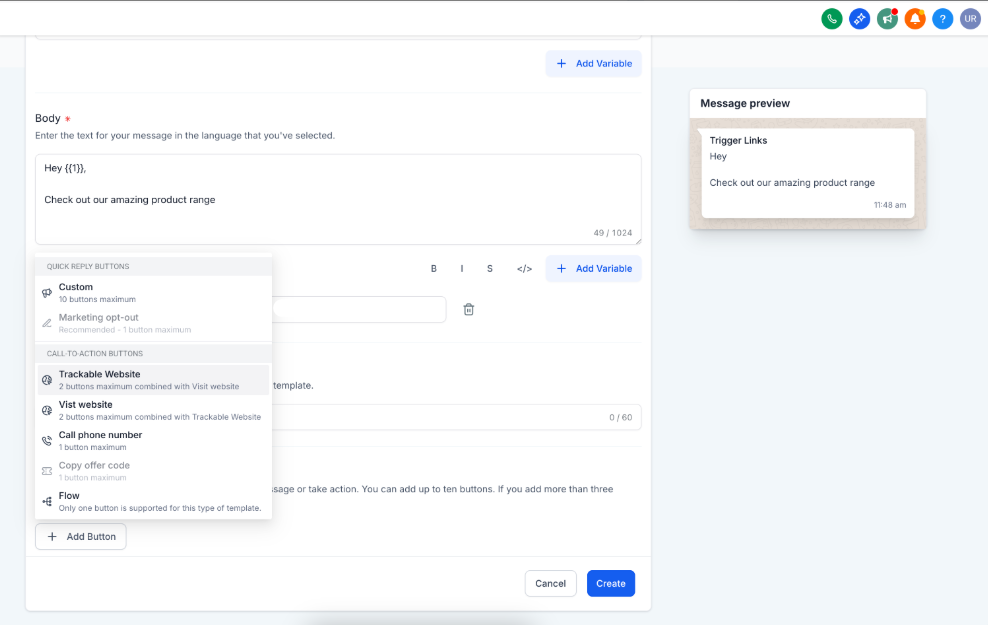
Make your templates interactive by adding buttons. You can include:
- Quick Reply – Let parents respond with one tap ("Confirm", "Reschedule", etc.)
- Visit Website – Link to your enrollment page or virtual tour
- Call Phone Number – Let parents call your center directly
- Copy Offer Code – Make it easy for parents to save enrollment discounts
To add a button, click Add Button and select your button type. For website links, you can even personalize the URL with a variable at the end.
Step 5: Review and Submit
Double-check your template, then click Create. Enrollio automatically submits it to Meta for approval.
Tracking Your Template Status
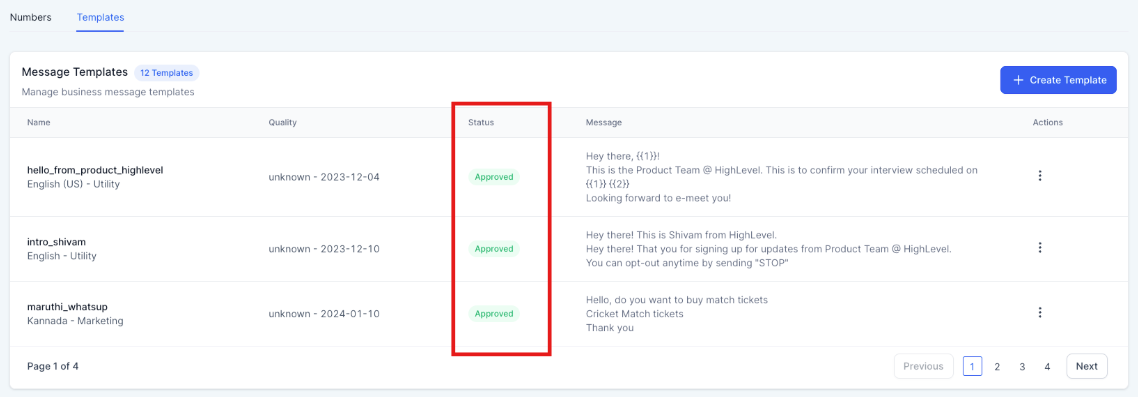
After submission, check the Templates tab to see your approval status:
- Pending – Submitted and waiting for Meta's review
- Approved – Ready to use in your parent communications
- Rejected – Needs editing. Common reasons include category mismatch or prohibited content
If rejected, click the template to see Meta's feedback, make your edits, and resubmit.
How to Clone a WhatsApp Template
Save time by duplicating existing templates instead of starting from scratch. All variables, buttons, and formatting carry over.
Step 1: Find Your Template
Go to Settings → WhatsApp → Templates.
Step 2: Clone It
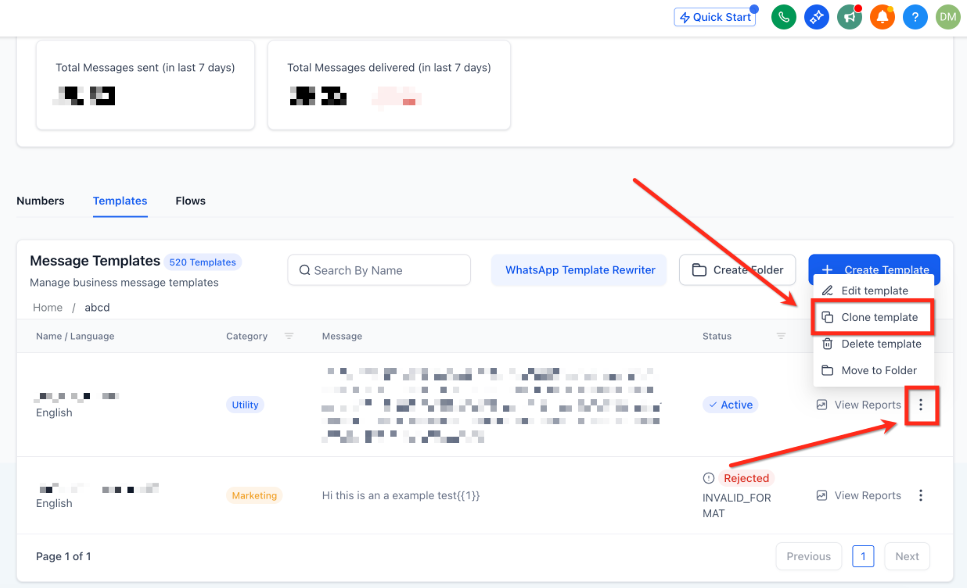
Click the 3-dot menu next to the template you want to copy. Select Clone Template.
Step 3: Edit and Save
In the popup, rename your template and make any changes you need. Click Save to create your new template. It will go through Meta approval just like any new template.
Using Media in Templates
WhatsApp supports media templates, so you can include:
- Images (great for showcasing your center or programs)
- Videos (virtual tours or welcome messages)
- Documents (enrollment forms or parent handbooks)
- Location pins (help parents find your center)
When creating your template, select your media type in the Header section and upload your file.
What's Next?
Once your templates are approved, you can use them across Enrollio to:
- Send tour confirmations and reminders
- Follow up with prospective families
- Announce enrollment openings
- Communicate with parents on your waitlist
- Create automated message sequences
Frequently Asked Questions
How do I add custom variables to my template?
Click Add Variable in the Header or Body section. You can insert system fields like parent name, child name, or tour date. Always provide a sample value for each variable (for example, {{1}} → "Emma Rodriguez"). Meta uses these samples when reviewing your template.
Which category should I choose for my template?
Use Marketing for promotional content like enrollment specials, open houses, or program announcements. Use Utility for service messages like tour confirmations, tuition reminders, or waitlist updates. Match your category to your message content to avoid rejections.
How do I edit a rejected template?
Go to Settings → WhatsApp → Templates. Click on the rejected template to see Meta's feedback. Make your edits based on their notes, then click Update Template to resubmit for approval.
Can I use the same template for different centers?
Each center needs its own approved templates. However, you can clone templates across centers to save time—just remember each one needs Meta approval.
How long does template approval take?
Most templates are reviewed within a few hours, but it can take up to 48 hours. Plan ahead when creating templates for time-sensitive communications.